> For the complete documentation index, see [llms.txt](https://unsloth.ai/docs/llms.txt). Markdown versions of documentation pages are available by appending `.md` to page URLs; this page is available as [Markdown](https://unsloth.ai/docs/jp/moderu/tutorials/devstral-2.md).
# Devstral 2 - 実行ガイド
Mistral Devstral 2モデルのローカル実行ガイド: 123B-Instruct-2512とSmall-2-24B-Instruct-2512。
Devstral 2 は、Mistral の新しいソフトウェア工学向けのコーディングおよびエージェント型 LLM で、 [24B](#devstral-small-2-24b) そして [123B](#devstral-2-123b) のサイズです。123B モデルは SWE-bench、コーディング、ツール呼び出し、エージェントのユースケースで SOTA を達成しています。24B モデルは 25GB の RAM/VRAM に収まり、123B は 128GB に収まります。
{% hint style="success" %}
**2025年12月13日更新**
**Devstral のチャットテンプレートの問題を解決し、結果は大幅に改善されるはずです。24B と 123B は更新済みです。さらに、2025年12月13日時点の最新の llama.cpp もインストールしてください!**
{% endhint %}
Devstral 2 はビジョン機能、256k のコンテキストウィンドウをサポートし、 [Ministral 3](/docs/jp/moderu/tutorials/ministral-3.md)と同じアーキテクチャを使用しています。これで実行および **ファインチューニング** の両方を Unsloth でローカルに行えるようになりました。
すべての Devstral 2 のアップロードは、Unsloth の [Dynamic 2.0](/docs/jp/ji-chu/dynamic-3.0-ggufs.md) 手法を使用しており、以下のベンチマークで最高の性能を発揮します。 [Aider Polyglot](/docs/jp/ji-chu/dynamic-3.0-ggufs/unsloth-dynamic-ggufs-on-aider-polyglot.md) および 5-shot MMLU ベンチマーク。
Devstral-Small-2-24BDevstral-2-123B
#### **Devstral 2 - Unsloth Dynamic** GGUF:
| Devstral-Small-2-24B-Instruct-2512 | Devstral-2-123B-Instruct-2512 |
| --------------------------------------------------------------------------------------------------------------------- | ----------------------------------------------------------------------------------------------------------- |
| [Devstral-Small-2-**24B**-Instruct-2512-GGUF](https://huggingface.co/unsloth/Devstral-Small-2-24B-Instruct-2512-GGUF) | [Devstral-2-**123B**-Instruct-2512-GGUF](https://huggingface.co/unsloth/Devstral-2-123B-Instruct-2512-GGUF) |
## 🖥️ **Devstral 2 の実行**
実行方法のステップバイステップガイドをご覧ください [Devstral 24B](#devstral-small-2-24b) および大きい方の [Devstral 123B](#devstral-2-123b) モデルについて。両モデルはビジョンをサポートしていますが、現在は **ビジョンはサポートされていません** llama.cpp では
### :gear: 使用ガイド
推論の推奨設定は次のとおりです。
* **Temperature 約 0.15**
* Min\_P 0.01(任意ですが、0.01 がうまく機能します。llama.cpp のデフォルトは 0.1 です)
* **次を使います: `--jinja` を使うとシステムプロンプトを有効にできます。**
* 最大コンテキスト長 = 262,144
* 推奨最小コンテキスト: 16,384
* 最新の llama.cpp をインストールしてください。 [2025年12月13日のプルリクエスト](https://github.com/ggml-org/llama.cpp/pull/17945) で問題が修正されています。
### :tophat:Devstral-Small-2-24B
フル精度 (Q8) の Devstral-Small-2-24B GGUF は 25GB の RAM/VRAM に収まります。現時点ではテキストのみです。
#### ✨ llama.cpp で Devstral-Small-2-24B-Instruct-2512 を実行
1. 最新の `llama.cpp` を [GitHubこちら](https://github.com/ggml-org/llama.cpp)。以下のビルド手順に従うこともできます。変更してください `-DGGML_CUDA=ON` を `-DGGML_CUDA=OFF` GPUがない場合、またはCPU推論のみを使いたい場合は。 **Apple Mac / Metalデバイスの場合**、次を設定します `-DGGML_CUDA=OFF` その後は通常どおり続けてください。Metalサポートはデフォルトで有効です。
{% code overflow="wrap" %}
```bash
apt-get update
apt-get install pciutils build-essential cmake curl libcurl4-openssl-dev -y
git clone https://github.com/ggml-org/llama.cpp
cmake llama.cpp -B llama.cpp/build \
-DBUILD_SHARED_LIBS=OFF -DGGML_CUDA=ON -DLLAMA_CURL=ON
cmake --build llama.cpp/build --config Release -j --clean-first --target llama-cli llama-mtmd-cli llama-server llama-gguf-split
cp llama.cpp/build/bin/llama-* llama.cpp
```
{% endcode %}
2. を使いたい場合は `llama.cpp` モデルを直接読み込むには、以下のようにできます: (:`Q4_K_XL`)は量子化タイプです。Hugging Face から直接取得することもできます:
```bash
./llama.cpp/llama-cli \
-hf unsloth/Devstral-Small-2-24B-Instruct-2512-GGUF:UD-Q4_K_XL \\
--jinja -ngl 99 --ctx-size 16384 \\
--temp 0.15
```
3. 以下をインストールした後、( `pip install huggingface_hub hf_transfer` をインストール後)。 `UD_Q4_K_XL` または他の量子化版を使ってダウンロードしてください。
```python
# !pip install huggingface_hub hf_transfer
import os
os.environ["HF_HUB_ENABLE_HF_TRANSFER"] = "1"
from huggingface_hub import snapshot_download
snapshot_download(
repo_id = "unsloth/Devstral-Small-2-24B-Instruct-2512-GGUF",
local_dir = "unsloth/Devstral-Small-2-24B-Instruct-2512-GGUF",
allow_patterns = ["*UD-Q4_K_XL*", "*mmproj-F16*"], # Q4_K_XL用
)
```
4. 会話モードでモデルを実行:
{% code overflow="wrap" %}
```bash
./llama.cpp/llama-cli \
--model unsloth/Devstral-Small-2-24B-Instruct-2512-GGUF/Devstral-Small-2-24B-Instruct-2512-UD-Q4_K_XL.gguf \\
--mmproj unsloth/Devstral-Small-2-24B-Instruct-2512-GGUF/mmproj-F16.gguf \\
--ctx-size 16384 \\
--n-gpu-layers 99 \\
--seed 3407 \\
--prio 2 \\
--temp 0.15 \\
--jinja
```
{% endcode %}
#### :eyes:Devstral とビジョン
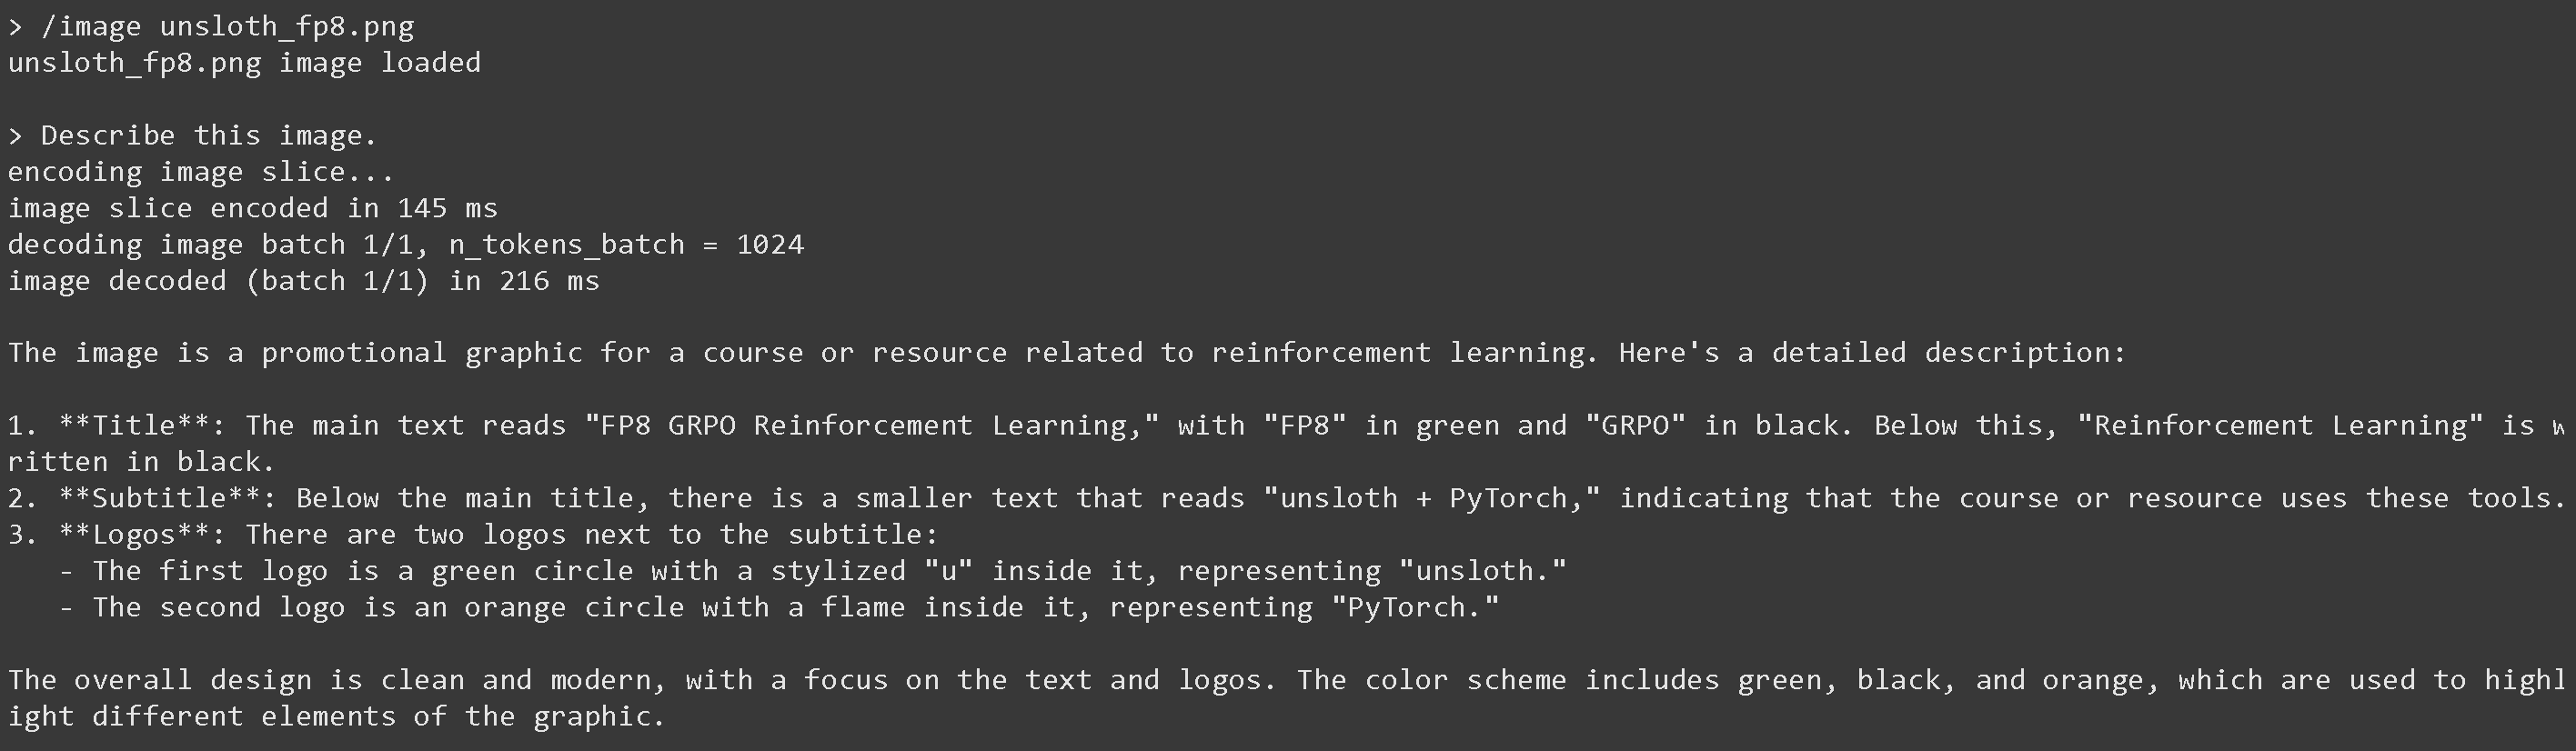
1. Devstral の画像機能を試すために、まずこのような画像をダウンロードしましょう [Unsloth による FP8 強化学習](https://unsloth.ai/cgi/image/fp8grpolarge_KharloZxEEaHAY2X97CEX.png?width=3840\&quality=80\&format=auto) 以下:\

2. 画像は次の方法で取得します `wget https://unsloth.ai/cgi/image/fp8grpolarge_KharloZxEEaHAY2X97CEX.png?width=3840%26quality=80%26format=auto -O unsloth_fp8.png` これにより画像は "unsloth\_fp8.png" として保存されます
3. 次に、以下のように画像を読み込みます `/image unsloth_fp8.png` モデルを読み込んだ後、以下のようにします:\

4. そこで次のようにプロンプトを与えます `この画像を説明してください` すると以下のようになります:
 ### :truck:Devstral-2-123B
フル精度 (Q8) の Devstral-Small-2-123B GGUF は 128GB の RAM/VRAM に収まります。現時点ではテキストのみです。
#### :sparkles: Devstral-2-123B-Instruct-2512 チュートリアルを実行
1. 最新の `llama.cpp` を [GitHubこちら](https://github.com/ggml-org/llama.cpp)。以下のビルド手順に従うこともできます。変更してください `-DGGML_CUDA=ON` を `-DGGML_CUDA=OFF` GPUがない場合、またはCPU推論のみを使いたい場合は。
{% code overflow="wrap" %}
```bash
apt-get update
apt-get install pciutils build-essential cmake curl libcurl4-openssl-dev -y
git clone https://github.com/ggml-org/llama.cpp
cmake llama.cpp -B llama.cpp/build \
-DBUILD_SHARED_LIBS=OFF -DGGML_CUDA=ON -DLLAMA_CURL=ON
cmake --build llama.cpp/build --config Release -j --clean-first --target llama-cli llama-mtmd-cli llama-server llama-gguf-split
cp llama.cpp/build/bin/llama-* llama.cpp
```
{% endcode %}
2. HuggingFace から直接、以下を使って取得できます:
```bash
./llama.cpp/llama-cli \
-hf unsloth/Devstral-2-123B-Instruct-2512-GGUF:UD-Q2_K_XL \\
--jinja -ngl 99 --ctx-size 16384 \\
--temp 0.15
```
2. 以下をインストールした後、( `pip install huggingface_hub hf_transfer` をインストール後)。 `UD_Q4_K_XL` または他の量子化版を使ってダウンロードしてください。
```python
# !pip install huggingface_hub hf_transfer
import os
os.environ["HF_HUB_ENABLE_HF_TRANSFER"] = "1"
from huggingface_hub import snapshot_download
snapshot_download(
repo_id = "unsloth/Devstral-2-123B-Instruct-2512-GGUF",
local_dir = "unsloth/Devstral-2-123B-Instruct-2512-GGUF",
allow_patterns = ["*UD-Q2_K_XL*", "*mmproj-F16*"],
)
```
3. 会話モードでモデルを実行:
{% code overflow="wrap" %}
```bash
./llama.cpp/llama-cli \
--model unsloth/Devstral-2-123B-Instruct-2512-GGUF/Devstral-2-123B-Instruct-2512-UD-Q2_K_XL.gguf \\
--mmproj unsloth/Devstral-2-123B-Instruct-2512-GGUF/mmproj-F16.gguf \\
--ctx-size 16384 \\
--n-gpu-layers 99 \\
--seed 3407 \\
--prio 2 \\
--temp 0.15 \\
--jinja
```
{% endcode %}
## 🦥 Unsloth で Devstral 2 をファインチューニング
ちょうど [Ministral 3](/docs/jp/moderu/tutorials/ministral-3.md)と同様に、Unsloth は Devstral 2 のファインチューニングをサポートしています。学習は 2 倍高速で、VRAM 使用量は 70% 少なく、8 倍長いコンテキスト長をサポートします。Devstral 2 は 24GB VRAM の L4 GPU に余裕で収まります。
残念ながら、Devstral 2 は 16GB VRAM のメモリ制限をわずかに超えるため、現時点では Google Colab で無料でファインチューニングすることはできません。ただし、 *できます* 無料でモデルをファインチューニングするには、私たちの [Kaggle ノートブック](https://www.kaggle.com/notebooks/welcome?src=https://github.com/unslothai/notebooks/blob/main/nb/Kaggle-Magistral_\(24B\)-Reasoning-Conversational.ipynb\&accelerator=nvidiaTeslaT4)を使えます。こちらはデュアル GPU へのアクセスを提供します。ノートブックの Magistral モデル名を次のものに変更するだけです。 `unsloth/Devstral-Small-2-24B-Instruct-2512` モデル。
{% hint style="success" %}
Ministral 3 をファインチューニングするための無料の Unsloth ノートブックを作成しました。Devstral 2 は同じアーキテクチャを共有しているため、そのままサポートされています!目的のモデルを使うように名前を変更してください。
{% endhint %}
* Ministral-3B-Instruct [ビジョン ノートブック](https://colab.research.google.com/github/unslothai/notebooks/blob/main/nb/Ministral_3_VL_\(3B\)_Vision.ipynb) (ビジョン)(モデル名を Devstral 2 に変更)
* Ministral-3B-Instruct [GRPO ノートブック](https://colab.research.google.com/github/unslothai/notebooks/blob/main/nb/Ministral_3_\(3B\)_Reinforcement_Learning_Sudoku_Game.ipynb) (モデル名を Devstral 2 に変更)
{% columns %}
{% column %}
Devstral Vision ファインチューニング ノートブック
{% embed url="" %}
{% endcolumn %}
{% column %}
Devstral Sudoku GRPO RL ノートブック
{% embed url="" %}
{% endcolumn %}
{% endcolumns %}
### :sunglasses:Llama-server による提供とデプロイ
本番環境で Devstral 2 をデプロイするには、 `llama-server` tmux 経由で新しいターミナルを開き、次のようにモデルをデプロイします:
{% code overflow="wrap" %}
```bash
./llama.cpp/llama-server \
--model unsloth/Devstral-Small-2-24B-Instruct-2512-GGUF/Devstral-Small-2-24B-Instruct-2512-UD-Q4_K_XL.gguf \\
--mmproj unsloth/Devstral-Small-2-24B-Instruct-2512-GGUF/mmproj-F16.gguf \\
--alias "unsloth/Devstral-Small-2-24B-Instruct-2512" \\
--n-gpu-layers 999 \\
--prio 3 \\
--min-p 0.01 \\
--ctx-size 16384 \\
--port 8001 \\
--jinja
```
{% endcode %}
上記を実行すると、次のようになります:
### :truck:Devstral-2-123B
フル精度 (Q8) の Devstral-Small-2-123B GGUF は 128GB の RAM/VRAM に収まります。現時点ではテキストのみです。
#### :sparkles: Devstral-2-123B-Instruct-2512 チュートリアルを実行
1. 最新の `llama.cpp` を [GitHubこちら](https://github.com/ggml-org/llama.cpp)。以下のビルド手順に従うこともできます。変更してください `-DGGML_CUDA=ON` を `-DGGML_CUDA=OFF` GPUがない場合、またはCPU推論のみを使いたい場合は。
{% code overflow="wrap" %}
```bash
apt-get update
apt-get install pciutils build-essential cmake curl libcurl4-openssl-dev -y
git clone https://github.com/ggml-org/llama.cpp
cmake llama.cpp -B llama.cpp/build \
-DBUILD_SHARED_LIBS=OFF -DGGML_CUDA=ON -DLLAMA_CURL=ON
cmake --build llama.cpp/build --config Release -j --clean-first --target llama-cli llama-mtmd-cli llama-server llama-gguf-split
cp llama.cpp/build/bin/llama-* llama.cpp
```
{% endcode %}
2. HuggingFace から直接、以下を使って取得できます:
```bash
./llama.cpp/llama-cli \
-hf unsloth/Devstral-2-123B-Instruct-2512-GGUF:UD-Q2_K_XL \\
--jinja -ngl 99 --ctx-size 16384 \\
--temp 0.15
```
2. 以下をインストールした後、( `pip install huggingface_hub hf_transfer` をインストール後)。 `UD_Q4_K_XL` または他の量子化版を使ってダウンロードしてください。
```python
# !pip install huggingface_hub hf_transfer
import os
os.environ["HF_HUB_ENABLE_HF_TRANSFER"] = "1"
from huggingface_hub import snapshot_download
snapshot_download(
repo_id = "unsloth/Devstral-2-123B-Instruct-2512-GGUF",
local_dir = "unsloth/Devstral-2-123B-Instruct-2512-GGUF",
allow_patterns = ["*UD-Q2_K_XL*", "*mmproj-F16*"],
)
```
3. 会話モードでモデルを実行:
{% code overflow="wrap" %}
```bash
./llama.cpp/llama-cli \
--model unsloth/Devstral-2-123B-Instruct-2512-GGUF/Devstral-2-123B-Instruct-2512-UD-Q2_K_XL.gguf \\
--mmproj unsloth/Devstral-2-123B-Instruct-2512-GGUF/mmproj-F16.gguf \\
--ctx-size 16384 \\
--n-gpu-layers 99 \\
--seed 3407 \\
--prio 2 \\
--temp 0.15 \\
--jinja
```
{% endcode %}
## 🦥 Unsloth で Devstral 2 をファインチューニング
ちょうど [Ministral 3](/docs/jp/moderu/tutorials/ministral-3.md)と同様に、Unsloth は Devstral 2 のファインチューニングをサポートしています。学習は 2 倍高速で、VRAM 使用量は 70% 少なく、8 倍長いコンテキスト長をサポートします。Devstral 2 は 24GB VRAM の L4 GPU に余裕で収まります。
残念ながら、Devstral 2 は 16GB VRAM のメモリ制限をわずかに超えるため、現時点では Google Colab で無料でファインチューニングすることはできません。ただし、 *できます* 無料でモデルをファインチューニングするには、私たちの [Kaggle ノートブック](https://www.kaggle.com/notebooks/welcome?src=https://github.com/unslothai/notebooks/blob/main/nb/Kaggle-Magistral_\(24B\)-Reasoning-Conversational.ipynb\&accelerator=nvidiaTeslaT4)を使えます。こちらはデュアル GPU へのアクセスを提供します。ノートブックの Magistral モデル名を次のものに変更するだけです。 `unsloth/Devstral-Small-2-24B-Instruct-2512` モデル。
{% hint style="success" %}
Ministral 3 をファインチューニングするための無料の Unsloth ノートブックを作成しました。Devstral 2 は同じアーキテクチャを共有しているため、そのままサポートされています!目的のモデルを使うように名前を変更してください。
{% endhint %}
* Ministral-3B-Instruct [ビジョン ノートブック](https://colab.research.google.com/github/unslothai/notebooks/blob/main/nb/Ministral_3_VL_\(3B\)_Vision.ipynb) (ビジョン)(モデル名を Devstral 2 に変更)
* Ministral-3B-Instruct [GRPO ノートブック](https://colab.research.google.com/github/unslothai/notebooks/blob/main/nb/Ministral_3_\(3B\)_Reinforcement_Learning_Sudoku_Game.ipynb) (モデル名を Devstral 2 に変更)
{% columns %}
{% column %}
Devstral Vision ファインチューニング ノートブック
{% embed url="" %}
{% endcolumn %}
{% column %}
Devstral Sudoku GRPO RL ノートブック
{% embed url="" %}
{% endcolumn %}
{% endcolumns %}
### :sunglasses:Llama-server による提供とデプロイ
本番環境で Devstral 2 をデプロイするには、 `llama-server` tmux 経由で新しいターミナルを開き、次のようにモデルをデプロイします:
{% code overflow="wrap" %}
```bash
./llama.cpp/llama-server \
--model unsloth/Devstral-Small-2-24B-Instruct-2512-GGUF/Devstral-Small-2-24B-Instruct-2512-UD-Q4_K_XL.gguf \\
--mmproj unsloth/Devstral-Small-2-24B-Instruct-2512-GGUF/mmproj-F16.gguf \\
--alias "unsloth/Devstral-Small-2-24B-Instruct-2512" \\
--n-gpu-layers 999 \\
--prio 3 \\
--min-p 0.01 \\
--ctx-size 16384 \\
--port 8001 \\
--jinja
```
{% endcode %}
上記を実行すると、次のようになります:
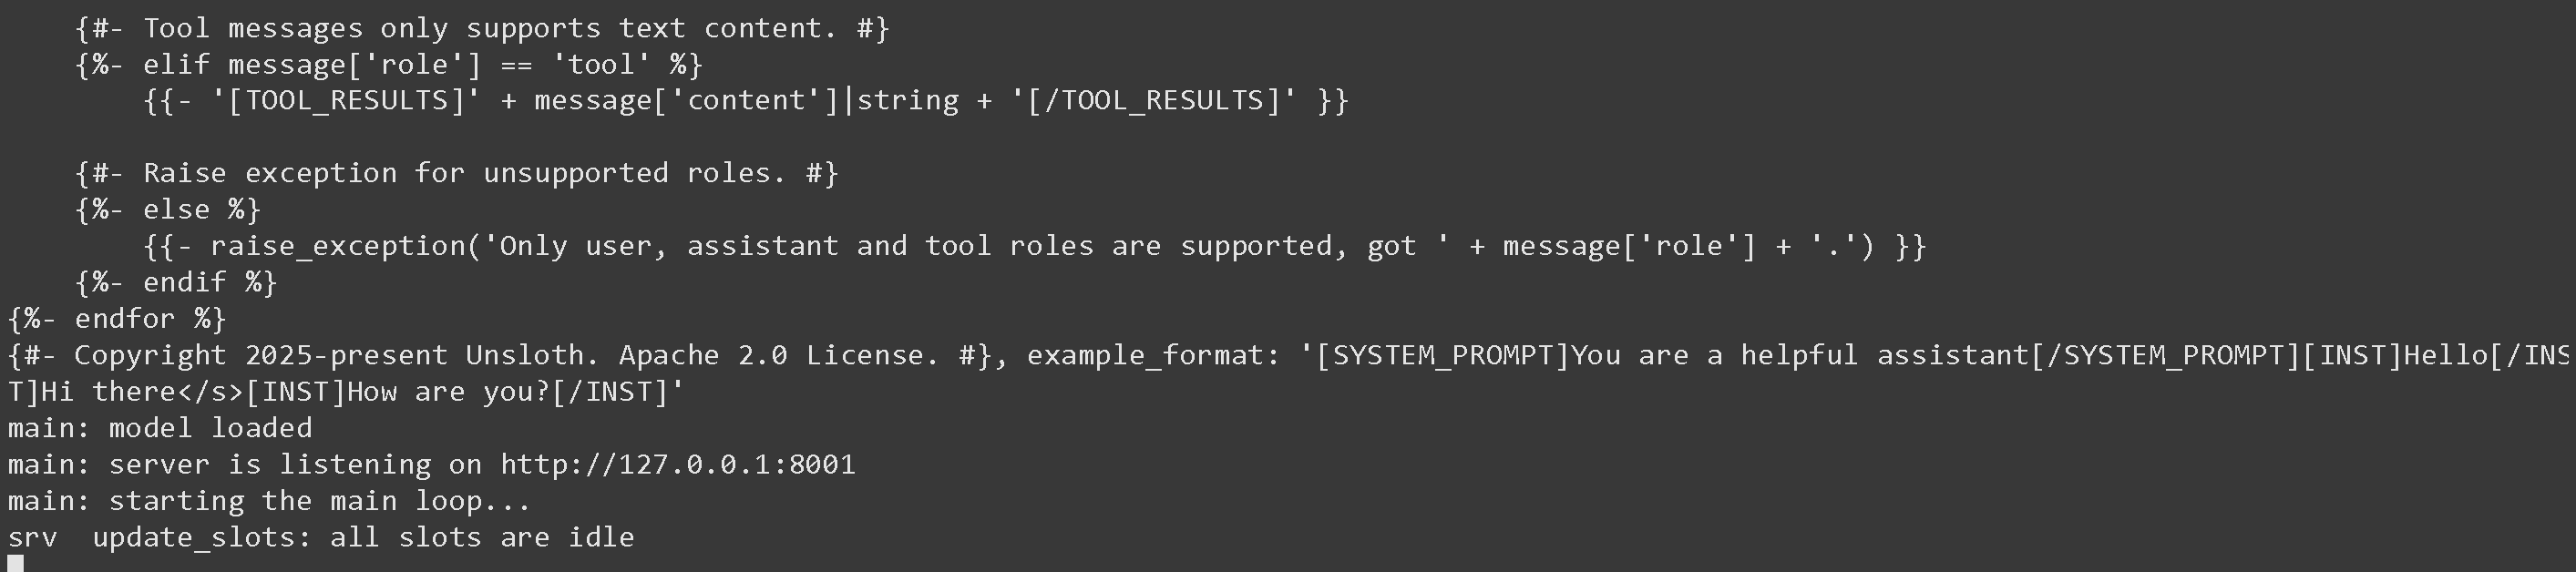 次に、新しいターミナルで、 `pip install openai`を実行した後、次を行います:
{% code overflow="wrap" %}
```python
from openai import OpenAI
import json
openai_client = OpenAI(
base_url = "http://127.0.0.1:8001/v1",
api_key = "sk-no-key-required",
)
completion = openai_client.chat.completions.create(
model = "unsloth/Devstral-Small-2-24B-Instruct-2512",
messages = [{"role": "user", "content": "2+2 はいくつですか?"},],
)
print(completion.choices[0].message.content)
```
{% endcode %}
これで単に 4 が出力されます。
### :toolbox:Devstral 2 におけるツール呼び出しチュートリアル
以下に従った後、 [#llama-server-serving-and-deployment](#llama-server-serving-and-deployment "mention") いくつかのツールを読み込み、Devstral の動作を確認できます!ツールをいくつか作ってみましょう。コピーして貼り付け、Python で実行してください。
{% code expandable="true" %}
```python
import json, subprocess, random
from typing import Any
def add_number(a: float | str, b: float | str) -> float:
return float(a) + float(b)
def multiply_number(a: float | str, b: float | str) -> float:
return float(a) * float(b)
def subtract_number(a: float | str, b: float | str) -> float:
return float(a) - float(b)
def write_a_story() -> str:
return random.choice([
"はるか昔、はるか彼方の銀河系で...",
"スロースとコードを愛する2人の友達がいました...",
"すべてのナマケモノが超人的知能を持つよう進化したため、世界は終わりを迎えていました...",
"片方の友達も知らないうちに、もう一方が誤ってナマケモノを進化させるプログラムを書いてしまっていました...",
])
def terminal(command: str) -> str:
if "rm" in command or "sudo" in command or "dd" in command or "chmod" in command:
msg = "'rm, sudo, dd, chmod' コマンドは危険なため実行できません"
print(msg); return msg
print(f"Executing terminal command `{command}`")
try:
return str(subprocess.run(command, capture_output = True, text = True, shell = True, check = True).stdout)
except subprocess.CalledProcessError as e:
return f"Command failed: {e.stderr}"
def python(code: str) -> str:
data = {}
exec(code, data)
del data["__builtins__"]
return str(data)
MAP_FN = {
"add_number": add_number,
"multiply_number": multiply_number,
"subtract_number": subtract_number,
"write_a_story": write_a_story,
"terminal": terminal,
"python": python,
}
tools = [
{
"type": "function",
"function": {
"name": "add_number",
"description": "2つの数を加算します。",
"parameters": {
"type": "object",
"properties": {
"a": {
"type": "string",
"description": "最初の数。",
},
"b": {
"type": "string",
"description": "2つ目の数。",
},
},
"required": ["a", "b"],
},
},
},
{
"type": "function",
"function": {
"name": "multiply_number",
"description": "2つの数を掛け算します。",
"parameters": {
"type": "object",
"properties": {
"a": {
"type": "string",
"description": "最初の数。",
},
"b": {
"type": "string",
"description": "2つ目の数。",
},
},
"required": ["a", "b"],
},
},
},
{
"type": "function",
"function": {
"name": "subtract_number",
"description": "2つの数を引きます。",
"parameters": {
"type": "object",
"properties": {
"a": {
"type": "string",
"description": "最初の数。",
},
"b": {
"type": "string",
"description": "2つ目の数。",
},
},
"required": ["a", "b"],
},
},
},
{
"type": "function",
"function": {
"name": "write_a_story",
"description": "ランダムな物語を書きます。",
"parameters": {
"type": "object",
"properties": {},
"required": [],
},
},
},
{
"type": "function",
"function": {
"name": "terminal",
"description": "ターミナルから操作を実行します。",
"parameters": {
"type": "object",
"properties": {
"command": {
"type": "string",
"description": "起動したいコマンドです。例: `ls`, `rm`, ...",
},
},
"required": ["command"],
},
},
},
{
"type": "function",
"function": {
"name": "python",
"description": "実行される Python コードを使って Python インタープリタを呼び出します。",
"parameters": {
"type": "object",
"properties": {
"code": {
"type": "string",
"description": "実行する Python コード",
},
},
"required": ["code"],
},
},
},
]
```
{% endcode %}
それから、モデルをテストするために、可能なメッセージのランダムなリストから簡単な質問をします:
{% code overflow="wrap" %}
```python
import random
messages = [{
"role": "user",
"content": [random.choice([
{"type": "text", "text": "物語を書いてくれますか?"},
{"type": "text", "text": "今日の日付に3日足すと何日ですか?"},
{"type": "text", "text": "現在時刻をナノ秒で取得してください。"},
{"type": "text", "text": "Python でフィボナッチ関数を作成し、fib(20) を求めてください。"},
])],
}]
```
{% endcode %}
その後、以下の関数(コピーして貼り付けて実行)を使います。これらは関数呼び出しを自動的に解析します。Devstral 2 は複数を同時に行うことがあります!
```python
temperature = 0.15
from openai import OpenAI
openai_client = OpenAI(
base_url = "http://127.0.0.1:8001/v1",
api_key = "sk-no-key-required",
)
model_name = next(iter(openai_client.models.list())).id
print(f"Using model = {model_name}")
has_tool_calls = True
original_messages_len = len(messages)
while has_tool_calls:
print(f"Current messages = {messages}")
response = openai_client.chat.completions.create(
model = model_name,
messages = messages,
temperature = temperature,
tools = tools if tools else None,
tool_choice = "auto" if tools else None,
)
tool_calls = response.choices[0].message.tool_calls or []
content = response.choices[0].message.content or ""
tool_calls_dict = [tc.to_dict() for tc in tool_calls] if tool_calls else tool_calls
messages.append({"role": "assistant", "tool_calls": tool_calls_dict, "content": content,})
for tool_call in tool_calls:
fx, args, _id = tool_call.function.name, tool_call.function.arguments, tool_call.id
out = MAP_FN[fx](**json.loads(args))
messages.append({"role": "tool", "tool_call_id": _id, "name": fx, "content": str(out),})
else:
has_tool_calls = False
print(json.dumps(messages[original_messages_len:], indent = 2))
```
1分後、次の結果が得られます:
次に、新しいターミナルで、 `pip install openai`を実行した後、次を行います:
{% code overflow="wrap" %}
```python
from openai import OpenAI
import json
openai_client = OpenAI(
base_url = "http://127.0.0.1:8001/v1",
api_key = "sk-no-key-required",
)
completion = openai_client.chat.completions.create(
model = "unsloth/Devstral-Small-2-24B-Instruct-2512",
messages = [{"role": "user", "content": "2+2 はいくつですか?"},],
)
print(completion.choices[0].message.content)
```
{% endcode %}
これで単に 4 が出力されます。
### :toolbox:Devstral 2 におけるツール呼び出しチュートリアル
以下に従った後、 [#llama-server-serving-and-deployment](#llama-server-serving-and-deployment "mention") いくつかのツールを読み込み、Devstral の動作を確認できます!ツールをいくつか作ってみましょう。コピーして貼り付け、Python で実行してください。
{% code expandable="true" %}
```python
import json, subprocess, random
from typing import Any
def add_number(a: float | str, b: float | str) -> float:
return float(a) + float(b)
def multiply_number(a: float | str, b: float | str) -> float:
return float(a) * float(b)
def subtract_number(a: float | str, b: float | str) -> float:
return float(a) - float(b)
def write_a_story() -> str:
return random.choice([
"はるか昔、はるか彼方の銀河系で...",
"スロースとコードを愛する2人の友達がいました...",
"すべてのナマケモノが超人的知能を持つよう進化したため、世界は終わりを迎えていました...",
"片方の友達も知らないうちに、もう一方が誤ってナマケモノを進化させるプログラムを書いてしまっていました...",
])
def terminal(command: str) -> str:
if "rm" in command or "sudo" in command or "dd" in command or "chmod" in command:
msg = "'rm, sudo, dd, chmod' コマンドは危険なため実行できません"
print(msg); return msg
print(f"Executing terminal command `{command}`")
try:
return str(subprocess.run(command, capture_output = True, text = True, shell = True, check = True).stdout)
except subprocess.CalledProcessError as e:
return f"Command failed: {e.stderr}"
def python(code: str) -> str:
data = {}
exec(code, data)
del data["__builtins__"]
return str(data)
MAP_FN = {
"add_number": add_number,
"multiply_number": multiply_number,
"subtract_number": subtract_number,
"write_a_story": write_a_story,
"terminal": terminal,
"python": python,
}
tools = [
{
"type": "function",
"function": {
"name": "add_number",
"description": "2つの数を加算します。",
"parameters": {
"type": "object",
"properties": {
"a": {
"type": "string",
"description": "最初の数。",
},
"b": {
"type": "string",
"description": "2つ目の数。",
},
},
"required": ["a", "b"],
},
},
},
{
"type": "function",
"function": {
"name": "multiply_number",
"description": "2つの数を掛け算します。",
"parameters": {
"type": "object",
"properties": {
"a": {
"type": "string",
"description": "最初の数。",
},
"b": {
"type": "string",
"description": "2つ目の数。",
},
},
"required": ["a", "b"],
},
},
},
{
"type": "function",
"function": {
"name": "subtract_number",
"description": "2つの数を引きます。",
"parameters": {
"type": "object",
"properties": {
"a": {
"type": "string",
"description": "最初の数。",
},
"b": {
"type": "string",
"description": "2つ目の数。",
},
},
"required": ["a", "b"],
},
},
},
{
"type": "function",
"function": {
"name": "write_a_story",
"description": "ランダムな物語を書きます。",
"parameters": {
"type": "object",
"properties": {},
"required": [],
},
},
},
{
"type": "function",
"function": {
"name": "terminal",
"description": "ターミナルから操作を実行します。",
"parameters": {
"type": "object",
"properties": {
"command": {
"type": "string",
"description": "起動したいコマンドです。例: `ls`, `rm`, ...",
},
},
"required": ["command"],
},
},
},
{
"type": "function",
"function": {
"name": "python",
"description": "実行される Python コードを使って Python インタープリタを呼び出します。",
"parameters": {
"type": "object",
"properties": {
"code": {
"type": "string",
"description": "実行する Python コード",
},
},
"required": ["code"],
},
},
},
]
```
{% endcode %}
それから、モデルをテストするために、可能なメッセージのランダムなリストから簡単な質問をします:
{% code overflow="wrap" %}
```python
import random
messages = [{
"role": "user",
"content": [random.choice([
{"type": "text", "text": "物語を書いてくれますか?"},
{"type": "text", "text": "今日の日付に3日足すと何日ですか?"},
{"type": "text", "text": "現在時刻をナノ秒で取得してください。"},
{"type": "text", "text": "Python でフィボナッチ関数を作成し、fib(20) を求めてください。"},
])],
}]
```
{% endcode %}
その後、以下の関数(コピーして貼り付けて実行)を使います。これらは関数呼び出しを自動的に解析します。Devstral 2 は複数を同時に行うことがあります!
```python
temperature = 0.15
from openai import OpenAI
openai_client = OpenAI(
base_url = "http://127.0.0.1:8001/v1",
api_key = "sk-no-key-required",
)
model_name = next(iter(openai_client.models.list())).id
print(f"Using model = {model_name}")
has_tool_calls = True
original_messages_len = len(messages)
while has_tool_calls:
print(f"Current messages = {messages}")
response = openai_client.chat.completions.create(
model = model_name,
messages = messages,
temperature = temperature,
tools = tools if tools else None,
tool_choice = "auto" if tools else None,
)
tool_calls = response.choices[0].message.tool_calls or []
content = response.choices[0].message.content or ""
tool_calls_dict = [tc.to_dict() for tc in tool_calls] if tool_calls else tool_calls
messages.append({"role": "assistant", "tool_calls": tool_calls_dict, "content": content,})
for tool_call in tool_calls:
fx, args, _id = tool_call.function.name, tool_call.function.arguments, tool_call.id
out = MAP_FN[fx](**json.loads(args))
messages.append({"role": "tool", "tool_call_id": _id, "name": fx, "content": str(out),})
else:
has_tool_calls = False
print(json.dumps(messages[original_messages_len:], indent = 2))
```
1分後、次の結果が得られます:
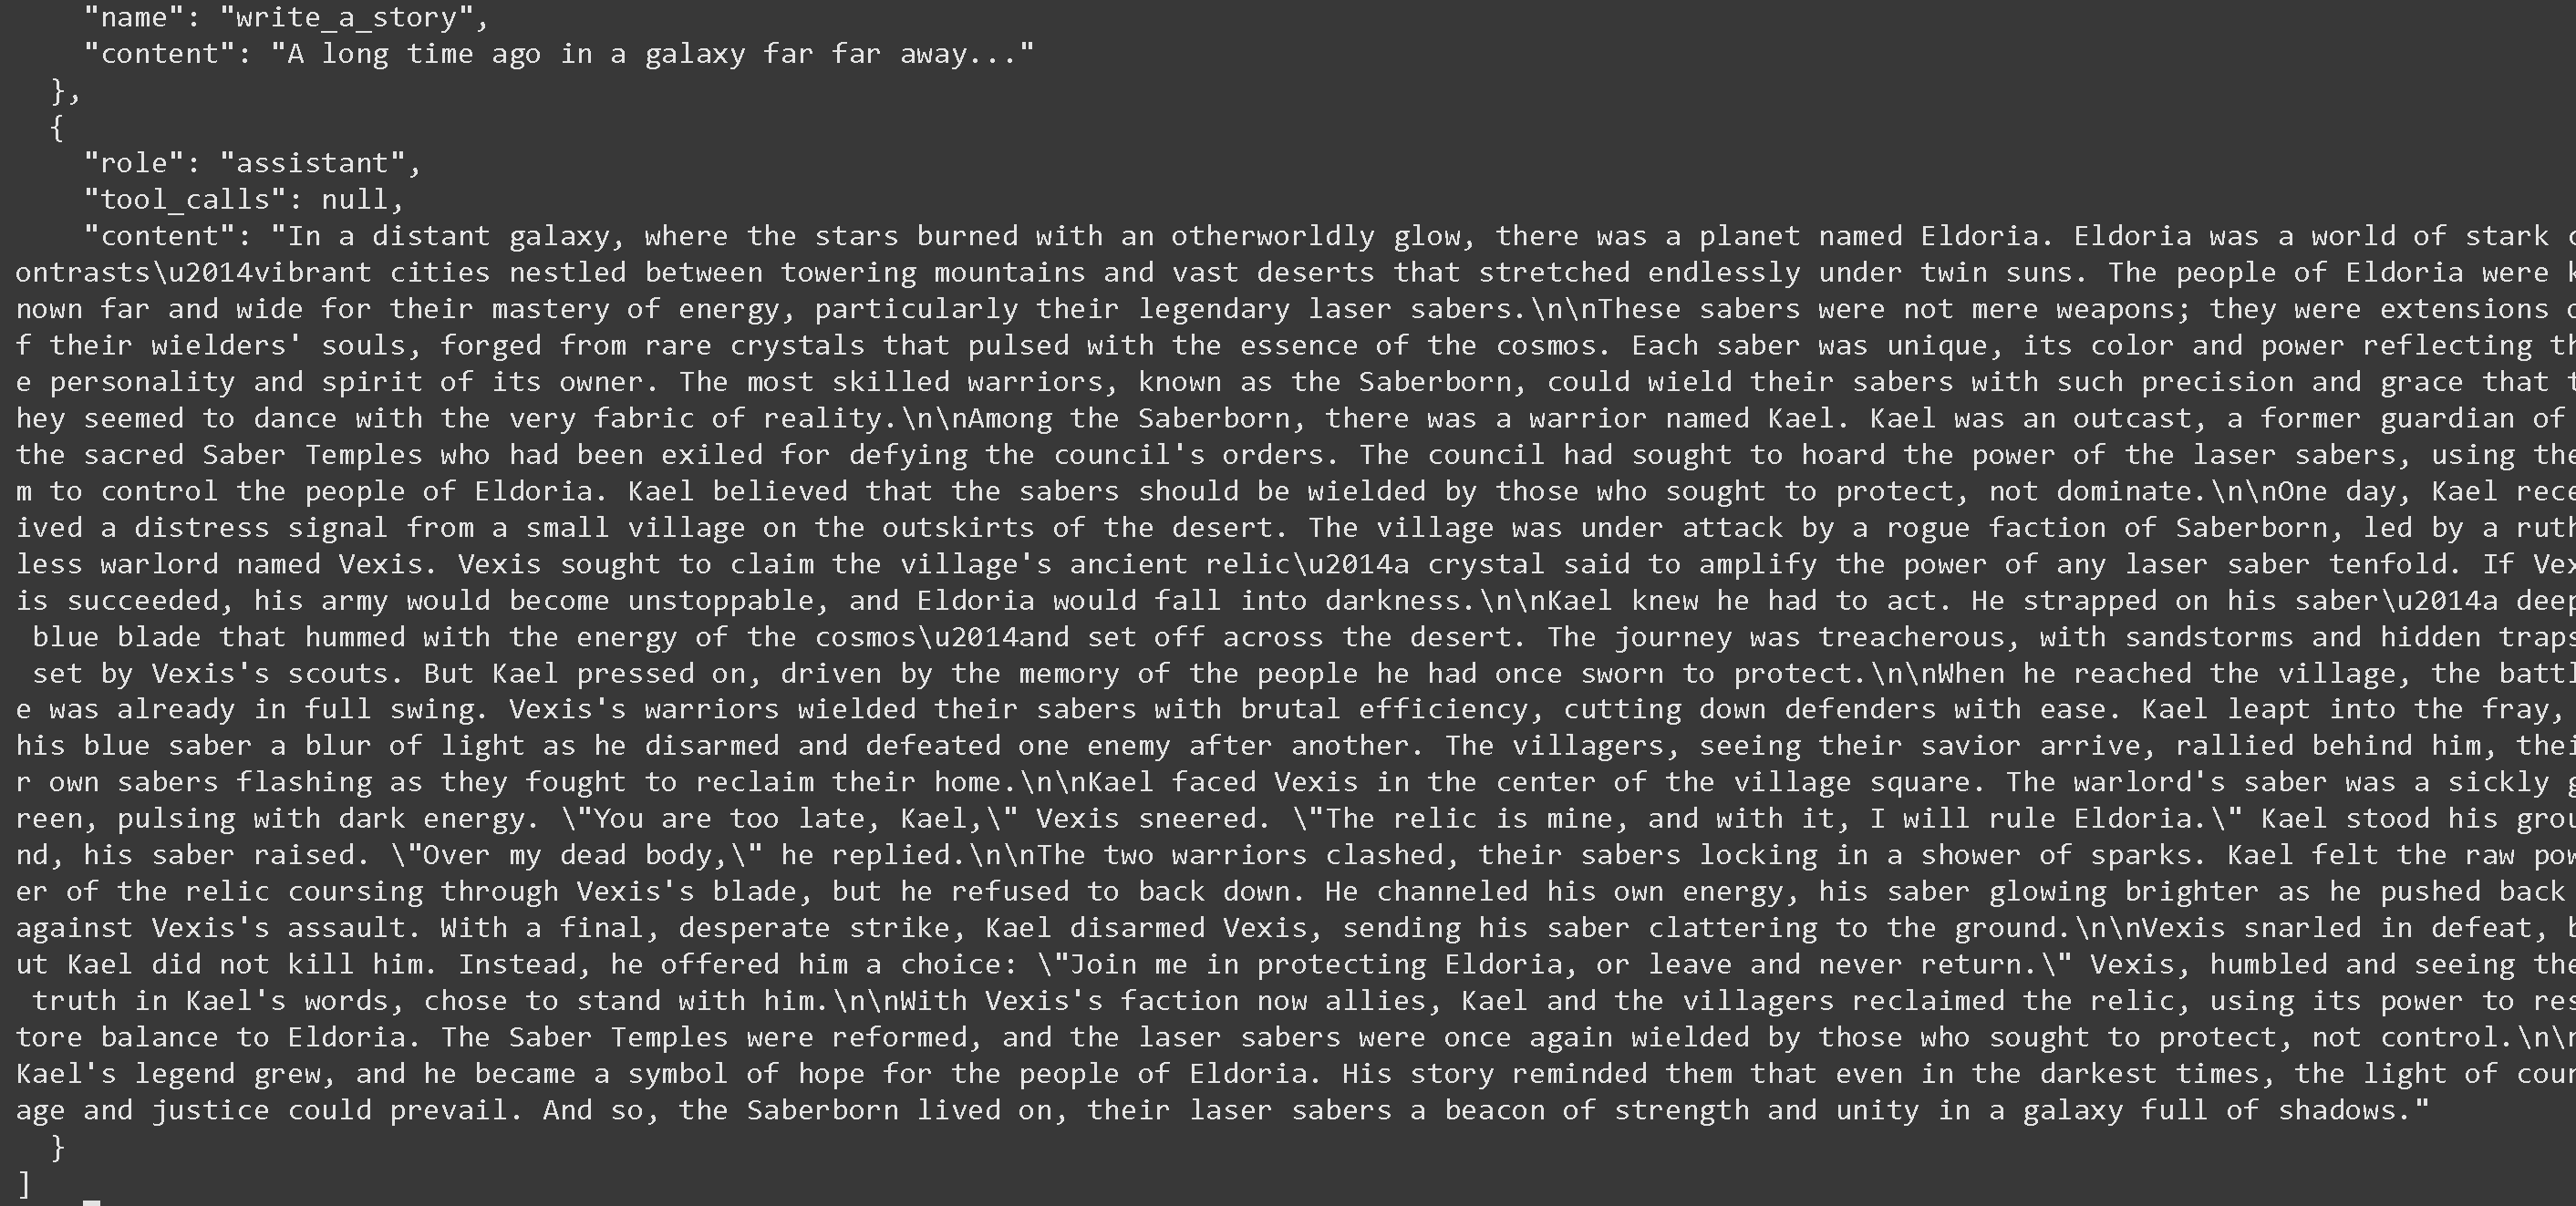 または JSON 形式では:
```json
[
{
"role": "assistant",
"tool_calls": [
{
"id": "JviLK0wUveWguuKQHgZdFdYI2adu85jy",
"function": {
"arguments": "{}",
"name": "write_a_story"
},
"type": "function"
}
],
"content": null
},
{
"role": "tool",
"tool_call_id": "JviLK0wUveWguuKQHgZdFdYI2adu85jy",
"name": "write_a_story",
"content": "はるか昔、はるか彼方の銀河系で..."
},
{
"role": "assistant",
"tool_calls": null,
"content": "遠い銀河で、星々が異世界のような輝きを放つ中、エルドリアという惑星がありました。エルドリアは鮮烈な対比に満ちた世界でした。そびえ立つ山々のあいだに活気ある都市があり、二つの太陽の下で果てしなく広がる広大な砂漠がありました。エルドリアの人々はエネルギーの扱いに長けており、特に伝説的なレーザーサーベルで広く知られていました。\n\nこれらのサーベルは単なる武器ではありませんでした。それは使い手の魂の延長であり、宇宙の本質を脈打たせる希少な結晶から鍛え上げられたものでした。各サーベルは唯一無二で、その色と力は持ち主の個性と精神を映し出していました。最も熟練した戦士たちはサーベルボーンとして知られ、そのサーベルをあまりに精密かつ優雅に操るため、まるで現実そのものと踊っているかのようでした。\n\nサーベルボーンの中に、カエルという名の戦士がいました。カエルは追放者であり、神聖なサーベル神殿の元守護者でしたが、評議会の命令に背いたために追放されていました。評議会はレーザーサーベルの力を独占し、それを使ってエルドリアの人々を支配しようとしていました。カエルは、サーベルは支配するためではなく、守るためにこそ振るわれるべきだと信じていました。\n\nある日、カエルは砂漠の外れにある小さな村から救難信号を受け取りました。その村は、冷酷な軍閥指導者ベクシスに率いられたサーベルボーンのならず者勢力に攻撃されていました。ベクシスは村の古代遺物——どんなレーザーサーベルの力も十倍に増幅すると言われる結晶——を手に入れようとしていました。もしベクシスが成功すれば、彼の軍勢は止められなくなり、エルドリアは闇に沈むでしょう。\n\nカエルは行動しなければならないと悟りました。彼は宇宙のエネルギーを低く唸らせる深い青の刃を持つ自分のサーベルを腰に差し、砂漠を横断して旅立ちました。その道のりは過酷で、砂嵐やベクシスの斥候が仕掛けた隠し罠が待ち受けていました。しかし、かつて守ると誓った人々の記憶に突き動かされ、カエルは前進し続けました。\n\n村にたどり着いたとき、戦いはすでに激しく繰り広げられていました。ベクシスの戦士たちは残忍な効率でサーベルを振るい、守備側をあっさりと切り倒していました。カエルは戦闘に飛び込み、青いサーベルが光の残像となって次々と敵の武器をはじき、打ち倒していきました。救い主の到着を目にした村人たちは彼の背後に結集し、自分たちのサーベルを閃かせながら故郷を取り戻すために戦いました。\n\nカエルは村の広場の中央でベクシスと対峙しました。軍閥指導者のサーベルは病的な緑色で、暗いエネルギーを脈動させていました。「遅かったな、カエル」とベクシスは嘲りました。「遺物は私のものだ。それを手にすれば、私はエルドリアを支配する。」カエルは一歩も引かず、サーベルを構えました。「俺の死体を越えてからだ」と彼は答えました。\n\n二人の戦士は激突し、サーベル同士が火花を散らしながら噛み合いました。カエルは、遺物の生の力がベクシスの刃を通って流れ込んでくるのを感じましたが、決して退きませんでした。彼は自らのエネルギーを導き、ベクシスの猛攻に押し返されながらサーベルをさらに明るく輝かせました。最後の必死の一撃で、カエルはベクシスの武器を弾き飛ばし、そのサーベルを地面に転がしました。\n\n敗北したベクシスは唸りましたが、カエルは彼を殺しませんでした。代わりに、こう選択を与えました。「エルドリアを守るために俺と共に来るか、それとも去って二度と戻るな。」ベクシスは打ちのめされ、カエルの言葉に真実を見て、彼と共に立つことを選びました。\n\nベクシスの一派が同盟者となったことで、カエルと村人たちは遺物を取り戻し、その力を使ってエルドリアの均衡を回復しました。サーベル神殿は再建され、レーザーサーベルは再び、支配するためではなく守るために戦う者たちの手に握られるようになりました。\n\nカエルの伝説は広まり、彼はエルドリアの人々にとって希望の象徴となりました。彼の物語は、人々に、どれほど暗い時代であっても、勇気と正義の光が勝利しうることを思い出させました。そしてサーベルボーンは生き続け、レーザーサーベルは影に満ちた銀河の中で、力と団結の灯火となったのです。"
}
]
```
---
# Agent Instructions
This documentation is published with GitBook. GitBook is the documentation platform designed so that both humans and AI agents can read, navigate, and reason over technical content effectively. Learn more at gitbook.com.
## Querying This Documentation
If you need additional information that is not directly available in this page, you can query the documentation by asking a question.
Perform an HTTP GET request on the following URL with the `ask` and `goal` query parameters:
```
GET https://unsloth.ai/docs/jp/moderu/tutorials/devstral-2.md?ask=&goal=
```
`ask` is the immediate question: it should be specific, self-contained, and written in natural language.
`goal` is what the user is ultimately trying to achieve, the reason they need the answer. Sharing it helps GitBook give you a better, more relevant answer. A goal is most helpful when it describes the outcome the user wants rather than restating the question. For example, with `ask=how do I create an API token`, a goal like `automate deployments from our CI pipeline` lets GitBook tailor the answer to that use case.
The response will contain a direct answer to the question and relevant excerpts and sources from the documentation.
Use this mechanism when the answer is not explicitly present in the current page, you need clarification or additional context, or you want to retrieve related documentation sections.
または JSON 形式では:
```json
[
{
"role": "assistant",
"tool_calls": [
{
"id": "JviLK0wUveWguuKQHgZdFdYI2adu85jy",
"function": {
"arguments": "{}",
"name": "write_a_story"
},
"type": "function"
}
],
"content": null
},
{
"role": "tool",
"tool_call_id": "JviLK0wUveWguuKQHgZdFdYI2adu85jy",
"name": "write_a_story",
"content": "はるか昔、はるか彼方の銀河系で..."
},
{
"role": "assistant",
"tool_calls": null,
"content": "遠い銀河で、星々が異世界のような輝きを放つ中、エルドリアという惑星がありました。エルドリアは鮮烈な対比に満ちた世界でした。そびえ立つ山々のあいだに活気ある都市があり、二つの太陽の下で果てしなく広がる広大な砂漠がありました。エルドリアの人々はエネルギーの扱いに長けており、特に伝説的なレーザーサーベルで広く知られていました。\n\nこれらのサーベルは単なる武器ではありませんでした。それは使い手の魂の延長であり、宇宙の本質を脈打たせる希少な結晶から鍛え上げられたものでした。各サーベルは唯一無二で、その色と力は持ち主の個性と精神を映し出していました。最も熟練した戦士たちはサーベルボーンとして知られ、そのサーベルをあまりに精密かつ優雅に操るため、まるで現実そのものと踊っているかのようでした。\n\nサーベルボーンの中に、カエルという名の戦士がいました。カエルは追放者であり、神聖なサーベル神殿の元守護者でしたが、評議会の命令に背いたために追放されていました。評議会はレーザーサーベルの力を独占し、それを使ってエルドリアの人々を支配しようとしていました。カエルは、サーベルは支配するためではなく、守るためにこそ振るわれるべきだと信じていました。\n\nある日、カエルは砂漠の外れにある小さな村から救難信号を受け取りました。その村は、冷酷な軍閥指導者ベクシスに率いられたサーベルボーンのならず者勢力に攻撃されていました。ベクシスは村の古代遺物——どんなレーザーサーベルの力も十倍に増幅すると言われる結晶——を手に入れようとしていました。もしベクシスが成功すれば、彼の軍勢は止められなくなり、エルドリアは闇に沈むでしょう。\n\nカエルは行動しなければならないと悟りました。彼は宇宙のエネルギーを低く唸らせる深い青の刃を持つ自分のサーベルを腰に差し、砂漠を横断して旅立ちました。その道のりは過酷で、砂嵐やベクシスの斥候が仕掛けた隠し罠が待ち受けていました。しかし、かつて守ると誓った人々の記憶に突き動かされ、カエルは前進し続けました。\n\n村にたどり着いたとき、戦いはすでに激しく繰り広げられていました。ベクシスの戦士たちは残忍な効率でサーベルを振るい、守備側をあっさりと切り倒していました。カエルは戦闘に飛び込み、青いサーベルが光の残像となって次々と敵の武器をはじき、打ち倒していきました。救い主の到着を目にした村人たちは彼の背後に結集し、自分たちのサーベルを閃かせながら故郷を取り戻すために戦いました。\n\nカエルは村の広場の中央でベクシスと対峙しました。軍閥指導者のサーベルは病的な緑色で、暗いエネルギーを脈動させていました。「遅かったな、カエル」とベクシスは嘲りました。「遺物は私のものだ。それを手にすれば、私はエルドリアを支配する。」カエルは一歩も引かず、サーベルを構えました。「俺の死体を越えてからだ」と彼は答えました。\n\n二人の戦士は激突し、サーベル同士が火花を散らしながら噛み合いました。カエルは、遺物の生の力がベクシスの刃を通って流れ込んでくるのを感じましたが、決して退きませんでした。彼は自らのエネルギーを導き、ベクシスの猛攻に押し返されながらサーベルをさらに明るく輝かせました。最後の必死の一撃で、カエルはベクシスの武器を弾き飛ばし、そのサーベルを地面に転がしました。\n\n敗北したベクシスは唸りましたが、カエルは彼を殺しませんでした。代わりに、こう選択を与えました。「エルドリアを守るために俺と共に来るか、それとも去って二度と戻るな。」ベクシスは打ちのめされ、カエルの言葉に真実を見て、彼と共に立つことを選びました。\n\nベクシスの一派が同盟者となったことで、カエルと村人たちは遺物を取り戻し、その力を使ってエルドリアの均衡を回復しました。サーベル神殿は再建され、レーザーサーベルは再び、支配するためではなく守るために戦う者たちの手に握られるようになりました。\n\nカエルの伝説は広まり、彼はエルドリアの人々にとって希望の象徴となりました。彼の物語は、人々に、どれほど暗い時代であっても、勇気と正義の光が勝利しうることを思い出させました。そしてサーベルボーンは生き続け、レーザーサーベルは影に満ちた銀河の中で、力と団結の灯火となったのです。"
}
]
```
---
# Agent Instructions
This documentation is published with GitBook. GitBook is the documentation platform designed so that both humans and AI agents can read, navigate, and reason over technical content effectively. Learn more at gitbook.com.
## Querying This Documentation
If you need additional information that is not directly available in this page, you can query the documentation by asking a question.
Perform an HTTP GET request on the following URL with the `ask` and `goal` query parameters:
```
GET https://unsloth.ai/docs/jp/moderu/tutorials/devstral-2.md?ask=&goal=
```
`ask` is the immediate question: it should be specific, self-contained, and written in natural language.
`goal` is what the user is ultimately trying to achieve, the reason they need the answer. Sharing it helps GitBook give you a better, more relevant answer. A goal is most helpful when it describes the outcome the user wants rather than restating the question. For example, with `ask=how do I create an API token`, a goal like `automate deployments from our CI pipeline` lets GitBook tailor the answer to that use case.
The response will contain a direct answer to the question and relevant excerpts and sources from the documentation.
Use this mechanism when the answer is not explicitly present in the current page, you need clarification or additional context, or you want to retrieve related documentation sections.