> For the complete documentation index, see [llms.txt](https://unsloth.ai/docs/llms.txt). Markdown versions of documentation pages are available by appending `.md` to page URLs; this page is available as [Markdown](https://unsloth.ai/docs/zh/mo-xing/tutorials/devstral-2.md).
# Devstral 2 - 运行指南
Mistral Devstral 2 模型本地运行指南:123B-Instruct-2512 和 Small-2-24B-Instruct-2512。
Devstral 2 是 Mistral 面向软件工程的新编码和智能体 LLM,提供 [24B](#devstral-small-2-24b) 和 [123B](#devstral-2-123b) 规模。123B 模型在 SWE-bench、编码、工具调用和智能体用例上取得了 SOTA。24B 模型可容纳在 25GB RAM/VRAM 中,而 123B 可容纳在 128GB 中。
{% hint style="success" %}
**2025年12月13日更新**
**我们已经解决了 Devstral 聊天模板中的问题,结果应该会显著更好。24B 和 123B 已更新。另外,请安装截至 2025 年 12 月 13 日的最新 llama.cpp!**
{% endhint %}
Devstral 2 支持视觉能力,拥有 256k 上下文窗口,并使用与 [Ministral 3](/docs/zh/mo-xing/tutorials/ministral-3.md)。你现在可以运行并 **微调** 借助 Unsloth 在本地微调这两个模型。
所有 Devstral 2 上传都使用我们的 Unsloth [Dynamic 2.0](/docs/zh/ji-chu-zhi-shi/dynamic-3.0-ggufs.md) 方法论,在 [Aider Polyglot](/docs/zh/ji-chu-zhi-shi/dynamic-3.0-ggufs/unsloth-dynamic-ggufs-on-aider-polyglot.md) 和 5-shot MMLU 基准上表现最佳。
Devstral-Small-2-24BDevstral-2-123B
#### **Devstral 2 - Unsloth Dynamic** GGUF:
| Devstral-Small-2-24B-Instruct-2512 | Devstral-2-123B-Instruct-2512 |
| --------------------------------------------------------------------------------------------------------------------- | ----------------------------------------------------------------------------------------------------------- |
| [Devstral-Small-2-**24B**-Instruct-2512-GGUF](https://huggingface.co/unsloth/Devstral-Small-2-24B-Instruct-2512-GGUF) | [Devstral-2-**123B**-Instruct-2512-GGUF](https://huggingface.co/unsloth/Devstral-2-123B-Instruct-2512-GGUF) |
## 🖥️ **运行 Devstral 2**
请查看我们关于运行的分步指南 [Devstral 24B](#devstral-small-2-24b) 以及更大的 [Devstral 123B](#devstral-2-123b) 模型。这两个模型都支持视觉功能,但目前 **不支持视觉功能** 在 llama.cpp 中
### :gear: 使用指南
以下是推荐的推理设置:
* **Temperature \~0.15**
* Min\_P 为 0.01(可选,但 0.01 效果不错,llama.cpp 默认值为 0.1)
* **使用 `--jinja` 以启用系统提示词。**
* 最大上下文长度 = 262,144
* 推荐的最小上下文长度:16,384
* 请安装最新的 llama.cpp,因为一个 [2025 年 12 月 13 日的 pull request](https://github.com/ggml-org/llama.cpp/pull/17945) 修复了问题。
### :tophat:Devstral-Small-2-24B
全精度(Q8)Devstral-Small-2-24B GGUF 可装入 25GB RAM/VRAM。目前仅支持文本。
#### ✨ 在 llama.cpp 中运行 Devstral-Small-2-24B-Instruct-2512
1. 获取最新的 `llama.cpp` 在 [GitHub 上获取](https://github.com/ggml-org/llama.cpp)。你也可以按照下面的构建说明进行操作。将 `-DGGML_CUDA=ON` 改为 `-DGGML_CUDA=OFF` 如果你没有 GPU,或者只想使用 CPU 推理。 **对于 Apple Mac / Metal 设备**,设置 `-DGGML_CUDA=OFF` 然后按常规继续——Metal 支持默认开启。
{% code overflow="wrap" %}
```bash
apt-get update
apt-get install pciutils build-essential cmake curl libcurl4-openssl-dev -y
git clone https://github.com/ggml-org/llama.cpp
cmake llama.cpp -B llama.cpp/build \\
-DBUILD_SHARED_LIBS=OFF -DGGML_CUDA=ON -DLLAMA_CURL=ON
cmake --build llama.cpp/build --config Release -j --clean-first --target llama-cli llama-mtmd-cli llama-server llama-gguf-split
cp llama.cpp/build/bin/llama-* llama.cpp
```
{% endcode %}
2. 如果你想使用 `llama.cpp` 若要直接加载模型,你可以这样做:(:`Q4_K_XL`)是量化类型。你也可以直接从 Hugging Face 拉取:
```bash
./llama.cpp/llama-cli \\
-hf unsloth/Devstral-Small-2-24B-Instruct-2512-GGUF:UD-Q4_K_XL \
--jinja -ngl 99 --ctx-size 16384 \
--temp 0.15
```
3. 通过以下方式下载模型(在安装 `pip install huggingface_hub hf_transfer` 之后)。你可以选择 `UD_Q4_K_XL` 或其他量化版本。
```python
# !pip install huggingface_hub hf_transfer
import os
os.environ["HF_HUB_ENABLE_HF_TRANSFER"] = "1"
from huggingface_hub import snapshot_download
snapshot_download(
repo_id = "unsloth/Devstral-Small-2-24B-Instruct-2512-GGUF",
local_dir = "unsloth/Devstral-Small-2-24B-Instruct-2512-GGUF",
allow_patterns = ["*UD-Q4_K_XL*", "*mmproj-F16*"], # 适用于 Q4_K_XL
)
```
4. 以对话模式运行模型:
{% code overflow="wrap" %}
```bash
./llama.cpp/llama-cli \\
--model unsloth/Devstral-Small-2-24B-Instruct-2512-GGUF/Devstral-Small-2-24B-Instruct-2512-UD-Q4_K_XL.gguf \
--mmproj unsloth/Devstral-Small-2-24B-Instruct-2512-GGUF/mmproj-F16.gguf \
--ctx-size 16384 \
--n-gpu-layers 99 \
--seed 3407 \
--prio 2 \
--temp 0.15 \
--jinja
```
{% endcode %}
#### :eyes:Devstral 与视觉
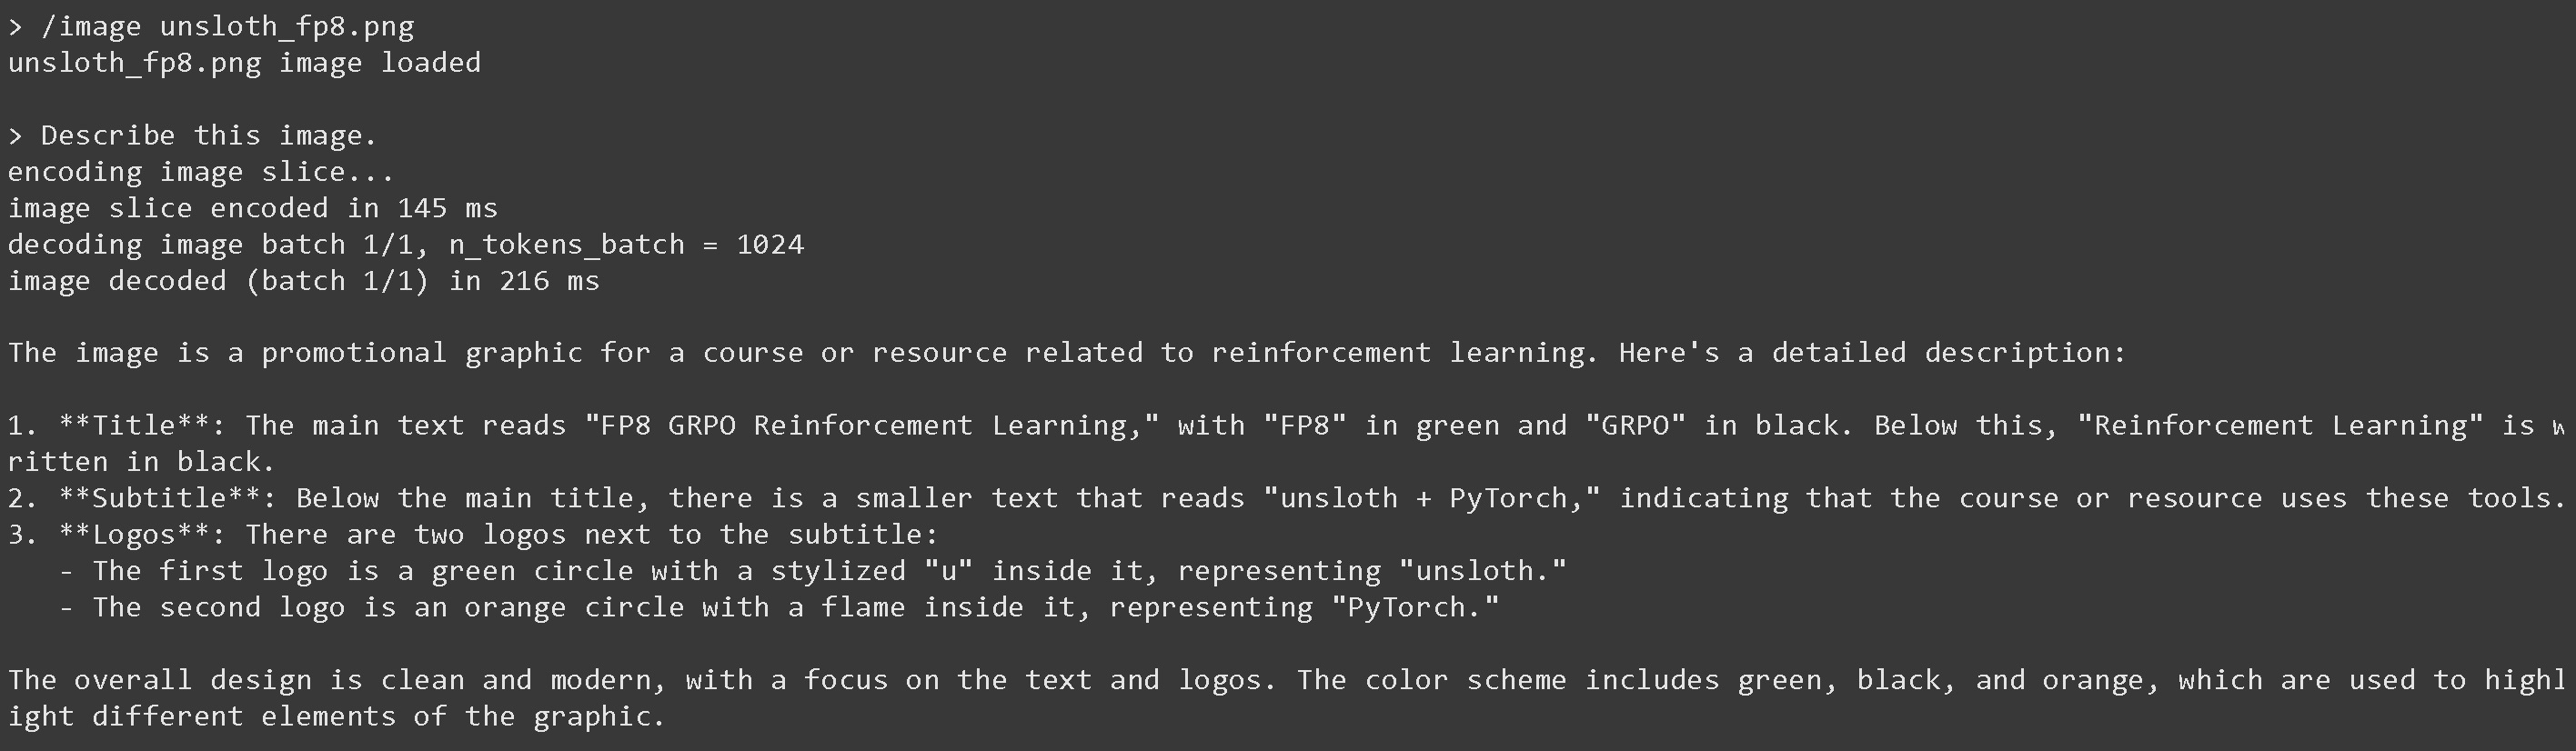
1. 要体验 Devstral 的图像能力,我们先下载一张这样的图片 [使用 Unsloth 的 FP8 强化学习](https://unsloth.ai/cgi/image/fp8grpolarge_KharloZxEEaHAY2X97CEX.png?width=3840\&quality=80\&format=auto) 如下:\

2. 我们通过以下方式获取图片 `wget https://unsloth.ai/cgi/image/fp8grpolarge_KharloZxEEaHAY2X97CEX.png?width=3840%26quality=80%26format=auto -O unsloth_fp8.png` 这会将图片保存为 "unsloth\_fp8.png"
3. 然后通过以下方式加载图片 `/image unsloth_fp8.png` 在模型加载后,如下所示:\

4. 然后我们向它提问 `描述这张图片` 并得到如下结果:
 ### :truck:Devstral-2-123B
全精度(Q8)Devstral-Small-2-123B GGUF 可装入 128GB RAM/VRAM。目前仅支持文本。
#### :sparkles: 运行 Devstral-2-123B-Instruct-2512 教程
1. 获取最新的 `llama.cpp` 在 [GitHub 上获取](https://github.com/ggml-org/llama.cpp)。你也可以按照下面的构建说明进行操作。将 `-DGGML_CUDA=ON` 改为 `-DGGML_CUDA=OFF` 如果你没有 GPU,或者只想使用 CPU 推理。
{% code overflow="wrap" %}
```bash
apt-get update
apt-get install pciutils build-essential cmake curl libcurl4-openssl-dev -y
git clone https://github.com/ggml-org/llama.cpp
cmake llama.cpp -B llama.cpp/build \\
-DBUILD_SHARED_LIBS=OFF -DGGML_CUDA=ON -DLLAMA_CURL=ON
cmake --build llama.cpp/build --config Release -j --clean-first --target llama-cli llama-mtmd-cli llama-server llama-gguf-split
cp llama.cpp/build/bin/llama-* llama.cpp
```
{% endcode %}
2. 你可以通过以下方式直接从 HuggingFace 拉取:
```bash
./llama.cpp/llama-cli \\
-hf unsloth/Devstral-2-123B-Instruct-2512-GGUF:UD-Q2_K_XL \
--jinja -ngl 99 --ctx-size 16384 \
--temp 0.15
```
2. 通过以下方式下载模型(在安装 `pip install huggingface_hub hf_transfer` 之后)。你可以选择 `UD_Q4_K_XL` 或其他量化版本。
```python
# !pip install huggingface_hub hf_transfer
import os
os.environ["HF_HUB_ENABLE_HF_TRANSFER"] = "1"
from huggingface_hub import snapshot_download
snapshot_download(
repo_id = "unsloth/Devstral-2-123B-Instruct-2512-GGUF",
local_dir = "unsloth/Devstral-2-123B-Instruct-2512-GGUF",
allow_patterns = ["*UD-Q2_K_XL*", "*mmproj-F16*"],
)
```
3. 以对话模式运行模型:
{% code overflow="wrap" %}
```bash
./llama.cpp/llama-cli \\
--model unsloth/Devstral-2-123B-Instruct-2512-GGUF/Devstral-2-123B-Instruct-2512-UD-Q2_K_XL.gguf \
--mmproj unsloth/Devstral-2-123B-Instruct-2512-GGUF/mmproj-F16.gguf \
--ctx-size 16384 \
--n-gpu-layers 99 \
--seed 3407 \
--prio 2 \
--temp 0.15 \
--jinja
```
{% endcode %}
## 🦥 使用 Unsloth 微调 Devstral 2
就像 [Ministral 3](/docs/zh/mo-xing/tutorials/ministral-3.md),Unsloth 支持 Devstral 2 微调。训练速度提升 2 倍,VRAM 占用减少 70%,并支持 8 倍更长的上下文长度。Devstral 2 可以轻松运行在 24GB VRAM 的 L4 GPU 上。
遗憾的是,Devstral 2 略微超出了 16GB VRAM 的内存限制,因此目前无法在 Google Colab 上免费微调它。不过,你 *可以* 使用我们的 [Kaggle 笔记本](https://www.kaggle.com/notebooks/welcome?src=https://github.com/unslothai/notebooks/blob/main/nb/Kaggle-Magistral_\(24B\)-Reasoning-Conversational.ipynb\&accelerator=nvidiaTeslaT4),它提供双 GPU 访问。只需将笔记本中的 Magistral 模型名称改为 `unsloth/Devstral-Small-2-24B-Instruct-2512` 模型。
{% hint style="success" %}
我们制作了可免费使用的 Unsloth 笔记本,用于微调 Ministral 3,并且由于它们共享相同架构,因此也直接支持 Devstral 2!只需更改名称即可使用所需模型。
{% endhint %}
* Ministral-3B-Instruct [视觉笔记本](https://colab.research.google.com/github/unslothai/notebooks/blob/main/nb/Ministral_3_VL_\(3B\)_Vision.ipynb) (视觉)(将模型名称改为 Devstral 2)
* Ministral-3B-Instruct [GRPO 笔记本](https://colab.research.google.com/github/unslothai/notebooks/blob/main/nb/Ministral_3_\(3B\)_Reinforcement_Learning_Sudoku_Game.ipynb) (将模型名称改为 Devstral 2)
{% columns %}
{% column %}
Devstral 视觉微调笔记本
{% embed url="" %}
{% endcolumn %}
{% column %}
Devstral 数独 GRPO 强化学习笔记本
{% embed url="" %}
{% endcolumn %}
{% endcolumns %}
### :sunglasses:Llama-server 服务与部署
为了将 Devstral 2 部署到生产环境,我们使用 `llama-server` 在新的终端中,例如通过 tmux,使用以下方式部署模型:
{% code overflow="wrap" %}
```bash
./llama.cpp/llama-server \\
--model unsloth/Devstral-Small-2-24B-Instruct-2512-GGUF/Devstral-Small-2-24B-Instruct-2512-UD-Q4_K_XL.gguf \
--mmproj unsloth/Devstral-Small-2-24B-Instruct-2512-GGUF/mmproj-F16.gguf \
--alias "unsloth/Devstral-Small-2-24B-Instruct-2512" \
--n-gpu-layers 999 \
--prio 3 \
--min-p 0.01 \
--ctx-size 16384 \
--port 8001 \\
--jinja
```
{% endcode %}
运行上面的命令后,你会得到:
### :truck:Devstral-2-123B
全精度(Q8)Devstral-Small-2-123B GGUF 可装入 128GB RAM/VRAM。目前仅支持文本。
#### :sparkles: 运行 Devstral-2-123B-Instruct-2512 教程
1. 获取最新的 `llama.cpp` 在 [GitHub 上获取](https://github.com/ggml-org/llama.cpp)。你也可以按照下面的构建说明进行操作。将 `-DGGML_CUDA=ON` 改为 `-DGGML_CUDA=OFF` 如果你没有 GPU,或者只想使用 CPU 推理。
{% code overflow="wrap" %}
```bash
apt-get update
apt-get install pciutils build-essential cmake curl libcurl4-openssl-dev -y
git clone https://github.com/ggml-org/llama.cpp
cmake llama.cpp -B llama.cpp/build \\
-DBUILD_SHARED_LIBS=OFF -DGGML_CUDA=ON -DLLAMA_CURL=ON
cmake --build llama.cpp/build --config Release -j --clean-first --target llama-cli llama-mtmd-cli llama-server llama-gguf-split
cp llama.cpp/build/bin/llama-* llama.cpp
```
{% endcode %}
2. 你可以通过以下方式直接从 HuggingFace 拉取:
```bash
./llama.cpp/llama-cli \\
-hf unsloth/Devstral-2-123B-Instruct-2512-GGUF:UD-Q2_K_XL \
--jinja -ngl 99 --ctx-size 16384 \
--temp 0.15
```
2. 通过以下方式下载模型(在安装 `pip install huggingface_hub hf_transfer` 之后)。你可以选择 `UD_Q4_K_XL` 或其他量化版本。
```python
# !pip install huggingface_hub hf_transfer
import os
os.environ["HF_HUB_ENABLE_HF_TRANSFER"] = "1"
from huggingface_hub import snapshot_download
snapshot_download(
repo_id = "unsloth/Devstral-2-123B-Instruct-2512-GGUF",
local_dir = "unsloth/Devstral-2-123B-Instruct-2512-GGUF",
allow_patterns = ["*UD-Q2_K_XL*", "*mmproj-F16*"],
)
```
3. 以对话模式运行模型:
{% code overflow="wrap" %}
```bash
./llama.cpp/llama-cli \\
--model unsloth/Devstral-2-123B-Instruct-2512-GGUF/Devstral-2-123B-Instruct-2512-UD-Q2_K_XL.gguf \
--mmproj unsloth/Devstral-2-123B-Instruct-2512-GGUF/mmproj-F16.gguf \
--ctx-size 16384 \
--n-gpu-layers 99 \
--seed 3407 \
--prio 2 \
--temp 0.15 \
--jinja
```
{% endcode %}
## 🦥 使用 Unsloth 微调 Devstral 2
就像 [Ministral 3](/docs/zh/mo-xing/tutorials/ministral-3.md),Unsloth 支持 Devstral 2 微调。训练速度提升 2 倍,VRAM 占用减少 70%,并支持 8 倍更长的上下文长度。Devstral 2 可以轻松运行在 24GB VRAM 的 L4 GPU 上。
遗憾的是,Devstral 2 略微超出了 16GB VRAM 的内存限制,因此目前无法在 Google Colab 上免费微调它。不过,你 *可以* 使用我们的 [Kaggle 笔记本](https://www.kaggle.com/notebooks/welcome?src=https://github.com/unslothai/notebooks/blob/main/nb/Kaggle-Magistral_\(24B\)-Reasoning-Conversational.ipynb\&accelerator=nvidiaTeslaT4),它提供双 GPU 访问。只需将笔记本中的 Magistral 模型名称改为 `unsloth/Devstral-Small-2-24B-Instruct-2512` 模型。
{% hint style="success" %}
我们制作了可免费使用的 Unsloth 笔记本,用于微调 Ministral 3,并且由于它们共享相同架构,因此也直接支持 Devstral 2!只需更改名称即可使用所需模型。
{% endhint %}
* Ministral-3B-Instruct [视觉笔记本](https://colab.research.google.com/github/unslothai/notebooks/blob/main/nb/Ministral_3_VL_\(3B\)_Vision.ipynb) (视觉)(将模型名称改为 Devstral 2)
* Ministral-3B-Instruct [GRPO 笔记本](https://colab.research.google.com/github/unslothai/notebooks/blob/main/nb/Ministral_3_\(3B\)_Reinforcement_Learning_Sudoku_Game.ipynb) (将模型名称改为 Devstral 2)
{% columns %}
{% column %}
Devstral 视觉微调笔记本
{% embed url="" %}
{% endcolumn %}
{% column %}
Devstral 数独 GRPO 强化学习笔记本
{% embed url="" %}
{% endcolumn %}
{% endcolumns %}
### :sunglasses:Llama-server 服务与部署
为了将 Devstral 2 部署到生产环境,我们使用 `llama-server` 在新的终端中,例如通过 tmux,使用以下方式部署模型:
{% code overflow="wrap" %}
```bash
./llama.cpp/llama-server \\
--model unsloth/Devstral-Small-2-24B-Instruct-2512-GGUF/Devstral-Small-2-24B-Instruct-2512-UD-Q4_K_XL.gguf \
--mmproj unsloth/Devstral-Small-2-24B-Instruct-2512-GGUF/mmproj-F16.gguf \
--alias "unsloth/Devstral-Small-2-24B-Instruct-2512" \
--n-gpu-layers 999 \
--prio 3 \
--min-p 0.01 \
--ctx-size 16384 \
--port 8001 \\
--jinja
```
{% endcode %}
运行上面的命令后,你会得到:
 然后在新的终端中,在完成以下操作后 `pip install openai`,执行:
{% code overflow="wrap" %}
```python
from openai import OpenAI
import json
openai_client = OpenAI(
base_url = "http://127.0.0.1:8001/v1",
api_key = "sk-no-key-required",
)
completion = openai_client.chat.completions.create(
model = "unsloth/Devstral-Small-2-24B-Instruct-2512",
messages = [{"role": "user", "content": "2+2 等于多少?"},],
)
print(completion.choices[0].message.content)
```
{% endcode %}
这将直接打印 4。
### :toolbox:Devstral 2 工具调用教程
在完成以下步骤后 [#llama-server-serving-and-deployment](#llama-server-serving-and-deployment "mention") 我们就可以加载一些工具,看看 Devstral 的实际表现了!让我们创建一些工具——复制粘贴并在 Python 中执行它们。
{% code expandable="true" %}
```python
import json, subprocess, random
from typing import Any
def add_number(a: float | str, b: float | str) -> float:
return float(a) + float(b)
def multiply_number(a: float | str, b: float | str) -> float:
return float(a) * float(b)
def subtract_number(a: float | str, b: float | str) -> float:
return float(a) - float(b)
def write_a_story() -> str:
return random.choice([
"很久很久以前,在一个遥远遥远的星系……",
"有两个朋友喜欢树懒和代码……",
"世界正在毁灭,因为每只树懒都进化出了超人的智慧……",
"其中一位朋友并不知道,另一位朋友不小心编写了一个让树懒进化的程序……",
])
def terminal(command: str) -> str:
if "rm" in command or "sudo" in command or "dd" in command or "chmod" in command:
msg = "由于这些命令很危险,无法执行 'rm, sudo, dd, chmod' 命令"
print(msg); return msg
print(f"正在执行终端命令 `{command}`")
try:
return str(subprocess.run(command, capture_output = True, text = True, shell = True, check = True).stdout)
except subprocess.CalledProcessError as e:
return f"命令失败:{e.stderr}"
def python(code: str) -> str:
data = {}
exec(code, data)
del data["__builtins__"]
return str(data)
MAP_FN = {
"add_number": add_number,
"multiply_number": multiply_number,
"subtract_number": subtract_number,
"write_a_story": write_a_story,
"terminal": terminal,
"python": python,
}
tools = [
{
"type": "function",
"function": {
"name": "add_number",
"description": "将两个数字相加。",
"parameters": {
"type": "object",
"properties": {
"a": {
"type": "string",
"description": "第一个数字。",
},
"b": {
"type": "string",
"description": "第二个数字。",
},
},
"required": ["a", "b"],
},
},
},
{
"type": "function",
"function": {
"name": "multiply_number",
"description": "将两个数字相乘。",
"parameters": {
"type": "object",
"properties": {
"a": {
"type": "string",
"description": "第一个数字。",
},
"b": {
"type": "string",
"description": "第二个数字。",
},
},
"required": ["a", "b"],
},
},
},
{
"type": "function",
"function": {
"name": "subtract_number",
"description": "将两个数字相减。",
"parameters": {
"type": "object",
"properties": {
"a": {
"type": "string",
"description": "第一个数字。",
},
"b": {
"type": "string",
"description": "第二个数字。",
},
},
"required": ["a", "b"],
},
},
},
{
"type": "function",
"function": {
"name": "write_a_story",
"description": "编写一个随机故事。",
"parameters": {
"type": "object",
"properties": {},
"required": [],
},
},
},
{
"type": "function",
"function": {
"name": "terminal",
"description": "执行终端操作。",
"parameters": {
"type": "object",
"properties": {
"command": {
"type": "string",
"description": "你想要执行的命令,例如 `ls`、`rm`,...",
},
},
"required": ["command"],
},
},
},
{
"type": "function",
"function": {
"name": "python",
"description": "使用一些将要运行的 Python 代码调用 Python 解释器。",
"parameters": {
"type": "object",
"properties": {
"code": {
"type": "string",
"description": "要运行的 Python 代码",
},
},
"required": ["code"],
},
},
},
]
```
{% endcode %}
然后我们从一组随机可能的消息中提一个简单问题来测试模型:
{% code overflow="wrap" %}
```python
import random
messages = [{
"role": "user",
"content": [random.choice([
{"type": "text", "text": "你能给我写个故事吗?"},
{"type": "text", "text": "今天的日期加 3 天是多少?"},
{"type": "text", "text": "获取当前时间,单位为纳秒。"},
{"type": "text", "text": "用 Python 创建一个斐波那契函数并求 fib(20)。"},
])],
}]
```
{% endcode %}
然后我们使用下面的函数(复制并粘贴并执行),它会自动解析函数调用——Devstral 2 可能会同时发起多个调用!
```python
temperature = 0.15
from openai import OpenAI
openai_client = OpenAI(
base_url = "http://127.0.0.1:8001/v1",
api_key = "sk-no-key-required",
)
model_name = next(iter(openai_client.models.list())).id
print(f"正在使用模型 = {model_name}")
has_tool_calls = True
original_messages_len = len(messages)
while has_tool_calls:
print(f"Current messages = {messages}")
response = openai_client.chat.completions.create(
model = model_name,
messages = messages,
temperature = temperature,
tools = tools if tools else None,
tool_choice = "auto" if tools else None,
)
tool_calls = response.choices[0].message.tool_calls or []
content = response.choices[0].message.content or ""
tool_calls_dict = [tc.to_dict() for tc in tool_calls] if tool_calls else tool_calls
messages.append({"role": "assistant", "tool_calls": tool_calls_dict, "content": content,})
for tool_call in tool_calls:
fx, args, _id = tool_call.function.name, tool_call.function.arguments, tool_call.id
out = MAP_FN[fx](**json.loads(args))
messages.append({"role": "tool", "tool_call_id": _id, "name": fx, "content": str(out),})
else:
has_tool_calls = False
print(json.dumps(messages[original_messages_len:], indent = 2))
```
1 分钟后,我们得到:
然后在新的终端中,在完成以下操作后 `pip install openai`,执行:
{% code overflow="wrap" %}
```python
from openai import OpenAI
import json
openai_client = OpenAI(
base_url = "http://127.0.0.1:8001/v1",
api_key = "sk-no-key-required",
)
completion = openai_client.chat.completions.create(
model = "unsloth/Devstral-Small-2-24B-Instruct-2512",
messages = [{"role": "user", "content": "2+2 等于多少?"},],
)
print(completion.choices[0].message.content)
```
{% endcode %}
这将直接打印 4。
### :toolbox:Devstral 2 工具调用教程
在完成以下步骤后 [#llama-server-serving-and-deployment](#llama-server-serving-and-deployment "mention") 我们就可以加载一些工具,看看 Devstral 的实际表现了!让我们创建一些工具——复制粘贴并在 Python 中执行它们。
{% code expandable="true" %}
```python
import json, subprocess, random
from typing import Any
def add_number(a: float | str, b: float | str) -> float:
return float(a) + float(b)
def multiply_number(a: float | str, b: float | str) -> float:
return float(a) * float(b)
def subtract_number(a: float | str, b: float | str) -> float:
return float(a) - float(b)
def write_a_story() -> str:
return random.choice([
"很久很久以前,在一个遥远遥远的星系……",
"有两个朋友喜欢树懒和代码……",
"世界正在毁灭,因为每只树懒都进化出了超人的智慧……",
"其中一位朋友并不知道,另一位朋友不小心编写了一个让树懒进化的程序……",
])
def terminal(command: str) -> str:
if "rm" in command or "sudo" in command or "dd" in command or "chmod" in command:
msg = "由于这些命令很危险,无法执行 'rm, sudo, dd, chmod' 命令"
print(msg); return msg
print(f"正在执行终端命令 `{command}`")
try:
return str(subprocess.run(command, capture_output = True, text = True, shell = True, check = True).stdout)
except subprocess.CalledProcessError as e:
return f"命令失败:{e.stderr}"
def python(code: str) -> str:
data = {}
exec(code, data)
del data["__builtins__"]
return str(data)
MAP_FN = {
"add_number": add_number,
"multiply_number": multiply_number,
"subtract_number": subtract_number,
"write_a_story": write_a_story,
"terminal": terminal,
"python": python,
}
tools = [
{
"type": "function",
"function": {
"name": "add_number",
"description": "将两个数字相加。",
"parameters": {
"type": "object",
"properties": {
"a": {
"type": "string",
"description": "第一个数字。",
},
"b": {
"type": "string",
"description": "第二个数字。",
},
},
"required": ["a", "b"],
},
},
},
{
"type": "function",
"function": {
"name": "multiply_number",
"description": "将两个数字相乘。",
"parameters": {
"type": "object",
"properties": {
"a": {
"type": "string",
"description": "第一个数字。",
},
"b": {
"type": "string",
"description": "第二个数字。",
},
},
"required": ["a", "b"],
},
},
},
{
"type": "function",
"function": {
"name": "subtract_number",
"description": "将两个数字相减。",
"parameters": {
"type": "object",
"properties": {
"a": {
"type": "string",
"description": "第一个数字。",
},
"b": {
"type": "string",
"description": "第二个数字。",
},
},
"required": ["a", "b"],
},
},
},
{
"type": "function",
"function": {
"name": "write_a_story",
"description": "编写一个随机故事。",
"parameters": {
"type": "object",
"properties": {},
"required": [],
},
},
},
{
"type": "function",
"function": {
"name": "terminal",
"description": "执行终端操作。",
"parameters": {
"type": "object",
"properties": {
"command": {
"type": "string",
"description": "你想要执行的命令,例如 `ls`、`rm`,...",
},
},
"required": ["command"],
},
},
},
{
"type": "function",
"function": {
"name": "python",
"description": "使用一些将要运行的 Python 代码调用 Python 解释器。",
"parameters": {
"type": "object",
"properties": {
"code": {
"type": "string",
"description": "要运行的 Python 代码",
},
},
"required": ["code"],
},
},
},
]
```
{% endcode %}
然后我们从一组随机可能的消息中提一个简单问题来测试模型:
{% code overflow="wrap" %}
```python
import random
messages = [{
"role": "user",
"content": [random.choice([
{"type": "text", "text": "你能给我写个故事吗?"},
{"type": "text", "text": "今天的日期加 3 天是多少?"},
{"type": "text", "text": "获取当前时间,单位为纳秒。"},
{"type": "text", "text": "用 Python 创建一个斐波那契函数并求 fib(20)。"},
])],
}]
```
{% endcode %}
然后我们使用下面的函数(复制并粘贴并执行),它会自动解析函数调用——Devstral 2 可能会同时发起多个调用!
```python
temperature = 0.15
from openai import OpenAI
openai_client = OpenAI(
base_url = "http://127.0.0.1:8001/v1",
api_key = "sk-no-key-required",
)
model_name = next(iter(openai_client.models.list())).id
print(f"正在使用模型 = {model_name}")
has_tool_calls = True
original_messages_len = len(messages)
while has_tool_calls:
print(f"Current messages = {messages}")
response = openai_client.chat.completions.create(
model = model_name,
messages = messages,
temperature = temperature,
tools = tools if tools else None,
tool_choice = "auto" if tools else None,
)
tool_calls = response.choices[0].message.tool_calls or []
content = response.choices[0].message.content or ""
tool_calls_dict = [tc.to_dict() for tc in tool_calls] if tool_calls else tool_calls
messages.append({"role": "assistant", "tool_calls": tool_calls_dict, "content": content,})
for tool_call in tool_calls:
fx, args, _id = tool_call.function.name, tool_call.function.arguments, tool_call.id
out = MAP_FN[fx](**json.loads(args))
messages.append({"role": "tool", "tool_call_id": _id, "name": fx, "content": str(out),})
else:
has_tool_calls = False
print(json.dumps(messages[original_messages_len:], indent = 2))
```
1 分钟后,我们得到:
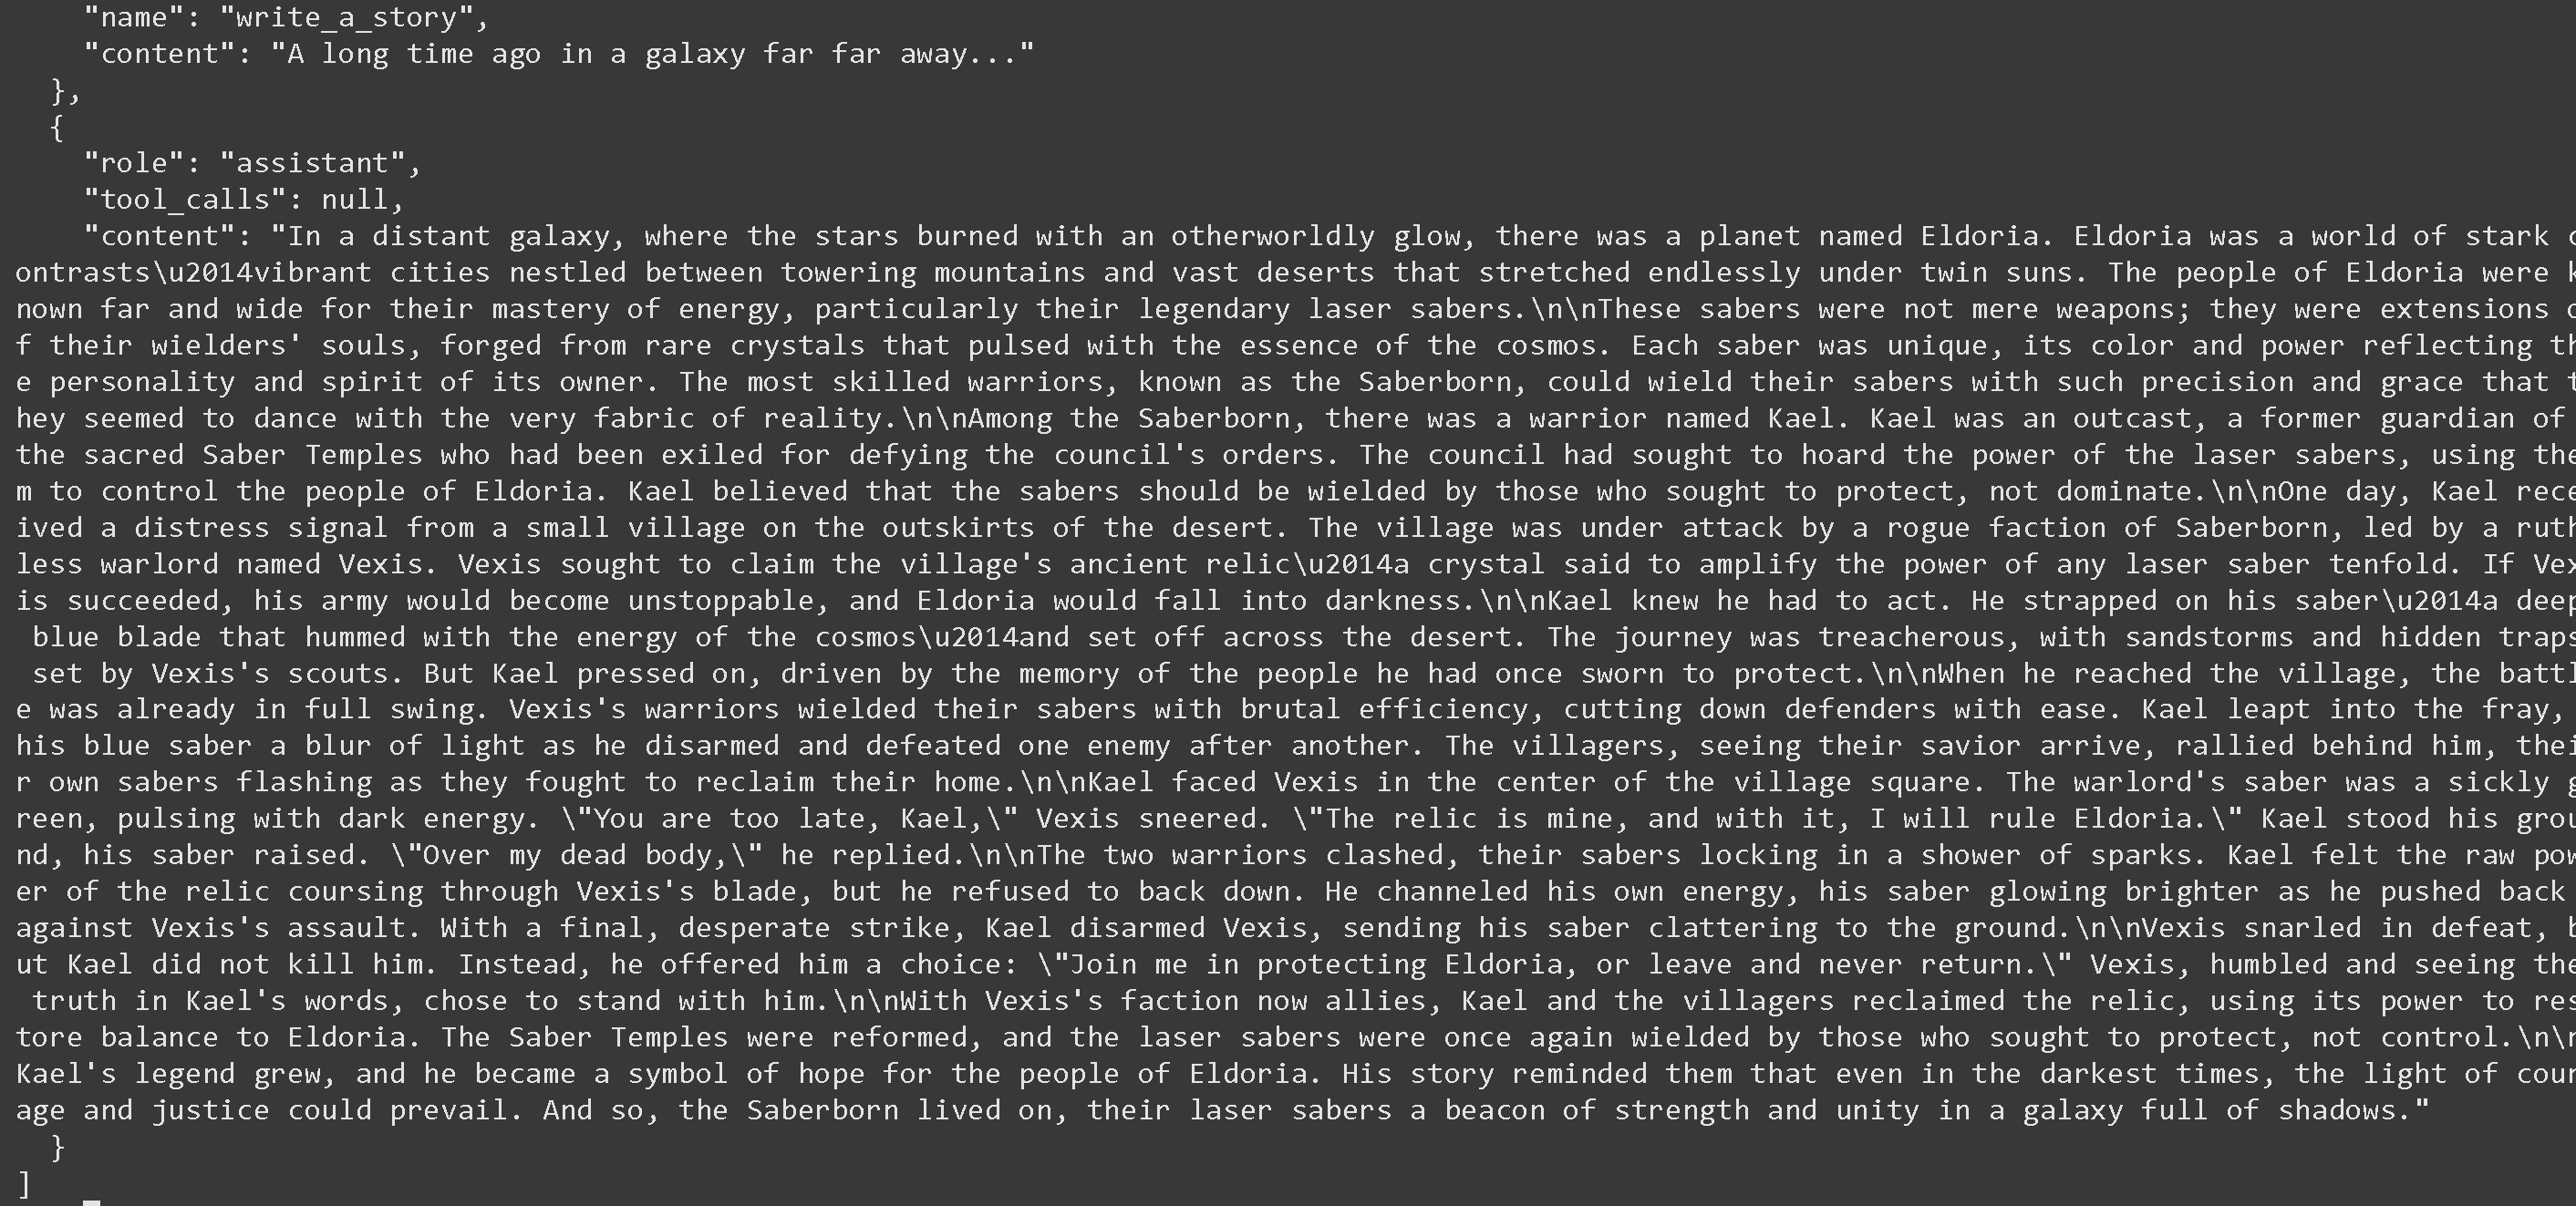 或者以 JSON 形式:
```json
[
{
"role": "assistant",
"tool_calls": [
{
"id": "JviLK0wUveWguuKQHgZdFdYI2adu85jy",
"function": {
"arguments": "{}",
"name": "write_a_story"
},
"type": "function"
}
],
"content": null
},
{
"role": "tool",
"tool_call_id": "JviLK0wUveWguuKQHgZdFdYI2adu85jy",
"name": "write_a_story",
"content": "很久很久以前,在一个遥远遥远的星系……"
},
{
"role": "assistant",
"tool_calls": null,
"content": "在一个遥远的星系里,恒星散发着超凡脱俗的光芒,那里有一颗名为 Eldoria 的星球。Eldoria 是一个充满强烈对比的世界——繁华的城市坐落在高耸的群山之间,广袤的沙漠在双日之下无尽延伸。Eldoria 的人民以精通能量而闻名遐迩,尤其是他们传奇般的激光剑。\n\n这些剑不仅仅是武器;它们是使用者灵魂的延伸,由稀有水晶锻造而成,脉动着宇宙的精髓。每一把剑都是独一无二的,其颜色与力量都映射着主人的性格与精神。最熟练的战士,被称为 Saberborn,能够以如此精准与优雅的方式挥舞他们的剑,仿佛与现实的本质共舞。\n\n在 Saberborn 之中,有一位名叫 Kael 的战士。Kael 是一名被放逐者,曾是神圣的 Saber 神殿的守护者之一,因为违抗议会的命令而被流放。议会一直试图囤积激光剑的力量,用它们来控制 Eldoria 的人民。Kael 认为,激光剑应该掌握在那些寻求守护而非支配的人手中。\n\n有一天,Kael 收到了一则来自沙漠边缘小村庄的求救信号。那个村庄正遭到一支由无情军阀 Vexis 领导的叛逃 Saberborn 派系袭击。Vexis 妄图夺取村庄中的古老遗物——一块据说能将任何激光剑威力放大十倍的水晶。如果 Vexis 得逞,他的军队将势不可挡,Eldoria 也将陷入黑暗。\n\nKael 知道自己必须行动。他把自己的剑——一把深蓝色的刃,嗡嗡作响,仿佛与宇宙能量同频——系在身上,踏上横穿沙漠的旅程。这段路途危机四伏,既有沙暴,也有 Vexis 侦察兵布下的隐蔽陷阱。但 Kael 仍然向前,因为他始终记得那些他曾发誓守护的人们。\n\n当他抵达村庄时,战斗已经全面展开。Vexis 的战士们挥舞着他们的剑,动作冷酷高效,轻易击倒了防守者。Kael 纵身跃入战团,他的蓝色剑光如同流动的光影,接连解除并击败一个又一个敌人。村民们看到救星到来,纷纷团结在他身后,自己的剑也闪烁起来,一同奋战,誓要夺回家园。\n\nKael 在村庄广场中央与 Vexis 正面交锋。那个军阀的剑是病态的绿色,涌动着黑暗能量。\"你来晚了,Kael,\"Vexis 冷笑道。\"这件遗物是我的,有了它,我将统治 Eldoria。\"Kael 站稳脚跟,举起自己的剑。\"除非我死,\"他回答道。\n\n两位战士猛然碰撞,剑刃相扣,迸发出一片火花。Kael 感受到遗物的原始力量正沿着 Vexis 的剑刃流淌,但他拒绝后退。他调动起自己的能量,随着对 Vexis 攻势的反击,他的剑愈发明亮。最后,他拼尽全力一击,卸下了 Vexis 的武器,让那把剑哐当一声掉在地上。\n\nVexis 败北后怒目而视,但 Kael 并没有杀死他。相反,他给了对方一个选择:\"要么和我一起守护 Eldoria,要么离开,永远不要回来。\"Vexis 被 Kael 的话所震慑,也看见了其中的真相,于是选择站到他这边。\n\n随着 Vexis 的派系变成盟友,Kael 和村民们夺回了那件遗物,并利用它的力量恢复了 Eldoria 的平衡。Saber 神殿被重新建立,激光剑也再次被那些寻求守护而非控制的人所执掌。\n\nKael 的传奇不断增长,他成为 Eldoria 人民希望的象征。他的故事提醒他们,即便在最黑暗的时刻,勇气与正义的光芒也能胜出。于是,Saberborn 延续了下来,他们的激光剑成为满是阴影的银河中的力量与团结之灯。"
}
]
```
---
# Agent Instructions
This documentation is published with GitBook. GitBook is the documentation platform designed so that both humans and AI agents can read, navigate, and reason over technical content effectively. Learn more at gitbook.com.
## Querying This Documentation
If you need additional information that is not directly available in this page, you can query the documentation by asking a question.
Perform an HTTP GET request on the following URL with the `ask` and `goal` query parameters:
```
GET https://unsloth.ai/docs/zh/mo-xing/tutorials/devstral-2.md?ask=&goal=
```
`ask` is the immediate question: it should be specific, self-contained, and written in natural language.
`goal` is what the user is ultimately trying to achieve, the reason they need the answer. Sharing it helps GitBook give you a better, more relevant answer. A goal is most helpful when it describes the outcome the user wants rather than restating the question. For example, with `ask=how do I create an API token`, a goal like `automate deployments from our CI pipeline` lets GitBook tailor the answer to that use case.
The response will contain a direct answer to the question and relevant excerpts and sources from the documentation.
Use this mechanism when the answer is not explicitly present in the current page, you need clarification or additional context, or you want to retrieve related documentation sections.
或者以 JSON 形式:
```json
[
{
"role": "assistant",
"tool_calls": [
{
"id": "JviLK0wUveWguuKQHgZdFdYI2adu85jy",
"function": {
"arguments": "{}",
"name": "write_a_story"
},
"type": "function"
}
],
"content": null
},
{
"role": "tool",
"tool_call_id": "JviLK0wUveWguuKQHgZdFdYI2adu85jy",
"name": "write_a_story",
"content": "很久很久以前,在一个遥远遥远的星系……"
},
{
"role": "assistant",
"tool_calls": null,
"content": "在一个遥远的星系里,恒星散发着超凡脱俗的光芒,那里有一颗名为 Eldoria 的星球。Eldoria 是一个充满强烈对比的世界——繁华的城市坐落在高耸的群山之间,广袤的沙漠在双日之下无尽延伸。Eldoria 的人民以精通能量而闻名遐迩,尤其是他们传奇般的激光剑。\n\n这些剑不仅仅是武器;它们是使用者灵魂的延伸,由稀有水晶锻造而成,脉动着宇宙的精髓。每一把剑都是独一无二的,其颜色与力量都映射着主人的性格与精神。最熟练的战士,被称为 Saberborn,能够以如此精准与优雅的方式挥舞他们的剑,仿佛与现实的本质共舞。\n\n在 Saberborn 之中,有一位名叫 Kael 的战士。Kael 是一名被放逐者,曾是神圣的 Saber 神殿的守护者之一,因为违抗议会的命令而被流放。议会一直试图囤积激光剑的力量,用它们来控制 Eldoria 的人民。Kael 认为,激光剑应该掌握在那些寻求守护而非支配的人手中。\n\n有一天,Kael 收到了一则来自沙漠边缘小村庄的求救信号。那个村庄正遭到一支由无情军阀 Vexis 领导的叛逃 Saberborn 派系袭击。Vexis 妄图夺取村庄中的古老遗物——一块据说能将任何激光剑威力放大十倍的水晶。如果 Vexis 得逞,他的军队将势不可挡,Eldoria 也将陷入黑暗。\n\nKael 知道自己必须行动。他把自己的剑——一把深蓝色的刃,嗡嗡作响,仿佛与宇宙能量同频——系在身上,踏上横穿沙漠的旅程。这段路途危机四伏,既有沙暴,也有 Vexis 侦察兵布下的隐蔽陷阱。但 Kael 仍然向前,因为他始终记得那些他曾发誓守护的人们。\n\n当他抵达村庄时,战斗已经全面展开。Vexis 的战士们挥舞着他们的剑,动作冷酷高效,轻易击倒了防守者。Kael 纵身跃入战团,他的蓝色剑光如同流动的光影,接连解除并击败一个又一个敌人。村民们看到救星到来,纷纷团结在他身后,自己的剑也闪烁起来,一同奋战,誓要夺回家园。\n\nKael 在村庄广场中央与 Vexis 正面交锋。那个军阀的剑是病态的绿色,涌动着黑暗能量。\"你来晚了,Kael,\"Vexis 冷笑道。\"这件遗物是我的,有了它,我将统治 Eldoria。\"Kael 站稳脚跟,举起自己的剑。\"除非我死,\"他回答道。\n\n两位战士猛然碰撞,剑刃相扣,迸发出一片火花。Kael 感受到遗物的原始力量正沿着 Vexis 的剑刃流淌,但他拒绝后退。他调动起自己的能量,随着对 Vexis 攻势的反击,他的剑愈发明亮。最后,他拼尽全力一击,卸下了 Vexis 的武器,让那把剑哐当一声掉在地上。\n\nVexis 败北后怒目而视,但 Kael 并没有杀死他。相反,他给了对方一个选择:\"要么和我一起守护 Eldoria,要么离开,永远不要回来。\"Vexis 被 Kael 的话所震慑,也看见了其中的真相,于是选择站到他这边。\n\n随着 Vexis 的派系变成盟友,Kael 和村民们夺回了那件遗物,并利用它的力量恢复了 Eldoria 的平衡。Saber 神殿被重新建立,激光剑也再次被那些寻求守护而非控制的人所执掌。\n\nKael 的传奇不断增长,他成为 Eldoria 人民希望的象征。他的故事提醒他们,即便在最黑暗的时刻,勇气与正义的光芒也能胜出。于是,Saberborn 延续了下来,他们的激光剑成为满是阴影的银河中的力量与团结之灯。"
}
]
```
---
# Agent Instructions
This documentation is published with GitBook. GitBook is the documentation platform designed so that both humans and AI agents can read, navigate, and reason over technical content effectively. Learn more at gitbook.com.
## Querying This Documentation
If you need additional information that is not directly available in this page, you can query the documentation by asking a question.
Perform an HTTP GET request on the following URL with the `ask` and `goal` query parameters:
```
GET https://unsloth.ai/docs/zh/mo-xing/tutorials/devstral-2.md?ask=&goal=
```
`ask` is the immediate question: it should be specific, self-contained, and written in natural language.
`goal` is what the user is ultimately trying to achieve, the reason they need the answer. Sharing it helps GitBook give you a better, more relevant answer. A goal is most helpful when it describes the outcome the user wants rather than restating the question. For example, with `ask=how do I create an API token`, a goal like `automate deployments from our CI pipeline` lets GitBook tailor the answer to that use case.
The response will contain a direct answer to the question and relevant excerpts and sources from the documentation.
Use this mechanism when the answer is not explicitly present in the current page, you need clarification or additional context, or you want to retrieve related documentation sections.