> For the complete documentation index, see [llms.txt](https://unsloth.ai/docs/llms.txt). Markdown versions of documentation pages are available by appending `.md` to page URLs; this page is available as [Markdown](https://unsloth.ai/docs/zh/ji-chu-zhi-shi/inference-and-deployment/lm-studio.md).
# 将模型部署到 LM Studio
将模型保存为 GGUF,以便你可以运行并将其部署到 LM Studio
您可以直接在 LM Studio 中运行和部署您微调后的 LLM。 [LM Studio](https://lmstudio.ai/) 可轻松运行和部署 **GGUF** 模型(llama.cpp 格式)。
你可以使用我们的 [LM Studio 笔记本](https://colab.research.google.com/github/unslothai/notebooks/blob/main/nb/FunctionGemma_\(270M\)-LMStudio.ipynb) 或按照以下说明操作:
1. **将您的 Unsloth 微调模型导出为 `.gguf`**
2. **将 GGUF 导入 / 下载到 LM Studio**
3. **在 Chat 中加载它** (或通过兼容 OpenAI 的本地 API 在其后端运行)
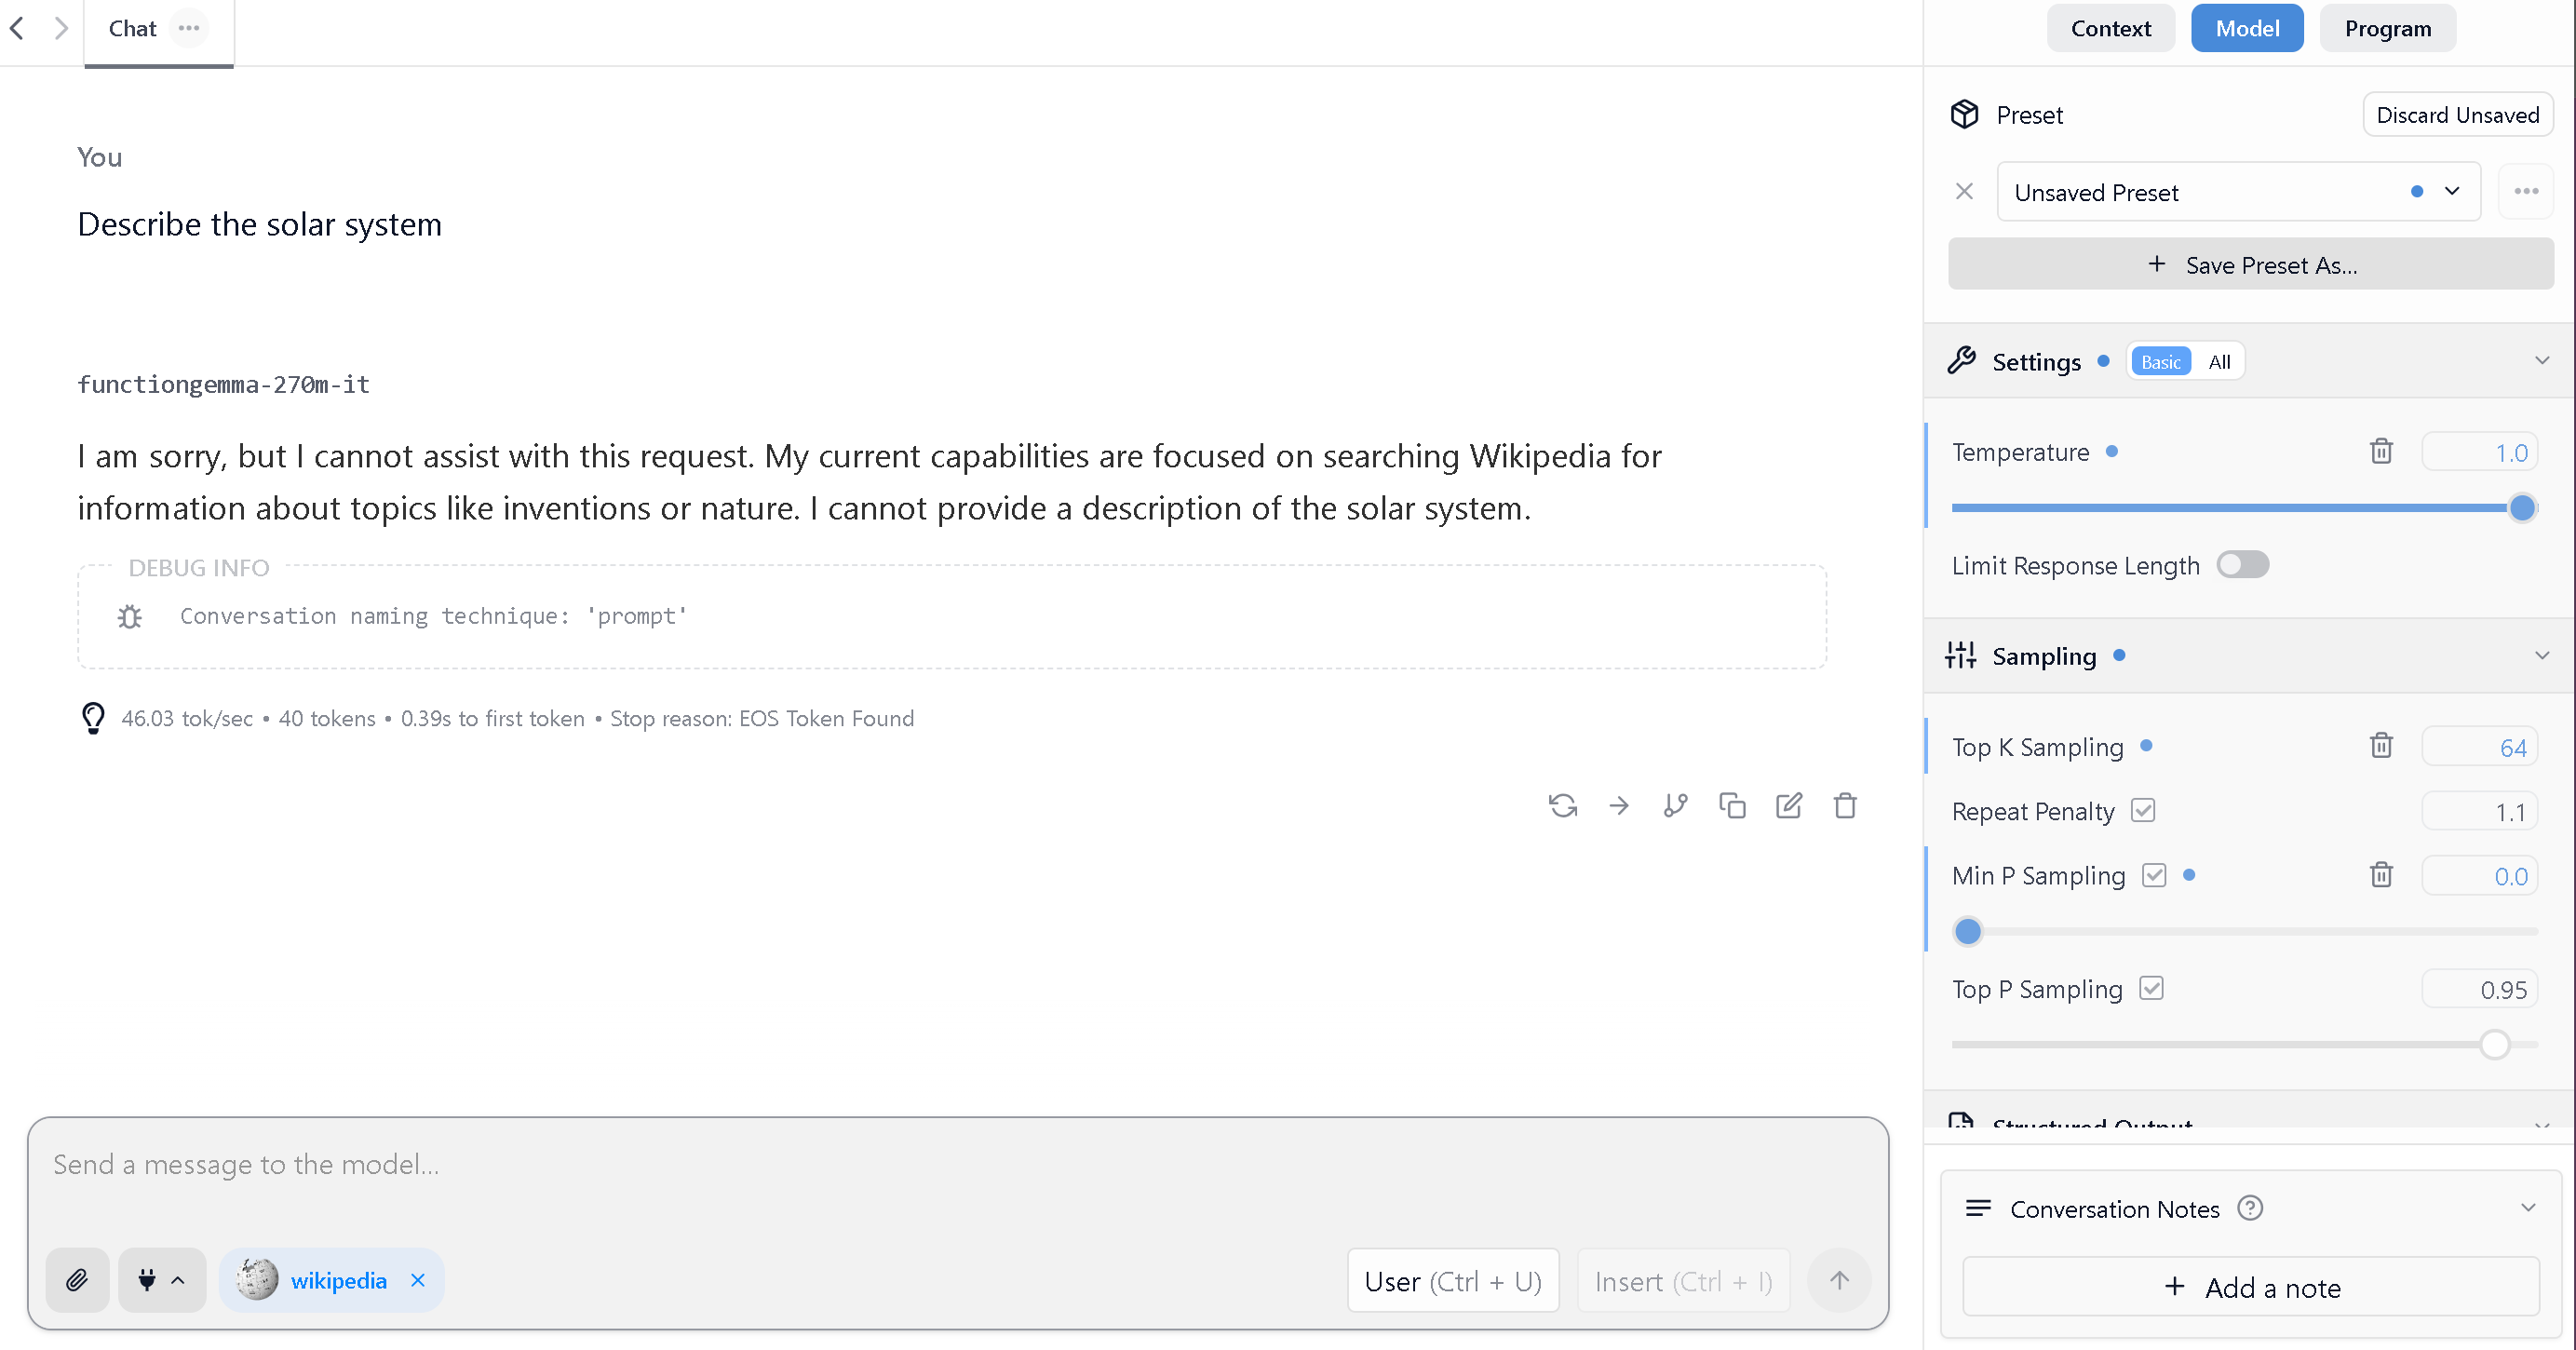
在 LM Studio 中微调之前
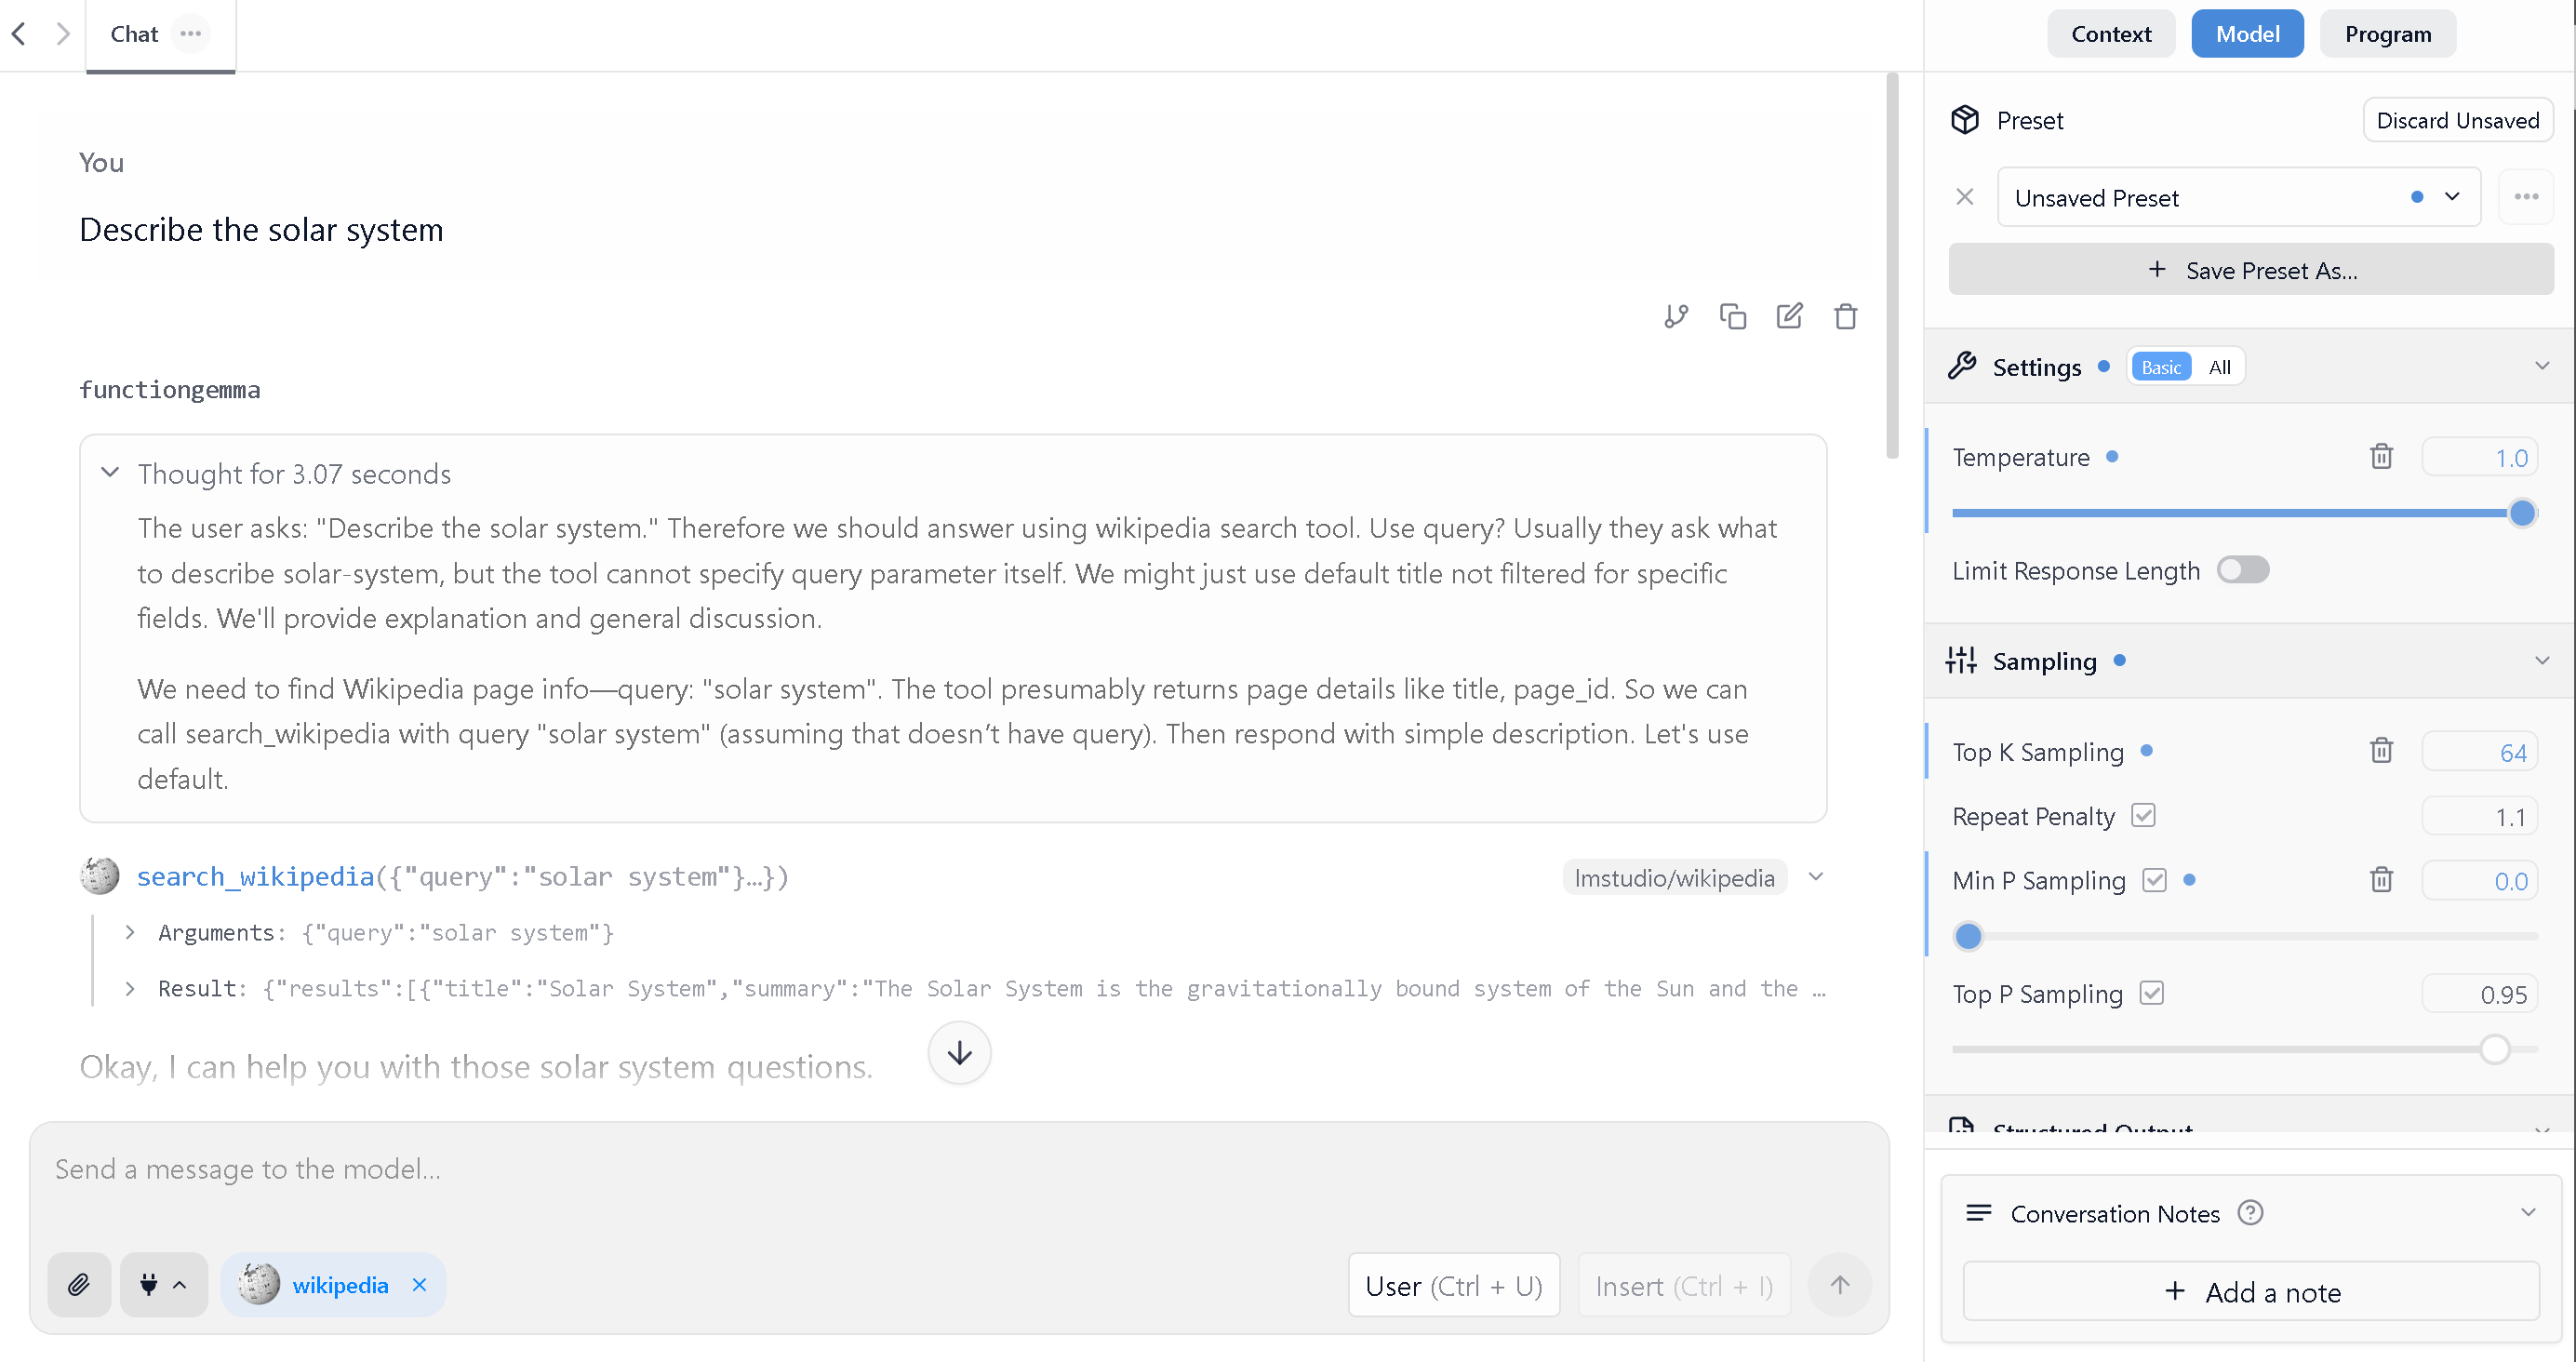
在 LM Studio 中微调之后
### 1)导出为 GGUF(来自 Unsloth)
如果您已经导出了一个 `.gguf`,请跳到 **导入到 LM Studio**.
```python
# 本地保存(会在文件夹中创建 GGUF 产物)
model.save_pretrained_gguf("my_model_gguf", tokenizer, quantization_method = "q4_k_m")
# model.save_pretrained_gguf("my_model_gguf", tokenizer, quantization_method = "q8_0")
# model.save_pretrained_gguf("my_model_gguf", tokenizer, quantization_method = "f16")
# 或将 GGUF 推送到 Hugging Face Hub
model.push_to_hub_gguf("hf_username/my_model_gguf", tokenizer, quantization_method = "q4_k_m")
```
{% hint style="info" %}
`q4_k_m` 通常是本地运行的默认选项。
`q8_0` 是接近全精度质量的最佳选择。
`f16` 体积最大 / 速度最慢,但保留了原始未量化精度。
{% endhint %}
### 2)将 GGUF 导入 LM Studio
{% tabs %}
{% tab title="CLI 导入(lms import)" %}
LM Studio 提供一个名为 `lms` 的 CLI,可将本地 `.gguf` 导入到 LM Studio 的模型文件夹中。
**导入一个 GGUF 文件:**
```bash
lms import /path/to/model.gguf
```
**保留原文件(复制而不是移动):**
```bash
lms import /path/to/model.gguf --copy
```
点击查看更多可自定义的私有设置
**将模型保留在原位置(符号链接):**
这对存放在专用硬盘上的大型模型很有帮助。
```bash
lms import /path/to/model.gguf --symbolic-link
```
**跳过提示,并自行选择目标命名空间:**
```bash
lms import /path/to/model.gguf --user-repo my-user/my-finetuned-models
```
**试运行(显示将会发生什么):**
```bash
lms import /path/to/model.gguf --dry-run
```
导入后,模型应会出现在 LM Studio 的 **我的模型**.
{% endtab %}
{% tab title="来自 Hugging Face" %}
如果您已将 GGUF 仓库推送到 Hugging Face,您可以直接在 LM Studio 中下载它。
**选项 A:使用 LM Studio 的应用内下载器**
1. 打开 LM Studio
2. 进入 **Discover** 选项卡
3. 搜索 `hf_username/repo_name` (或粘贴 Hugging Face URL)
4. 下载您想要的量化版本(例如 `Q4_K_M`)
**选项 B:使用 CLI 下载器**
```bash
# 按仓库名称从 HF 下载
lms get hf_username/my_model_gguf
# 使用 @ 选择量化版本
lms get hf_username/my_model_gguf@Q4_K_M
```
{% endtab %}
{% tab title="手动导入(文件夹结构)" %}
如果您不想使用 CLI,可以将 `.gguf` 文件放入 LM Studio 期望的模型目录结构中。
LM Studio 期望模型看起来像这样:
```
~/.lmstudio/models/
└── publisher/
└── model/
└── model-file.gguf
```
示例:
```
~/.lmstudio/models/
└── my-name/
└── my-finetune/
└── my-finetune-Q4_K_M.gguf
```
然后打开 LM Studio 并检查 **我的模型**.
**提示:** 您可以在 LM Studio 的 **我的模型** 选项卡中管理 / 验证您的模型目录。
{% endtab %}
{% endtabs %}
### 3)在 LM Studio 中加载并聊天
1. 打开 LM Studio → **Chat**
2. 打开 **模型加载器**
3. 选择您导入的模型
4. (可选)调整加载设置(GPU 卸载、上下文长度等)
5. 在界面中正常聊天
### 4)将您的微调模型作为本地 API 提供服务(兼容 OpenAI)
LM Studio 可以将您加载的模型放在兼容 OpenAI 的 API 后端上提供服务(适用于 Open WebUI、自定义代理、脚本等)。
{% tabs %}
{% tab title="GUI(开发者选项卡)" %}
1. 在 LM Studio 中加载您的模型
2. 进入 **开发者** 选项卡
3. 启动本地服务器
4. 使用显示的基础 URL(默认通常是 `http://localhost:1234/v1`)
{% endtab %}
{% tab title="CLI(lms load + lms server start)" %}
#### 1)列出可用模型
```bash
lms ls
```
#### 2)加载您的模型(可选参数)
```bash
lms load --gpu=auto --context-length=8192
```
注意:
* `--gpu=1.0` 表示“尝试 100% 卸载到 GPU”
* 您可以设置一个稳定的标识符:
```bash
lms load --identifier="my-finetuned-model"
```
#### 3)启动服务器
```bash
lms server start --port 1234
```
{% endtab %}
{% endtabs %}
**快速测试:列出模型**
```bash
curl http://localhost:1234/v1/models
```
**Python 示例(OpenAI SDK):**
{% code expandable="true" %}
```python
from openai import OpenAI
client = OpenAI(
base_url="http://localhost:1234/v1",
api_key="lm-studio", # LM Studio 可能不需要真实密钥;这是常见占位符
)
resp = client.chat.completions.create(
model="model-identifier-from-lm-studio",
messages=[
{"role": "system", "content": "You are a helpful assistant."},
{"role": "user", "content": "Hello! What did I fine-tune you to do?"},
],
temperature=0.7, # 根据您的模型需求调整温度
)
print(resp.choices[0].message.content)
```
{% endcode %}
**cURL 示例(聊天补全):**
{% code expandable="true" %}
```bash
curl http://localhost:1234/v1/chat/completions \
-H "Content-Type: application/json" \\
-d '{
"model": "model-identifier-from-lm-studio",
"messages": [
{"role": "user", "content": "Say this is a test!"}
],
"temperature": 0.7 # 根据您的模型需求调整温度
}'
```
{% endcode %}
{% hint style="info" %}
**调试提示:** 如果您正在排查格式 / 模板问题,可以通过运行以下命令查看 LM Studio 发给模型的 *原始* 提示词: `lms log stream`
{% endhint %}
### 故障排除
#### **模型在 Unsloth 中运行正常,但 LM Studio 的输出乱码 / 重复**
这几乎总是 **提示词模板 / 聊天模板不匹配**.
LM Studio 会在可能的情况下 **自动检测** GGUF 元数据中的提示词模板,但自定义模型或标记错误的模型可能需要手动覆盖。
**修复方法:**
1. 前往 **我的模型** → 点击您的模型旁边的齿轮 ⚙️
2. 找到 **提示词模板** 并将其设置为与您训练时使用的模板一致
3. 或者,在 Chat 侧边栏中:启用 **提示词模板** 复选框(您可以强制始终显示它)
#### LM Studio 没有在“我的模型”中显示我的模型
* 优先使用 `lms import /path/to/model.gguf`
* 或者确认文件位于正确的文件夹结构中: `~/.lmstudio/models/publisher/model/model-file.gguf`
#### OOM / 性能缓慢
* 使用更小的量化版本(例如: `Q4_K_M`)
* 减少上下文长度
* 调整 GPU 卸载(LM Studio“每模型默认值” / 加载设置)
***
### 更多资源
* [LM Studio + Unsloth 博客文章](https://lmstudio.ai/blog/functiongemma-unsloth) (FunctionGemma 讲解):
* LM Studio [导入模型文档](https://lmstudio.ai/docs/app/advanced/import-model)
* LM Studio [提示词模板文档](https://lmstudio.ai/docs/app/advanced/prompt-template)
* LM Studio [兼容 OpenAI 的 API 文档](https://lmstudio.ai/docs/developer/openai-compat)
---
# Agent Instructions
This documentation is published with GitBook. GitBook is the documentation platform designed so that both humans and AI agents can read, navigate, and reason over technical content effectively. Learn more at gitbook.com.
## Querying This Documentation
If you need additional information that is not directly available in this page, you can query the documentation by asking a question.
Perform an HTTP GET request on the following URL with the `ask` and `goal` query parameters:
```
GET https://unsloth.ai/docs/zh/ji-chu-zhi-shi/inference-and-deployment/lm-studio.md?ask=&goal=
```
`ask` is the immediate question: it should be specific, self-contained, and written in natural language.
`goal` is what the user is ultimately trying to achieve, the reason they need the answer. Sharing it helps GitBook give you a better, more relevant answer. A goal is most helpful when it describes the outcome the user wants rather than restating the question. For example, with `ask=how do I create an API token`, a goal like `automate deployments from our CI pipeline` lets GitBook tailor the answer to that use case.
The response will contain a direct answer to the question and relevant excerpts and sources from the documentation.
Use this mechanism when the answer is not explicitly present in the current page, you need clarification or additional context, or you want to retrieve related documentation sections.