> For the complete documentation index, see [llms.txt](https://unsloth.ai/docs/llms.txt). Markdown versions of documentation pages are available by appending `.md` to page URLs; this page is available as [Markdown](https://unsloth.ai/docs/zh/ji-chu/inference-and-deployment/deploy-llms-phone.md).
# 如何在你的 iOS 或 Android 手机上运行和部署 LLM
使用 ExecuTorch 微调你自己的 LLM,并将其部署到 Android 或 iPhone 的教程。
我们很兴奋地展示你如何训练 LLM,然后 **将它们部署到本地** 更改为 **Android 手机** 和 **iPhone**。我们与 [ExecuTorch](https://github.com/pytorch/executorch/) 以及来自 PyTorch 和 Meta 的团队合作,创建了一个使用量化感知训练([QAT](/docs/zh/bo-ke/quantization-aware-training-qat.md))的简化工作流,然后将它们直接部署到边缘设备。借助 [Unsloth](https://github.com/unslothai/unsloth)、TorchAO 和 ExecuTorch,我们展示你可以如何:
* 使用与 Meta 相同的技术(ExecuTorch),它支撑着 Instagram、WhatsApp 上数十亿用户
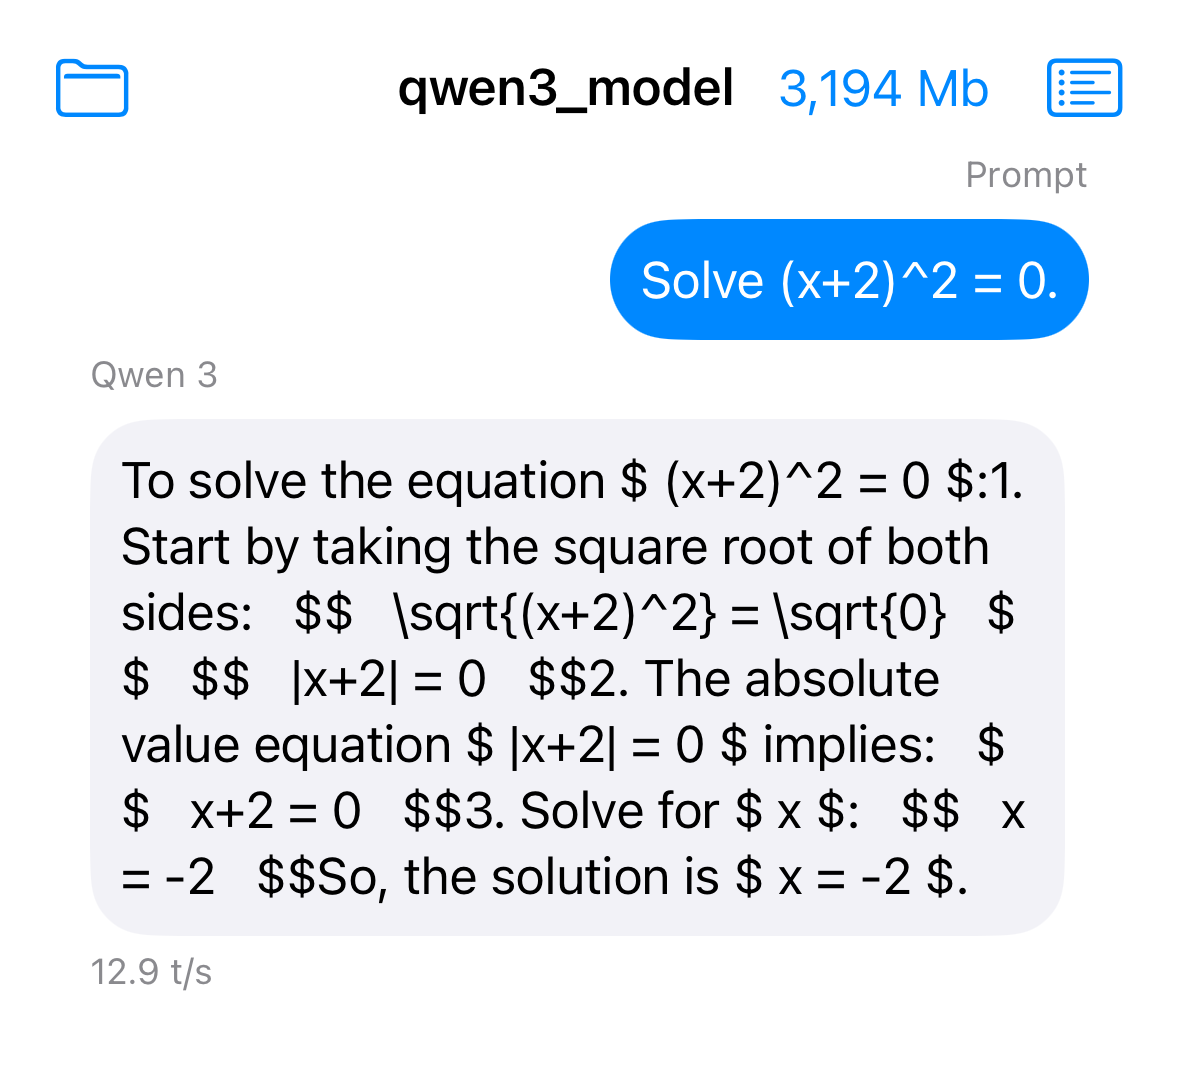
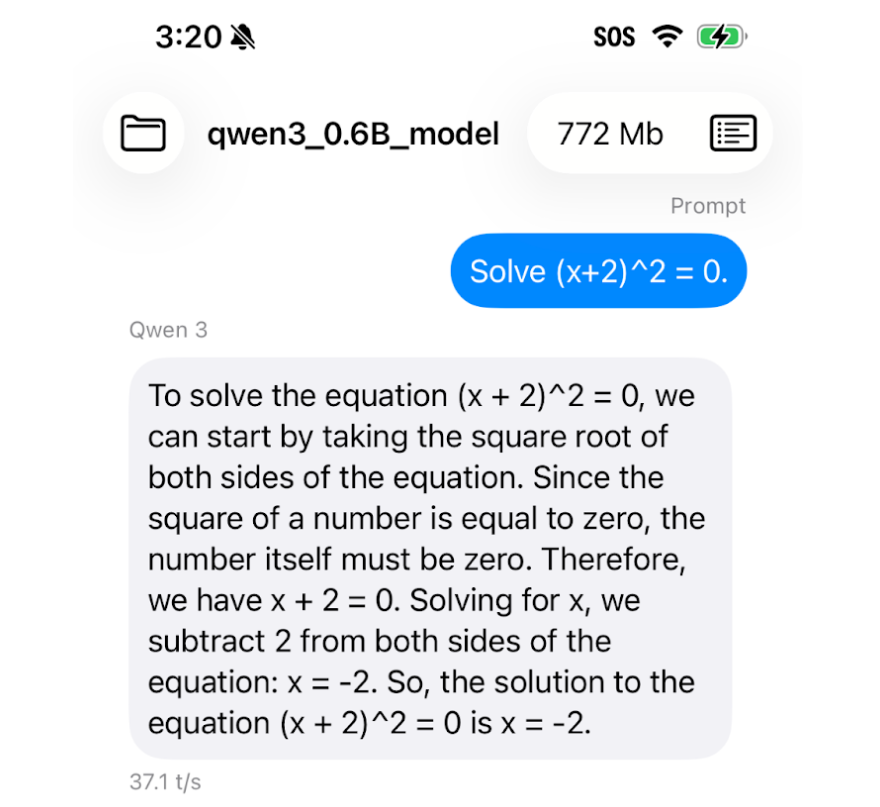
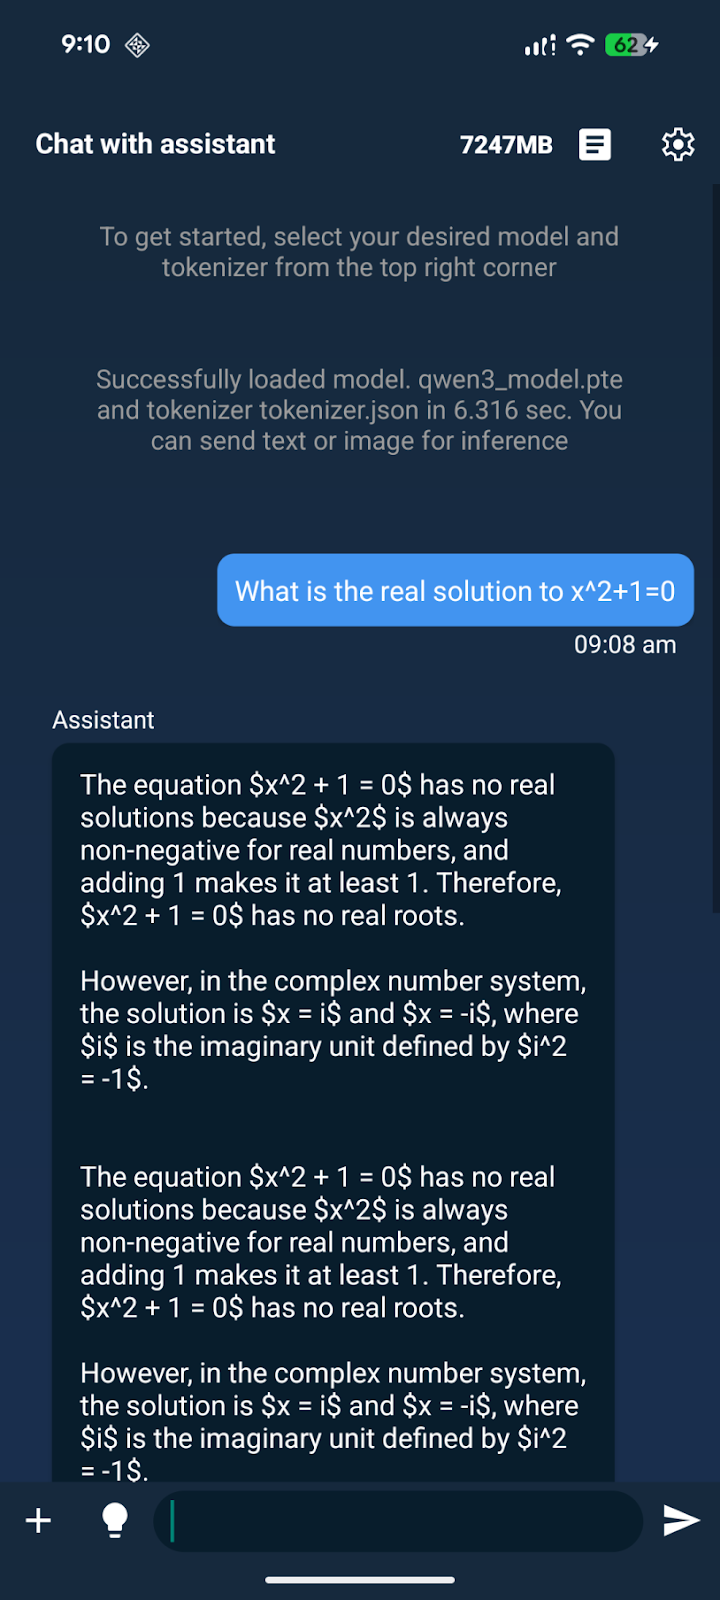
* 将 Qwen3-0.6B 本地部署到 **Pixel 8** 和 **和 iPhone 15 Pro,上下文处理速度约为 40 tokens/s**
* 通过 TorchAO 应用 QAT,恢复 70% 的准确率
* 获得隐私优先、即时响应和离线能力
* 使用我们的 [免费 Colab 笔记本](https://colab.research.google.com/github/unslothai/notebooks/blob/main/nb/Qwen3_\(0_6B\)-Phone_Deployment.ipynb) 来微调 Qwen3 0.6B,并将其导出用于手机部署
iOS 教程 Android 教程
{% columns %}
{% column %}
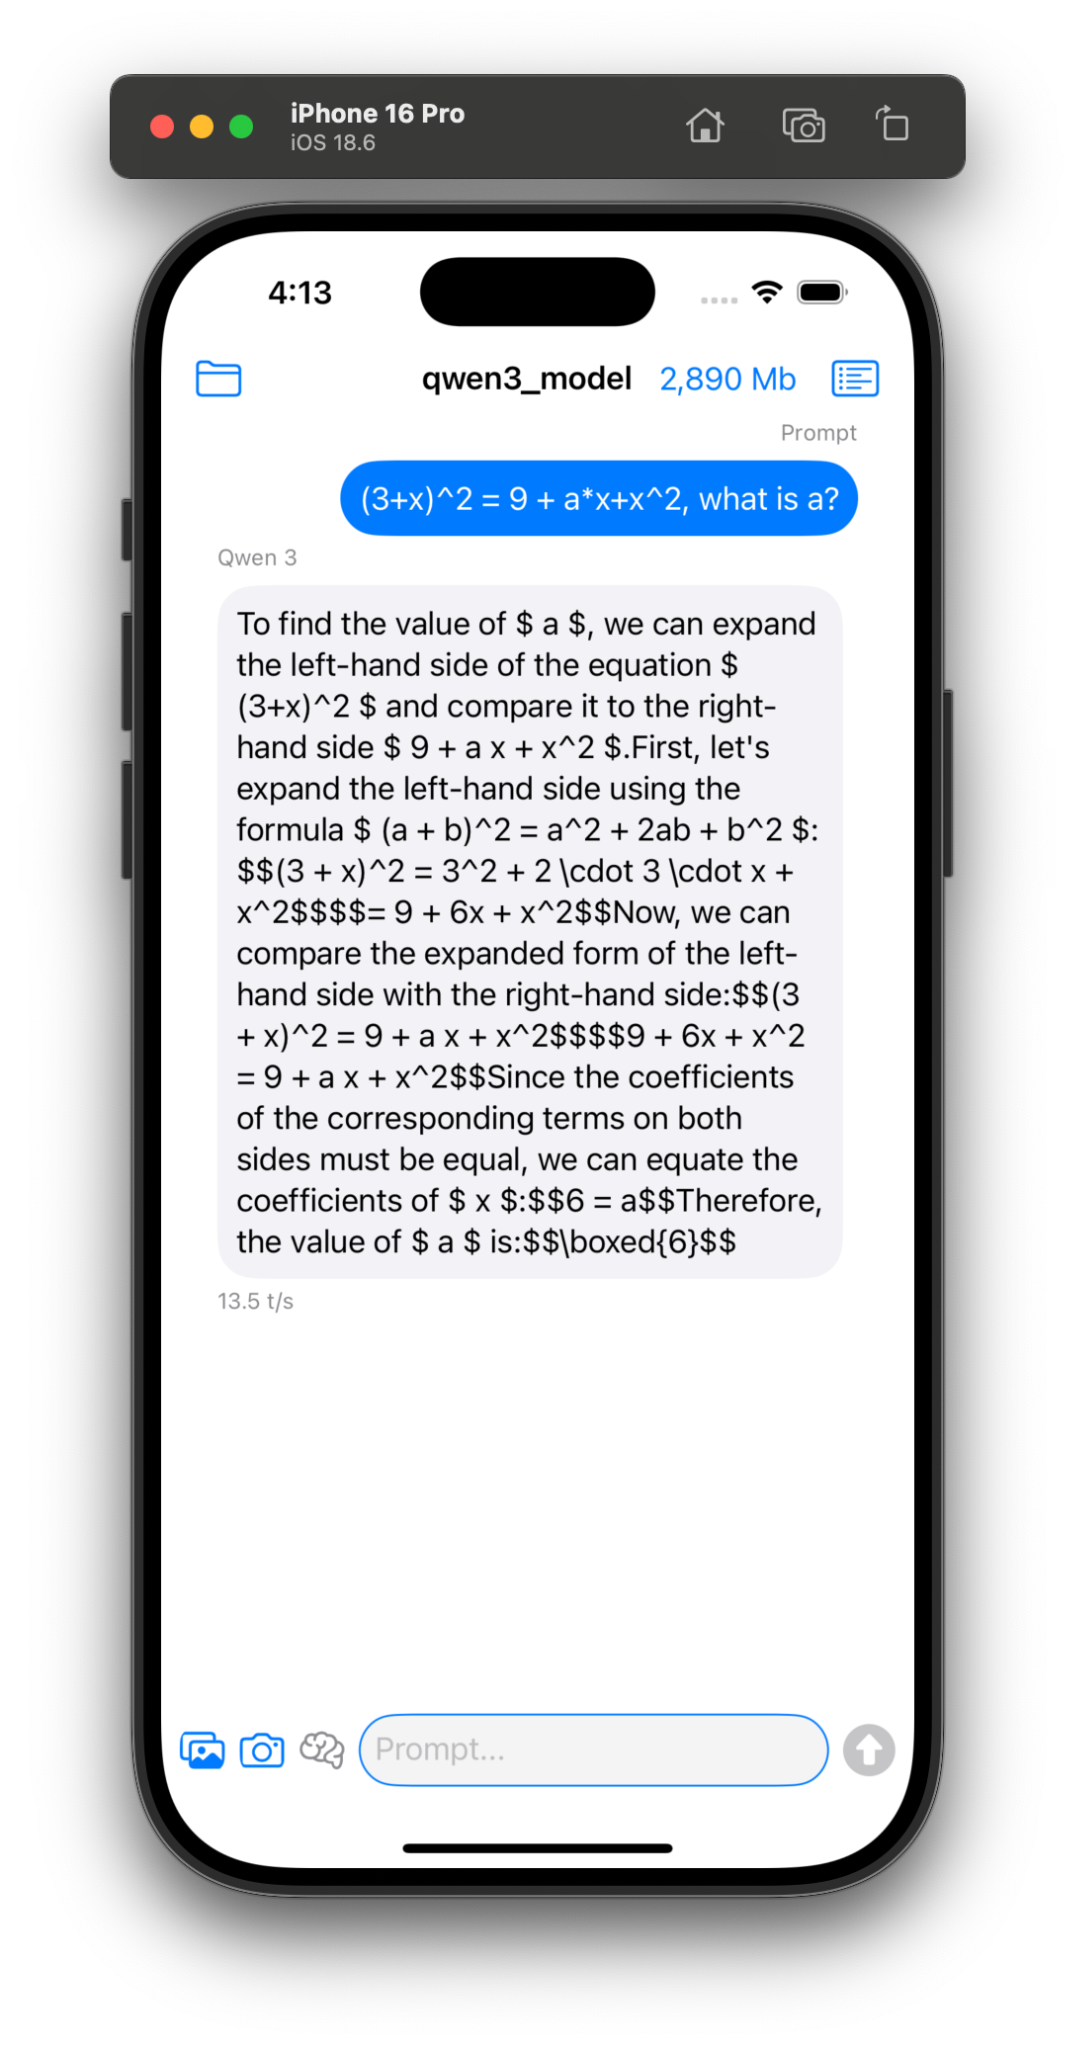
**Qwen3-4B** 部署在一台 iPhone 15 Pro 上
" %}
首先更新 Unsloth 并安装 TorchAO 和 Executorch。
```bash
pip install --upgrade unsloth unsloth_zoo
pip install torchao==0.14.0 executorch pytorch_tokenizers
```
然后只需使用 `qat_scheme = "phone-deployment"` 来表示我们希望将其部署到手机上。注意我们还设置了 `full_finetuning = True` ,用于完整微调!
```python
从 unsloth 导入 FastLanguageModel
import torch
model, tokenizer = FastLanguageModel.from_pretrained(
model_name = "unsloth/Qwen3-0.6B",
max_seq_length = 1024,
full_finetuning = True,
qat_scheme = "phone-deployment", # 手机部署标志
)
```
我们正在使用 `qat_scheme = "phone-deployment"` 我们实际上使用 `qat_scheme = "int8-int4"` 在底层启用 Unsloth/TorchAO QAT,它会在训练期间 *模拟* Linear 层的 INT8 动态激活量化与 INT4 权重量化(通过伪量化操作),同时保持计算为 16 位。训练结束后,模型会转换为真正的量化版本,因此设备端模型更小,并且通常 **比朴素 PTQ 更能保持准确率**.
按照 [Colab 笔记本](https://colab.research.google.com/github/unslothai/notebooks/blob/main/nb/Qwen3_\(0_6B\)-Phone_Deployment.ipynb)中所述完成微调后,我们接着将其保存为一个 `.pte` 文件,使用 Executorch:
{% code expandable="true" %}
```bash
# 将权重检查点 state dict 的键转换为 ExecuTorch 所期望的格式
python -m executorch.examples.models.qwen3.convert_weights "phone_model" pytorch_model_converted.bin
# 从 ExecuTorch 仓库下载模型配置
curl -L -o 0.6B_config.json https://raw.githubusercontent.com/pytorch/executorch/main/examples/models/qwen3/config/0_6b_config.json
# 导出为 ExecuTorch pte 文件
python -m executorch.examples.models.llama.export_llama \\
--model "qwen3_0_6b" \\
--checkpoint pytorch_model_converted.bin \\
--params 0.6B_config.json \\
--output_name qwen3_0.6B_model.pte \\
-kv --use_sdpa_with_kv_cache -X --xnnpack-extended-ops \\
--max_context_length 1024 --max_seq_length 128 --dtype fp32 \\
--metadata '{"get_bos_id":199999, "get_eos_ids":[200020,199999]}'
```
{% endcode %}
### 🏁 训练后部署
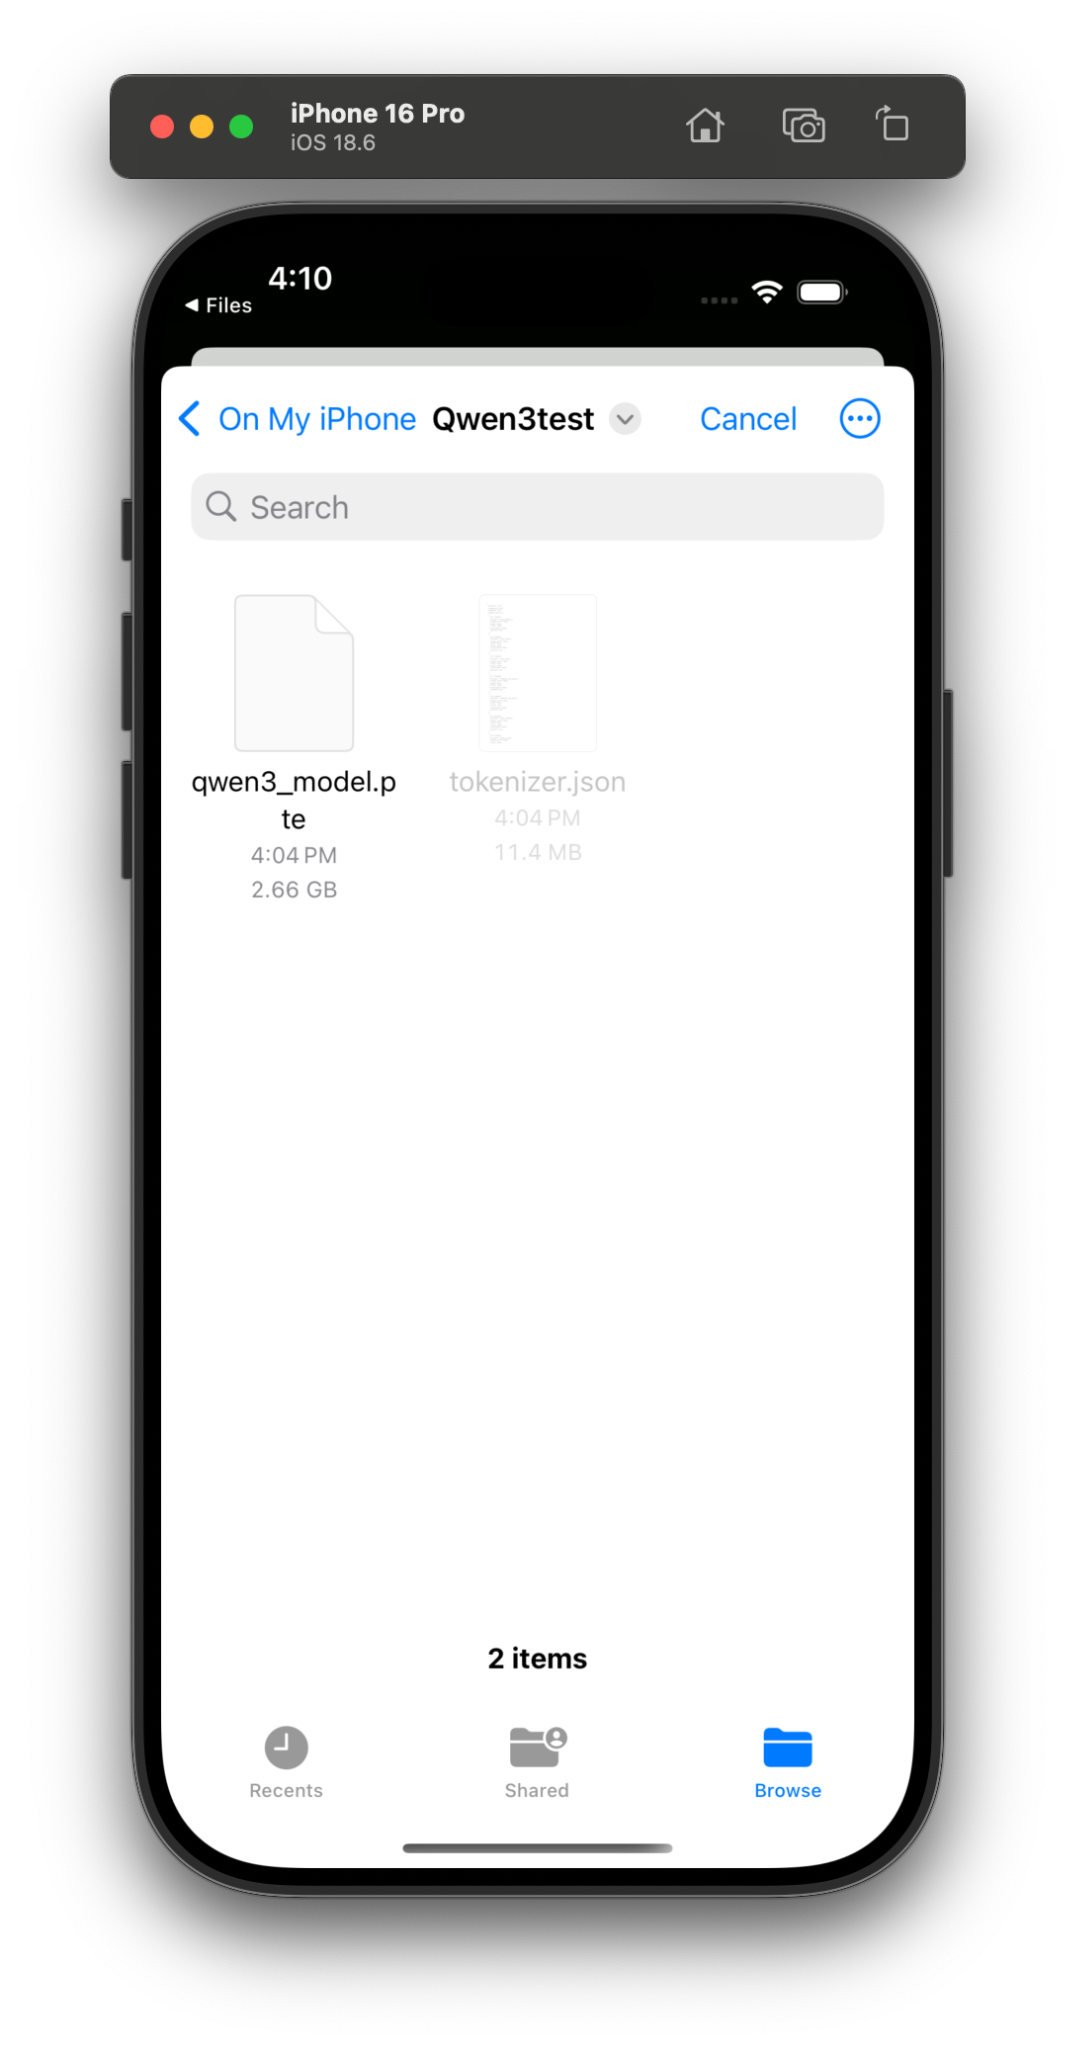
现在有了你的 `qwen3_0.6B_model.pte` 文件,大小约为 472MB,我们就可以部署它了!选择你的设备,直接开始:
* [#ios-deployment](#ios-deployment "mention") – Xcode 路线,模拟器或真机
* [#android-deployment](#android-deployment "mention") – 命令行路线,无需 Unsloth
## :apple: iOS 部署
在 iOS 上运行你的模型的教程(已在 iPhone 16 Pro 上测试,但也适用于其他 iPhone)。你需要一台基于 macOS 的实体设备,并且必须能够运行 Xcode 15。
### macOS 开发环境设置
**安装 Xcode 和命令行工具**
1. 从 Mac App Store 安装 Xcode(必须是 15 或更高版本)
2. 打开终端并验证你的安装: `xcode-select -p`
3. 安装命令行工具并接受许可:
1. `xcode-select --install`
2. `sudo xcodebuild -license accept`
4. 首次启动 Xcode,并在提示时安装任何额外组件
5. 如果要求选择平台,请选择 iOS 18 并下载以便访问模拟器
{% hint style="warning" %}
重要:首次启动 Xcode 至关重要!不要跳过那些额外组件的安装!查看 [这里](https://developer.apple.com/documentation/xcode/downloading-and-installing-additional-xcode-components) 和 [这里](https://developer.apple.com/documentation/safari-developer-tools/adding-additional-simulators) 以获取更多帮助。
{% endhint %}
**验证一切是否正常:** `xcode-select -p`
你应该能看到打印出的路径。如果没有,请重复第 3 步。

### Apple 开发者账户设置
**仅适用于实体设备!**
{% hint style="info" %}
如果你只使用 iOS 模拟器,请跳过整个部分。只有在向实体 iPhone 部署时才需要付费开发者账户。
{% endhint %}
{% columns %}
{% column %}
**创建你的 Apple ID**
没有 Apple ID?[ 在此注册](https://support.apple.com/en-us/108647?device-type=iphone).
#### **将你的账户添加到 Xcode**
1. 打开 Xcode
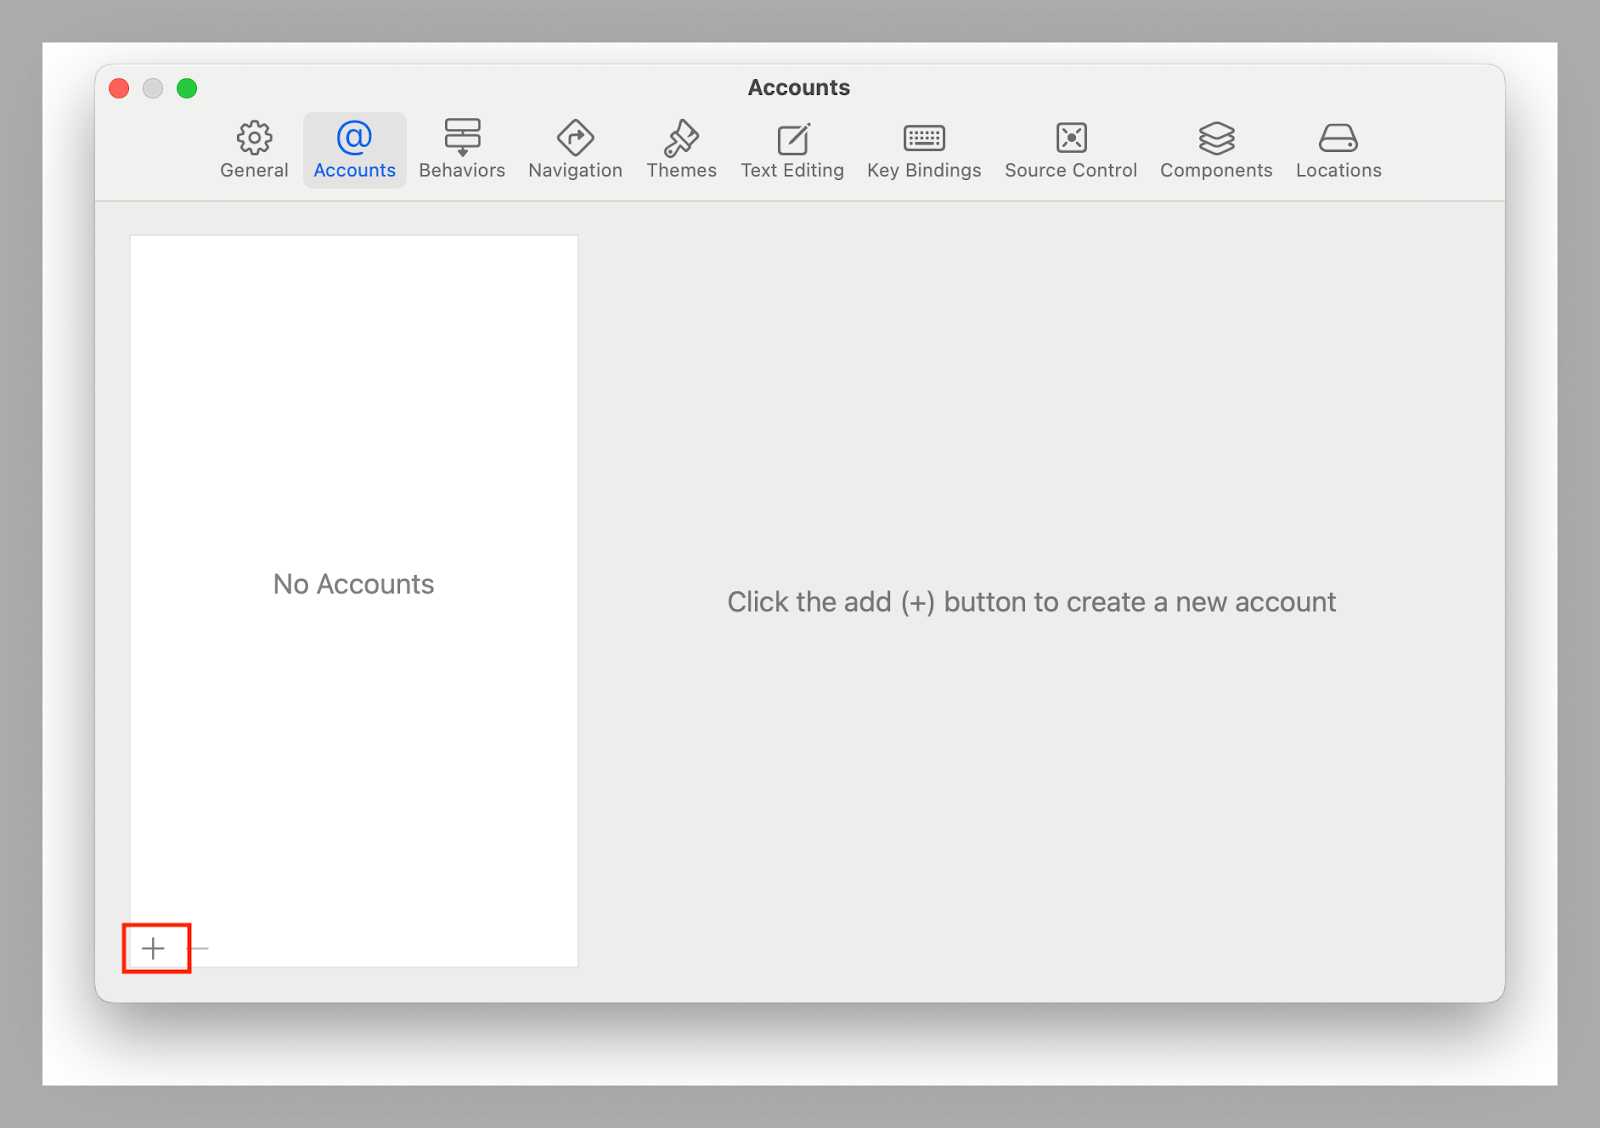
2. 导航到 Xcode → Settings → Accounts
3. 点击 + 按钮并选择 Apple ID
4. 使用你常用的 Apple ID 登录
{% endcolumn %}
{% column %}
{% endcolumn %}
{% endcolumns %}
#### **加入 Apple Developer Program**
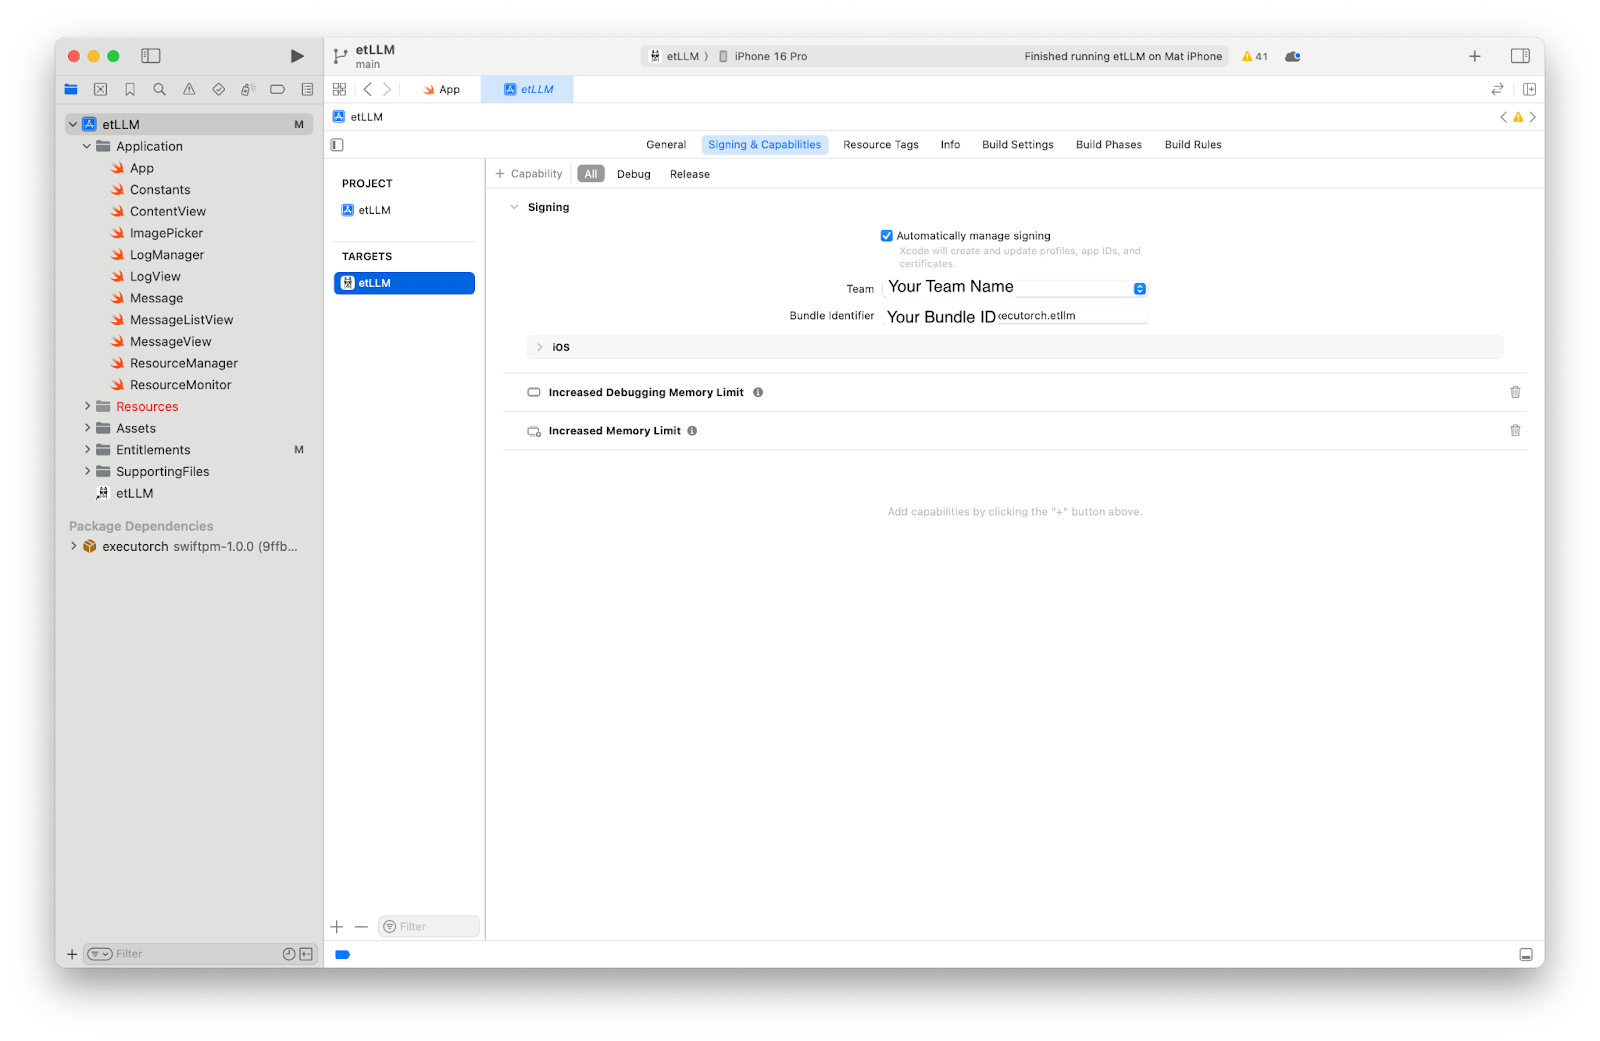
ExecuTorch 需要 `增加内存限制能力`,这需要付费开发者账户:
1. 访问[ developer.apple.com](https://developer.apple.com)
2. 使用你的 Apple ID 登录
3. 加入 Apple Developer Program
### 设置 ExecuTorch 演示应用
**获取示例代码:**
```bash
# 直接下载 LLM 示例应用
curl -L https://github.com/meta-pytorch/executorch-examples/archive/main.tar.gz | \\
tar -xz --strip-components=2 executorch-examples-main/llm/apple
```
{% columns %}
{% column %}
**在 Xcode 中打开**
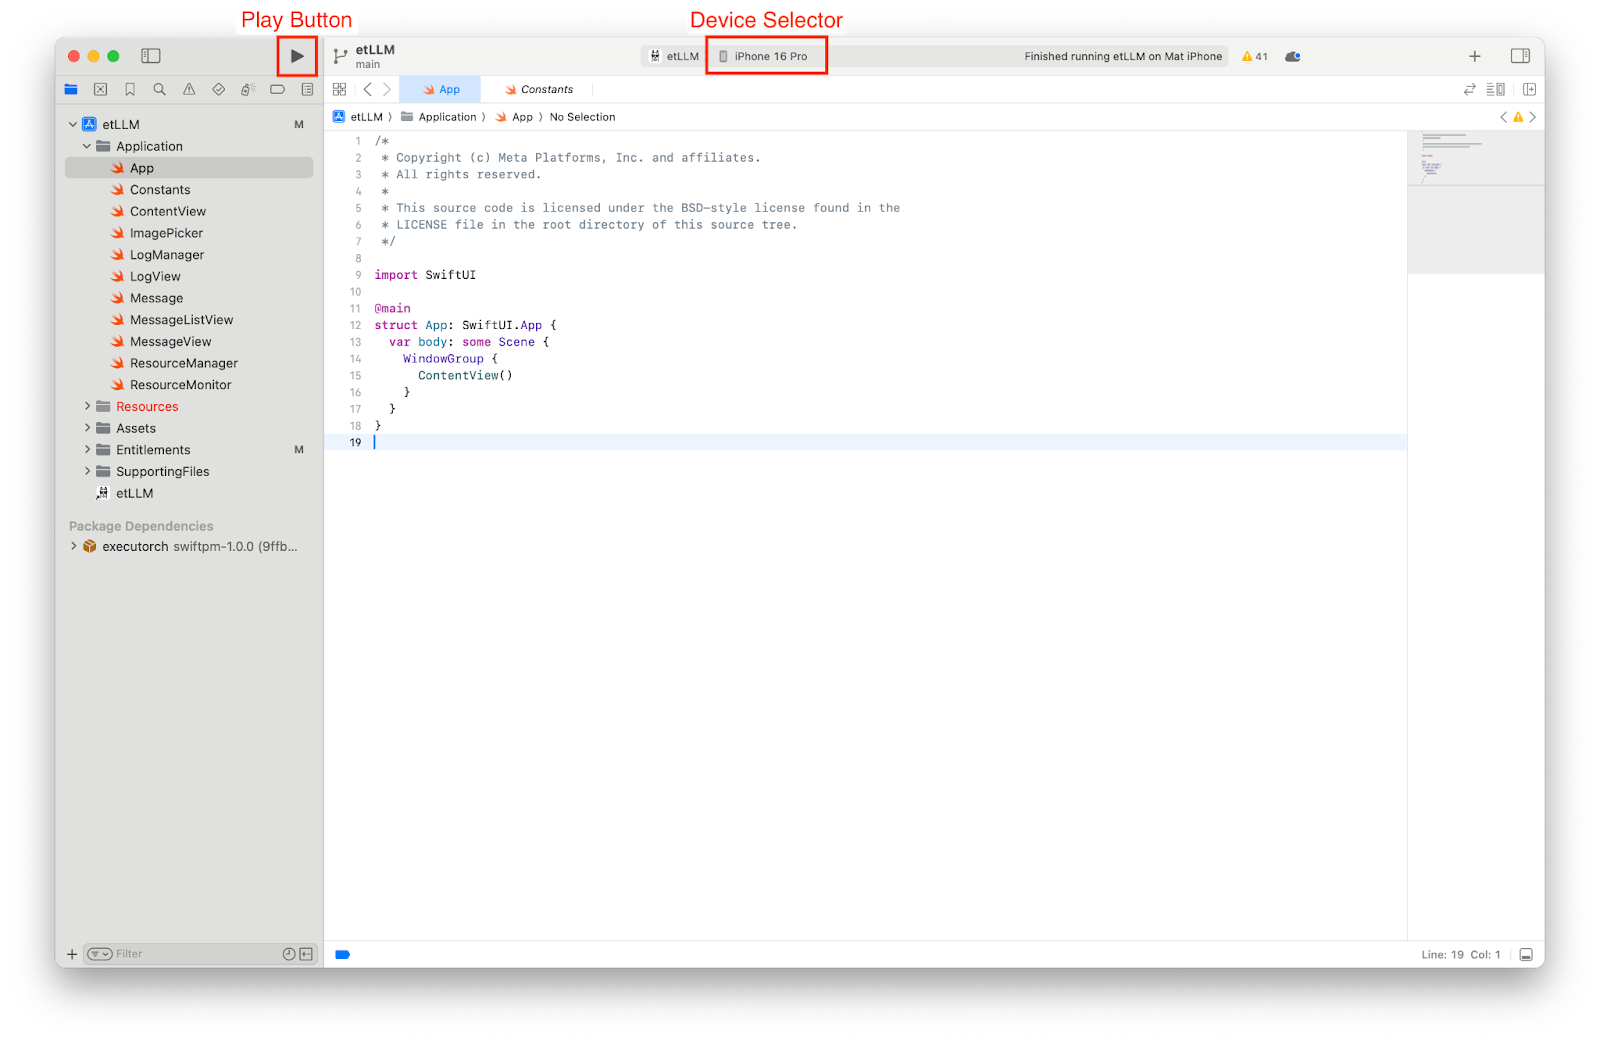
1. 打开 `apple/etLLM.xcodeproj` 在 Xcode 中
2. 在顶部工具栏中,选择 `iPhone 16 Pro` 模拟器作为你的目标设备
3. 点击运行(▶️)以构建并运行
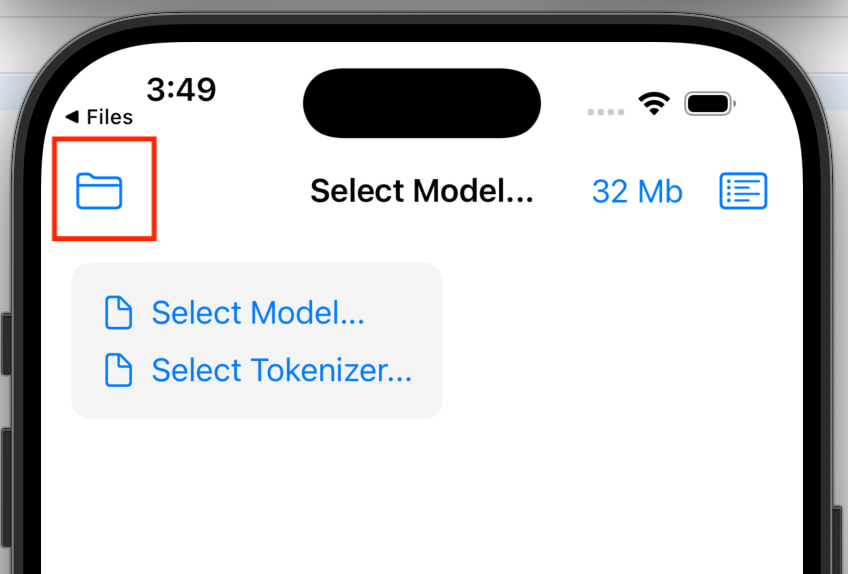
🎉 成功!应用现在应该会在模拟器中启动。它还不能工作,我们需要添加你的模型。
{% endcolumn %}
{% column %}
:android: Android 部署
本指南介绍如何在 Android 设备上构建并安装 ExecuTorch Llama 演示应用(已使用 Pixel 8 测试,但也适用于其他 Android 手机),使用 Linux/Mac 命令行环境。此方法将依赖降到最低(无需 Android Studio),并将繁重的构建过程卸载到你的电脑上。
### 要求
确保你的开发机器已安装以下内容:
* Java 17(Java 21 通常是默认版本,但可能导致构建问题)
* Git
* Wget / Curl
* Android 命令行工具
* [安装指南](https://www.xda-developers.com/install-adb-windows-macos-linux/) 和设置 `adb` 在你的 Android 设备和电脑上
#### 验证
检查你的 Java 版本是否为 17.x:
```bash
# 输出应类似于:openjdk version "17.0.x"
java -version
```
如果不匹配,请在 Ubuntu/Debian 上安装:
```bash
sudo apt install openjdk-17-jdk
```
然后将其设为默认或导出 `JAVA_HOME`:
```bash
export JAVA_HOME=/usr/lib/jvm/java-17-openjdk-amd64
export PATH=$JAVA_HOME/bin:$PATH
```
如果你使用的是其他操作系统或发行版,你可能需要参考 [本指南](https://docs.oracle.com/en/java/javase/25/install/overview-jdk-installation.html) 或者直接让你最喜欢的 LLM 带你完成。
### 第 1 步:安装 Android SDK 和 NDK
在不安装完整 Android Studio 的情况下设置一个最小化的 Android SDK 环境。
1\. 创建 SDK 目录:
```bash
mkdir -p ~/android-sdk/cmdline-tools
cd ~/android-sdk
```
2. 安装 Android 命令行工具
```bash
wget https://dl.google.com/android/repository/commandlinetools-linux-11076708_latest.zip
unzip commandlinetools-linux-*.zip -d cmdline-tools
# 重要:重新整理以满足 SDK 目录结构
mv cmdline-tools/cmdline-tools cmdline-tools/latest
```
### 第 2 步:配置环境变量
将这些添加到你的 `~/.bashrc` 或 `~/.zshrc`:
```bash
export ANDROID_HOME=$HOME/android-sdk
export PATH=$ANDROID_HOME/cmdline-tools/latest/bin:$PATH
export PATH=$ANDROID_HOME/platform-tools:$PATH
```
重新加载它们:
```bash
source ~/.zshrc # 或 ~/.bashrc,取决于你的 shell
```
### 第 3 步:安装 SDK 组件
ExecuTorch 需要特定版本的 NDK。
```bash
# 接受许可
yes | sdkmanager --licenses
# 安装 API 34 和 NDK 25
sdkmanager "platforms;android-34" "platform-tools" "build-tools;34.0.0" "ndk;25.0.8775105"
```
设置 NDK 变量:
```bash
export ANDROID_NDK=$ANDROID_HOME/ndk/25.0.8775105
```
### 第 4 步:获取代码
我们使用 `executorch-examples` 仓库,其中包含更新后的 Llama 演示。
```bash
cd ~
git clone https://github.com/meta-pytorch/executorch-examples.git
cd executorch-examples
```
### 第 5 步:修复常见编译问题
注意,当前代码没有这些问题,但我们之前遇到过,可能对你有帮助:
**修复“未找到 SDK 位置”:**
创建一个 `local.properties` 文件,明确告诉 Gradle SDK 位于何处:
```bash
echo "sdk.dir=$HOME/android-sdk" > llm/android/LlamaDemo/local.properties
```
**修复 `cannot find symbol` 错误:**
当前代码使用了一个已弃用的方法 `getDetailedError()`。用此命令修补:
```bash
sed -i 's/e.getDetailedError()/e.getMessage()/g' llm/android/LlamaDemo/app/src/main/java/com/example/executorchllamademo/MainActivity.java
```
### 第 6 步:构建 APK
这一步会编译应用和原生库。
1. 进入 Android 项目:
```bash
cd llm/android/LlamaDemo
```
2. 使用 Gradle 构建(显式设置 `JAVA_HOME` 为 17,以避免工具链错误):
注意:第一次运行会花几分钟。
```bash
export JAVA_HOME=/usr/lib/jvm/java-17-openjdk-amd64
./gradlew :app:assembleDebug
```
3. 最终生成的 apk 位于:
```
app/build/outputs/apk/debug/app-debug.apk
```
### 第 7 步:在你的 Android 设备上安装
你有两种安装应用的方式。
#### 选项 A:使用 ADB(有线/无线)
如果你可以 `adb` 访问你的手机:
```bash
adb install -r app/build/outputs/apk/debug/app-debug.apk
```
#### 选项 B:直接文件传输
如果你在远程 VM 上,或者没有数据线:
1. 将 app-debug.apk 上传到你可以在手机上下载的位置
2. 在你的手机上下载它
3. 点击安装(如果提示,启用“允许安装未知来源应用”)。
### 第 8 步:传输模型文件
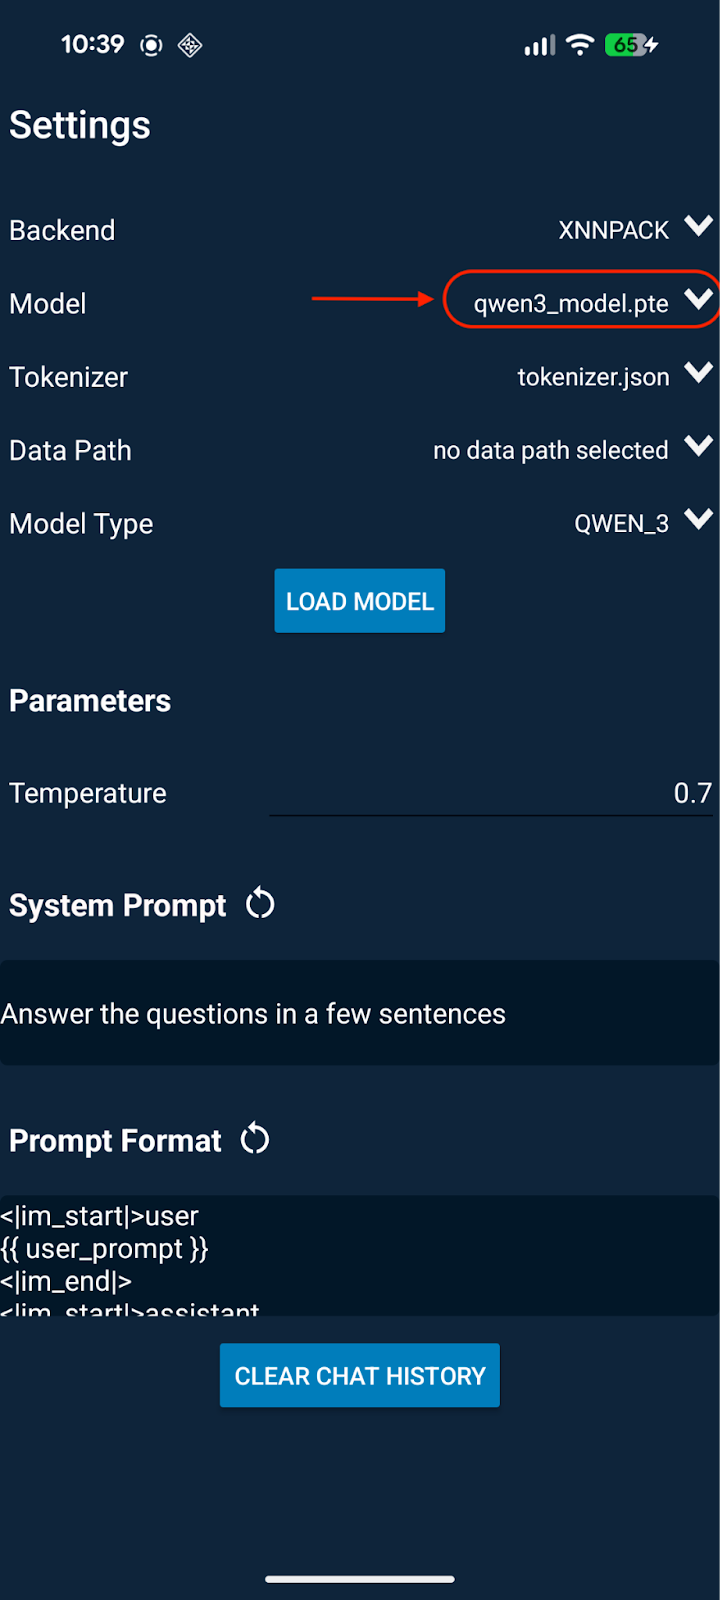
该应用需要 .pte 模型和 tokenizer 文件。
1. 传输文件:将你的 model.pte 和 tokenizer.bin(或 tokenizer.model)移动到手机存储中(例如 Downloads 文件夹)。
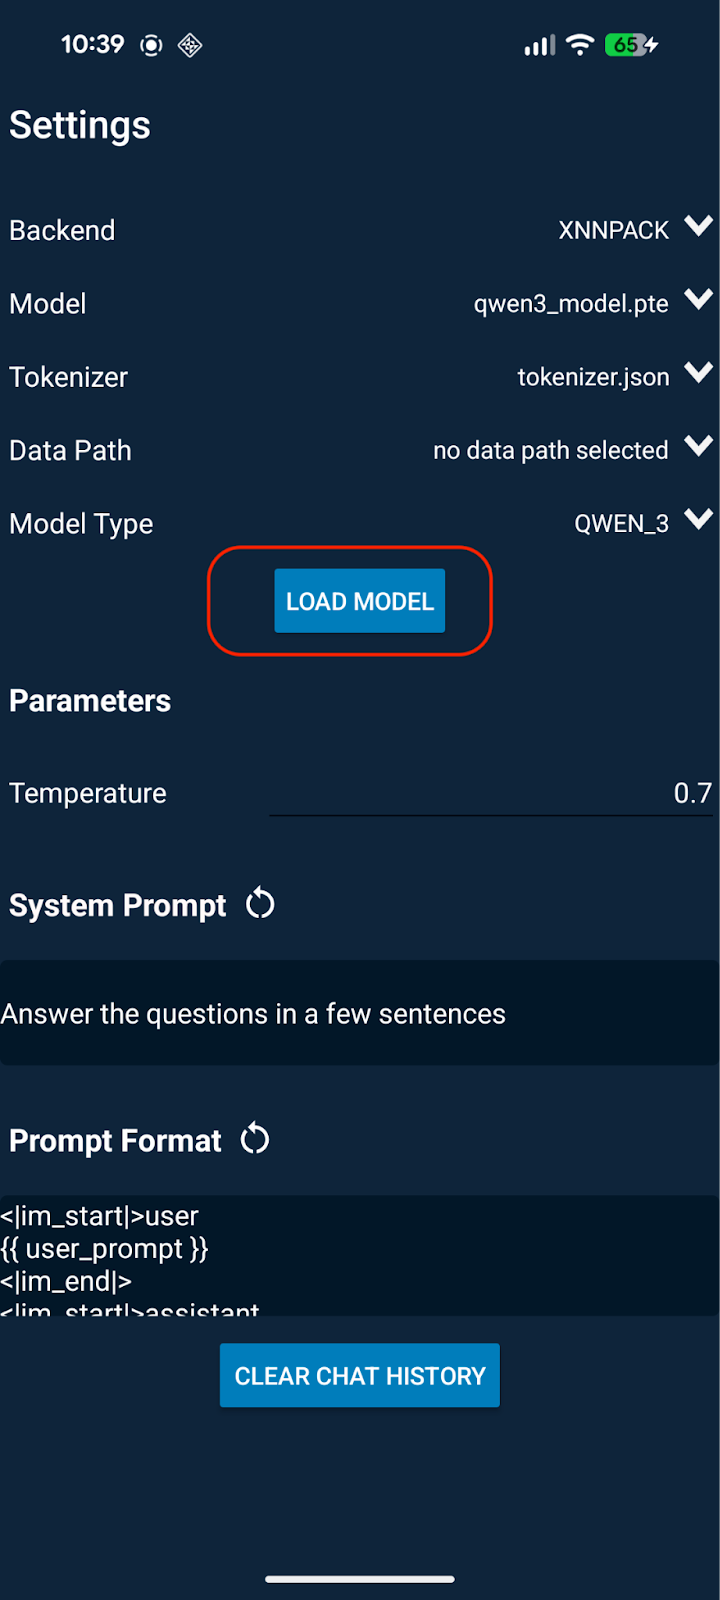
2. 打开 LlamaDemo 应用:在手机上启动该应用。
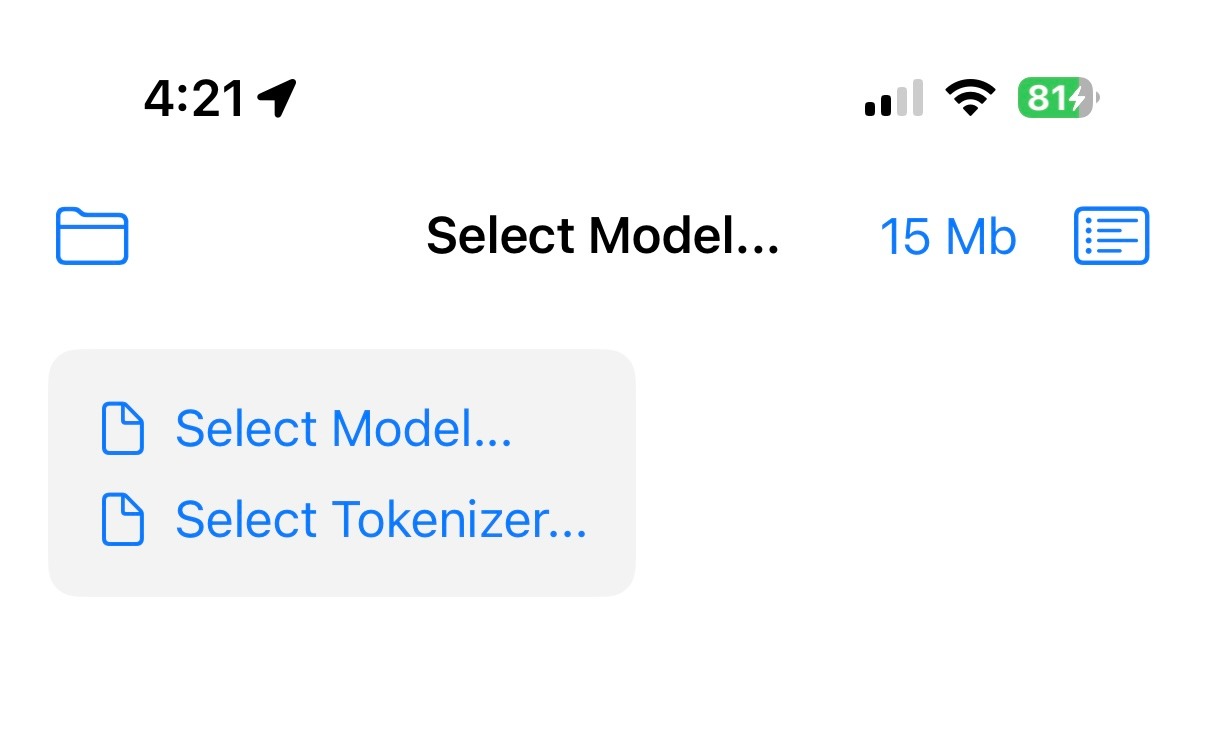
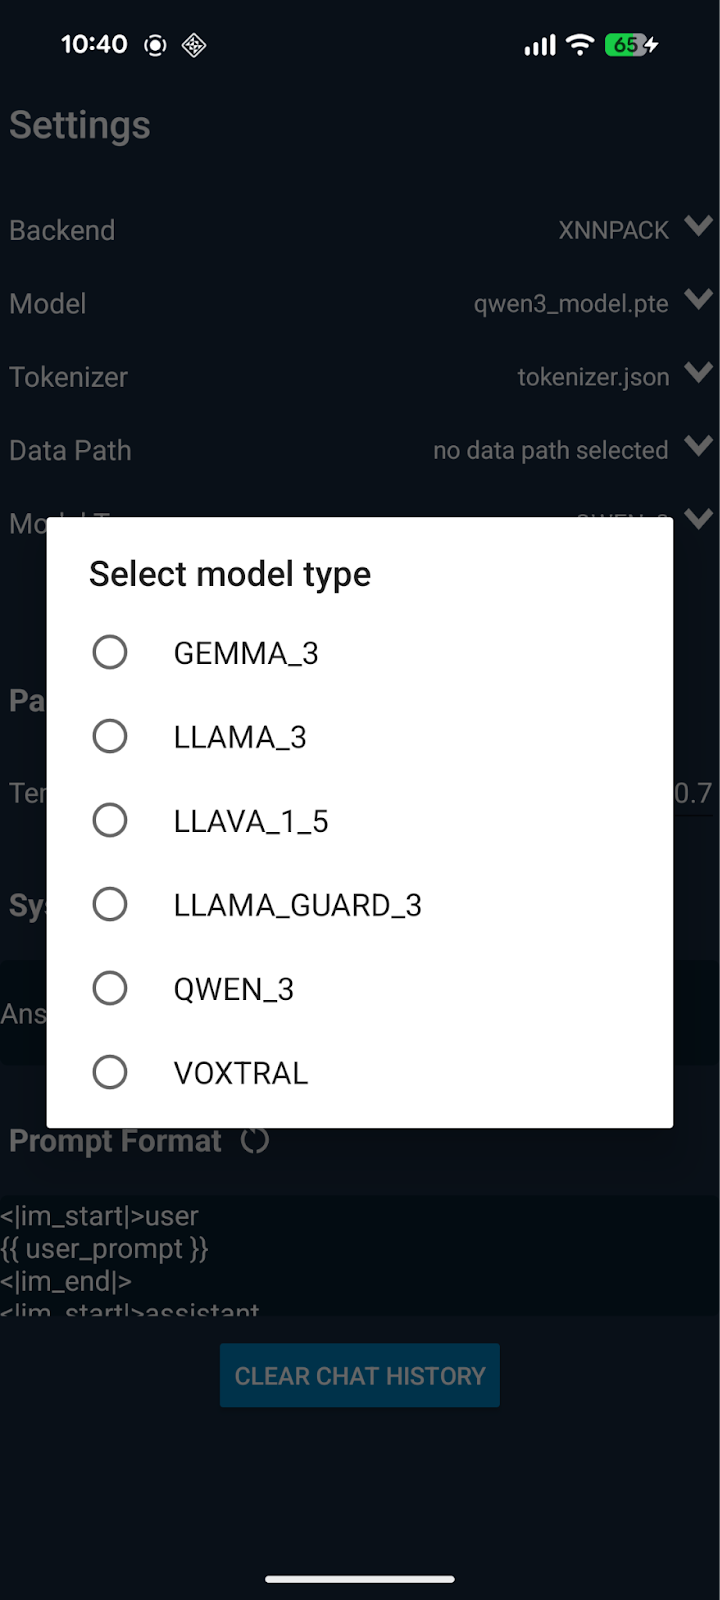
3. 选择模型
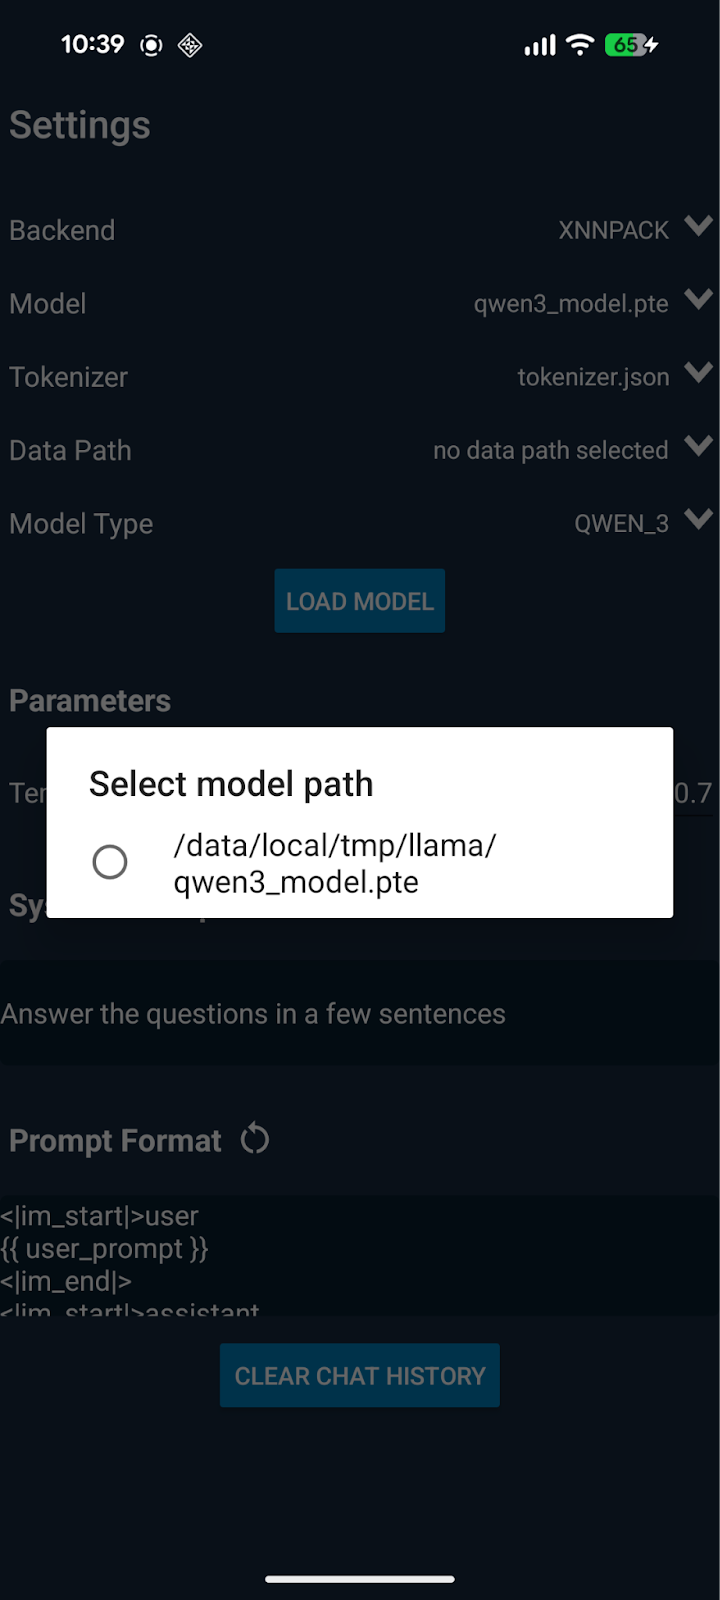
4. 点击设置(齿轮图标)或文件选择器。
5. 进入你的 Download 文件夹。
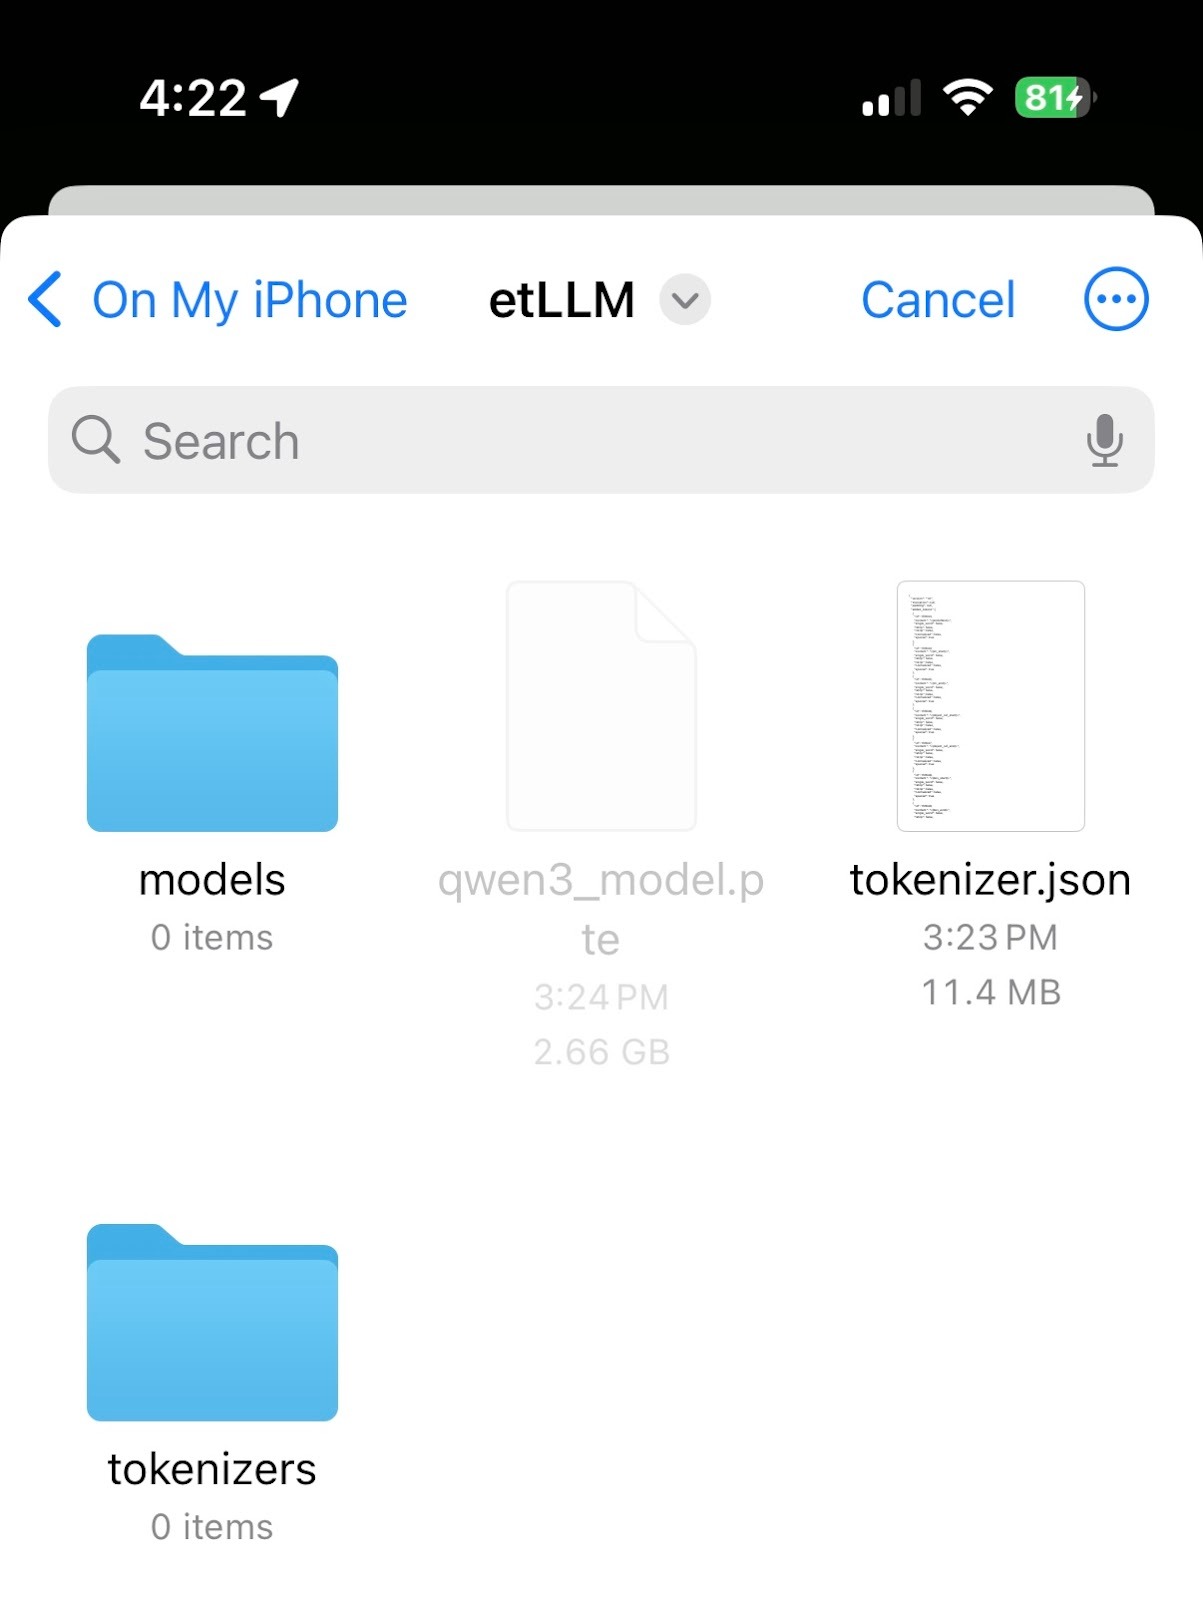
6. 选择你的 .pte 文件。
7. 选择你的 tokenizer 文件。
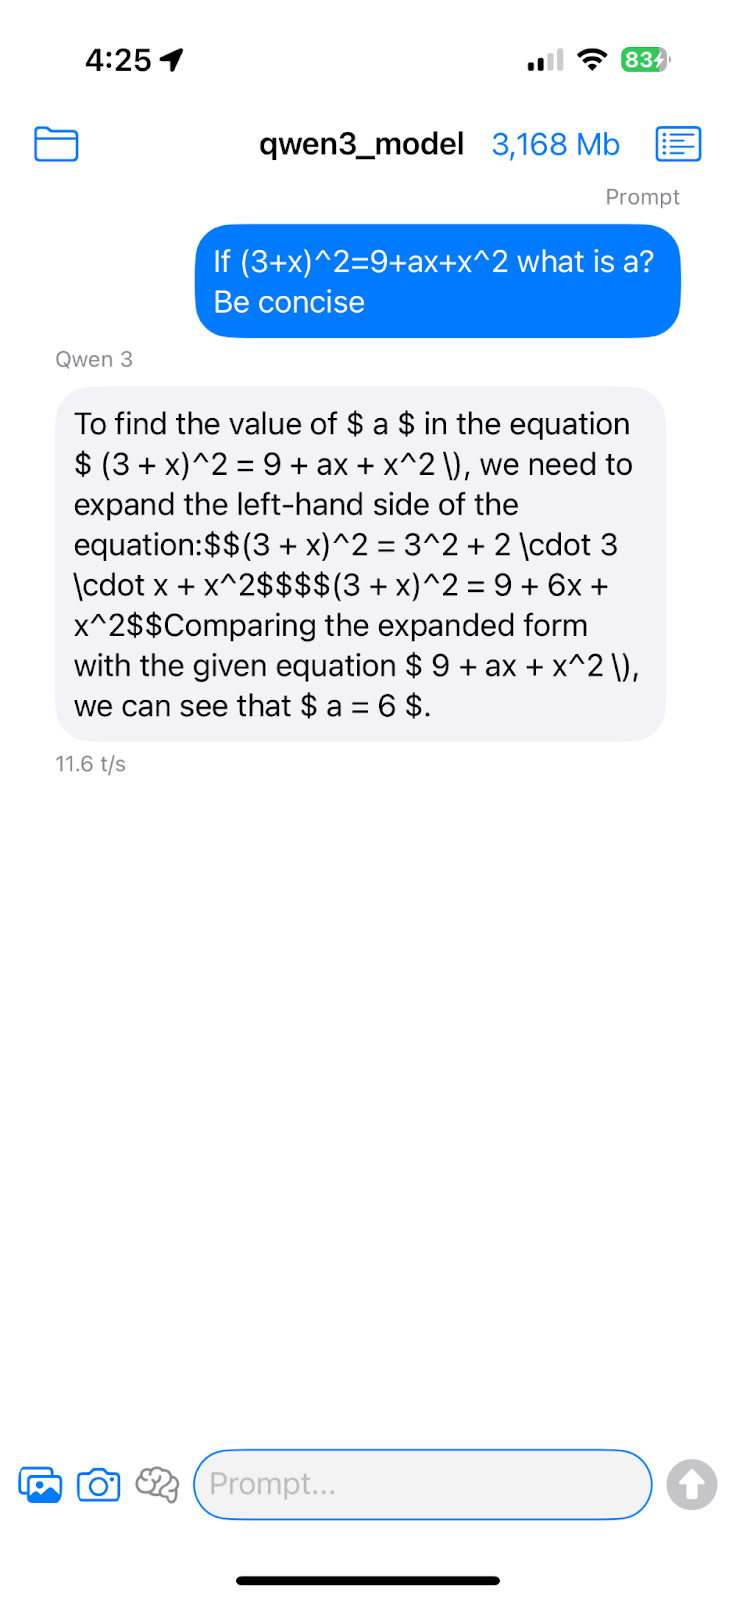
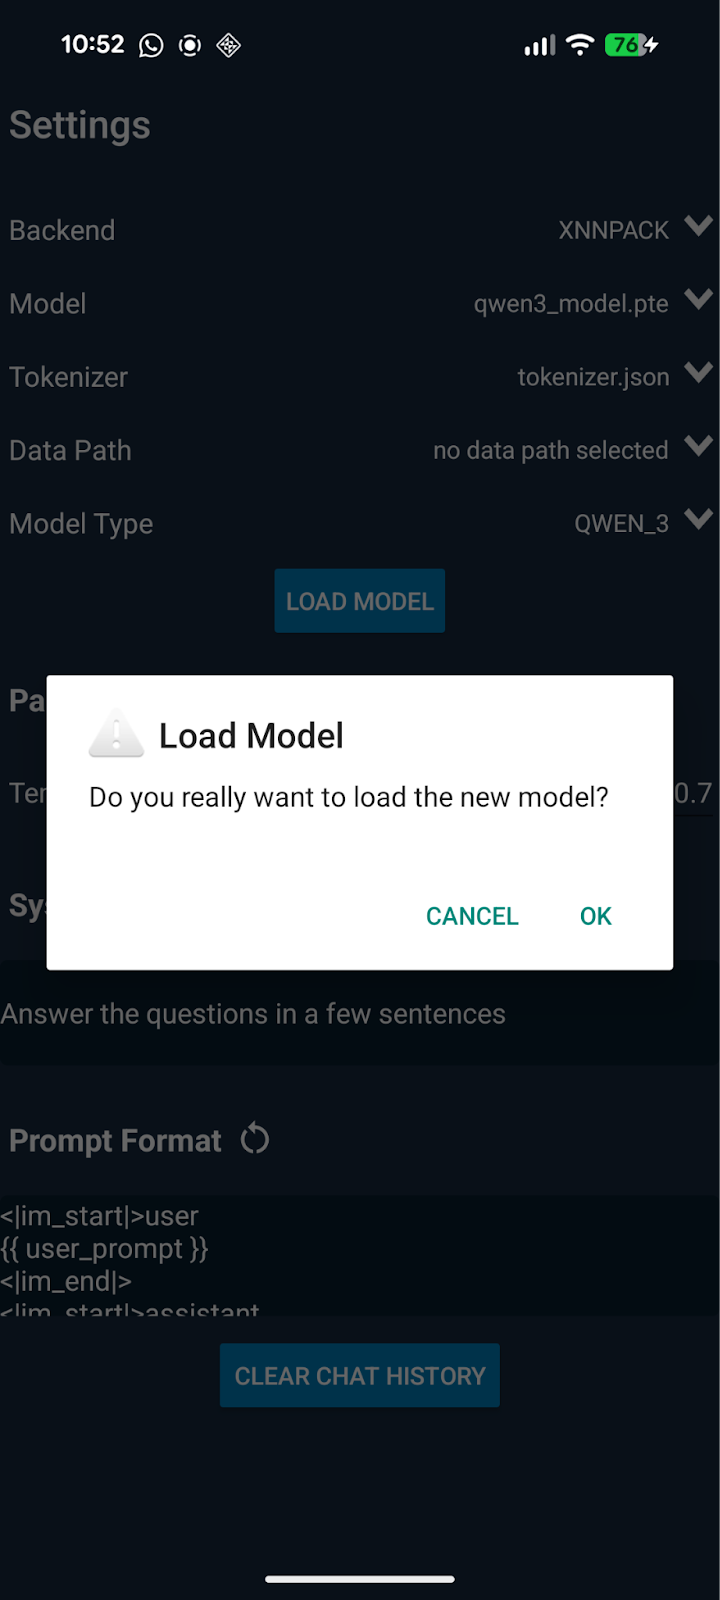
完成!现在你可以直接在设备上与 LLM 聊天了。
### 故障排除
* 构建失败?检查 java -version。它必须是 17。
* 模型未加载?确保你已同时选择 `.pte` 和 `分词器`.
* 应用崩溃?有效的 `.pte` 文件必须专门为 ExecuTorch 导出(通常是用于 CPU 的 XNNPACK 后端)。
### 将模型传输到你的手机
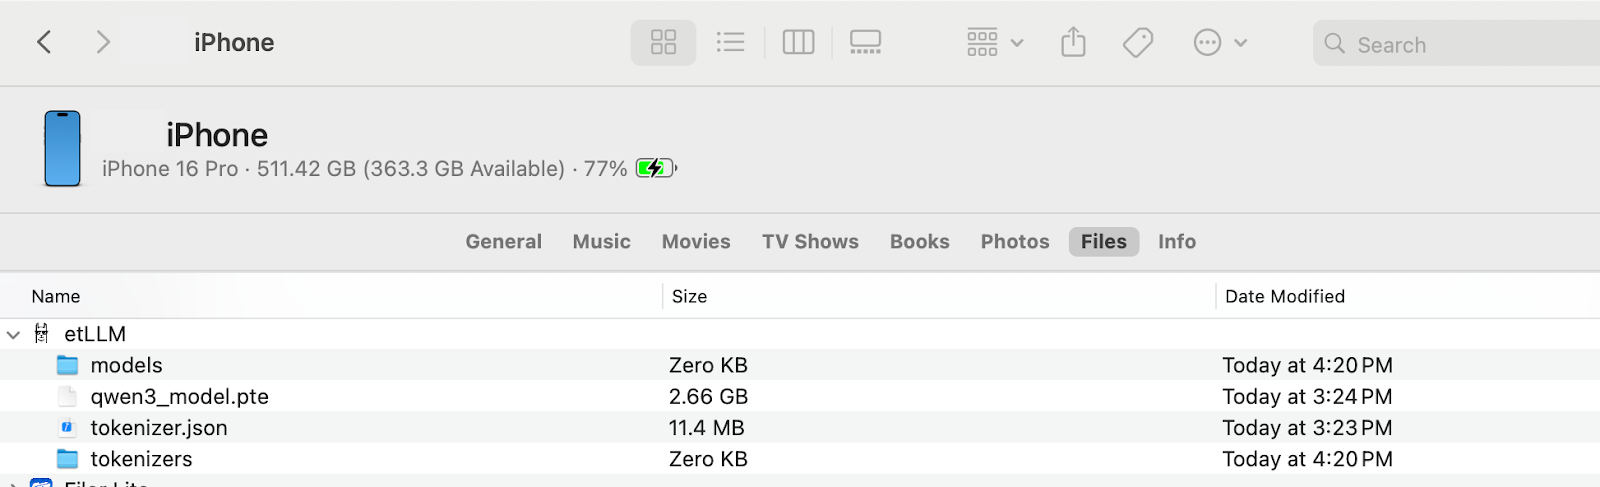
目前, `executorchllama` 我们构建的应用只能从 Android 上一个特定目录加载模型,而该目录无法通过普通文件管理器访问。不过我们可以使用 adb 将模型文件保存到那个目录。
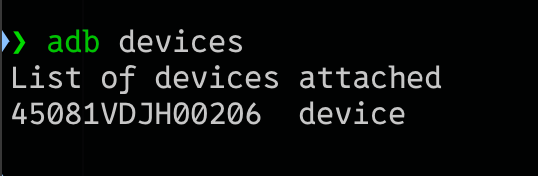
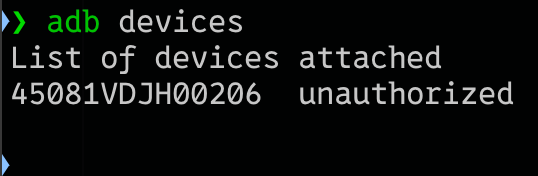
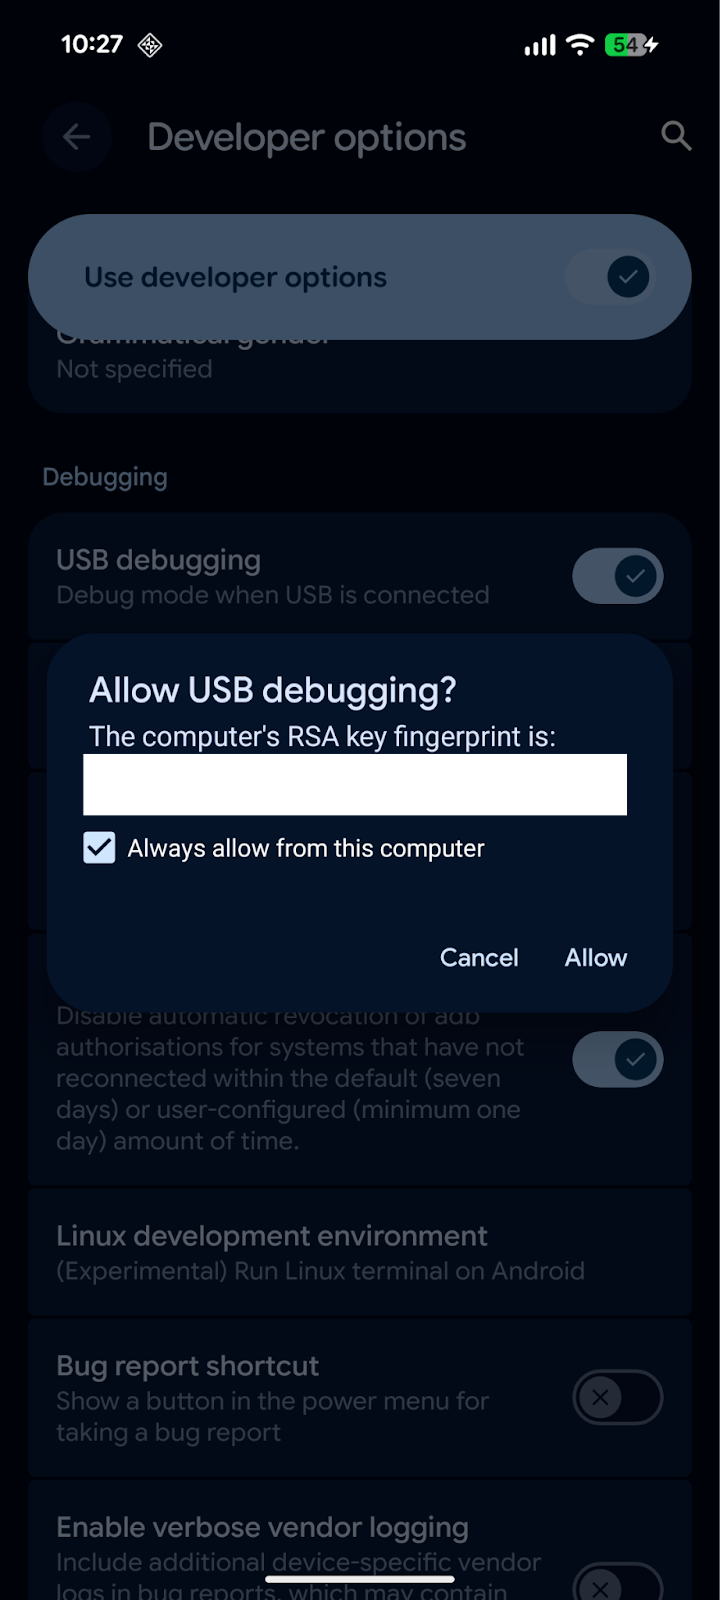
#### 确保 adb 正常运行并已连接
```shellscript
adb devices
```
{% columns %}
{% column %}
1. 如果你是通过无线调试连接的,你会看到类似这样的内容:
" %}
{% endcolumn %}
{% column %}
可用于 Gemma 3
{% embed url="" %}
{% endcolumn %}
{% column %}
可用于 Llama 3
{% embed url="" %}
{% endcolumn %}
{% endcolumns %}
前往我们的 [Unsloth Notebook](/docs/zh/kai-shi-shi-yong/unsloth-notebooks.md) 页面查看所有其他 notebook。
---
# Agent Instructions
This documentation is published with GitBook. GitBook is the documentation platform designed so that both humans and AI agents can read, navigate, and reason over technical content effectively. Learn more at gitbook.com.
## Querying This Documentation
If you need additional information that is not directly available in this page, you can query the documentation dynamically by asking a question.
Perform an HTTP GET request on the current page URL with the `ask` query parameter, and the optional `goal` query parameter:
```
GET https://unsloth.ai/docs/zh/ji-chu/inference-and-deployment/deploy-llms-phone.md?ask=&goal=
```
`ask` is the immediate question: it should be specific, self-contained, and written in natural language.
`goal` is optional and describes the broader end goal you are ultimately trying to accomplish on behalf of the user. GitBook uses it to tailor the answer towards what is most useful for that goal.
The response will contain a direct answer to the question and relevant excerpts and sources from the documentation.
Use this mechanism when the answer is not explicitly present in the current page, you need clarification or additional context, or you want to retrieve related documentation sections.