> For the complete documentation index, see [llms.txt](https://unsloth.ai/docs/llms.txt). Markdown versions of documentation pages are available by appending `.md` to page URLs; this page is available as [Markdown](https://unsloth.ai/docs/zh/bo-ke/unsloth-amd-pytorch-synthetic-data-hackathon.md).
# Unsloth AMD PyTorch 合成数据黑客松
在 AMD GPU 上运行 Unsloth 的技巧、故障排查和指南。
一旦你获得 MI300 机器的访问权限,你会看到 Jupyter Notebook 界面:
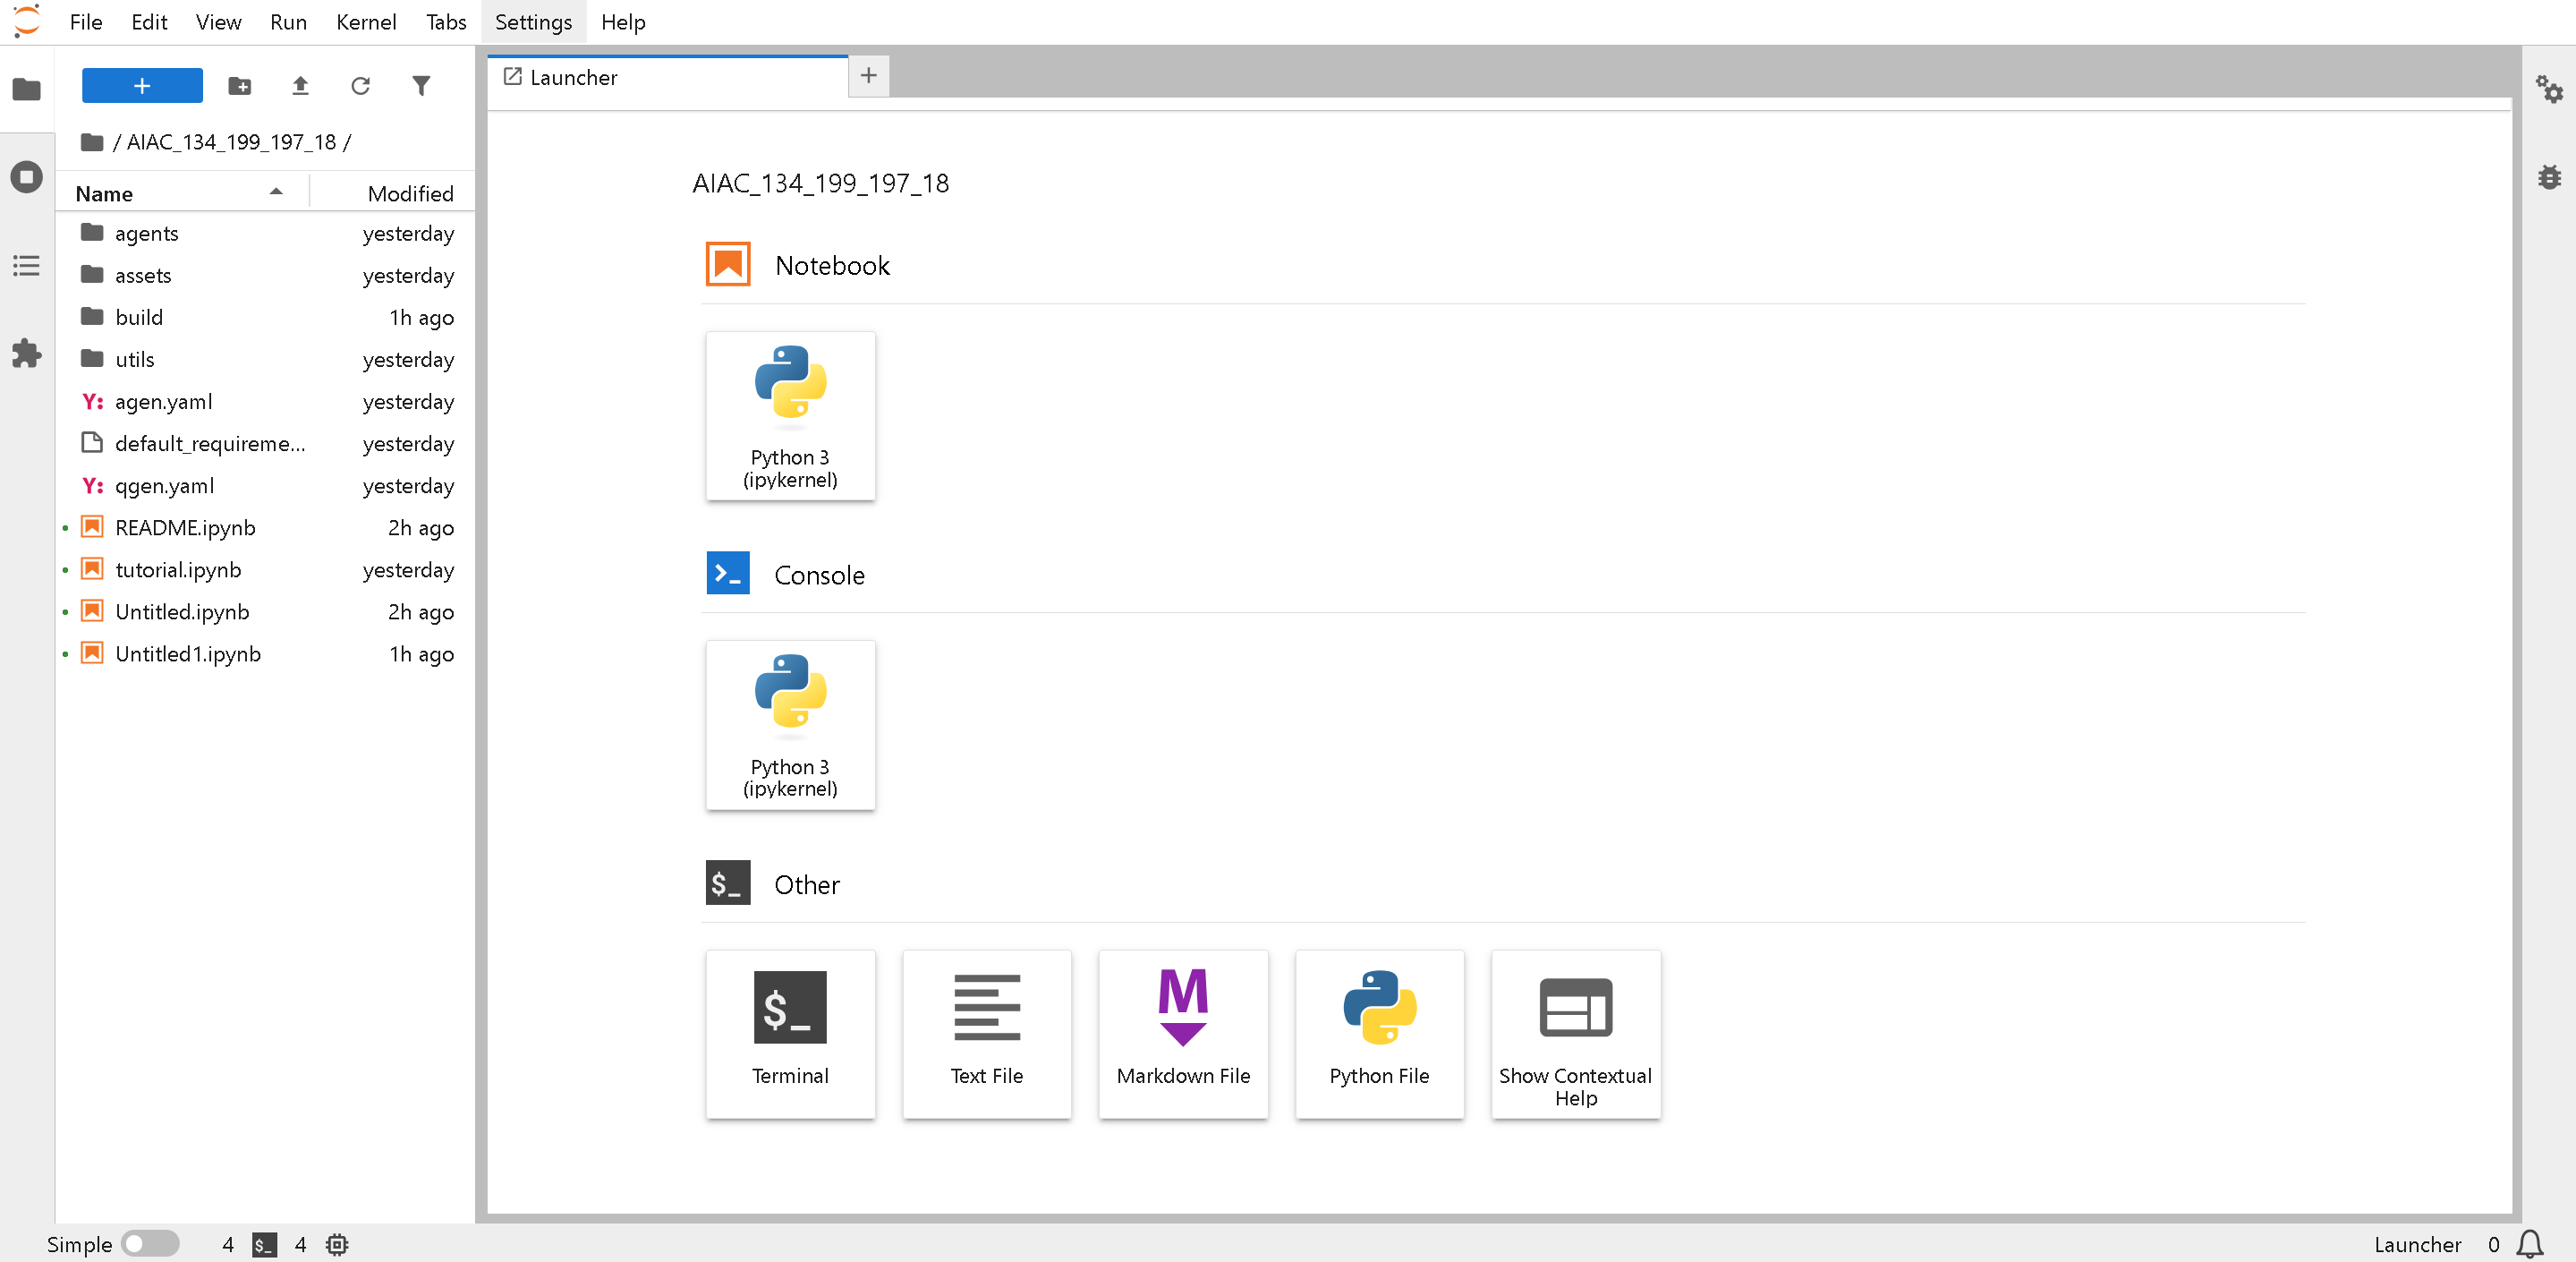 **首先,更新 Unsloth** 并确认一切按预期运行——点击 **终端**
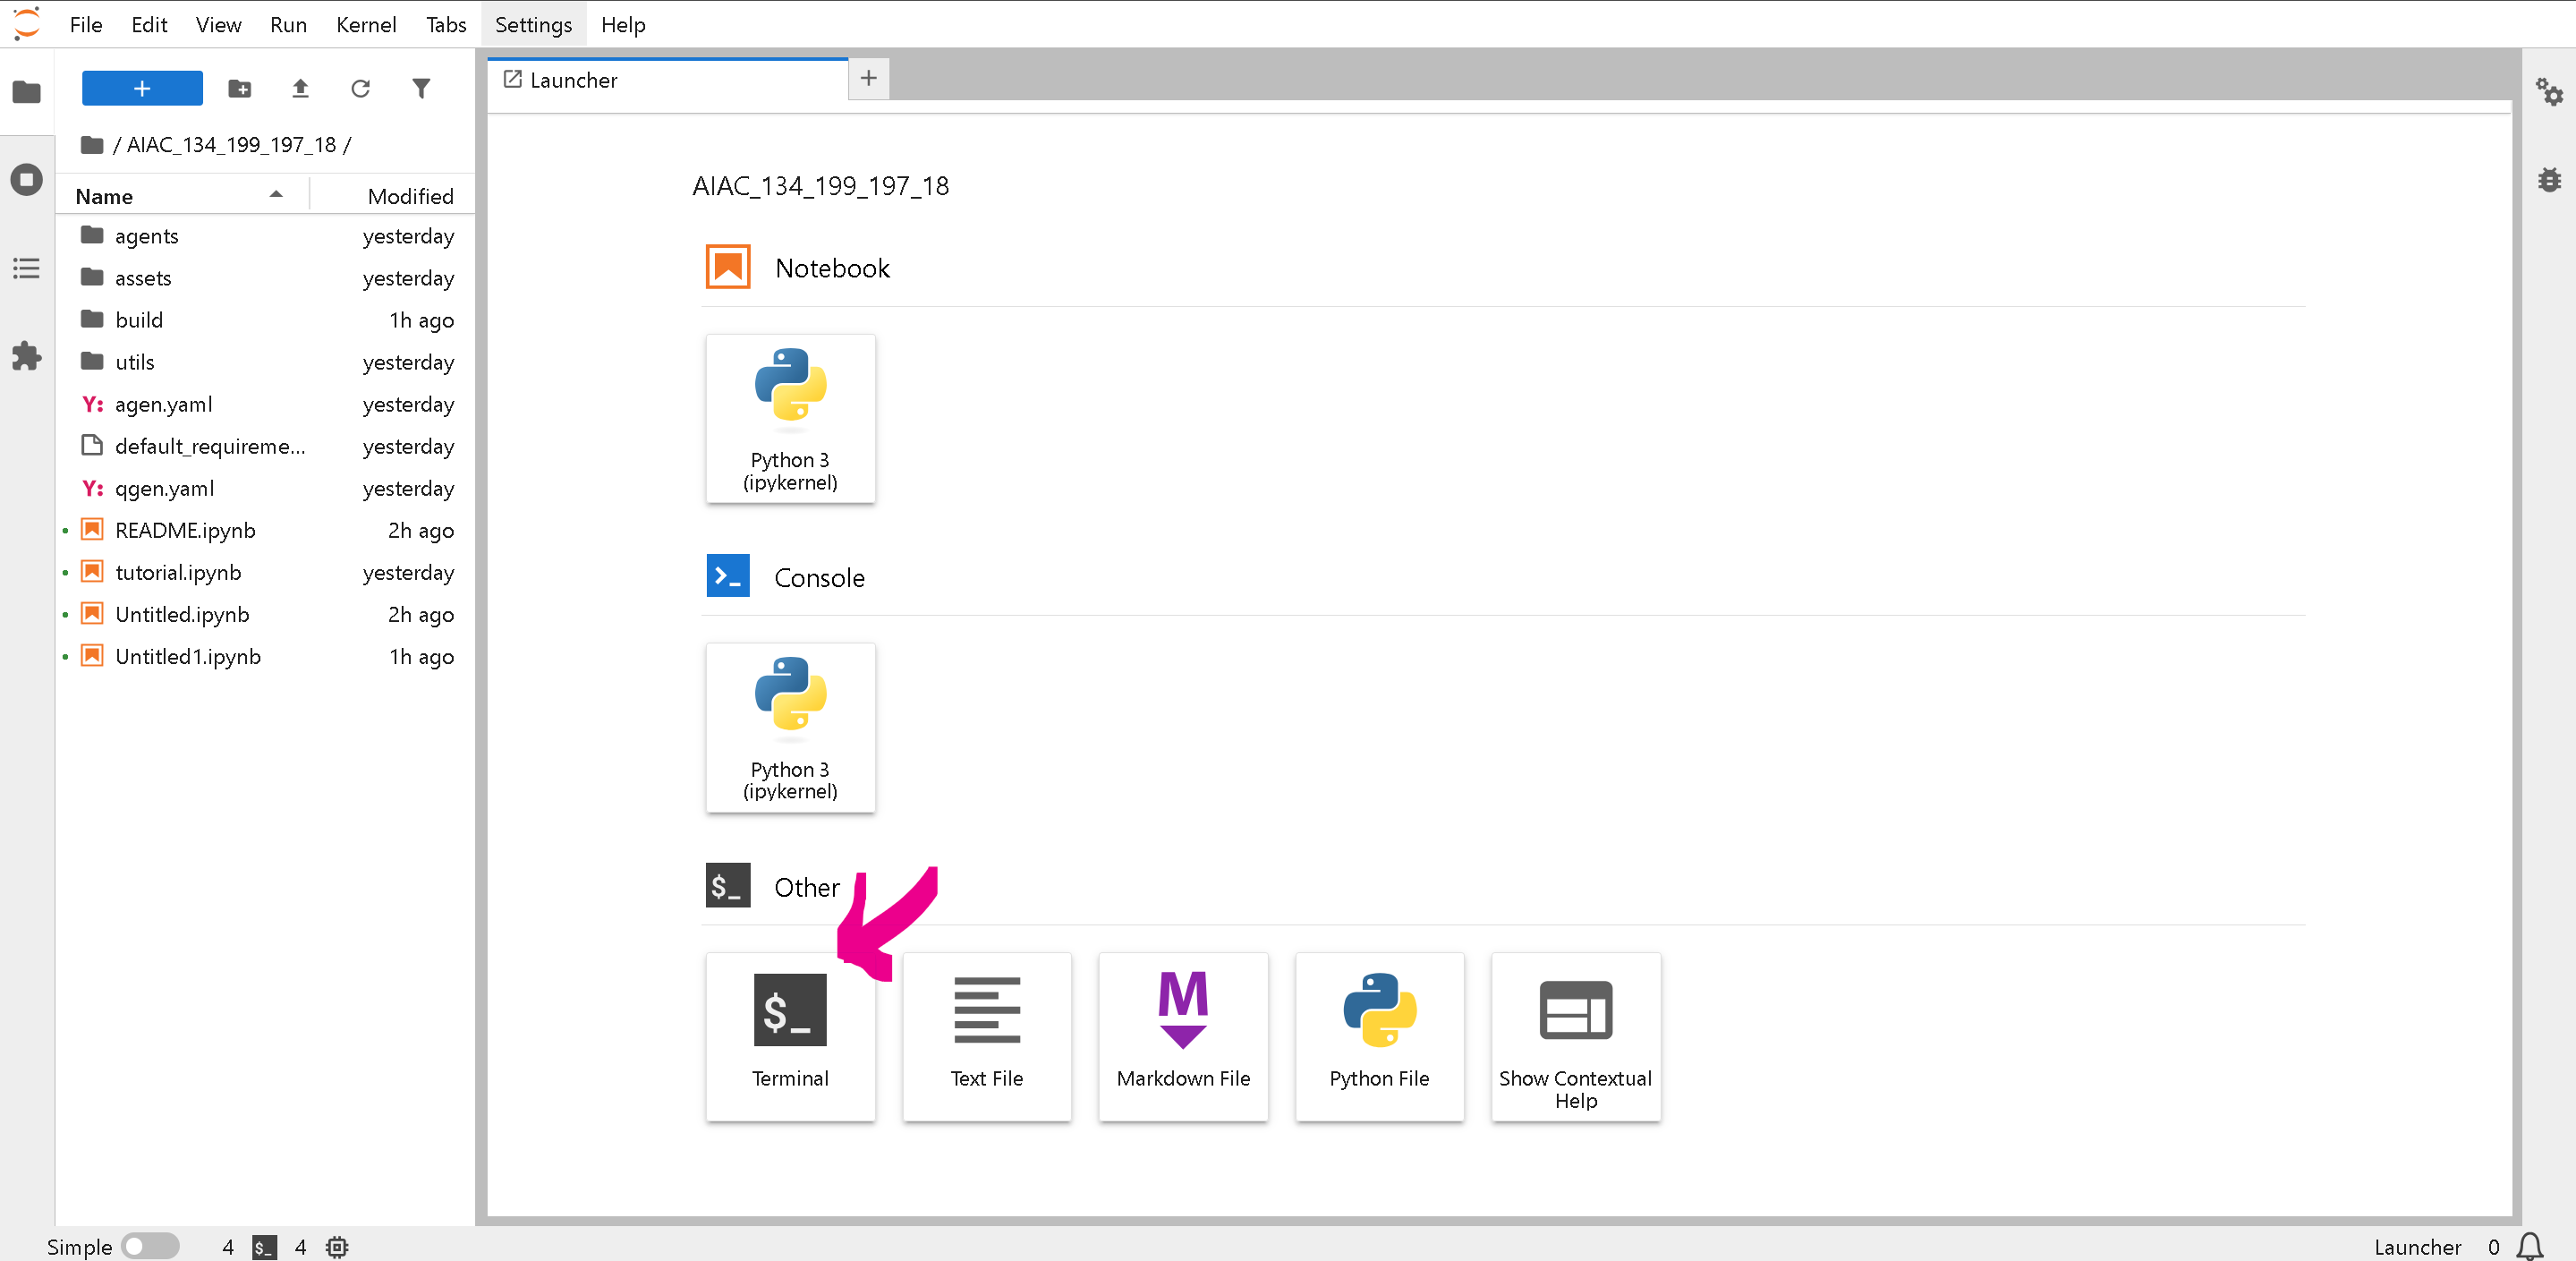 然后在下面的 **终端** 中更新 Unsloth——确保版本是 **2025.10.5** 或更高。
```
pip install --upgrade -qqq --no-cache-dir --force-reinstall --no-deps unsloth unsloth_zoo
python -c "import unsloth; print(unsloth.__version__)"
```
然后在下面的 **终端** 中更新 Unsloth——确保版本是 **2025.10.5** 或更高。
```
pip install --upgrade -qqq --no-cache-dir --force-reinstall --no-deps unsloth unsloth_zoo
python -c "import unsloth; print(unsloth.__version__)"
```
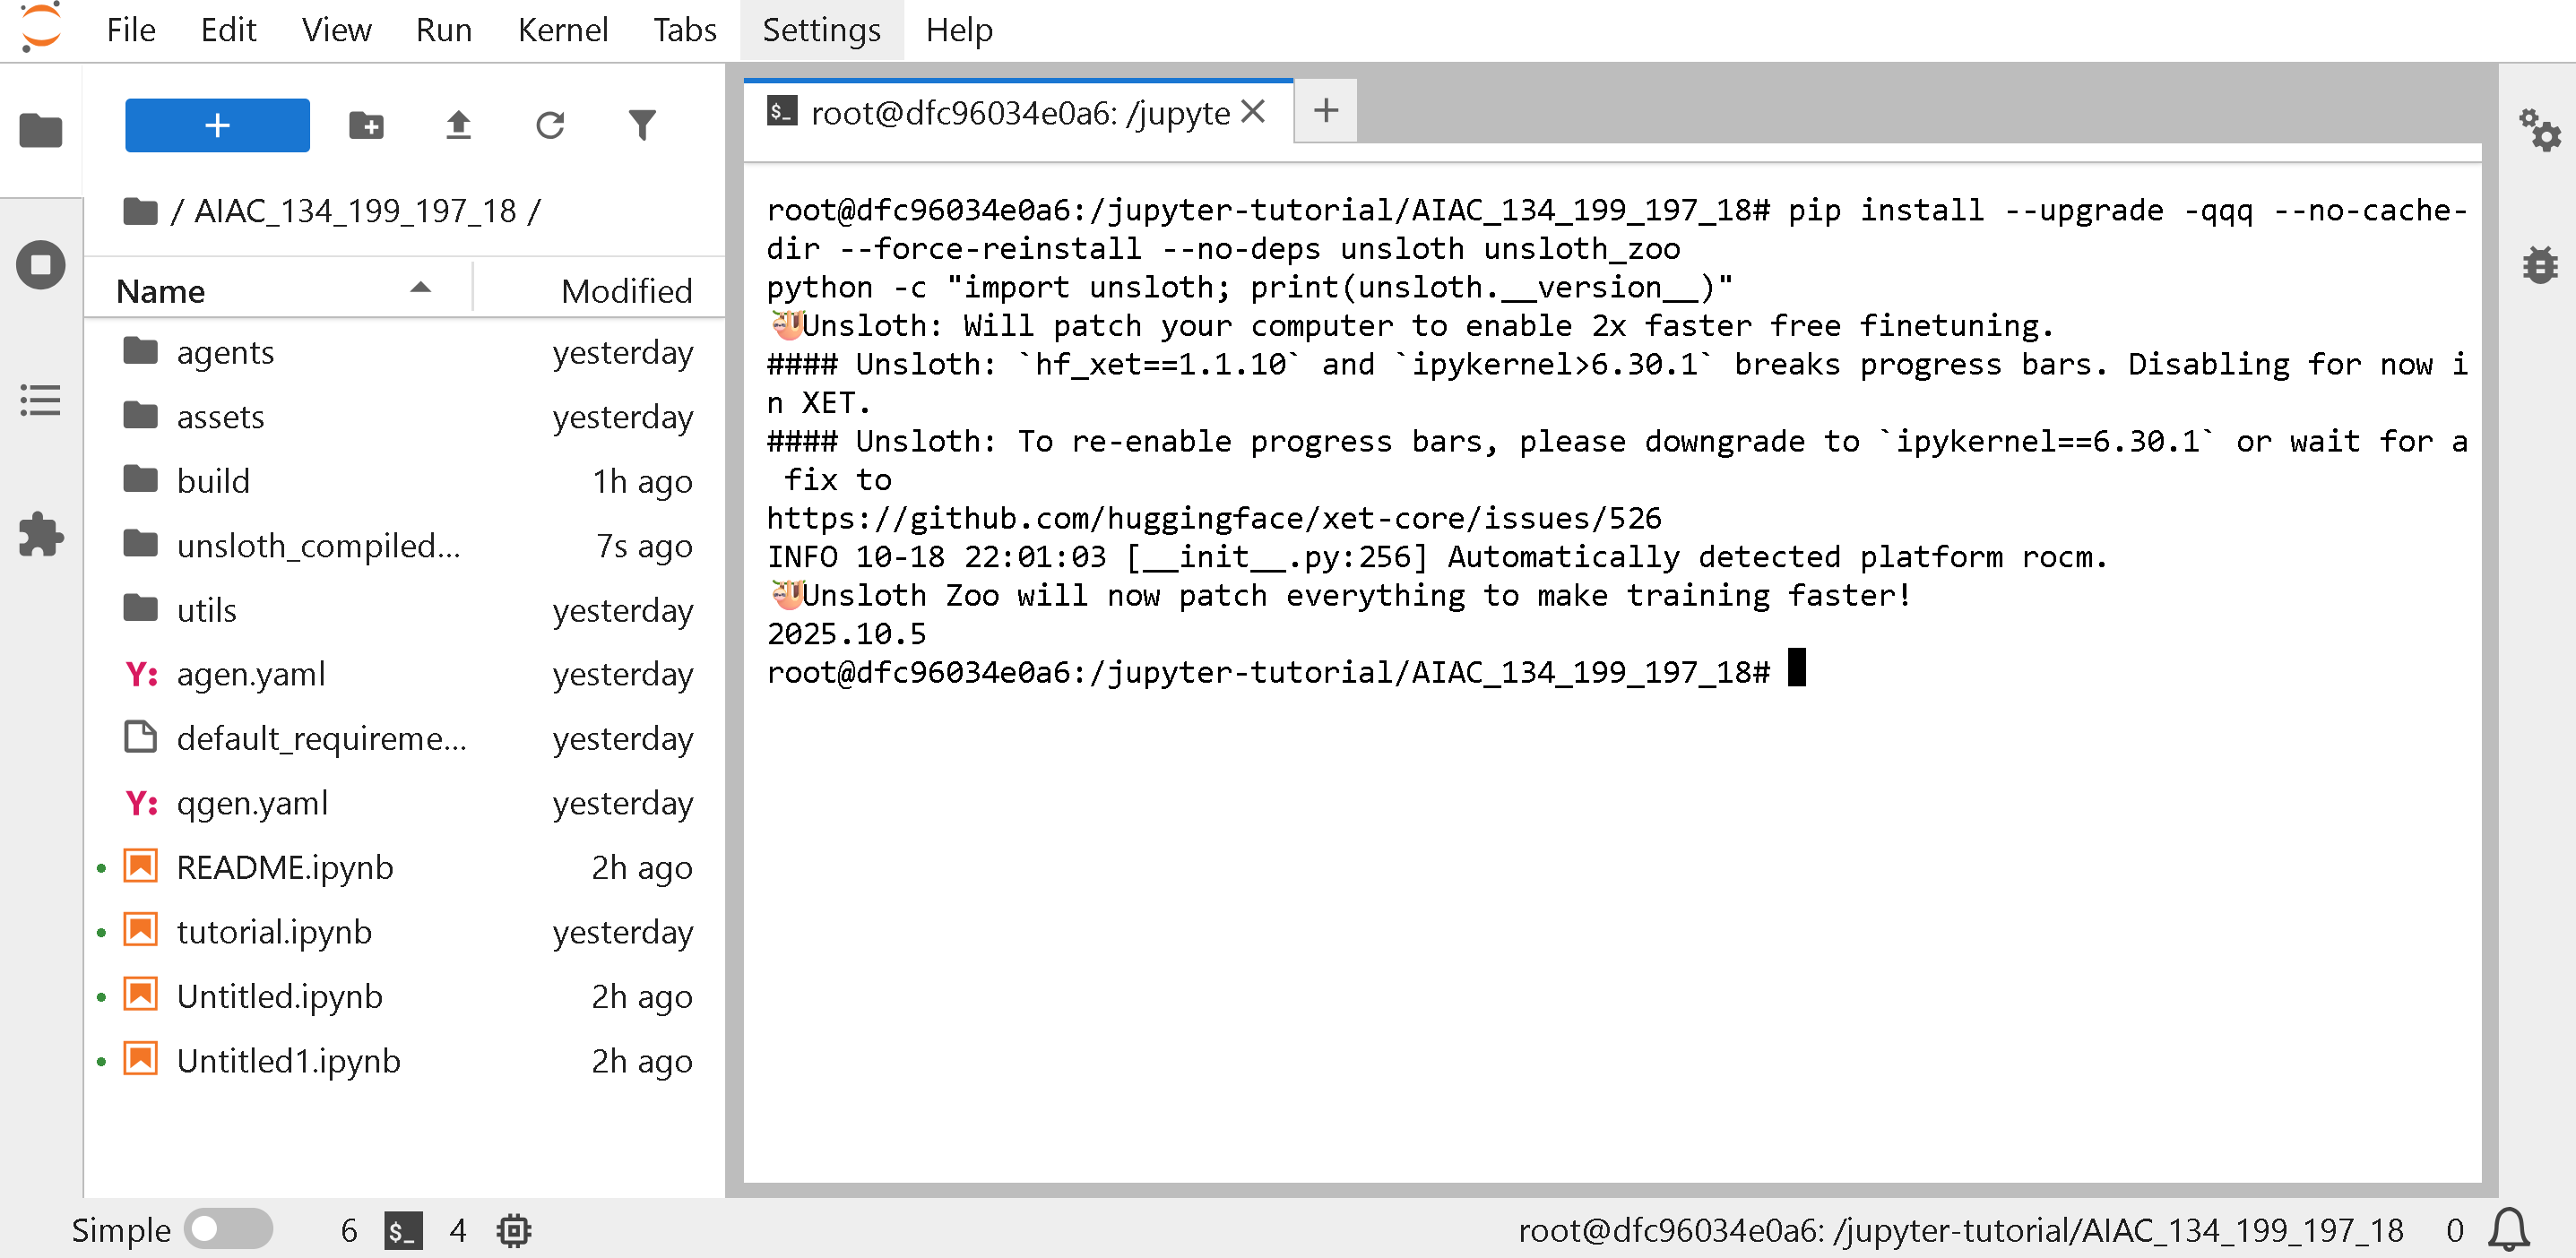 要创建新的 Notebook 或 Terminal,请点击 PLUS 按钮
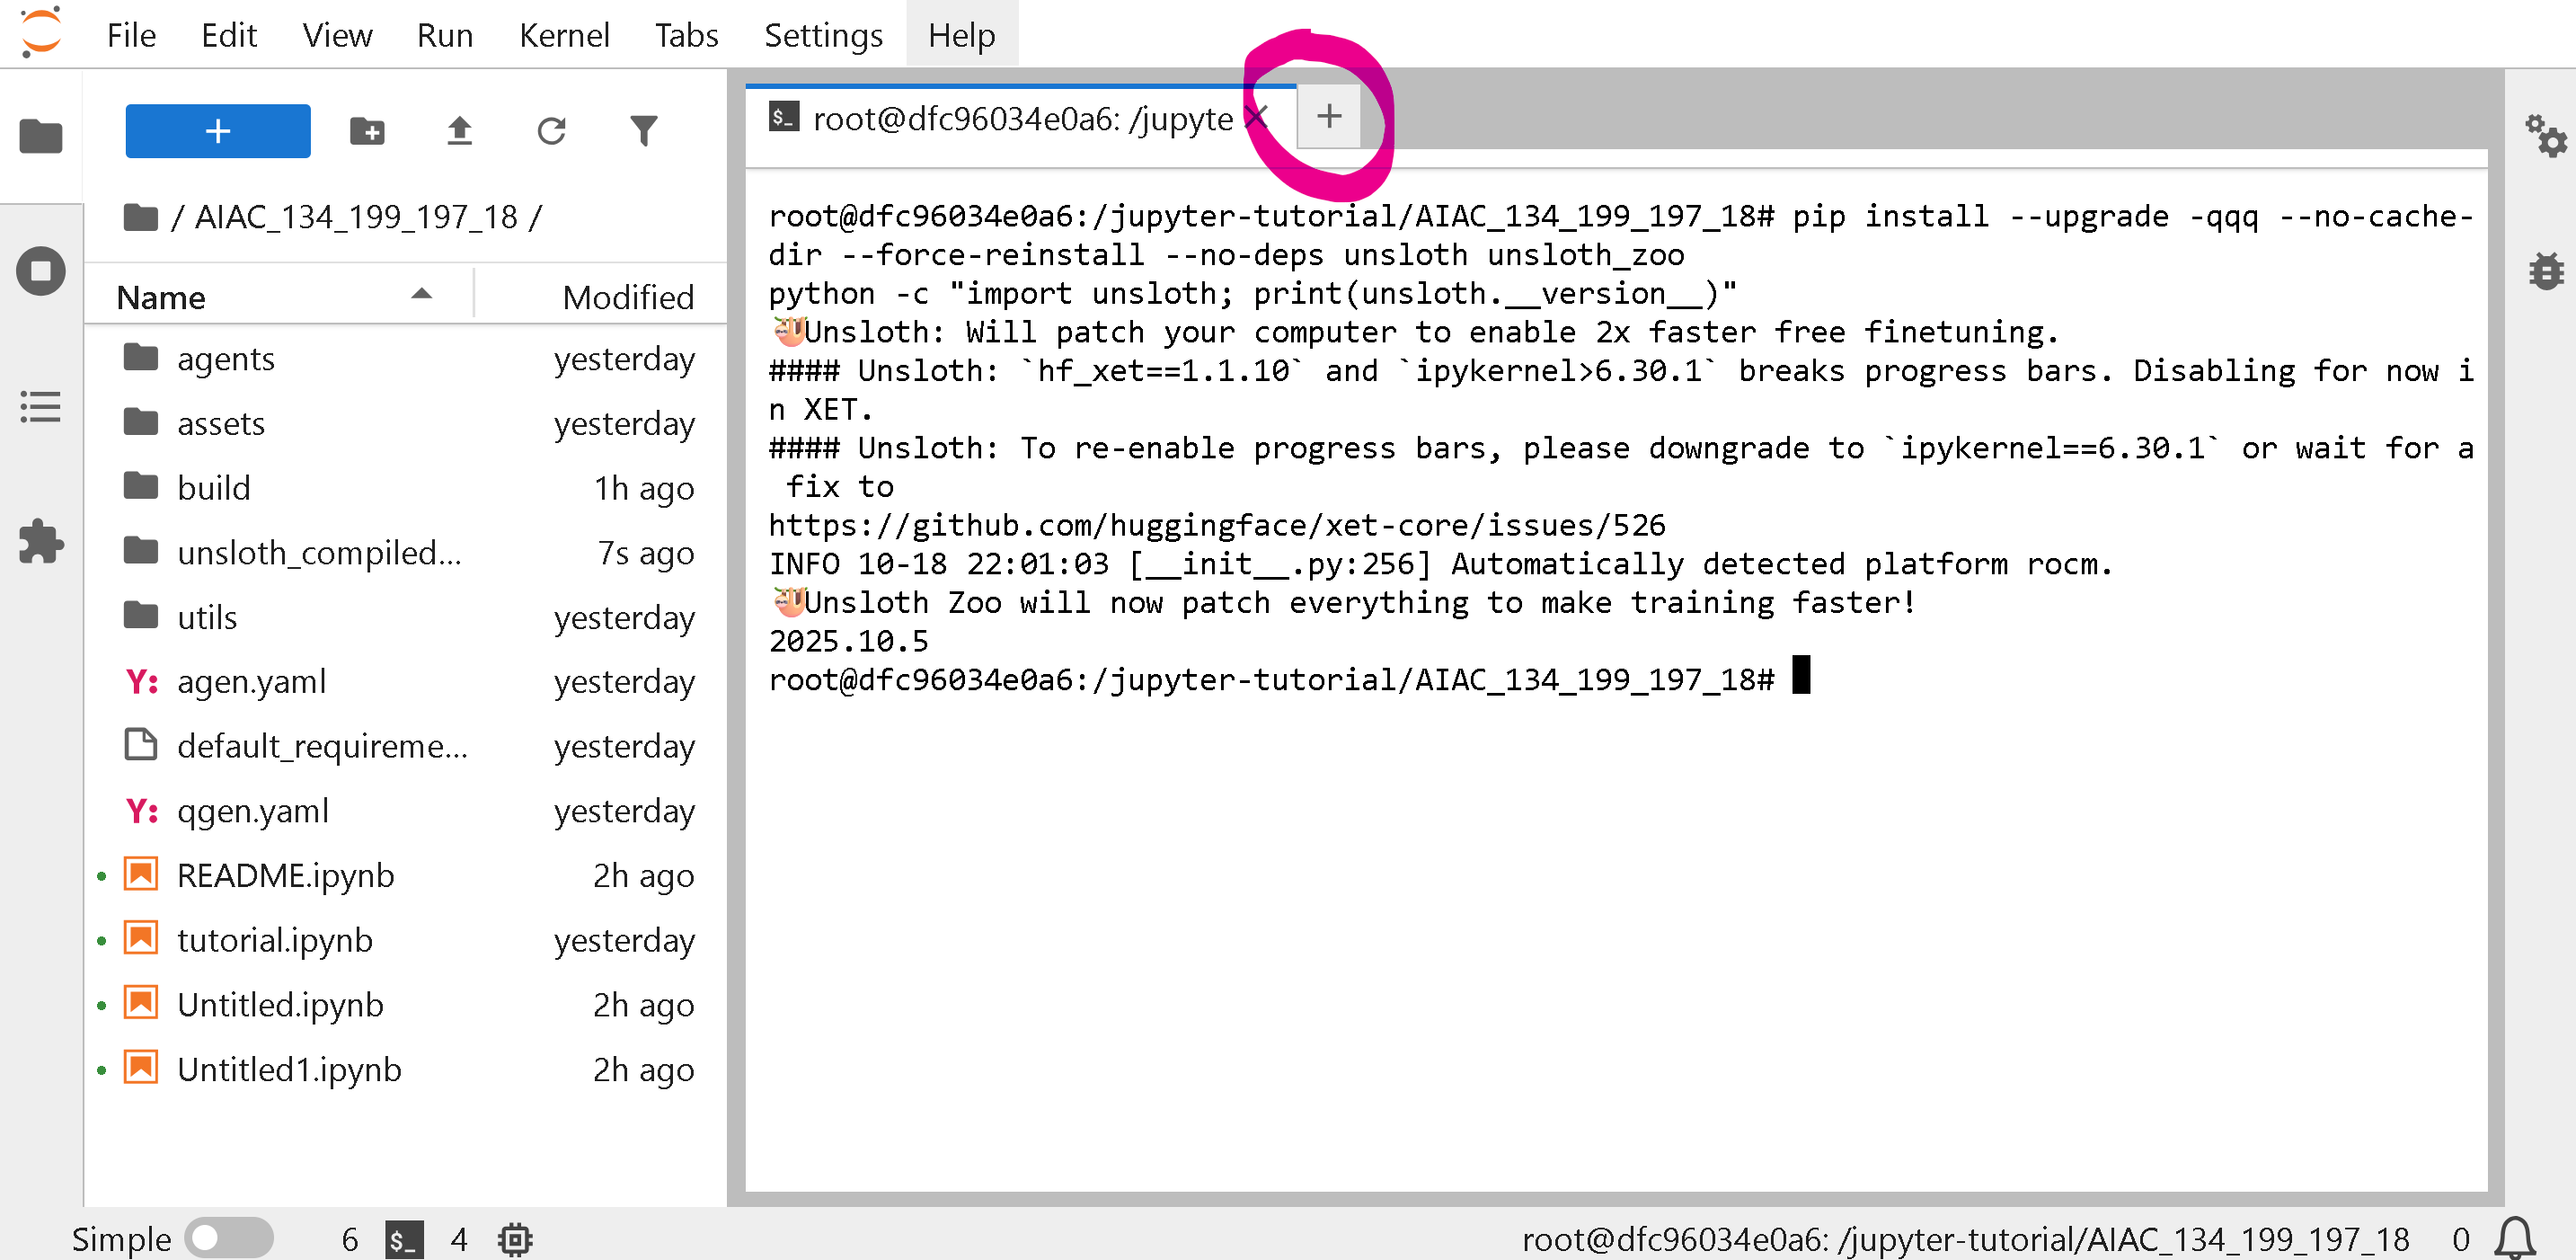 {% hint style="success" %}
**打开 README.ipynb 文件以阅读说明和评分标准**
{% endhint %}
### :butterfly:教程 1:确认 Unsloth 正常工作
确认我们简单的 Llama 3.2 1B / 3B 对话式 notebook 在新的 **终端**.
{% code overflow="wrap" %}
```bash
wget "https://raw.githubusercontent.com/unslothai/notebooks/refs/heads/main/python_scripts/Llama3.2_(1B_and_3B)-Conversational.py" -O llama_basic.py
python llama_basic.py
```
{% endcode %}
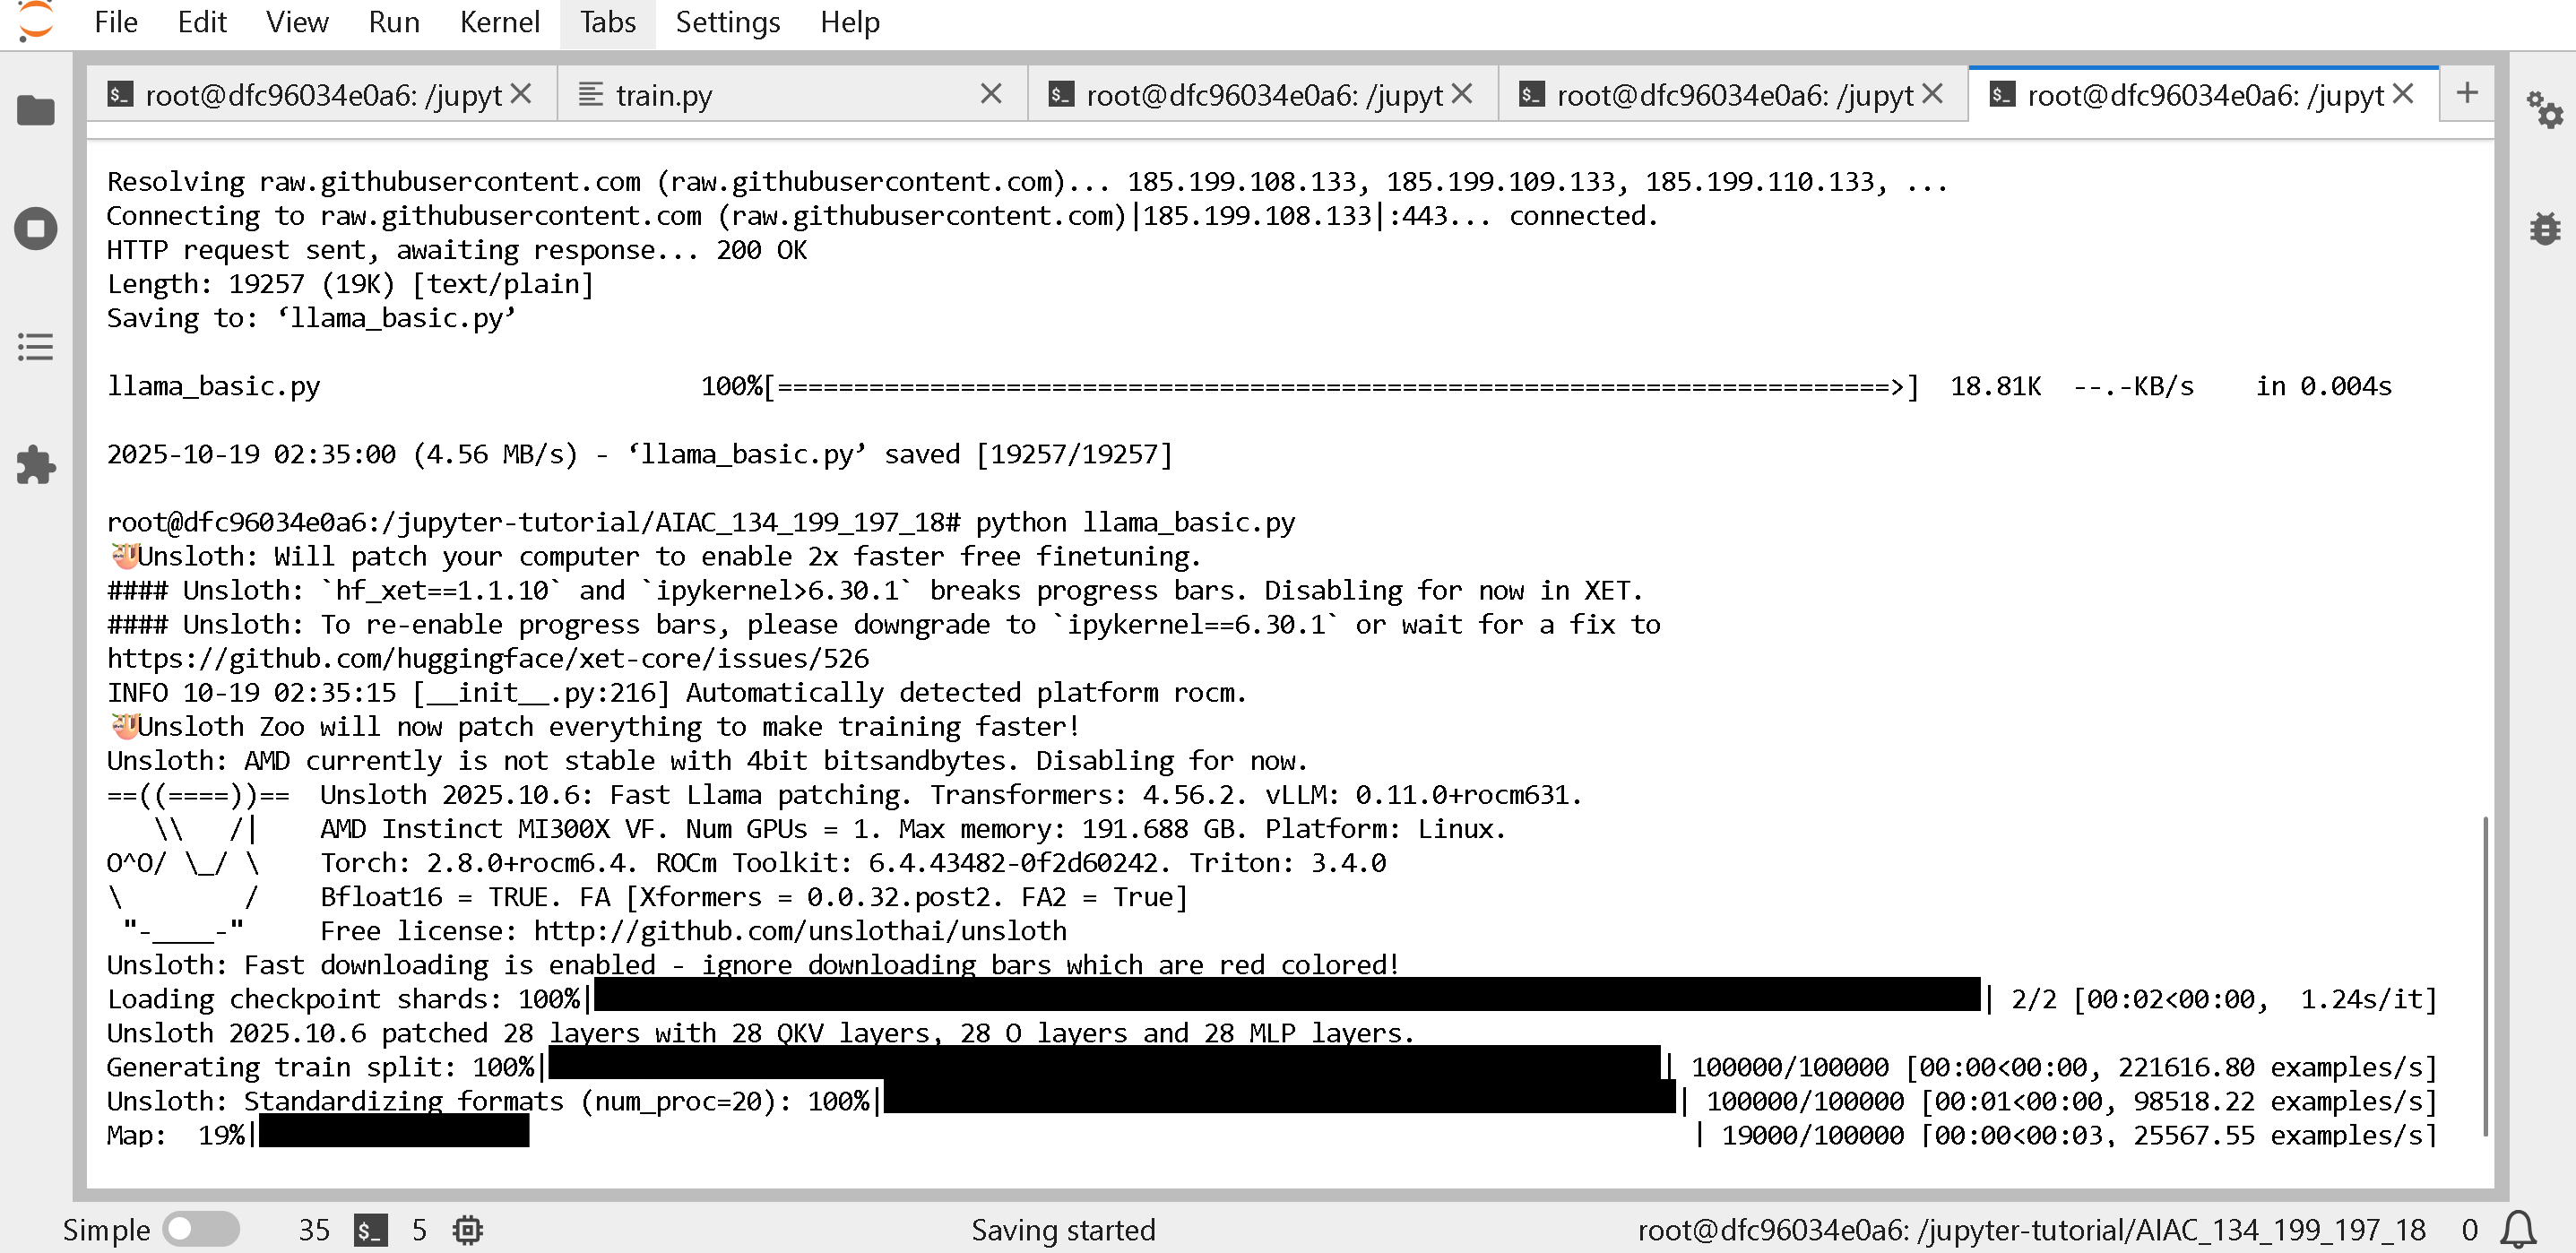
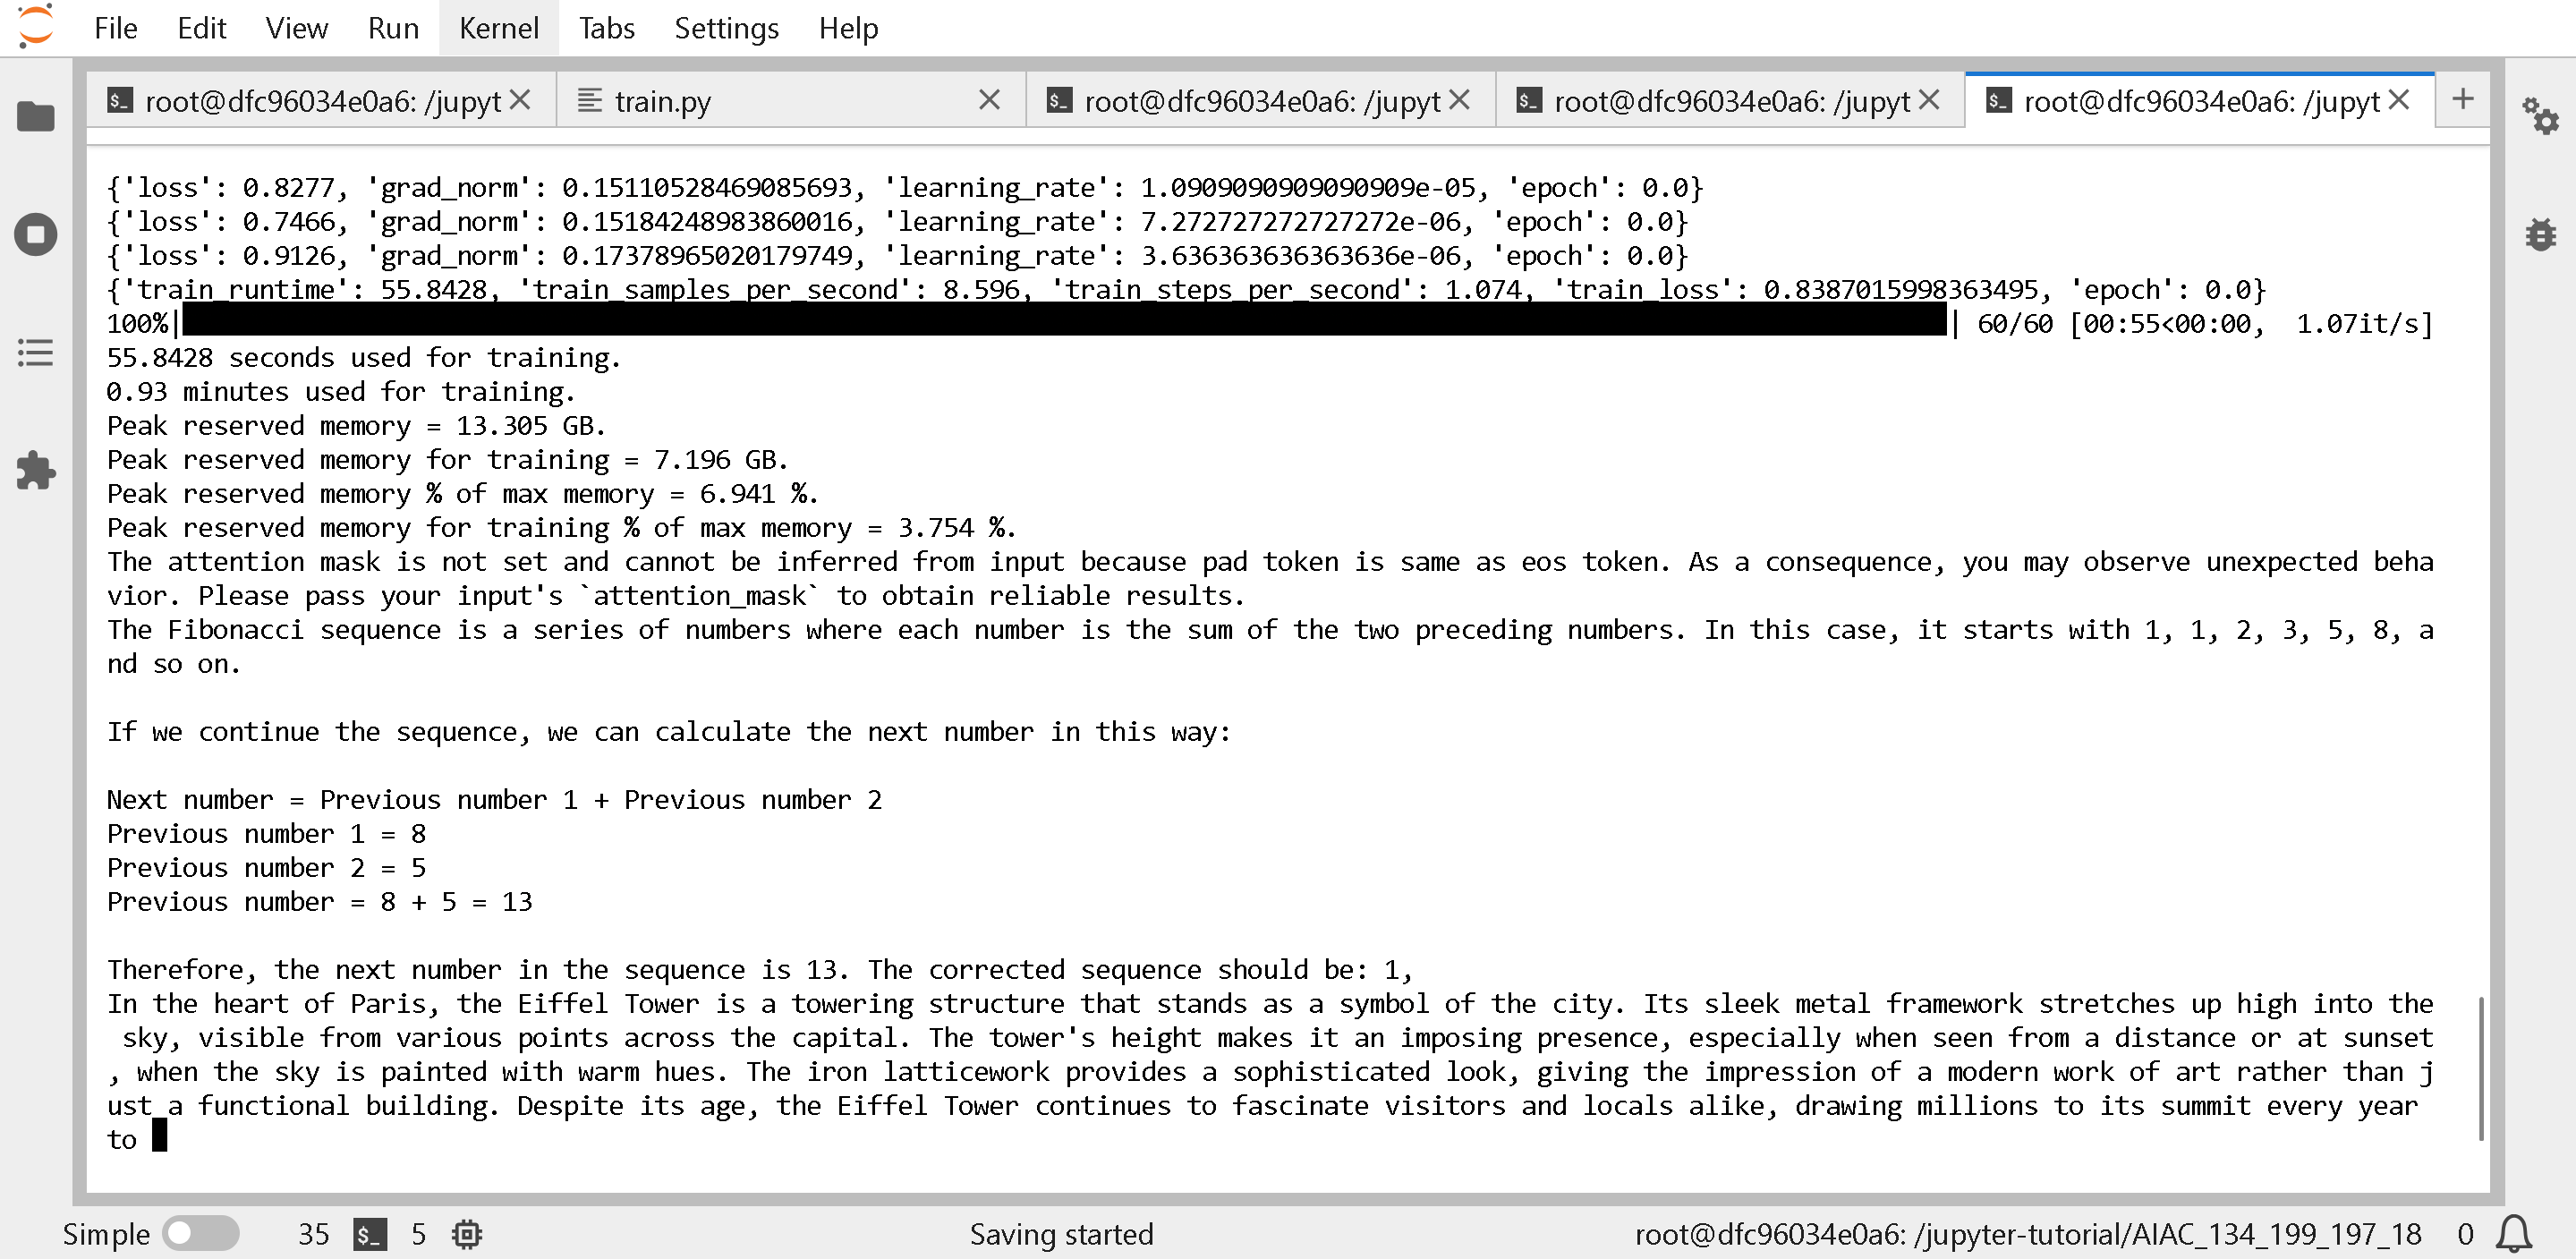
你应该会看到下面的内容(这将花费 2 分钟)。如果有任何问题,先通过
{% code overflow="wrap" %}
```bash
pip install --upgrade -qqq --no-cache-dir --force-reinstall --no-deps unsloth unsloth_zoo
python -c "import unsloth; print(unsloth.__version__)"
```
{% endcode %}
{% hint style="success" %}
**打开 README.ipynb 文件以阅读说明和评分标准**
{% endhint %}
### :butterfly:教程 1:确认 Unsloth 正常工作
确认我们简单的 Llama 3.2 1B / 3B 对话式 notebook 在新的 **终端**.
{% code overflow="wrap" %}
```bash
wget "https://raw.githubusercontent.com/unslothai/notebooks/refs/heads/main/python_scripts/Llama3.2_(1B_and_3B)-Conversational.py" -O llama_basic.py
python llama_basic.py
```
{% endcode %}
你应该会看到下面的内容(这将花费 2 分钟)。如果有任何问题,先通过
{% code overflow="wrap" %}
```bash
pip install --upgrade -qqq --no-cache-dir --force-reinstall --no-deps unsloth unsloth_zoo
python -c "import unsloth; print(unsloth.__version__)"
```
{% endcode %}
 ### :sloth:教程 2:运行合成数据生成
{% hint style="success" %}
**你也可以直接运行 tutorial.ipynb,它应该已经在我们的机器上,无需查看下面内容:**
{% endhint %}
现在让我们尝试下面的示例: 以及
首先新建一个 **终端** 再一次——PLUS 按钮将允许新建一个 **终端**.
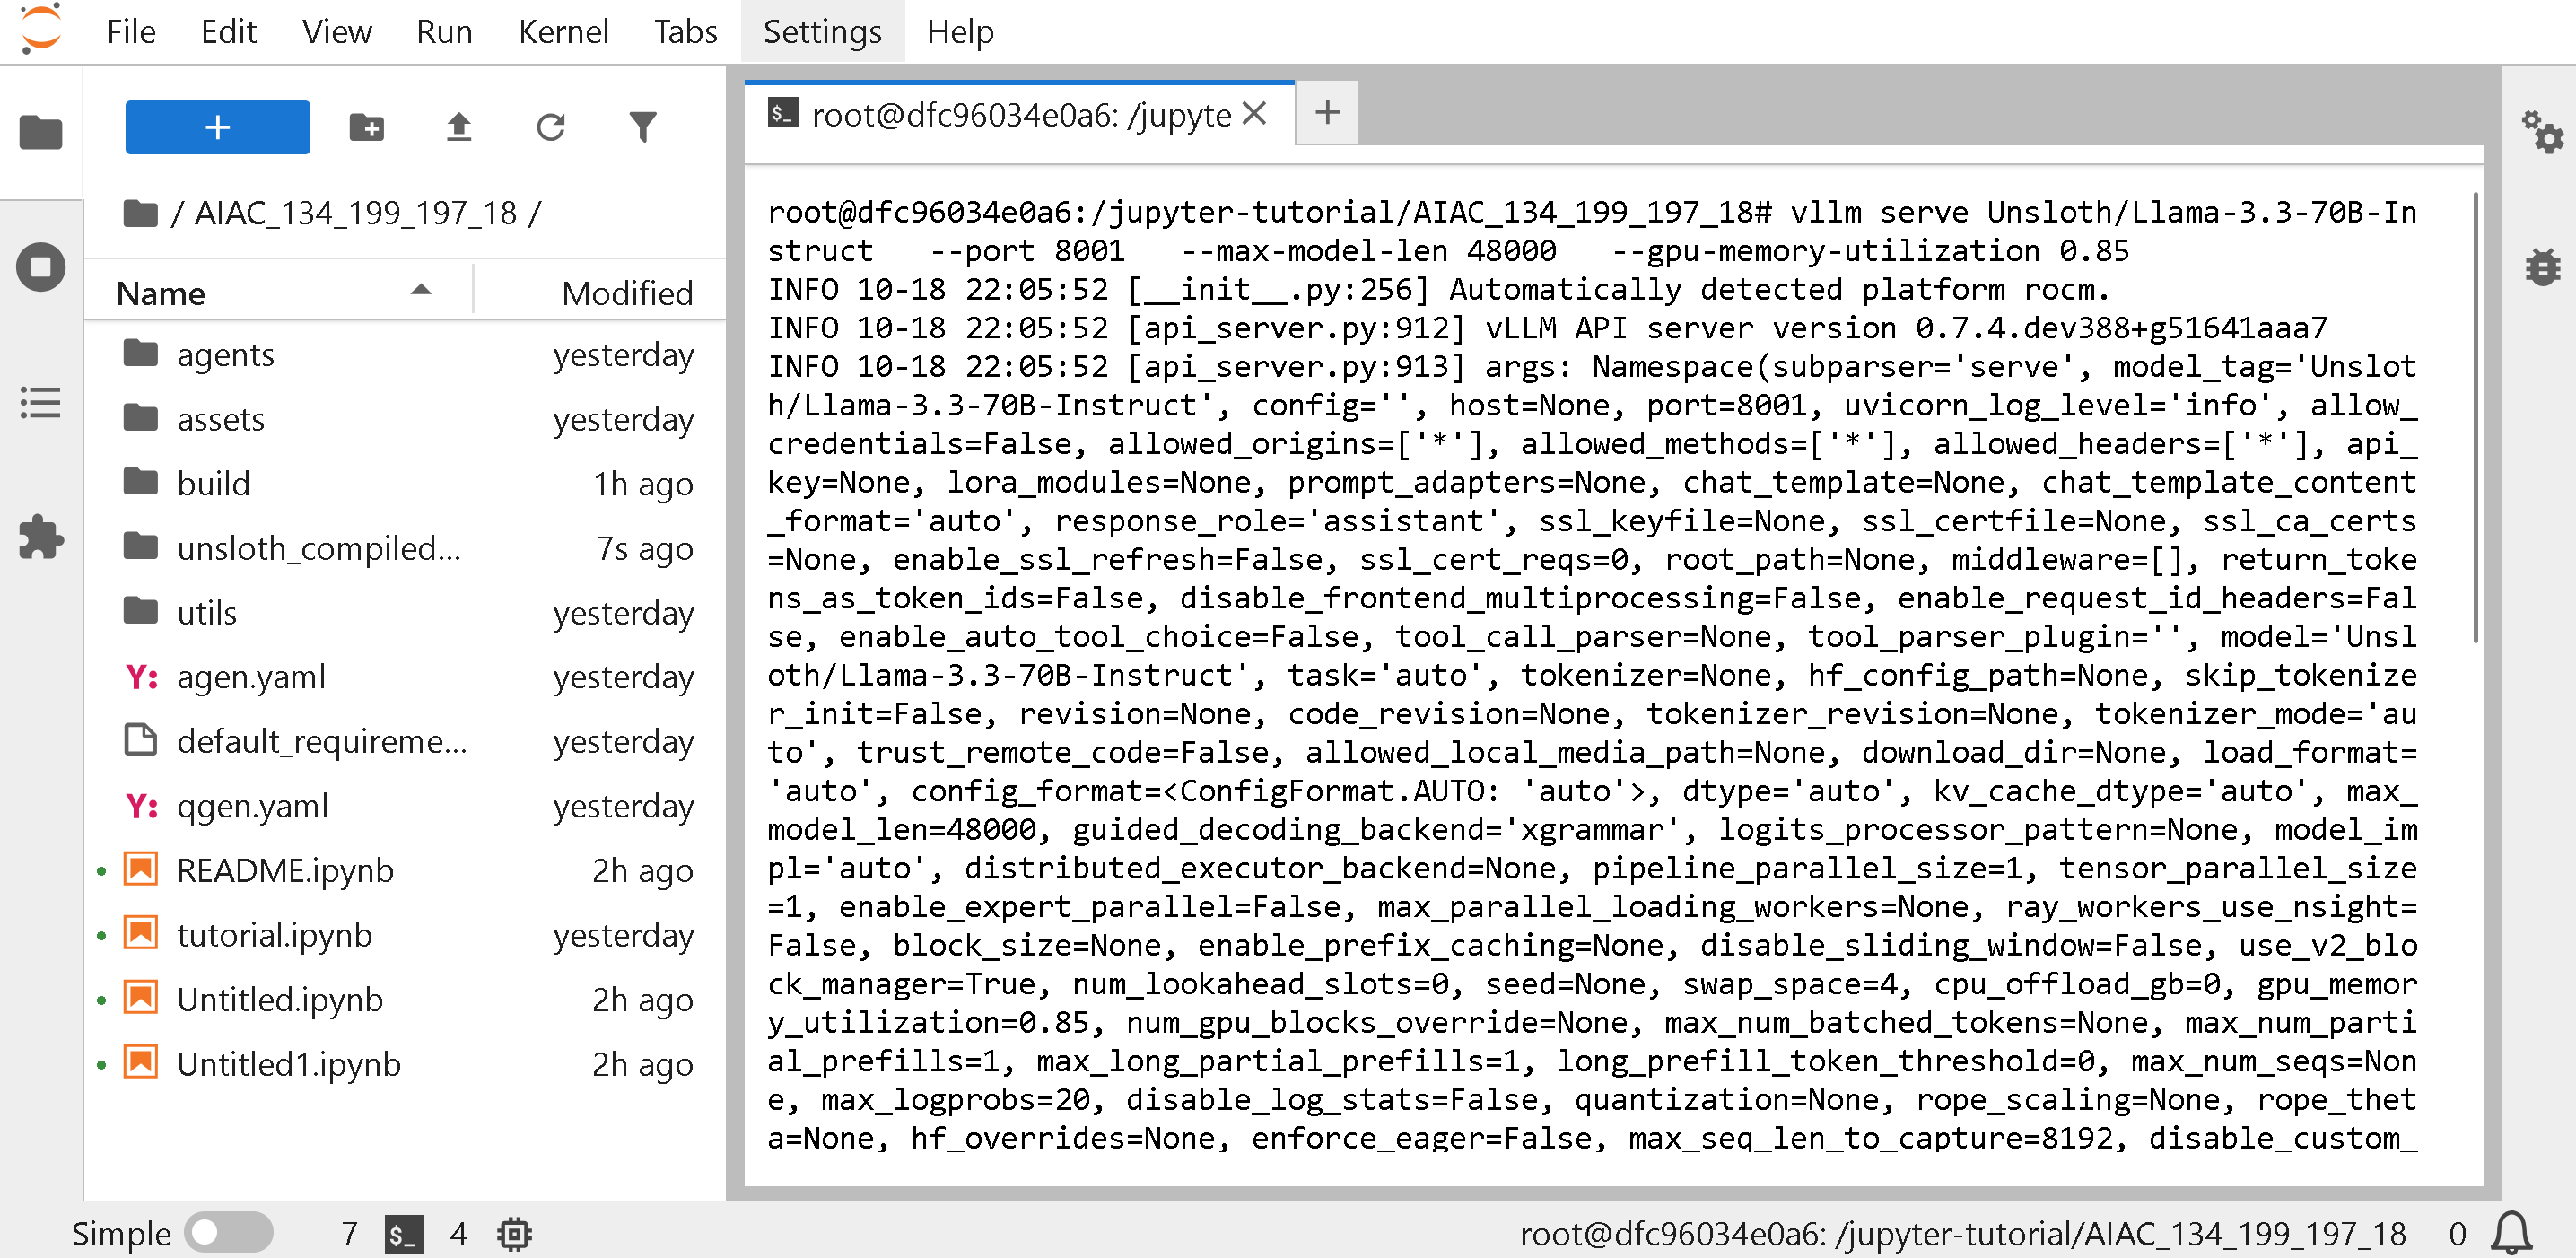
在新的 **终端** 中运行 vLLM 来加载 Llama 3.3 70B Instruct
{% code overflow="wrap" %}
```
vllm serve Unsloth/Llama-3.3-70B-Instruct --port 8001 --max-model-len 48000 --gpu-memory-utilization 0.85
```
{% endcode %}
你会看到:
### :sloth:教程 2:运行合成数据生成
{% hint style="success" %}
**你也可以直接运行 tutorial.ipynb,它应该已经在我们的机器上,无需查看下面内容:**
{% endhint %}
现在让我们尝试下面的示例: 以及
首先新建一个 **终端** 再一次——PLUS 按钮将允许新建一个 **终端**.
在新的 **终端** 中运行 vLLM 来加载 Llama 3.3 70B Instruct
{% code overflow="wrap" %}
```
vllm serve Unsloth/Llama-3.3-70B-Instruct --port 8001 --max-model-len 48000 --gpu-memory-utilization 0.85
```
{% endcode %}
你会看到:
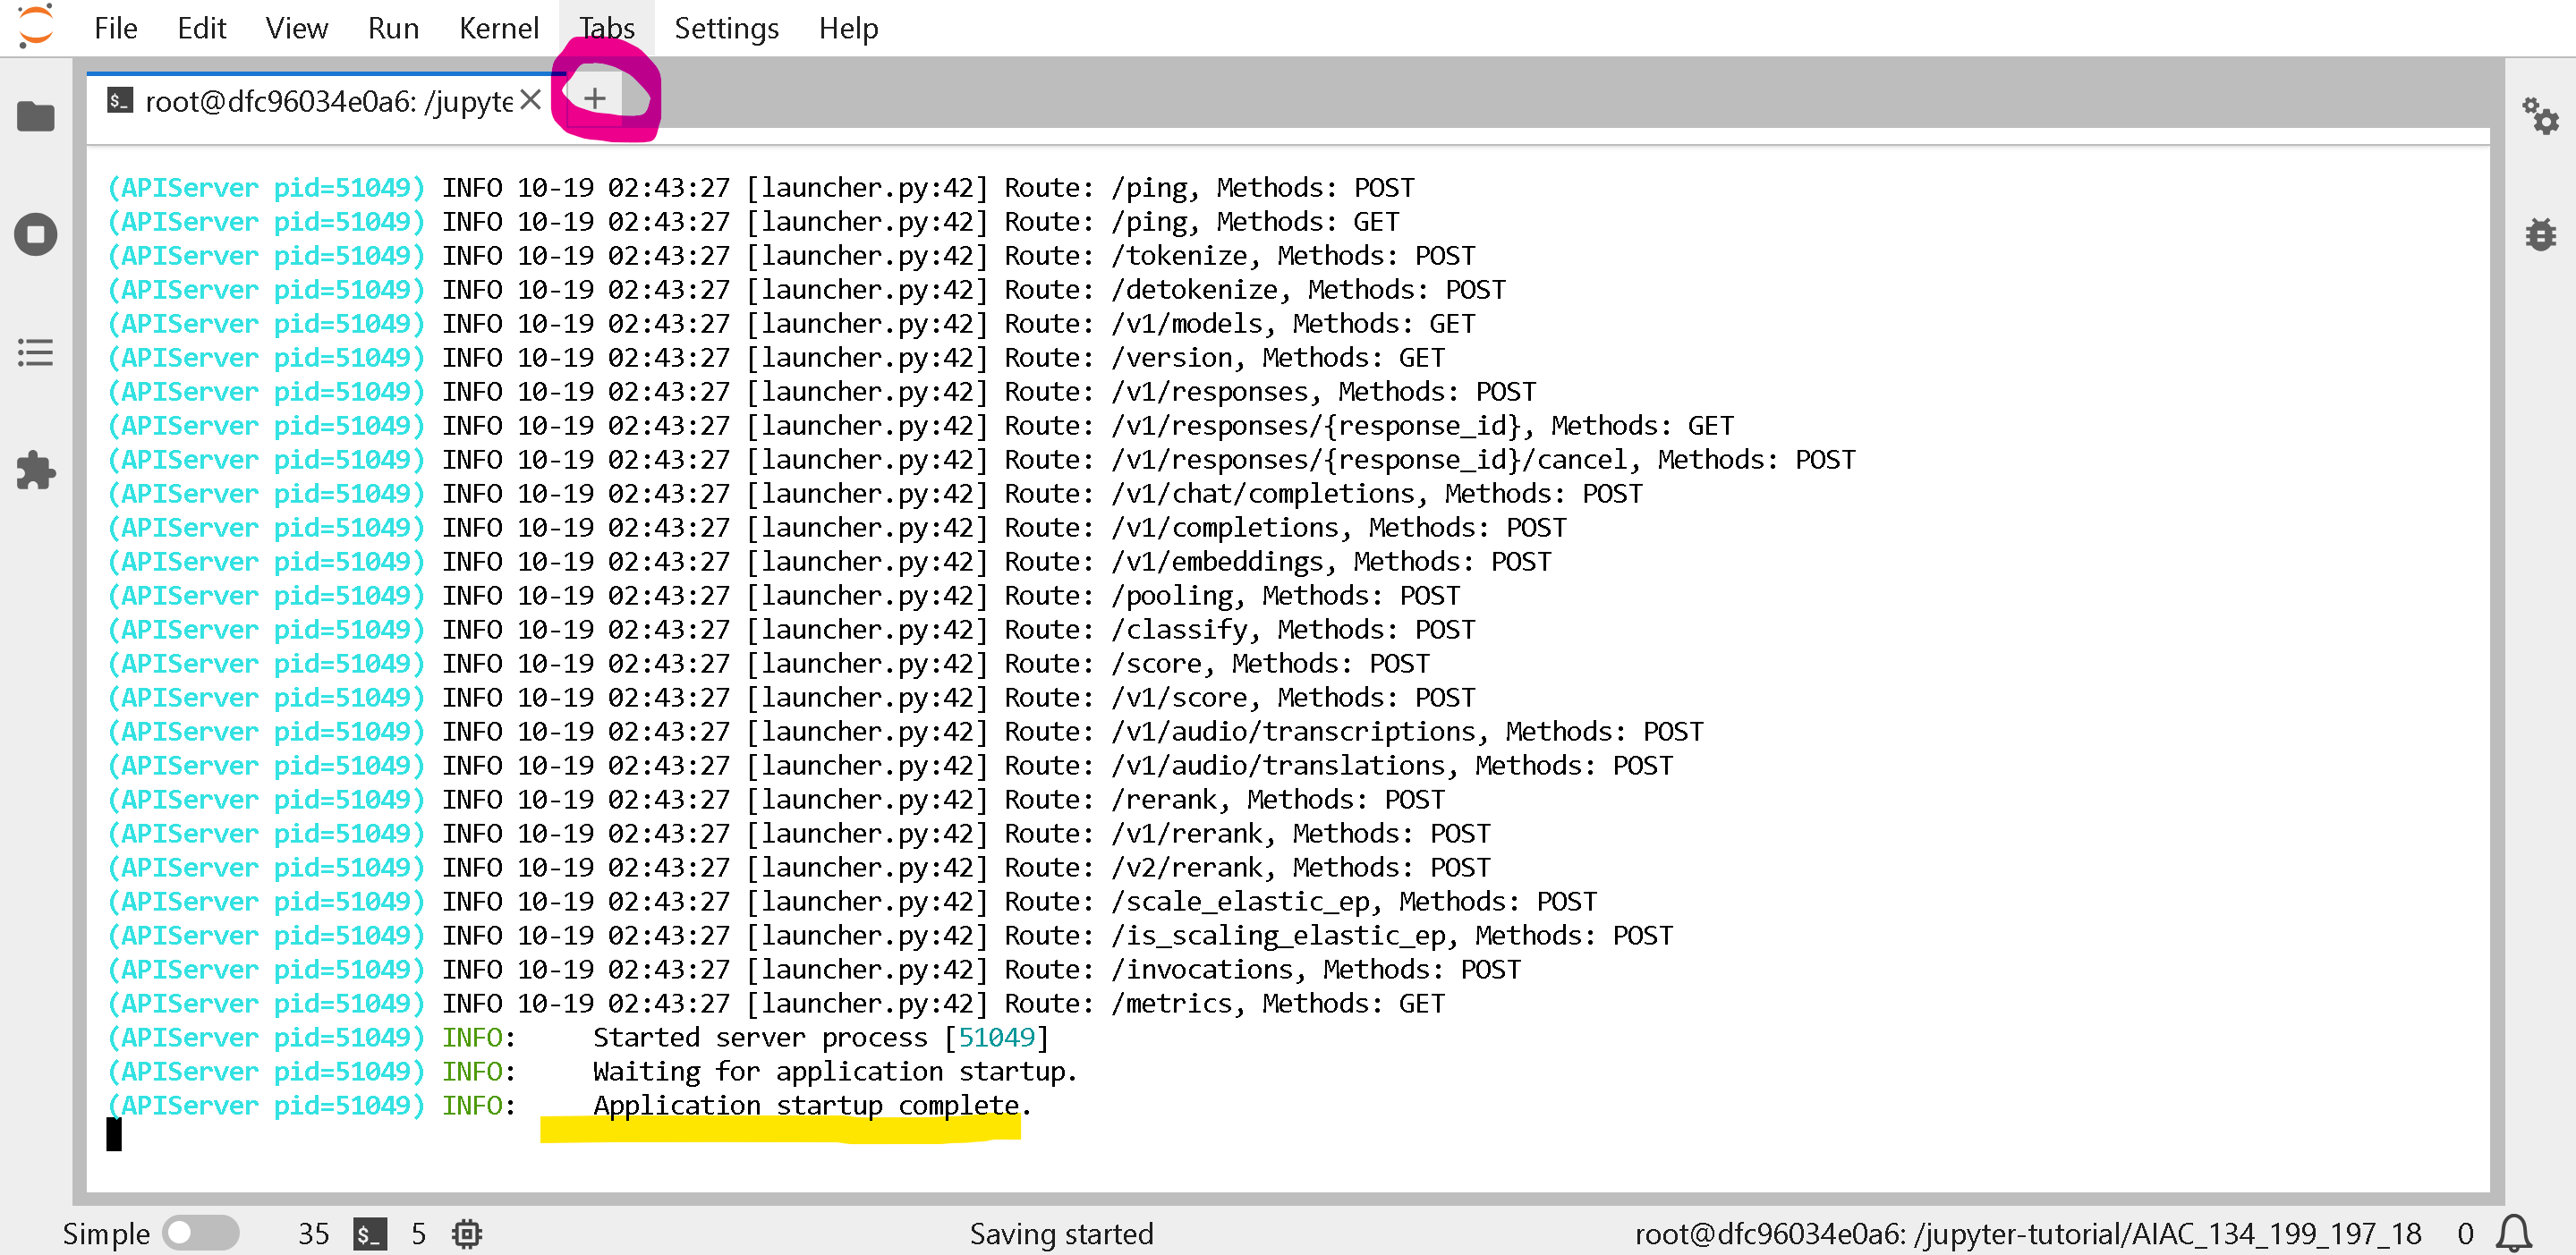
 等待直到你看到 `INFO: Application startup complete.` 然后点击 PLUS 按钮打开一个新标签页
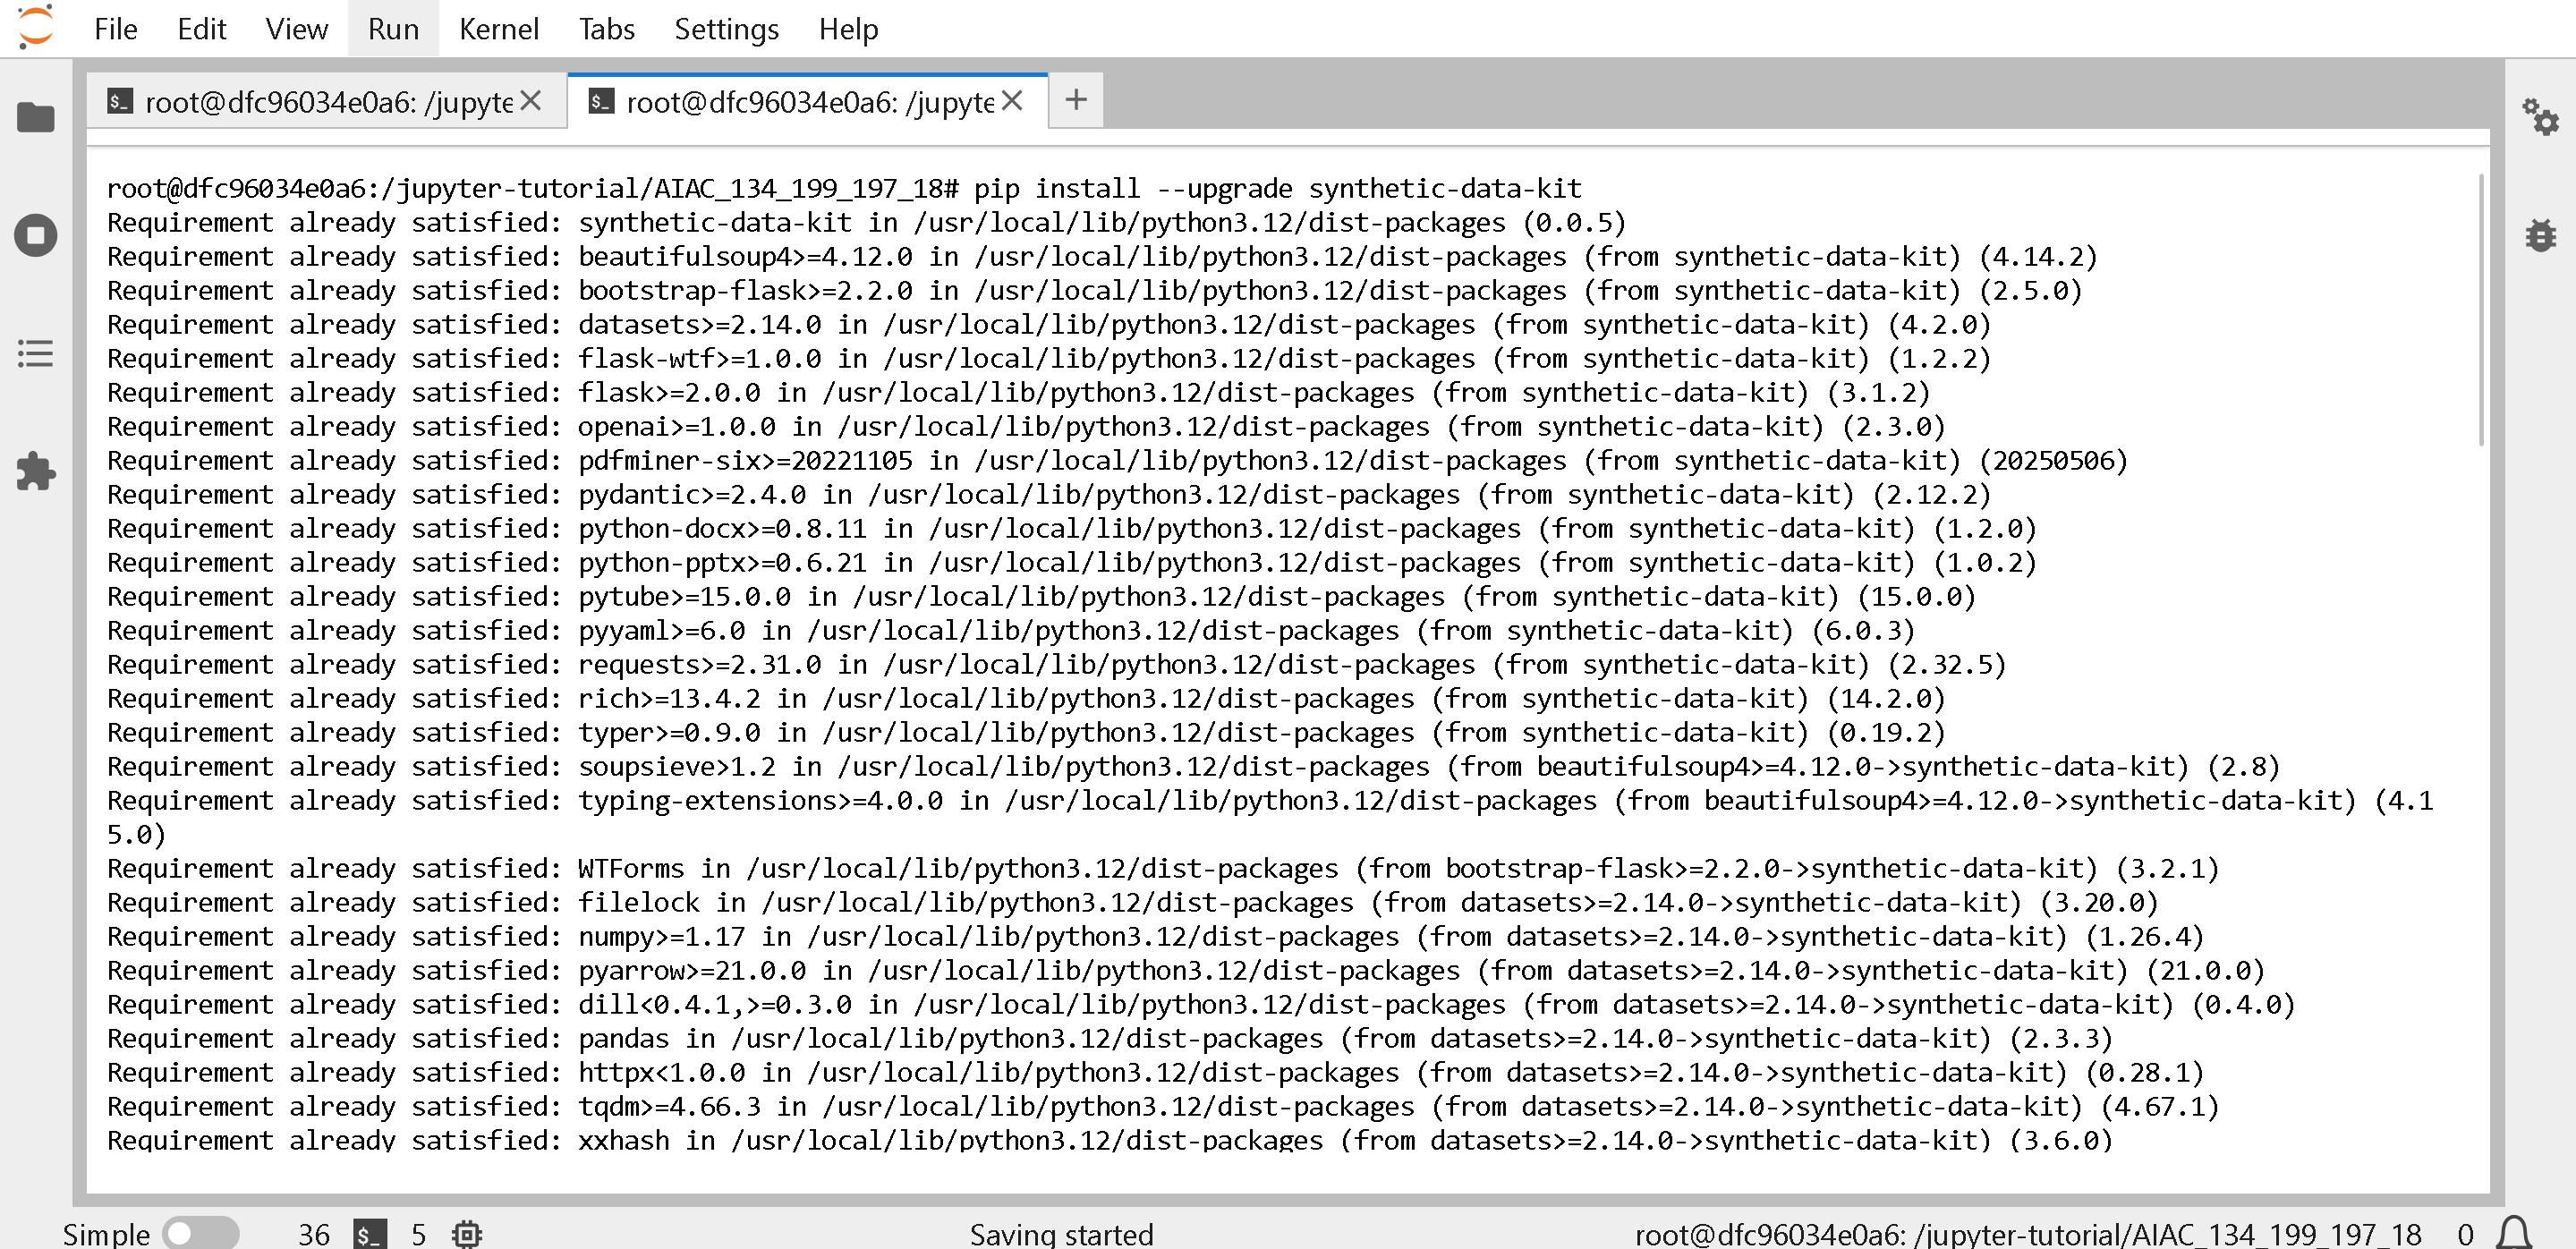
 安装 **synthetic-data-kit** 在新的 **终端** 窗口中。
```
pip install --upgrade synthetic-data-kit
```
安装 **synthetic-data-kit** 在新的 **终端** 窗口中。
```
pip install --upgrade synthetic-data-kit
```
 获取 `config.yaml` 可以从 ,或者如下:
{% file src="/files/6216535031c72d59966ba409c1b4e7f2d914ecf8" %}
{% code overflow="wrap" %}
```bash
wget https://raw.githubusercontent.com/edamamez/Unsloth-AMD-Fine-Tuning-Synthetic-Data/refs/heads/main/config.yaml -O config.yaml
```
{% endcode %}
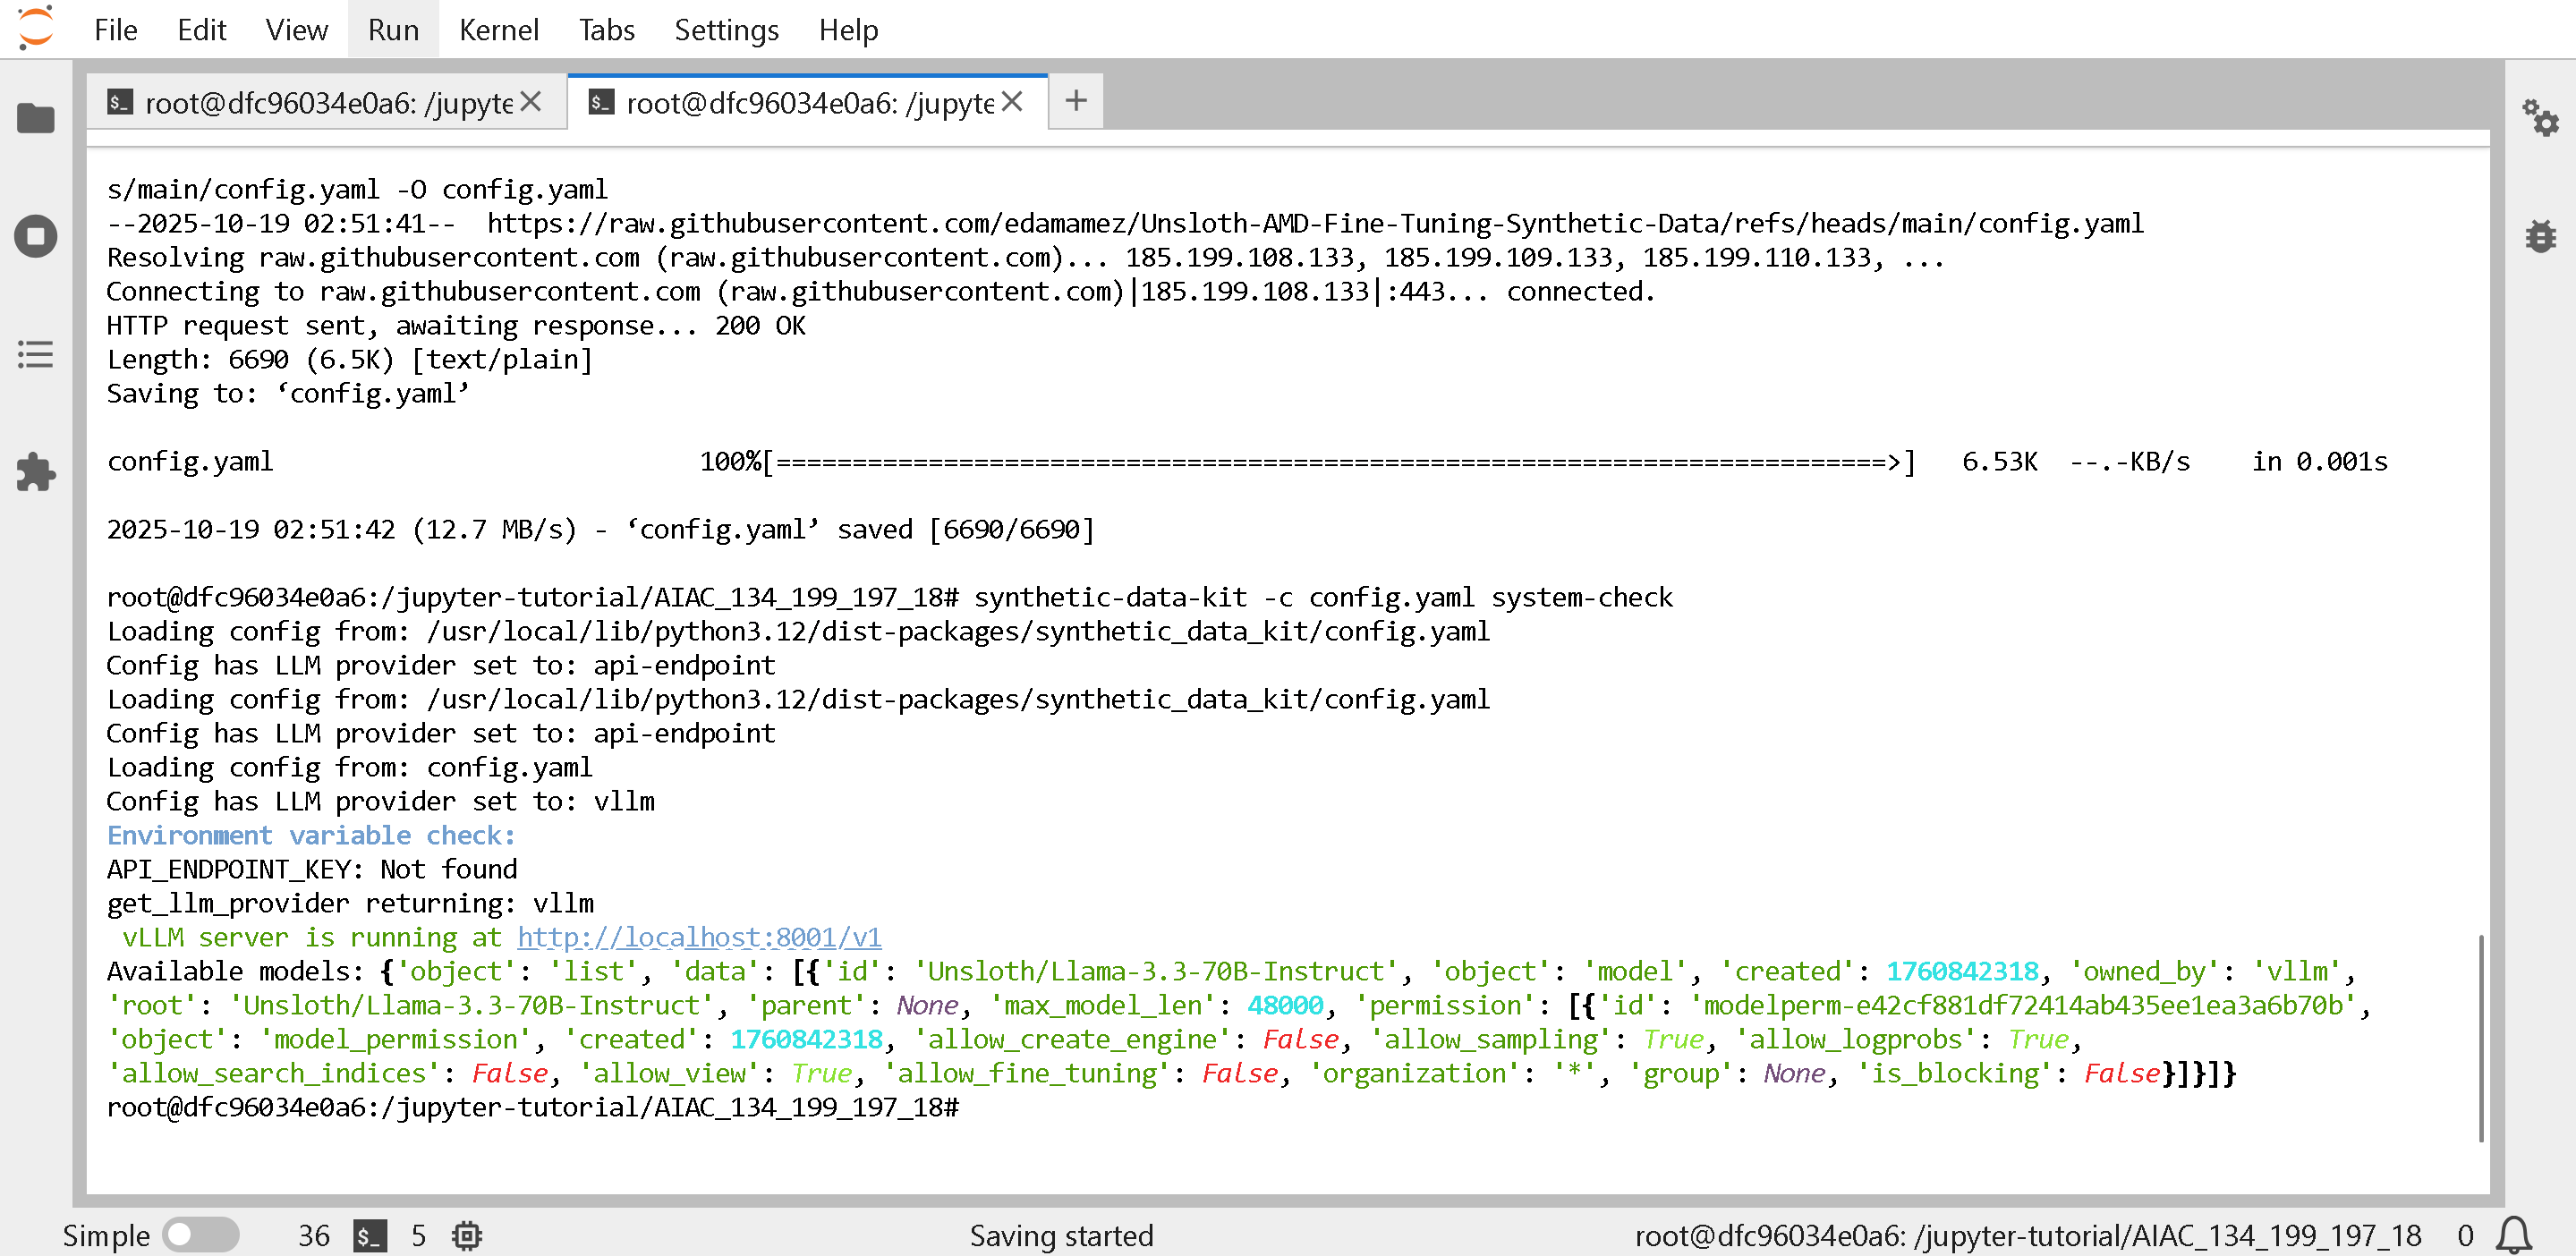
通过检查 synthetic data kit 是否正常工作。如果你看到错误,请先确认第一个单元格中 vLLM 正在运行。
{% code overflow="wrap" %}
```bash
synthetic-data-kit -c config.yaml system-check
```
{% endcode %}
获取 `config.yaml` 可以从 ,或者如下:
{% file src="/files/6216535031c72d59966ba409c1b4e7f2d914ecf8" %}
{% code overflow="wrap" %}
```bash
wget https://raw.githubusercontent.com/edamamez/Unsloth-AMD-Fine-Tuning-Synthetic-Data/refs/heads/main/config.yaml -O config.yaml
```
{% endcode %}
通过检查 synthetic data kit 是否正常工作。如果你看到错误,请先确认第一个单元格中 vLLM 正在运行。
{% code overflow="wrap" %}
```bash
synthetic-data-kit -c config.yaml system-check
```
{% endcode %}
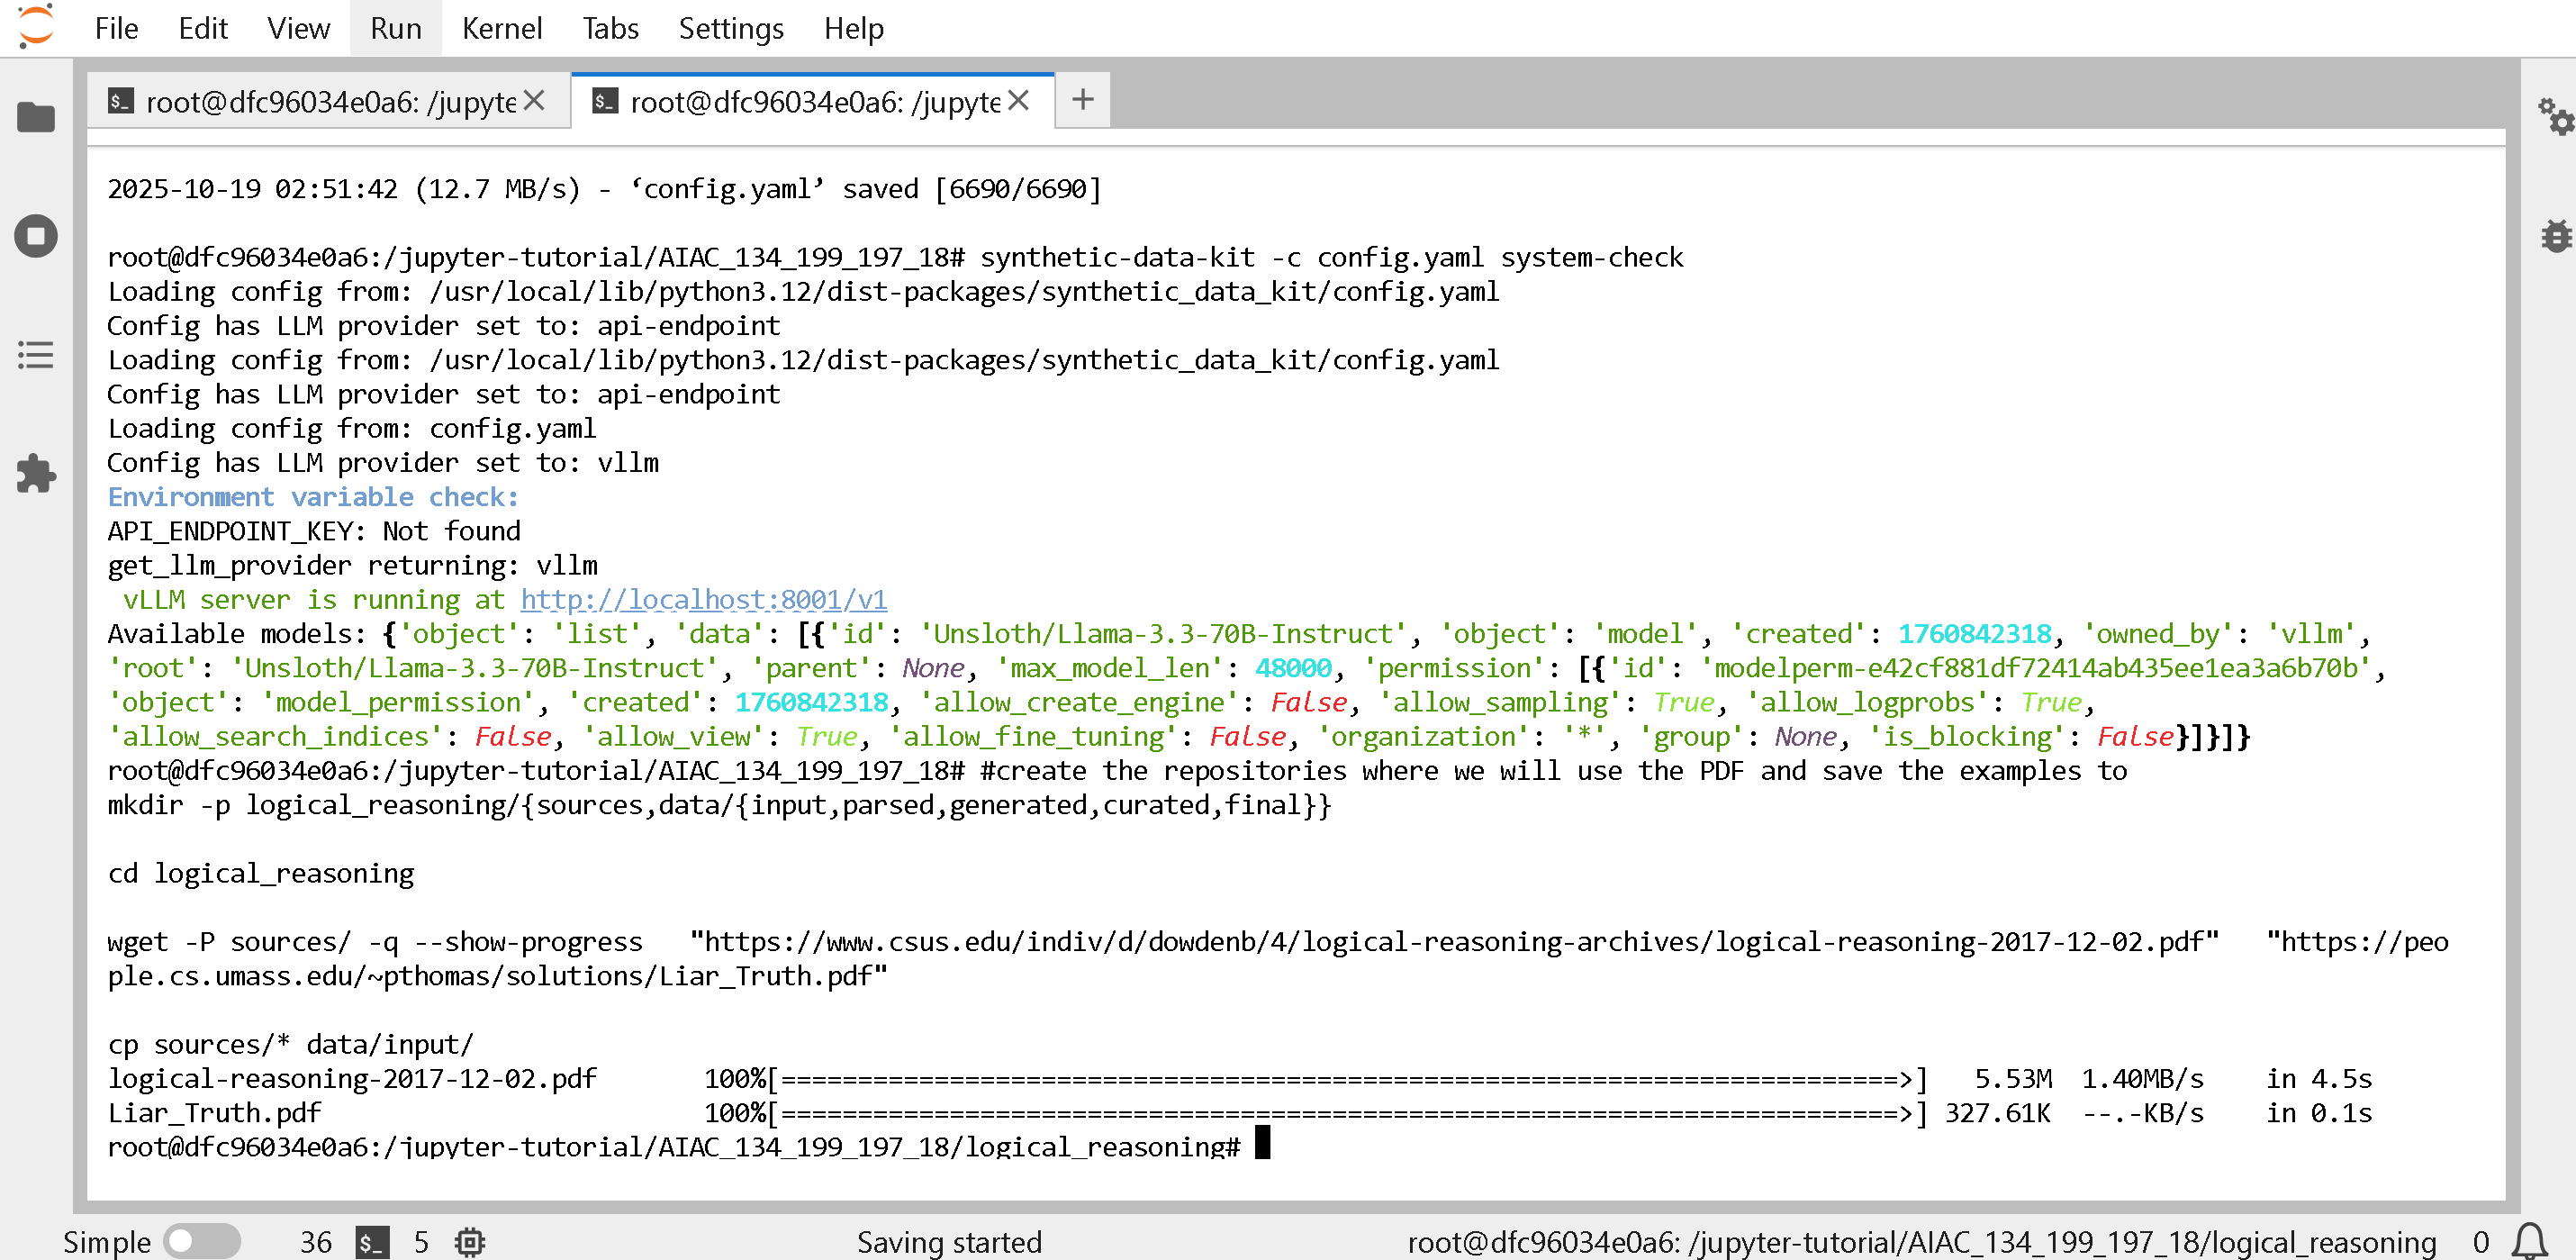
 现在,获取一些我们将用于处理的文件:
{% code overflow="wrap" %}
```bash
# 创建我们将使用 PDF 并保存示例的仓库
mkdir -p logical_reasoning/{sources,data/{input,parsed,generated,curated,final}}
wget -P logical_reasoning/sources/ -q --show-progress "https://www.csus.edu/indiv/d/dowdenb/4/logical-reasoning-archives/logical-reasoning-2017-12-02.pdf" "https://people.cs.umass.edu/~pthomas/solutions/Liar_Truth.pdf"
cp logical_reasoning/sources/* logical_reasoning/data/input/
cp config.yaml logical_reasoning
```
{% endcode %}
现在,获取一些我们将用于处理的文件:
{% code overflow="wrap" %}
```bash
# 创建我们将使用 PDF 并保存示例的仓库
mkdir -p logical_reasoning/{sources,data/{input,parsed,generated,curated,final}}
wget -P logical_reasoning/sources/ -q --show-progress "https://www.csus.edu/indiv/d/dowdenb/4/logical-reasoning-archives/logical-reasoning-2017-12-02.pdf" "https://people.cs.umass.edu/~pthomas/solutions/Liar_Truth.pdf"
cp logical_reasoning/sources/* logical_reasoning/data/input/
cp config.yaml logical_reasoning
```
{% endcode %}
 现在让我们摄取数据并进行处理:
{% code overflow="wrap" %}
```bash
cd logical_reasoning
synthetic-data-kit ingest ./data/input/ --verbose
```
{% endcode %}
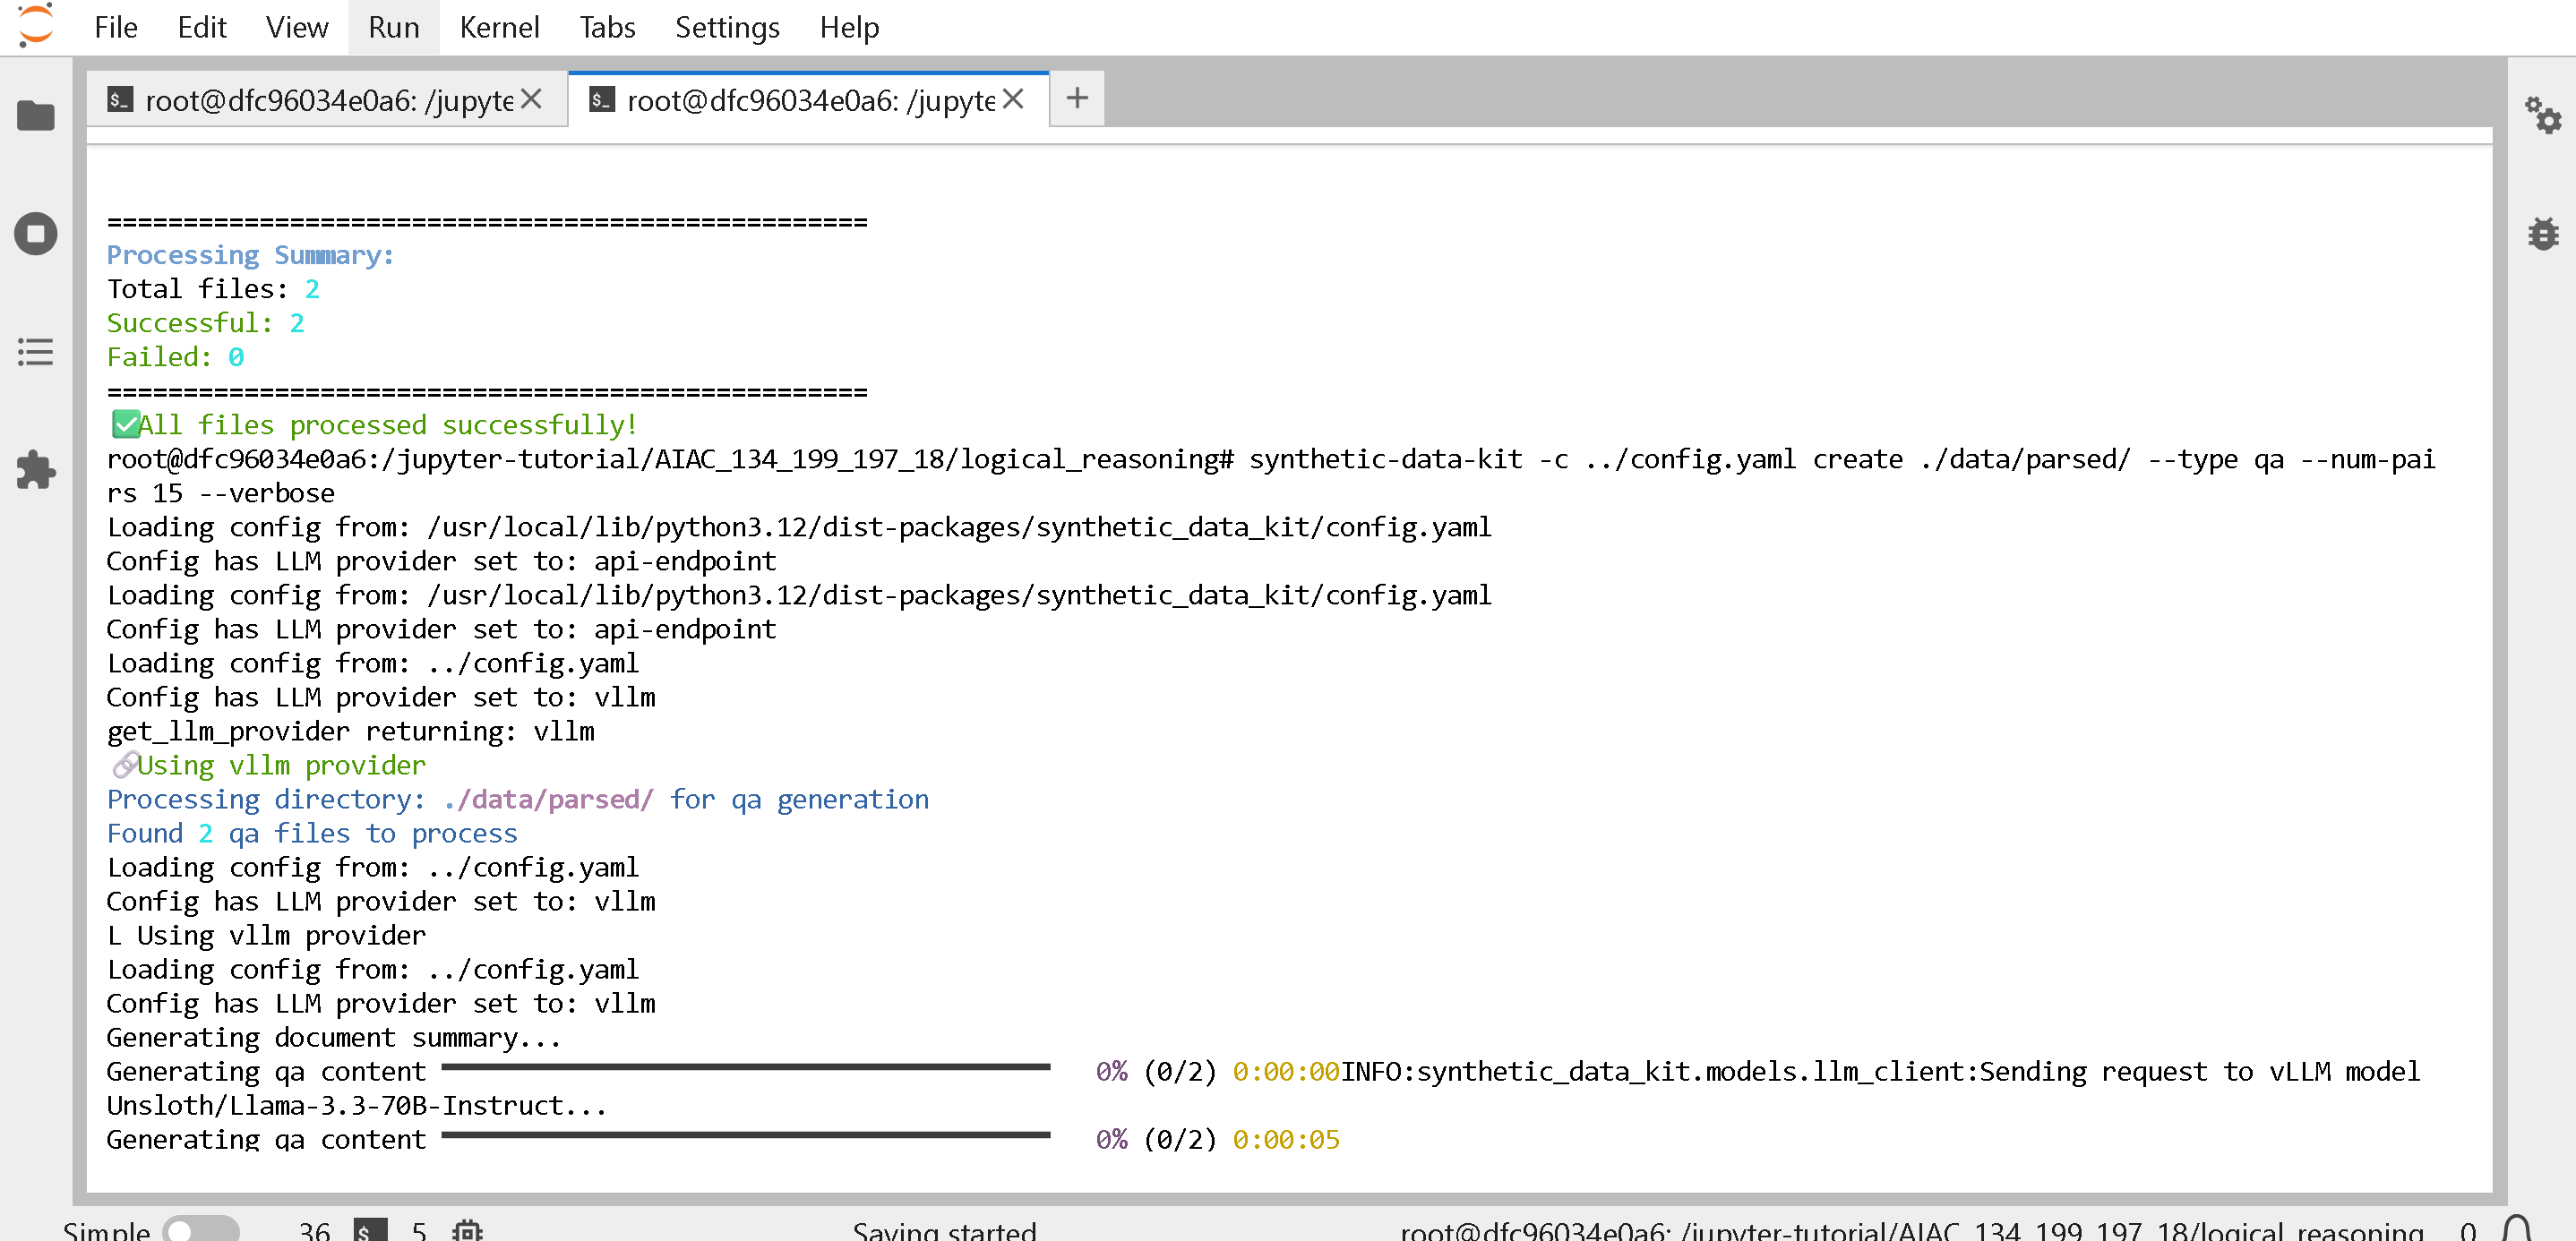
现在,创建 Q\&A(问答对)或 CoT(思维链)对(这可能需要 3 分钟)
{% code overflow="wrap" %}
```bash
synthetic-data-kit -c ../config.yaml create ./data/parsed/ --type qa --num-pairs 15 --verbose
##### 或者 #####
synthetic-data-kit -c ../config.yaml create ./data/parsed/ --type cot --num-pairs 15 --verbose
```
{% endcode %}
现在让我们摄取数据并进行处理:
{% code overflow="wrap" %}
```bash
cd logical_reasoning
synthetic-data-kit ingest ./data/input/ --verbose
```
{% endcode %}
现在,创建 Q\&A(问答对)或 CoT(思维链)对(这可能需要 3 分钟)
{% code overflow="wrap" %}
```bash
synthetic-data-kit -c ../config.yaml create ./data/parsed/ --type qa --num-pairs 15 --verbose
##### 或者 #####
synthetic-data-kit -c ../config.yaml create ./data/parsed/ --type cot --num-pairs 15 --verbose
```
{% endcode %}
 现在让我们请一个 LLM 来整理数据,并让 LLM 作为裁判删除不太理想的合成数据行,然后保存输出——这可能需要 3 分钟
{% code overflow="wrap" %}
```bash
synthetic-data-kit -c ../config.yaml curate ./data/generated/ --threshold 7.0 --verbose
synthetic-data-kit save-as ./data/curated/ --format ft --verbose
```
{% endcode %}
现在让我们请一个 LLM 来整理数据,并让 LLM 作为裁判删除不太理想的合成数据行,然后保存输出——这可能需要 3 分钟
{% code overflow="wrap" %}
```bash
synthetic-data-kit -c ../config.yaml curate ./data/generated/ --threshold 7.0 --verbose
synthetic-data-kit save-as ./data/curated/ --format ft --verbose
```
{% endcode %}
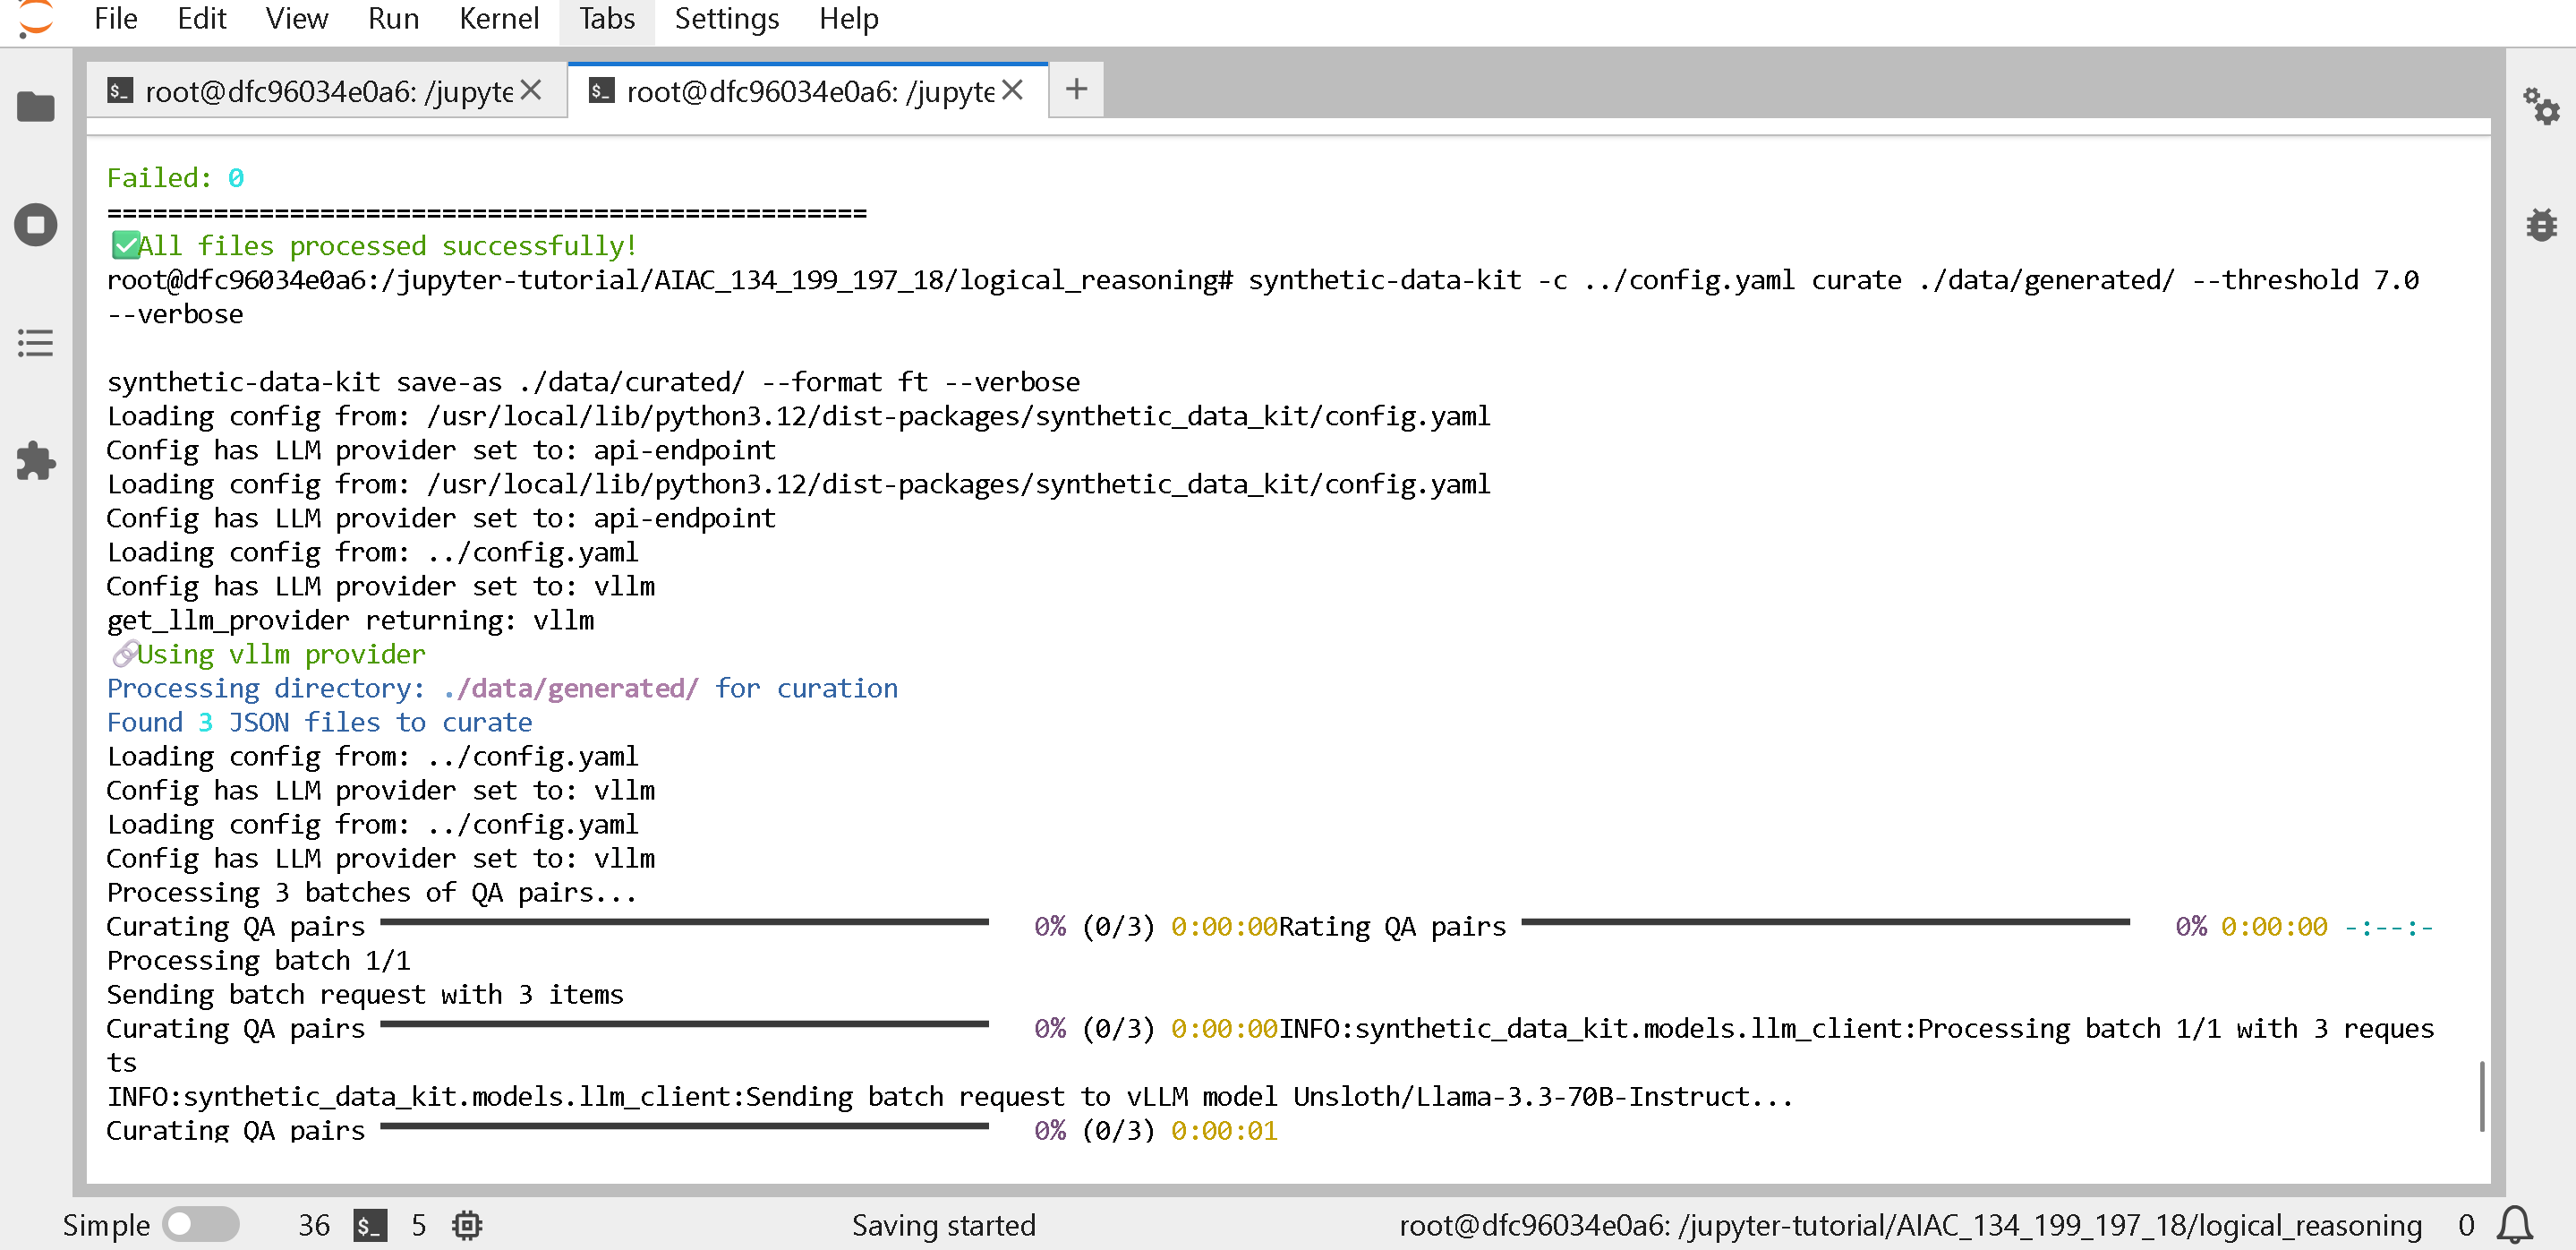 再次, **请关闭 vLLM 服务以节省 VRAM!!!回到前一个标签页,按 CTRL+C 3 次。或者查看** [#how-do-i-free-amd-gpu-memory](#how-do-i-free-amd-gpu-memory "mention")
现在获取我们将在以下位置运行的 notebook :
{% code overflow="wrap" %}
```bash
wget "https://github.com/unslothai/notebooks/raw/refs/heads/main/nb/Synthetic_Data_Hackathon.ipynb" -O "Synthetic_Data_Hackathon.ipynb"
```
{% endcode %}
{% hint style="info" %}
如果你遇到内存不足错误,请关闭你的 vLLM 实例——见 [#how-do-i-free-amd-gpu-memory](#how-do-i-free-amd-gpu-memory "mention")
{% endhint %}
点击左侧的文件夹按钮并打开 "Synthetic\_Data\_Hackathon.ipynb"(双击)
再次, **请关闭 vLLM 服务以节省 VRAM!!!回到前一个标签页,按 CTRL+C 3 次。或者查看** [#how-do-i-free-amd-gpu-memory](#how-do-i-free-amd-gpu-memory "mention")
现在获取我们将在以下位置运行的 notebook :
{% code overflow="wrap" %}
```bash
wget "https://github.com/unslothai/notebooks/raw/refs/heads/main/nb/Synthetic_Data_Hackathon.ipynb" -O "Synthetic_Data_Hackathon.ipynb"
```
{% endcode %}
{% hint style="info" %}
如果你遇到内存不足错误,请关闭你的 vLLM 实例——见 [#how-do-i-free-amd-gpu-memory](#how-do-i-free-amd-gpu-memory "mention")
{% endhint %}
点击左侧的文件夹按钮并打开 "Synthetic\_Data\_Hackathon.ipynb"(双击)
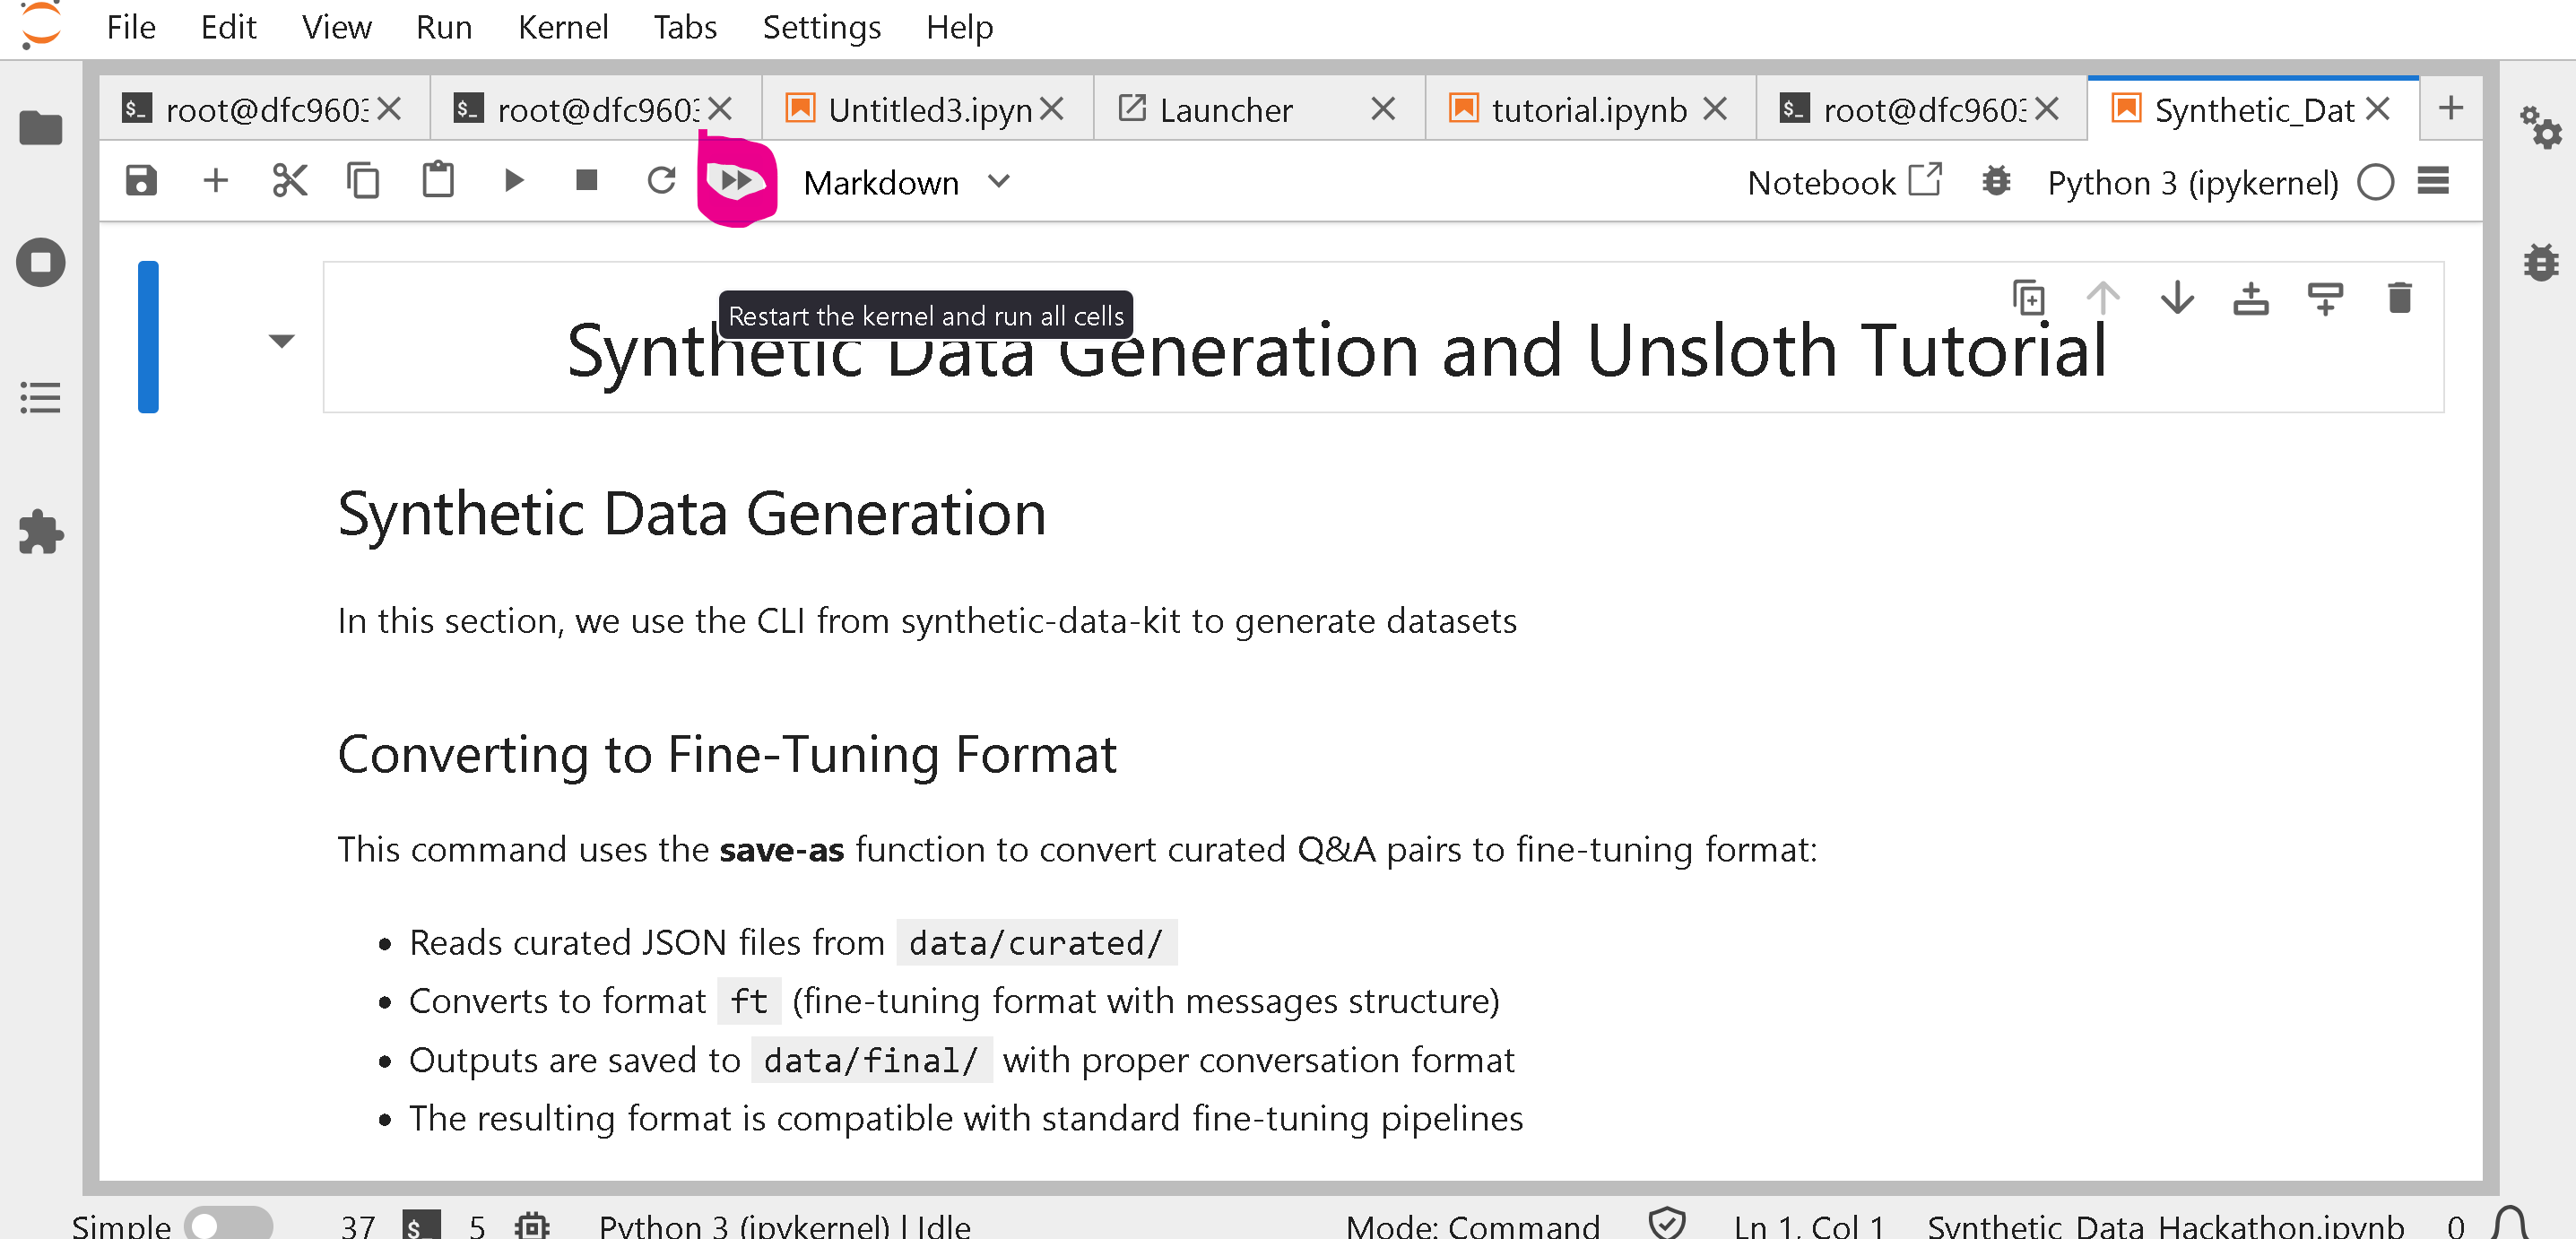
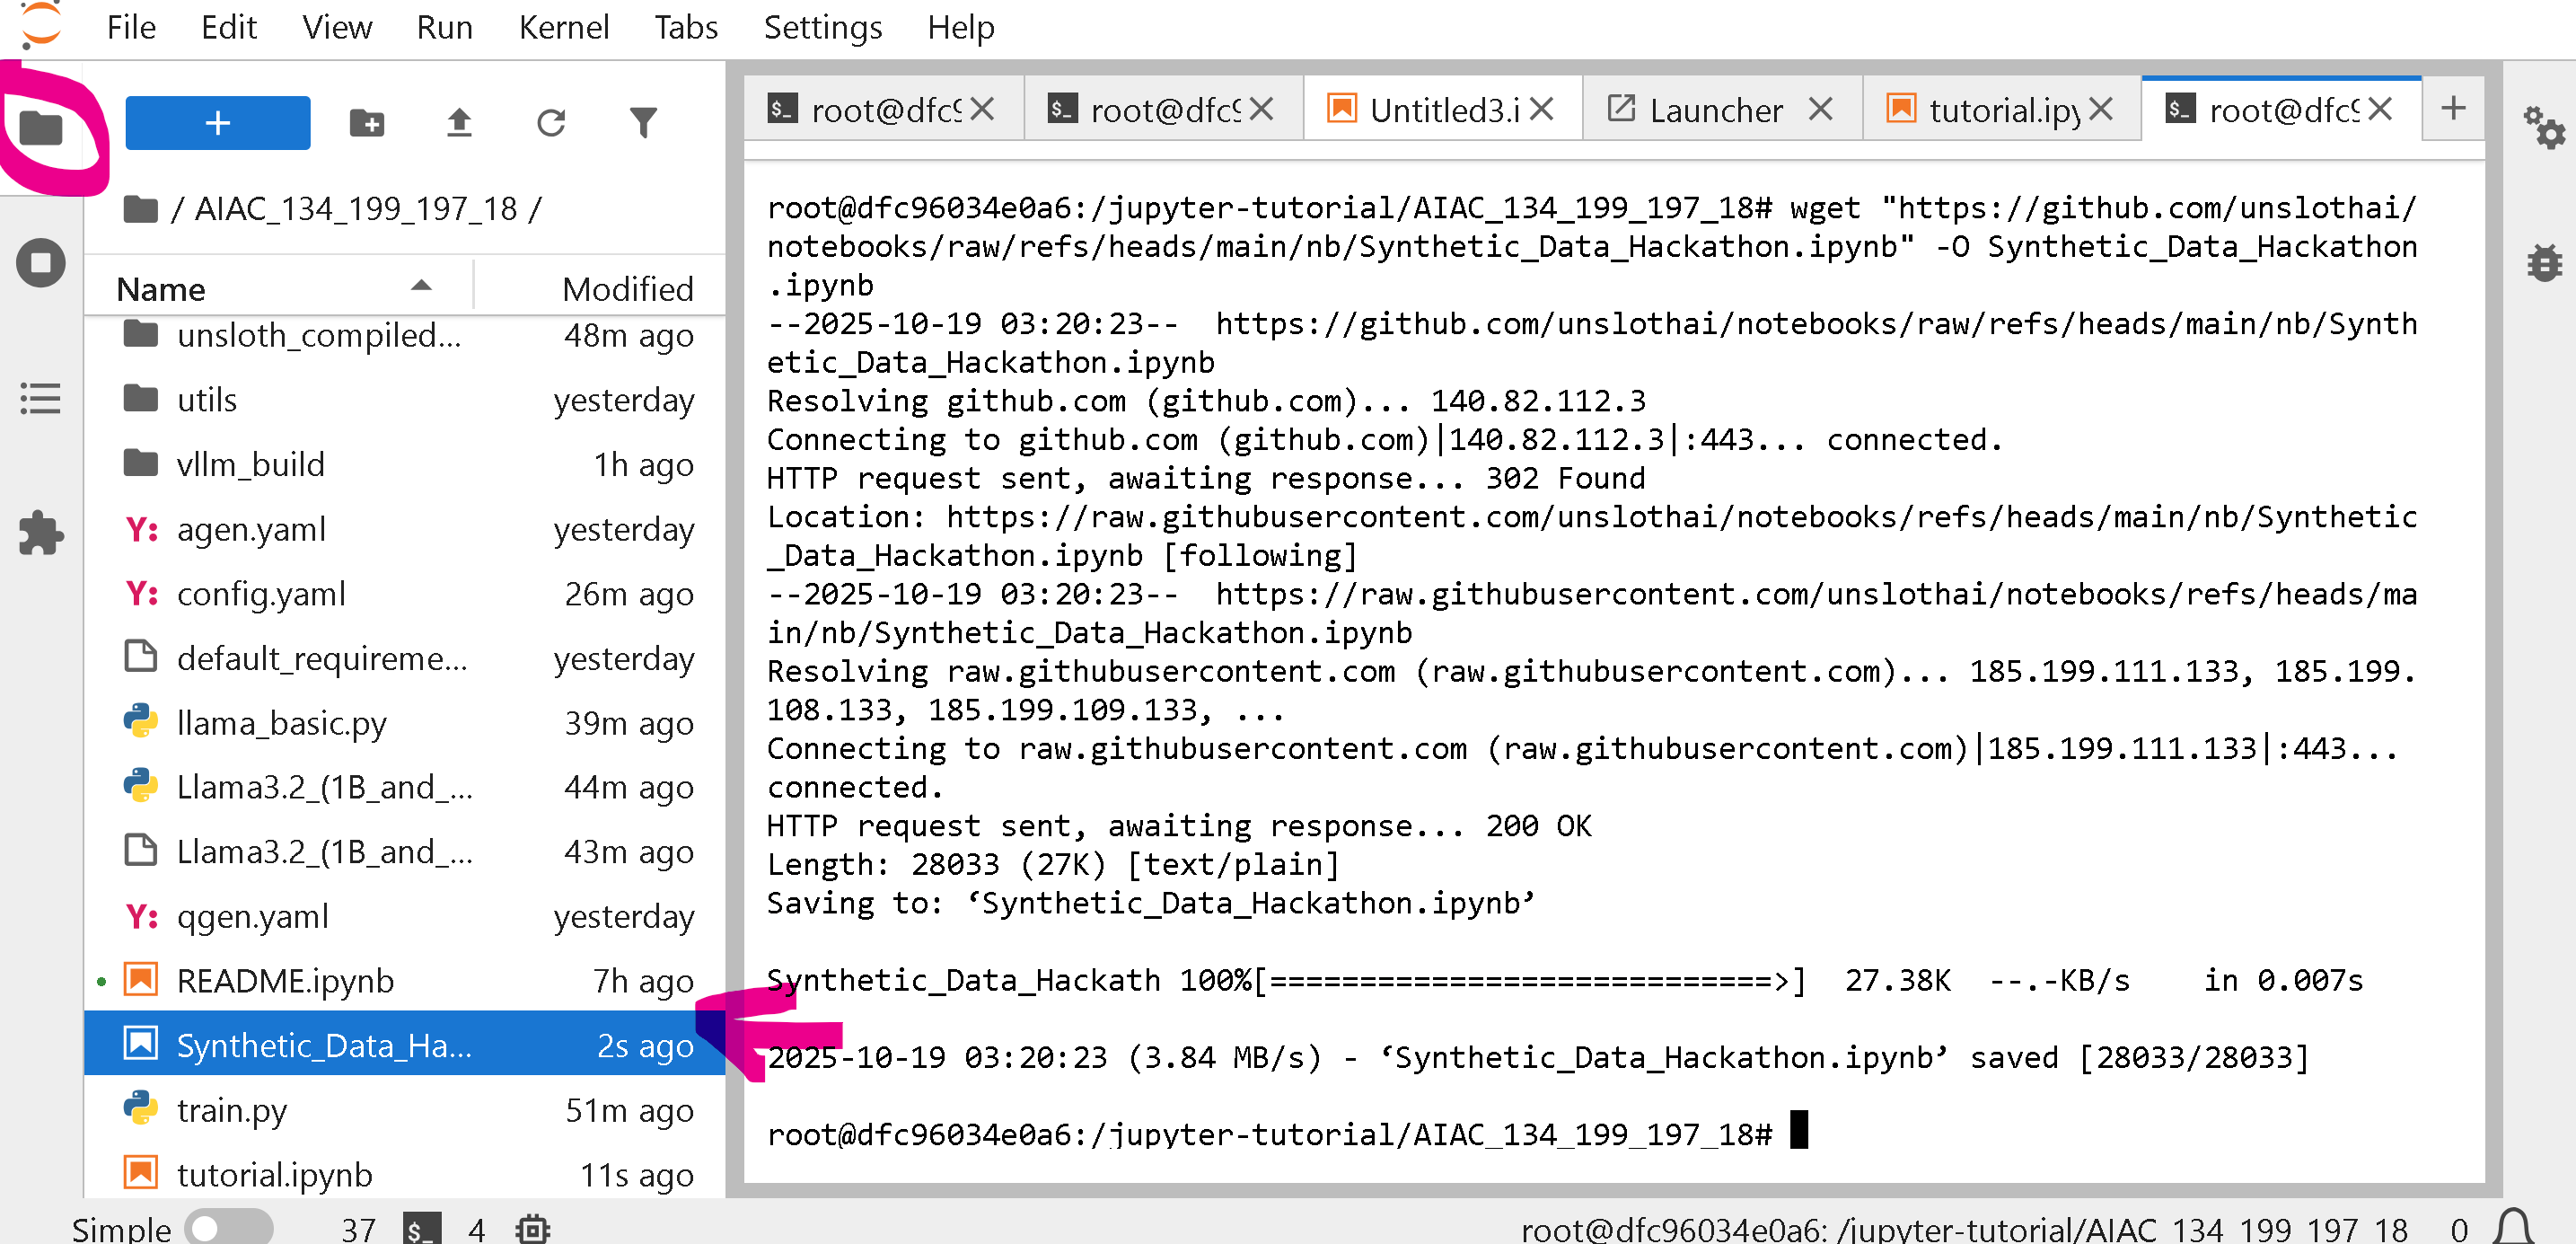 然后运行全部!
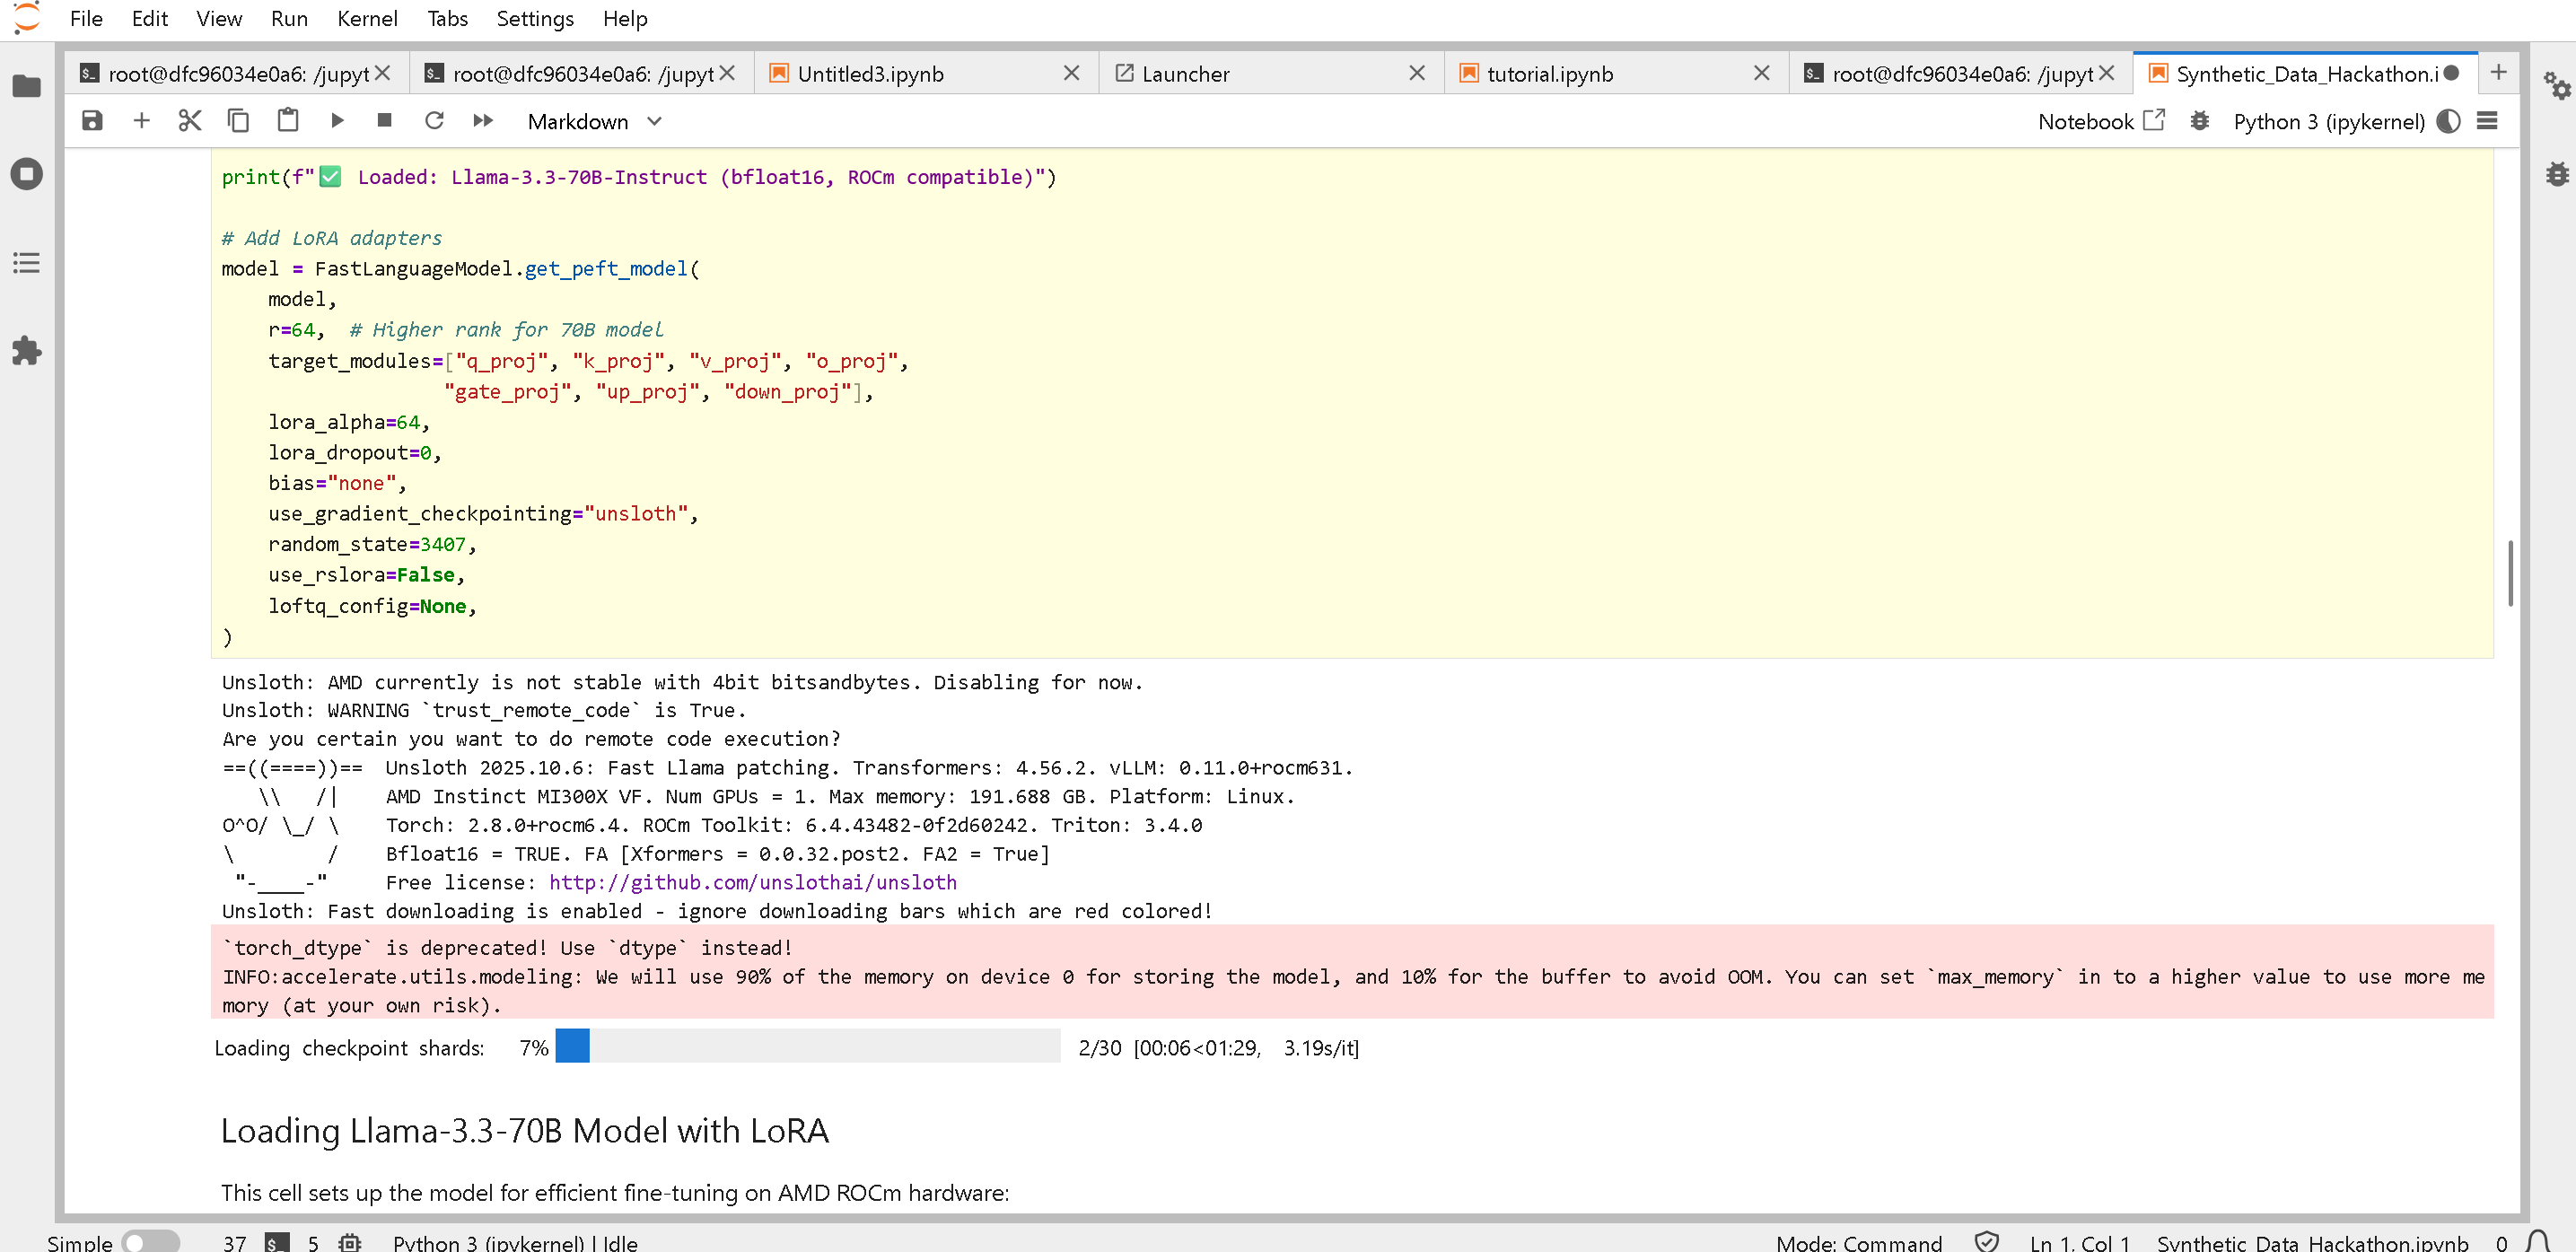
 你会在 notebook 中部看到:
 请看 了解更多细节
### :dolphin:教程 3:GPT-OSS 强化学习自动内核创建
你可以作为 notebook 运行,也可以通过 Python 脚本运行!
Python 脚本:
Notebook:
{% code overflow="wrap" %}
```bash
wget "https://raw.githubusercontent.com/unslothai/notebooks/refs/heads/main/nb/gpt_oss_(20B)_GRPO_BF16.ipynb" -O "Auto_Kernels_RL.ipynb"
```
{% endcode %}
然后像教程 2 一样,打开文件 "Auto\_Kernels\_RL.ipynb",重启并运行全部!
请看 了解更多细节
### :dolphin:教程 3:GPT-OSS 强化学习自动内核创建
你可以作为 notebook 运行,也可以通过 Python 脚本运行!
Python 脚本:
Notebook:
{% code overflow="wrap" %}
```bash
wget "https://raw.githubusercontent.com/unslothai/notebooks/refs/heads/main/nb/gpt_oss_(20B)_GRPO_BF16.ipynb" -O "Auto_Kernels_RL.ipynb"
```
{% endcode %}
然后像教程 2 一样,打开文件 "Auto\_Kernels\_RL.ipynb",重启并运行全部!
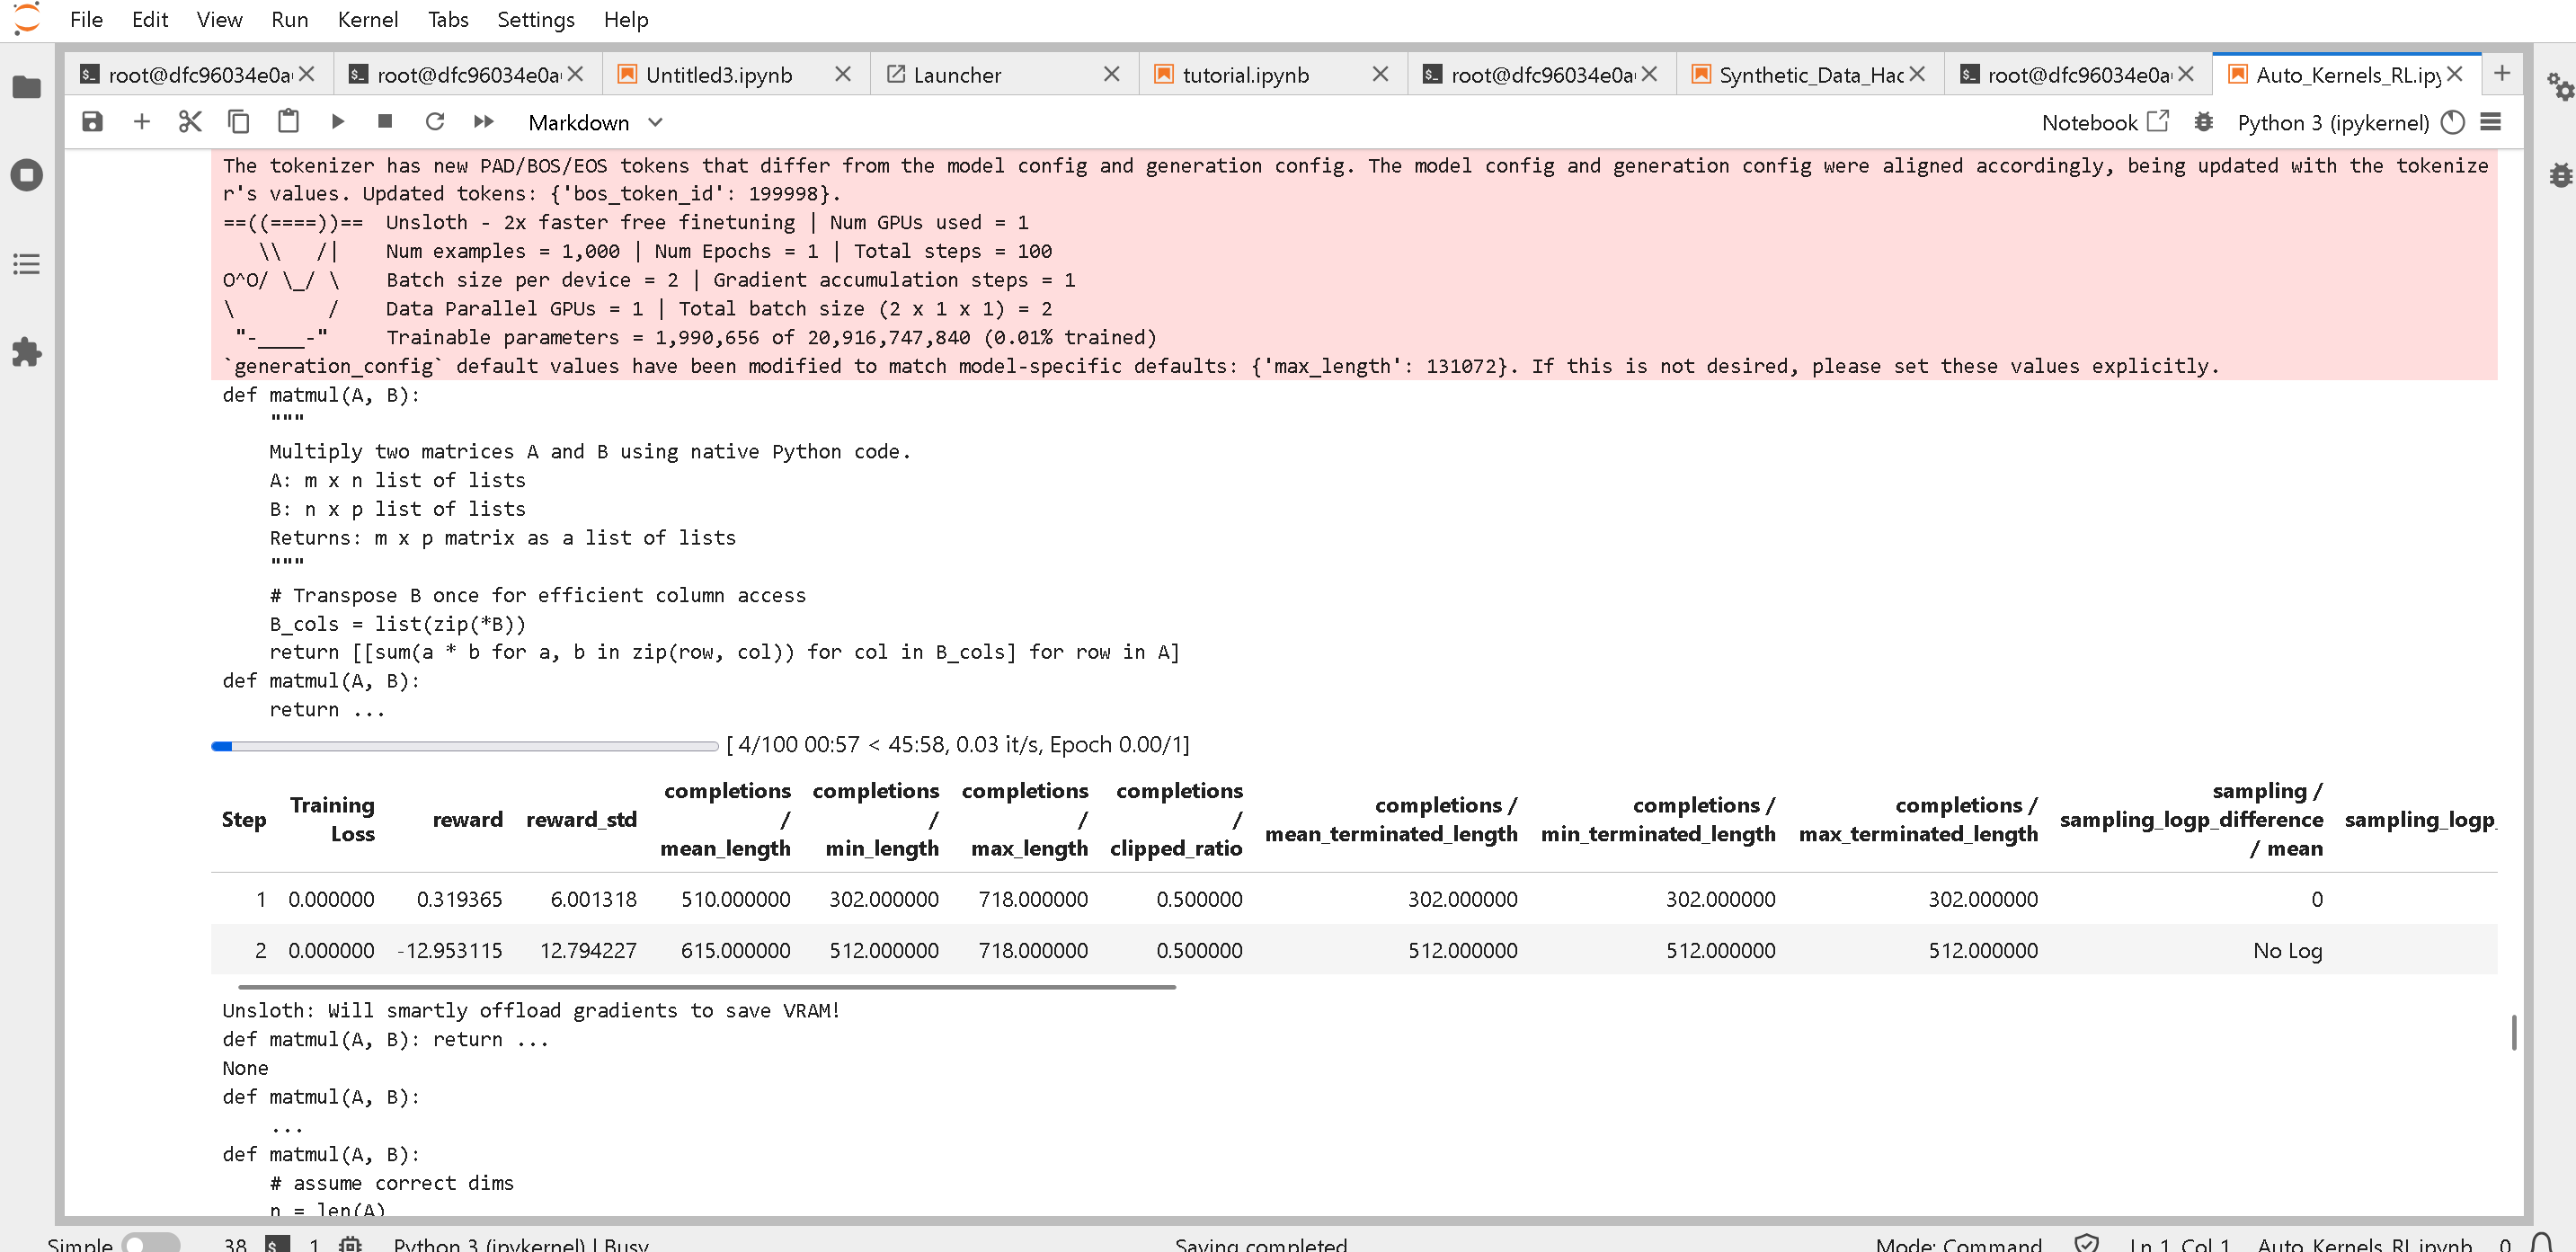
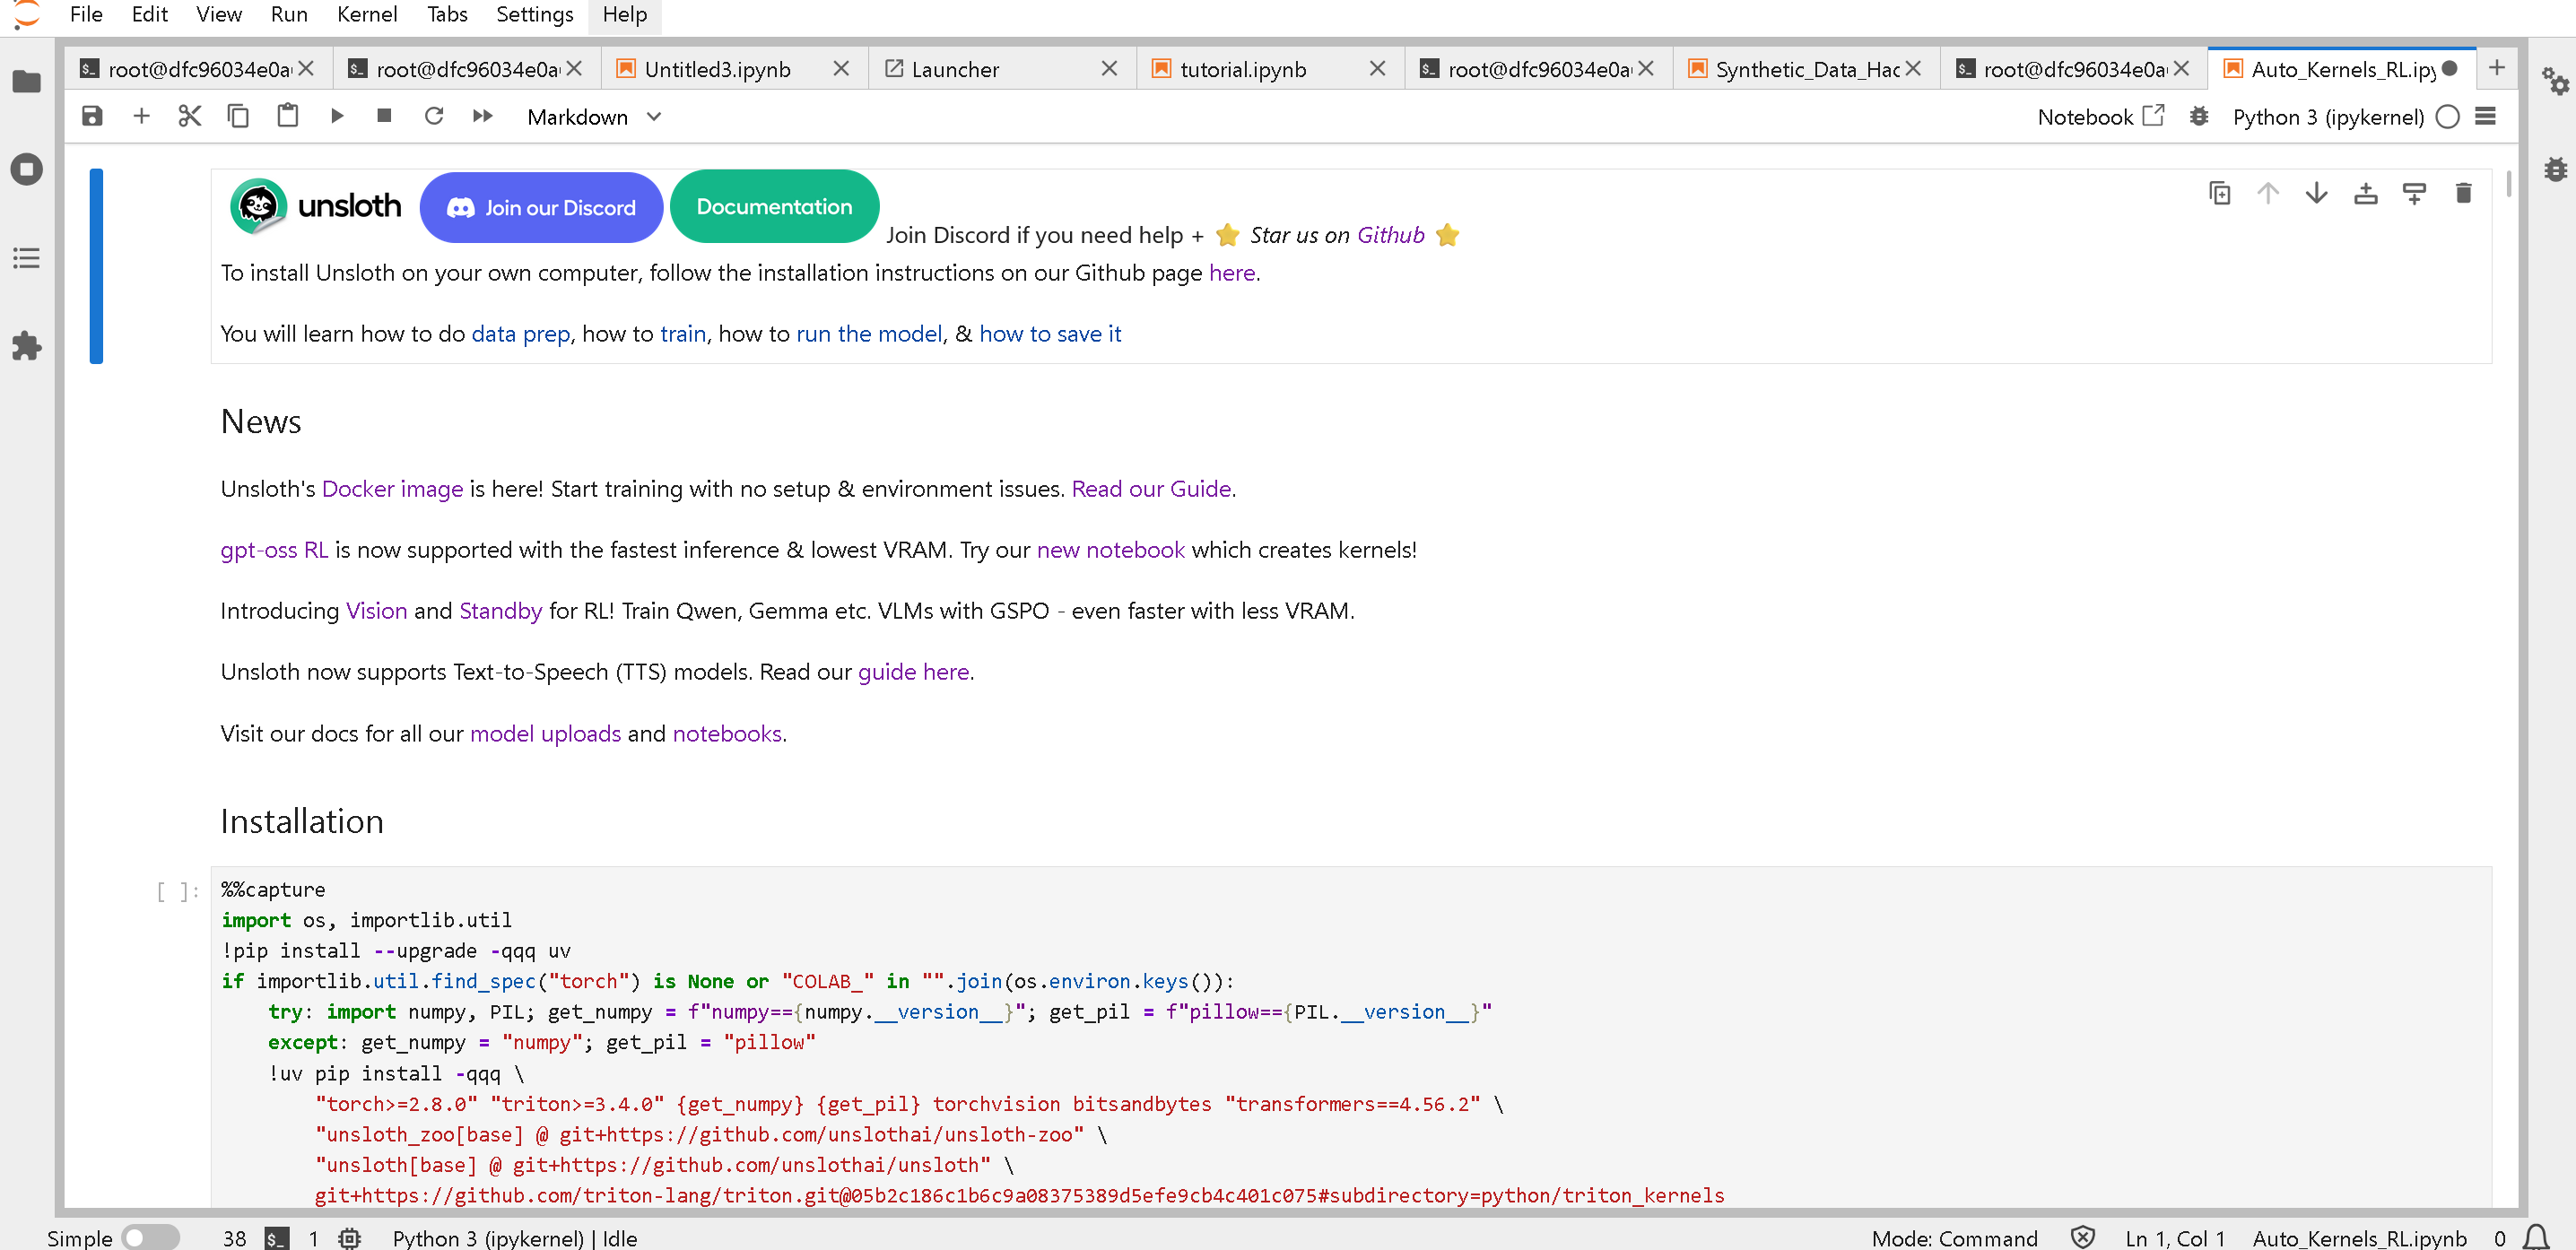 如果你运行它并向下滚动,你会看到通过 RL 自动生成策略来运行 2048 游戏:
 ### :diamonds:教程 4:GPT-OSS 强化学习 2048 游戏
你可以作为 notebook 运行,也可以通过 Python 脚本运行!
Python 脚本:
Notebook:
{% code overflow="wrap" %}
```bash
wget "https://github.com/unslothai/notebooks/raw/refs/heads/main/nb/gpt_oss_(20B)_Reinforcement_Learning_2048_Game_BF16.ipynb" -O "RL_2048_Game.ipynb"
```
{% endcode %}
然后像教程 3 一样,打开文件 "Auto\_Kernels\_RL.ipynb",重启并运行全部!
### :diamonds:教程 4:GPT-OSS 强化学习 2048 游戏
你可以作为 notebook 运行,也可以通过 Python 脚本运行!
Python 脚本:
Notebook:
{% code overflow="wrap" %}
```bash
wget "https://github.com/unslothai/notebooks/raw/refs/heads/main/nb/gpt_oss_(20B)_Reinforcement_Learning_2048_Game_BF16.ipynb" -O "RL_2048_Game.ipynb"
```
{% endcode %}
然后像教程 3 一样,打开文件 "Auto\_Kernels\_RL.ipynb",重启并运行全部!
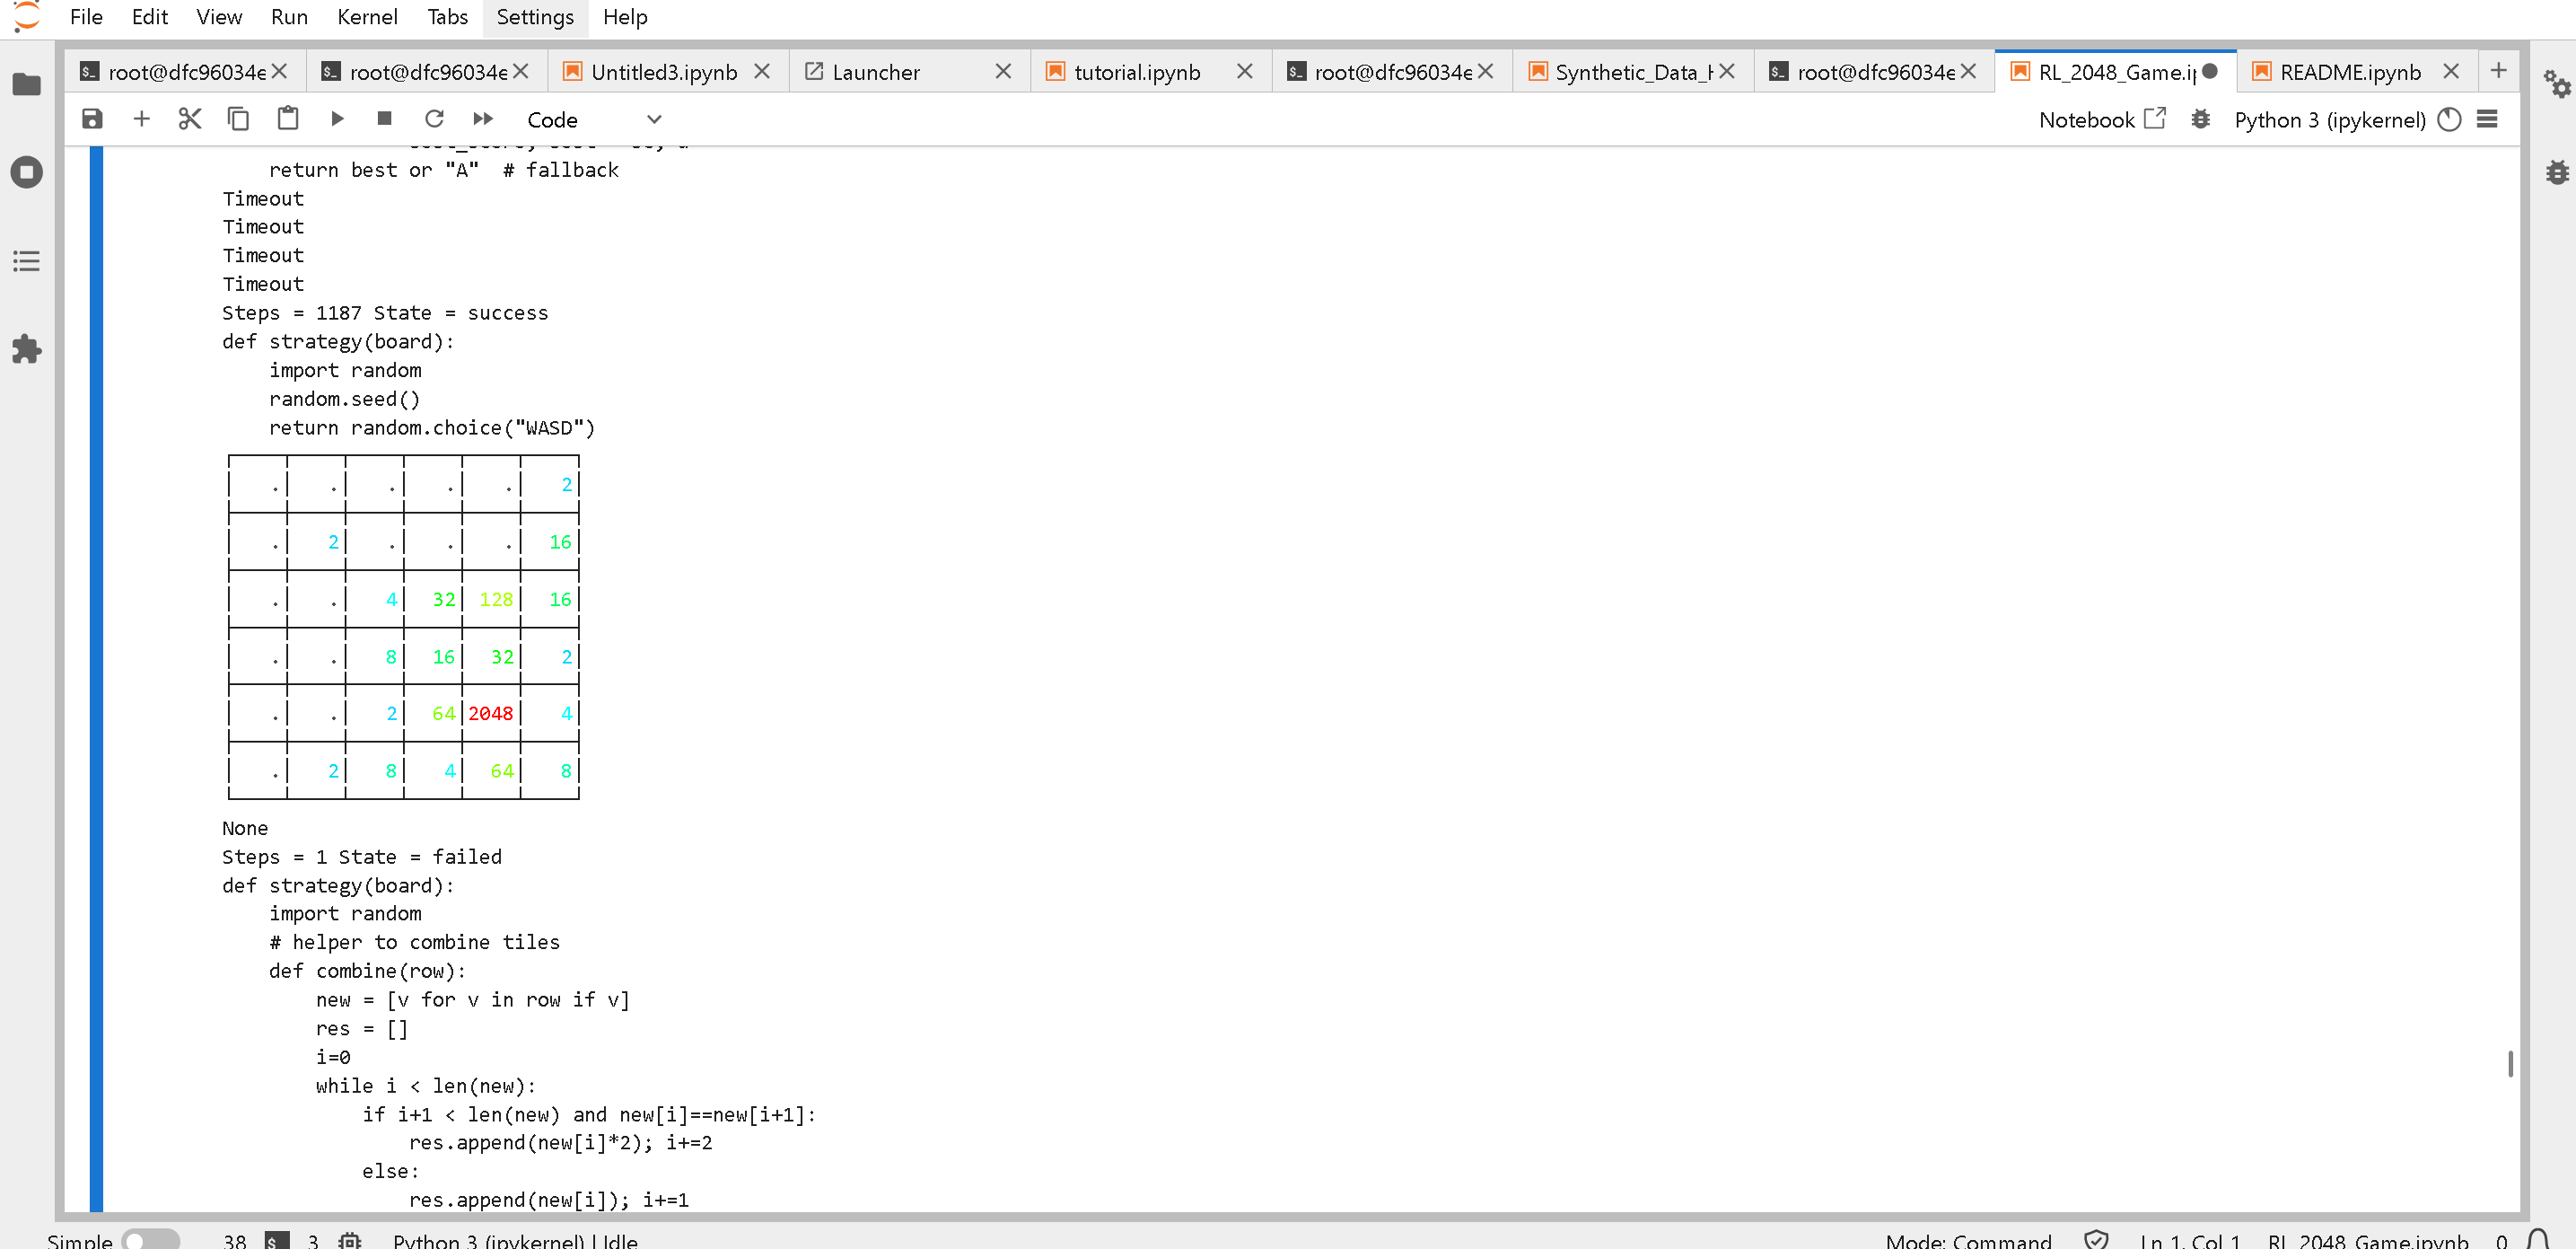
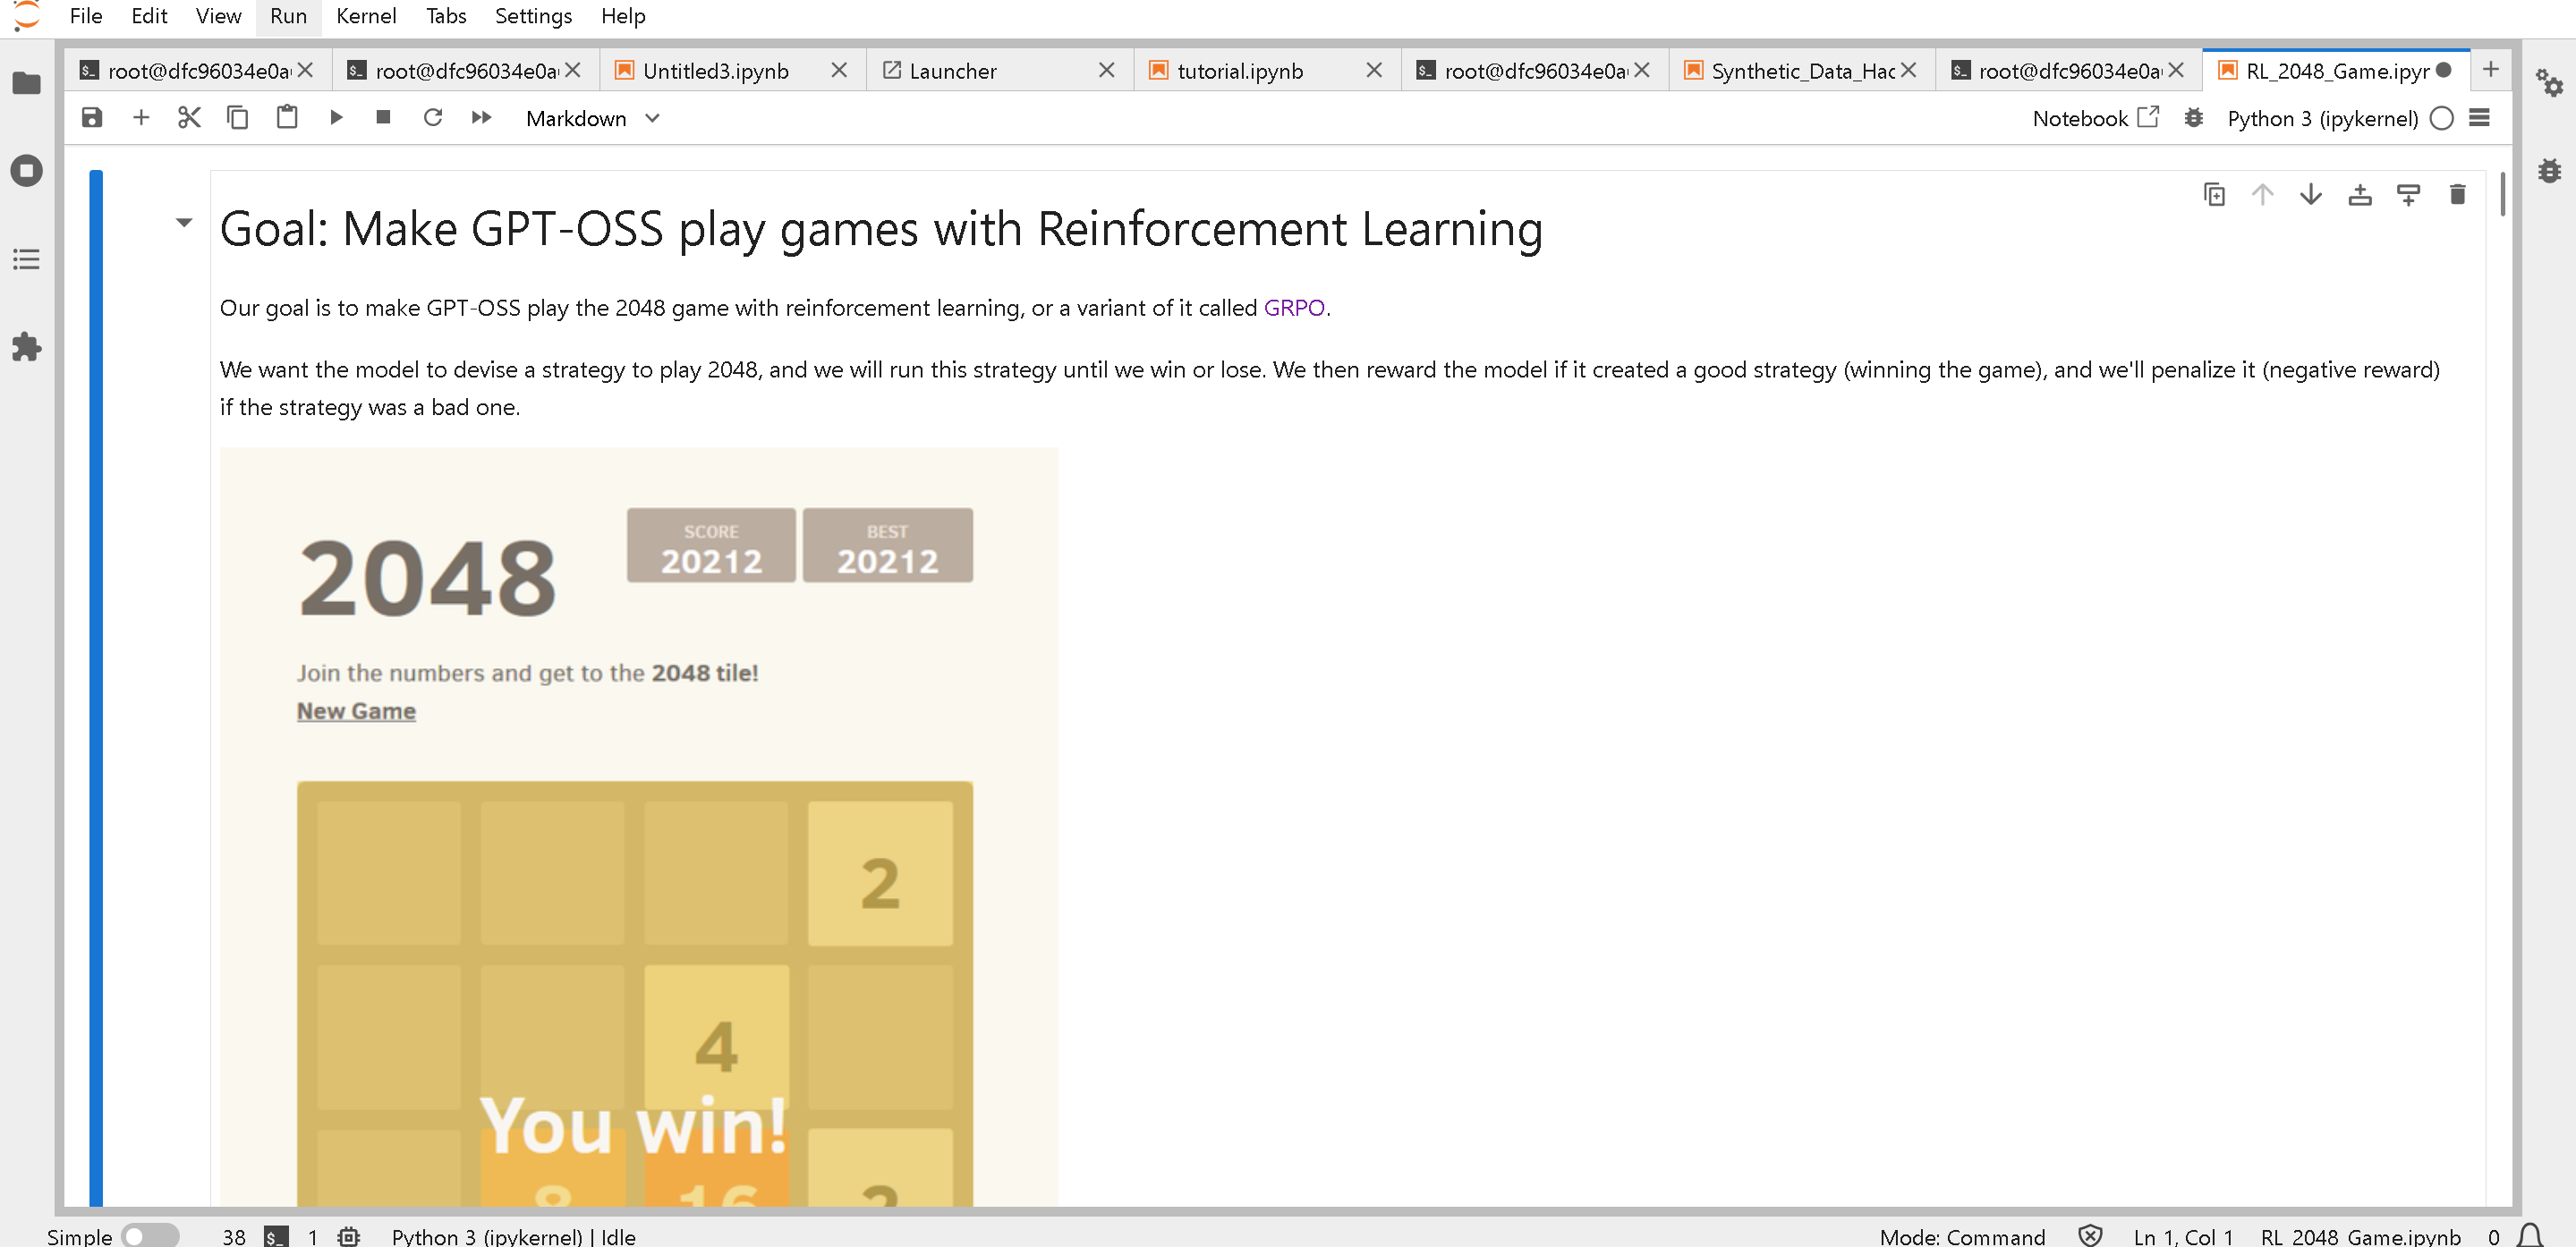 当你向下滚动时,你会看到 RL 算法自动创建策略来赢得 2048!
 ### :sunflower:AMD 上最优的 vLLM 命令
要在 AMD GPU 上提供模型服务,请使用以下命令,它们将提升性能。请确认已安装 aiter 和 flash-attention,或查看 [#updating-vllm-to-the-latest-on-amd](#updating-vllm-to-the-latest-on-amd "mention")
对于 MI300X、MI325X 和 Radeon GPU:
```bash
export VLLM_ROCM_USE_AITER=1
# 只有在安装了 Flash Attention 时,VLLM_USE_AITER_UNIFIED_ATTENTION 才有效
export VLLM_USE_AITER_UNIFIED_ATTENTION=0
export VLLM_ROCM_USE_AITER_MHA=0
vllm serve unsloth/gpt-oss-20b \
--no-enable-prefix-caching \
--compilation-config '{"full_cuda_graph": true}'
```
对于 MI355X,请执行以下操作:
```bash
export VLLM_ROCM_USE_AITER=1
# 只有在安装了 Flash Attention 时,VLLM_USE_AITER_UNIFIED_ATTENTION 才有效
export VLLM_USE_AITER_UNIFIED_ATTENTION=0
export VLLM_ROCM_USE_AITER_MHA=0
export VLLM_USE_AITER_TRITON_FUSED_SPLIT_QKV_ROPE=1
export VLLM_USE_AITER_TRITON_FUSED_ADD_RMSNORM_PAD=1
export TRITON_HIP_PRESHUFFLE_SCALES=1
export VLLM_USE_AITER_TRITON_GEMM=1
vllm serve unsloth/gpt-oss-120b \
--no-enable-prefix-caching \
--compilation-config '{"compile_sizes": [1, 2, 4, 8, 16, 24, 32, 64, 128, 256, 4096, 8192], "full_cuda_graph": true}' \
--block-size 64
```
## :tools:故障排除和常见问题
### :free:如何释放 AMD GPU 内存?
如果你在 Docker 镜像上(例如 hackathon)运行,请在新的 **终端** `rocm-smi -d 0 --showpids` 如果是在本地机器上
```bash
# 列出本地已打开 /dev/kfd 或 /dev/dri/render* 的 PID
for p in /proc/[0-9]*; do
readlink -f "$p/fd"/* 2>/dev/null | grep -qE '/dev/(kfd|dri/render)' || continue
cmd=$(tr -d '\0' < "$p/cmdline" 2>/dev/null | sed 's/ \+/ /g')
printf "%-8s %s\n" "${p##*/}" "${cmd:-[unknown]}"
done | sort -n
```
如果是在本地机器上,直接执行 `rocm-smi -d 0 --showpids` 并运行 `sudo kill -9 XXXX` 其中 `XXXX` 是该特定进程所列出的 PID,该进程使用了最多的 VRAM。
### :sunflower:AMD 上最优的 vLLM 命令
要在 AMD GPU 上提供模型服务,请使用以下命令,它们将提升性能。请确认已安装 aiter 和 flash-attention,或查看 [#updating-vllm-to-the-latest-on-amd](#updating-vllm-to-the-latest-on-amd "mention")
对于 MI300X、MI325X 和 Radeon GPU:
```bash
export VLLM_ROCM_USE_AITER=1
# 只有在安装了 Flash Attention 时,VLLM_USE_AITER_UNIFIED_ATTENTION 才有效
export VLLM_USE_AITER_UNIFIED_ATTENTION=0
export VLLM_ROCM_USE_AITER_MHA=0
vllm serve unsloth/gpt-oss-20b \
--no-enable-prefix-caching \
--compilation-config '{"full_cuda_graph": true}'
```
对于 MI355X,请执行以下操作:
```bash
export VLLM_ROCM_USE_AITER=1
# 只有在安装了 Flash Attention 时,VLLM_USE_AITER_UNIFIED_ATTENTION 才有效
export VLLM_USE_AITER_UNIFIED_ATTENTION=0
export VLLM_ROCM_USE_AITER_MHA=0
export VLLM_USE_AITER_TRITON_FUSED_SPLIT_QKV_ROPE=1
export VLLM_USE_AITER_TRITON_FUSED_ADD_RMSNORM_PAD=1
export TRITON_HIP_PRESHUFFLE_SCALES=1
export VLLM_USE_AITER_TRITON_GEMM=1
vllm serve unsloth/gpt-oss-120b \
--no-enable-prefix-caching \
--compilation-config '{"compile_sizes": [1, 2, 4, 8, 16, 24, 32, 64, 128, 256, 4096, 8192], "full_cuda_graph": true}' \
--block-size 64
```
## :tools:故障排除和常见问题
### :free:如何释放 AMD GPU 内存?
如果你在 Docker 镜像上(例如 hackathon)运行,请在新的 **终端** `rocm-smi -d 0 --showpids` 如果是在本地机器上
```bash
# 列出本地已打开 /dev/kfd 或 /dev/dri/render* 的 PID
for p in /proc/[0-9]*; do
readlink -f "$p/fd"/* 2>/dev/null | grep -qE '/dev/(kfd|dri/render)' || continue
cmd=$(tr -d '\0' < "$p/cmdline" 2>/dev/null | sed 's/ \+/ /g')
printf "%-8s %s\n" "${p##*/}" "${cmd:-[unknown]}"
done | sort -n
```
如果是在本地机器上,直接执行 `rocm-smi -d 0 --showpids` 并运行 `sudo kill -9 XXXX` 其中 `XXXX` 是该特定进程所列出的 PID,该进程使用了最多的 VRAM。
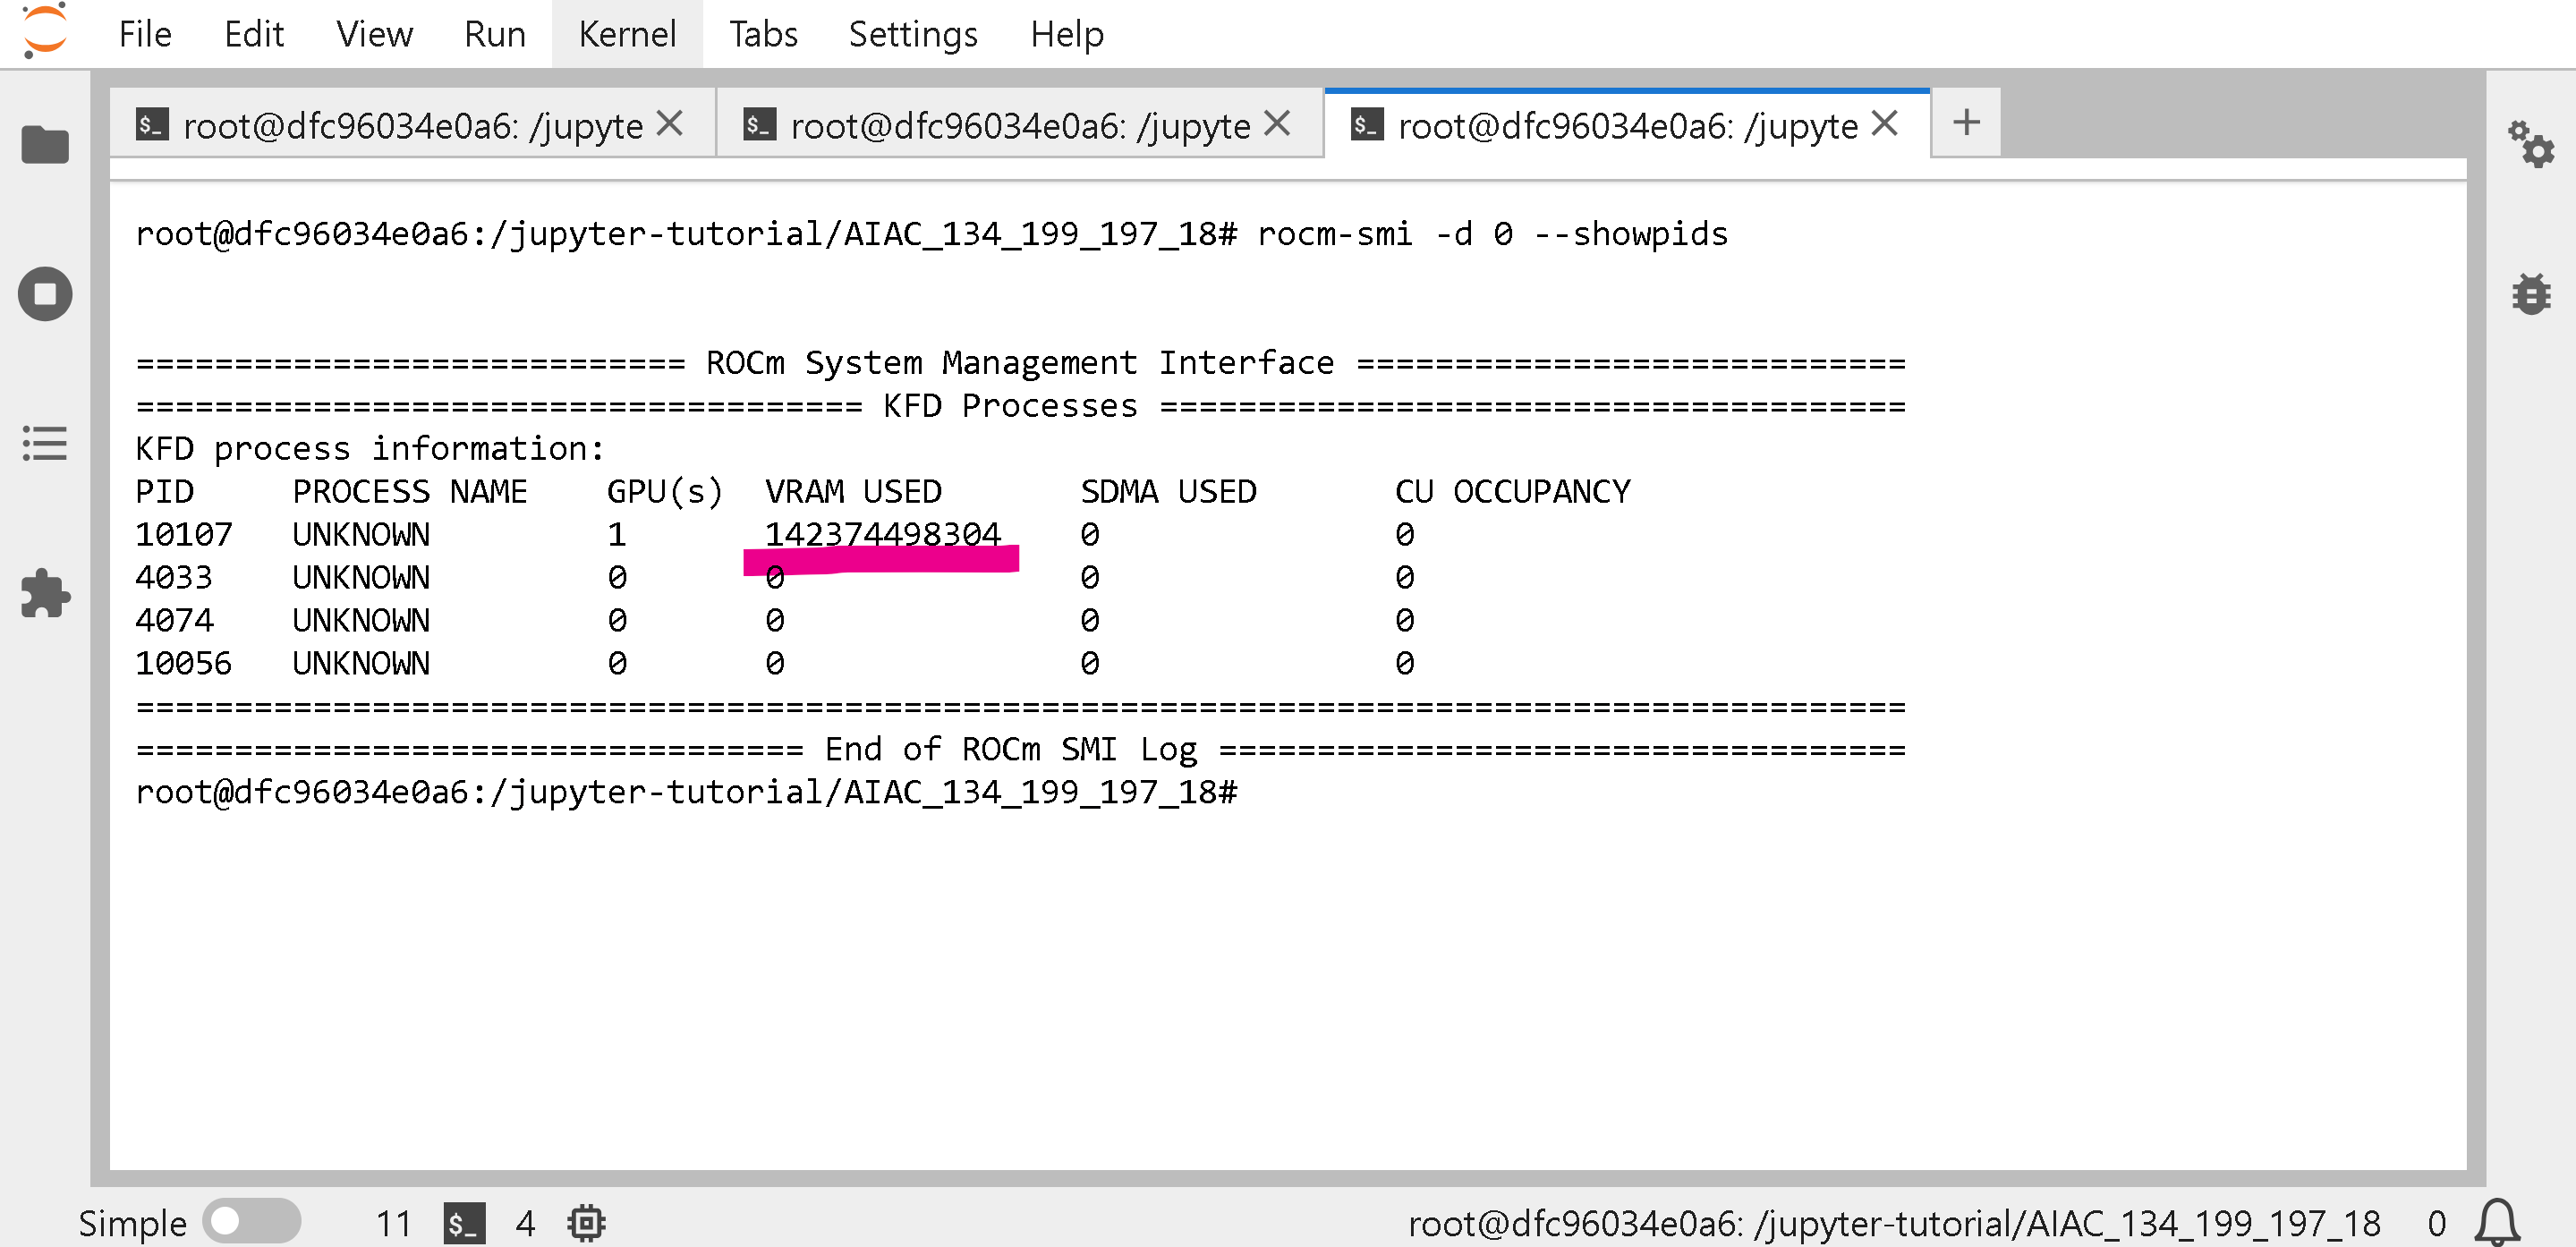 对于像 hackathon 中那样的 Docker 镜像,在运行第一个单元格后,你可能会看到如下内容:
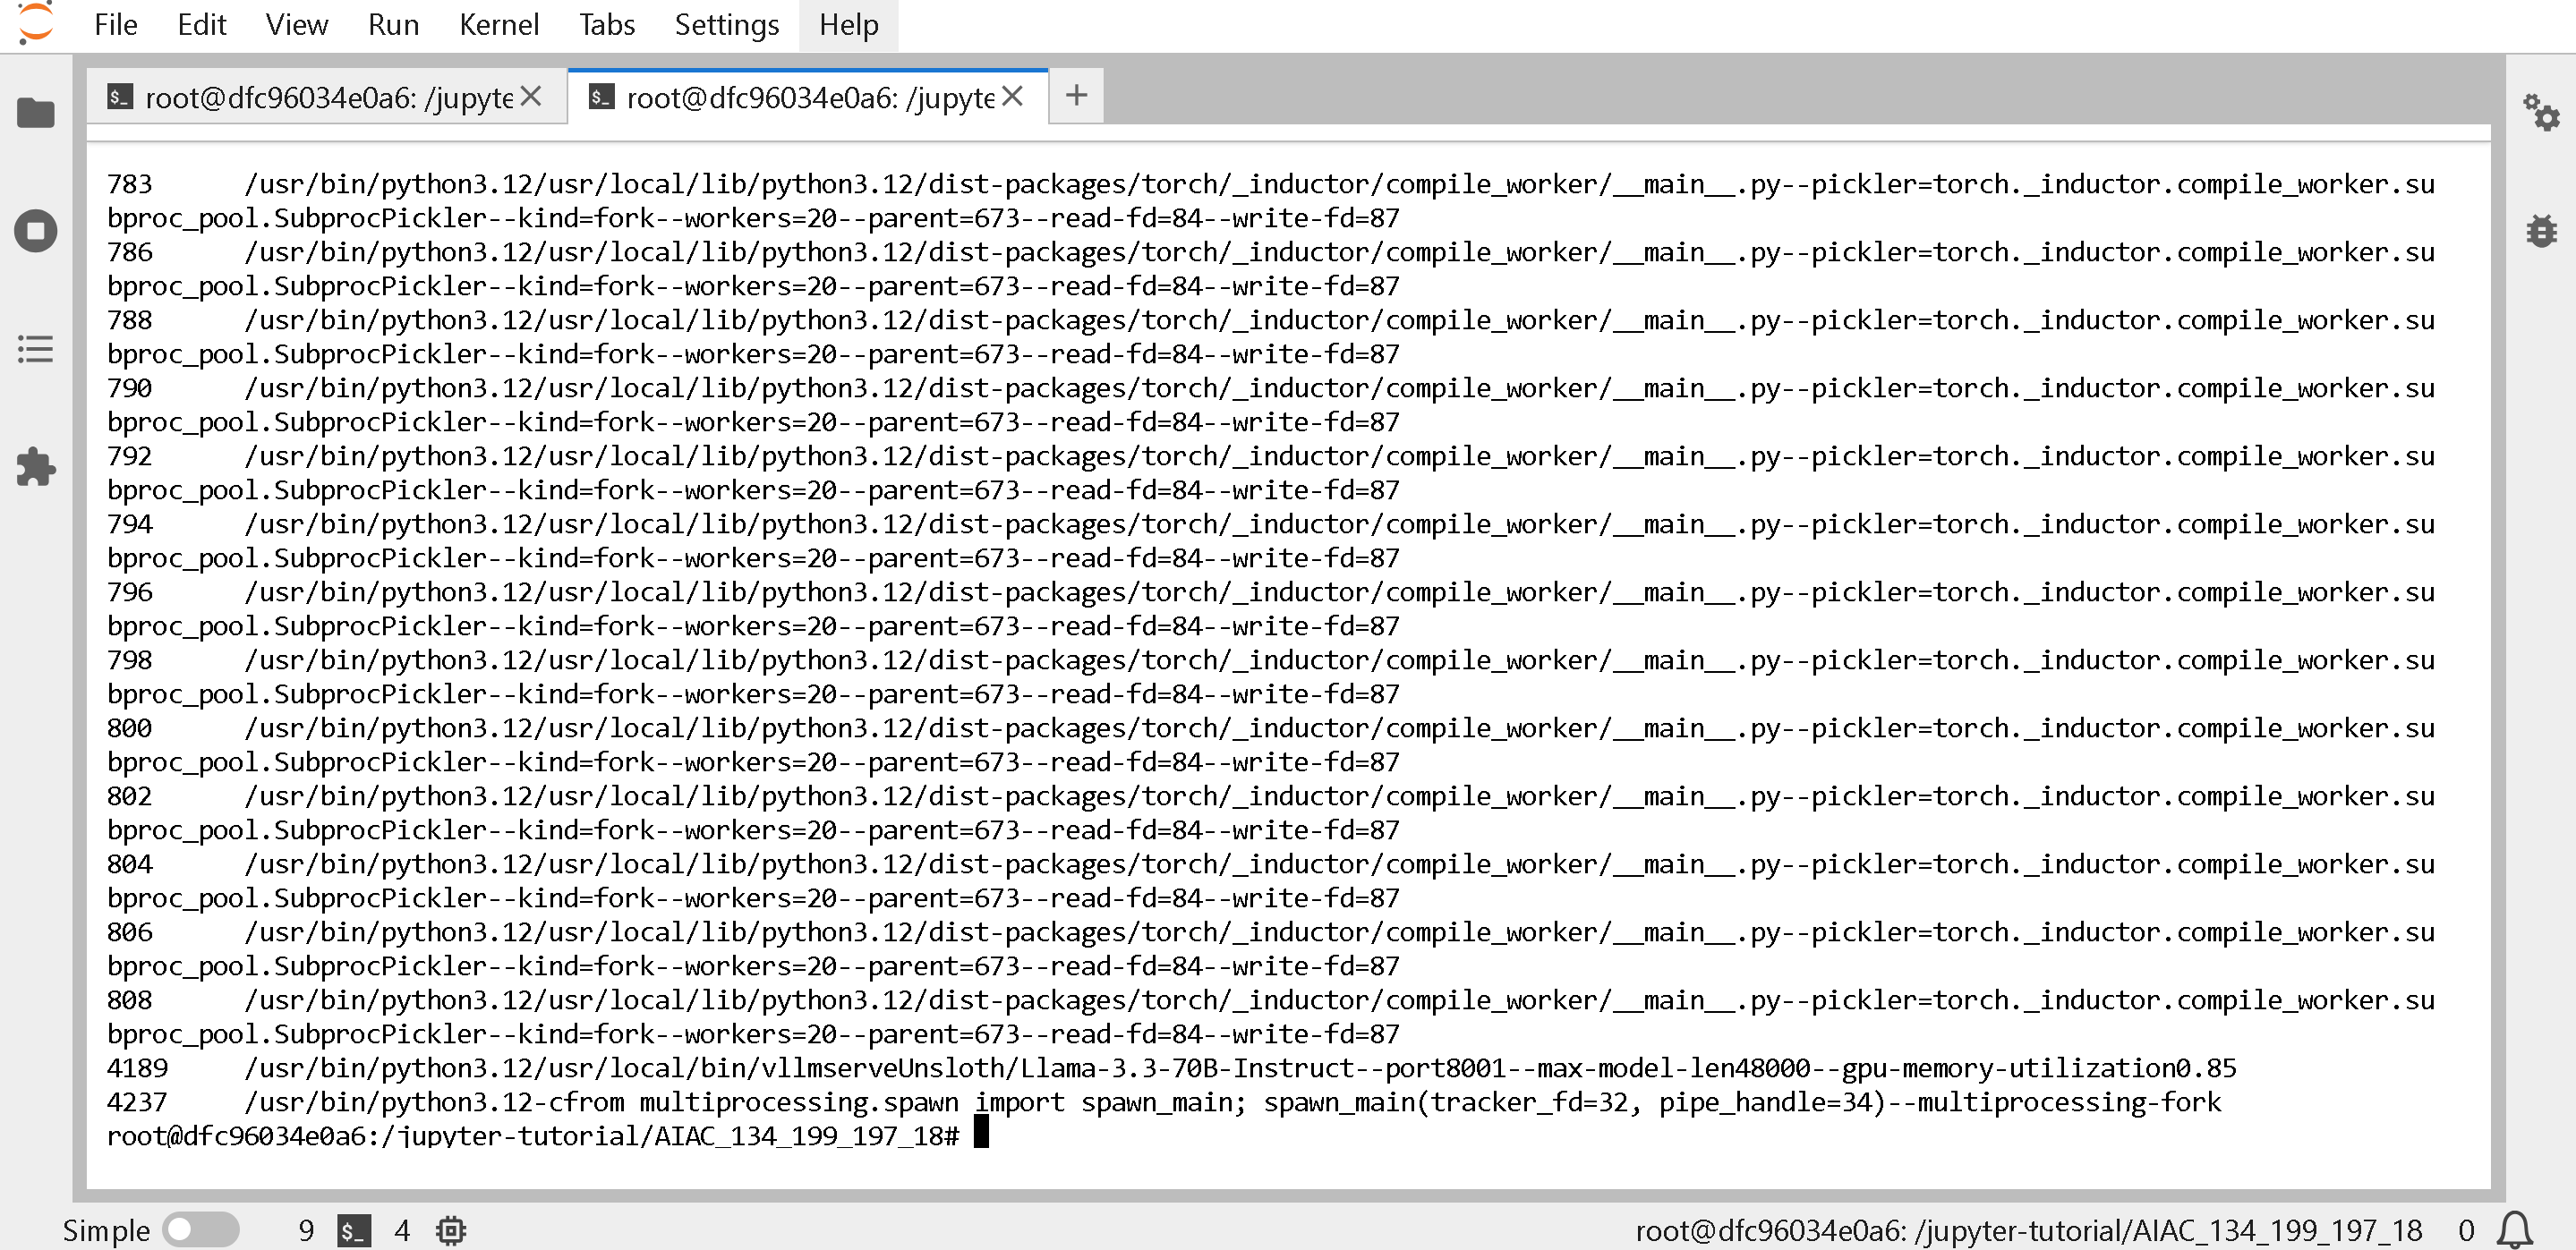 然后查找正在使用 VRAM 的进程(例如 vLLM),并输入 `sudo kill -9 XXXX` 其中 `XXXX` 是下图左侧列出的 PID:
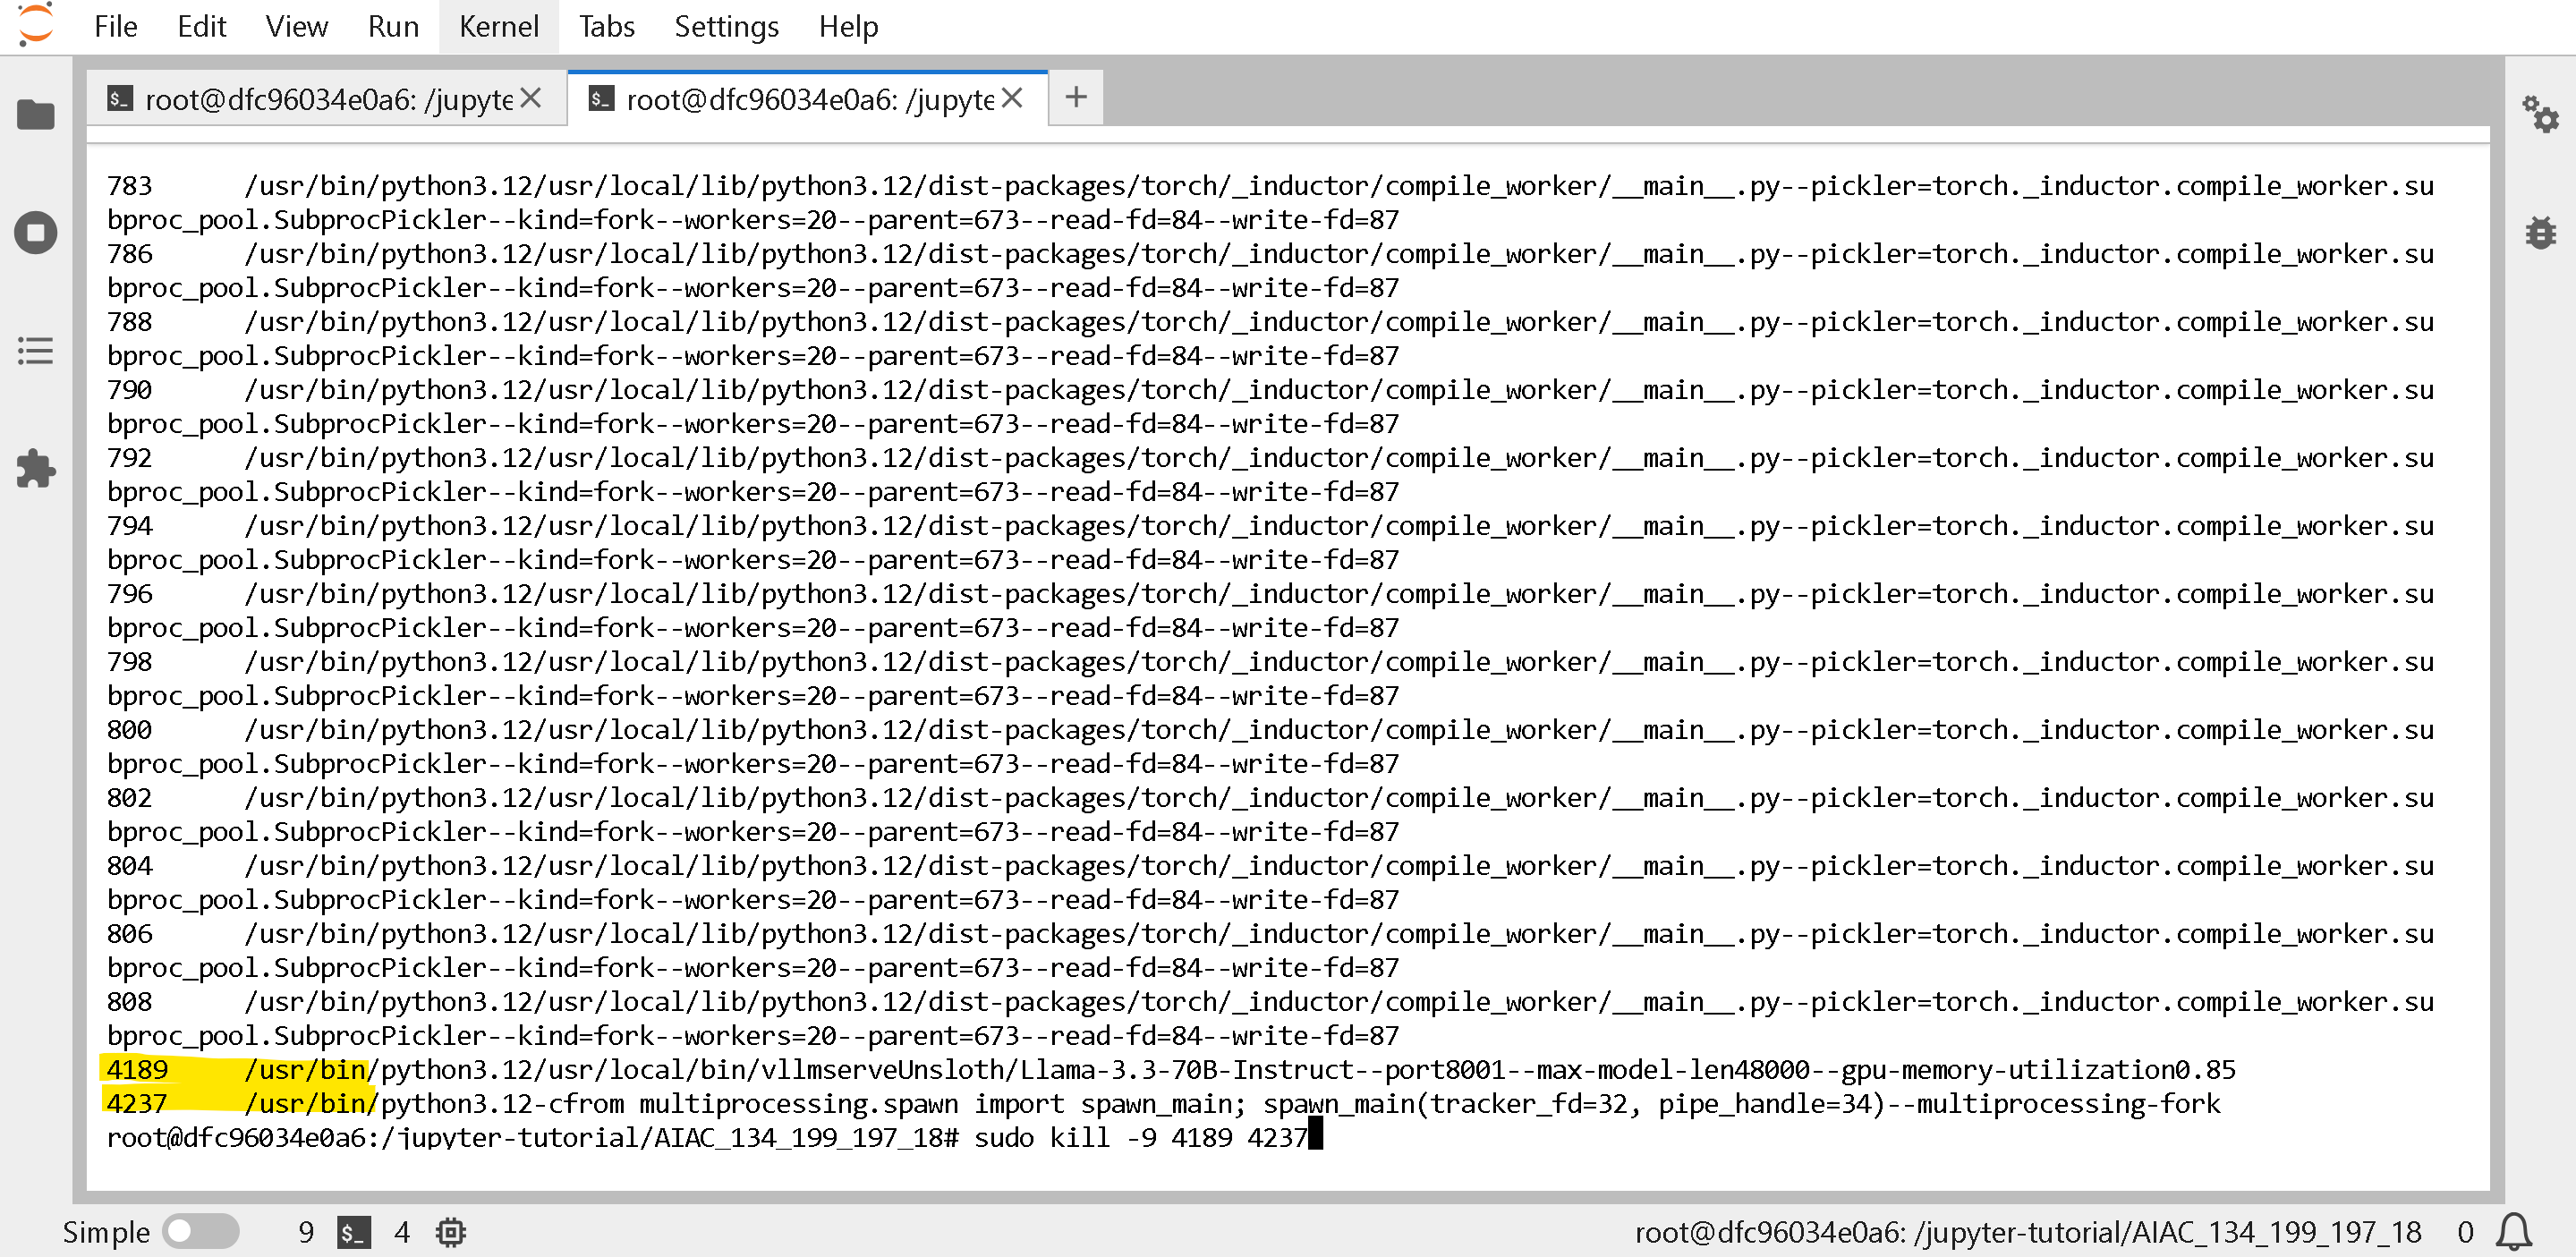 通过以下方式确认所有 GPU 内存已释放 `rocm-smi -d 0 --showpids` 例如下面显示内存使用为 0:
%20(1).png?alt=media) 如果你反而看到下面的情况,那么请重新运行第一个 Docker 单元格以再次终止该进程。
如果你反而看到下面的情况,那么请重新运行第一个 Docker 单元格以再次终止该进程。
%20(1).png?alt=media) ### :pencil:torch.OutOfMemoryError: HIP out of memory RuntimeError: Engine process failed to start.
请参见 [#how-do-i-free-amd-gpu-memory](#how-do-i-free-amd-gpu-memory "mention") 用于检查你的 GPU 是否正在使用另一个进程的内存,并尝试删除那个正在使用内存的进程。
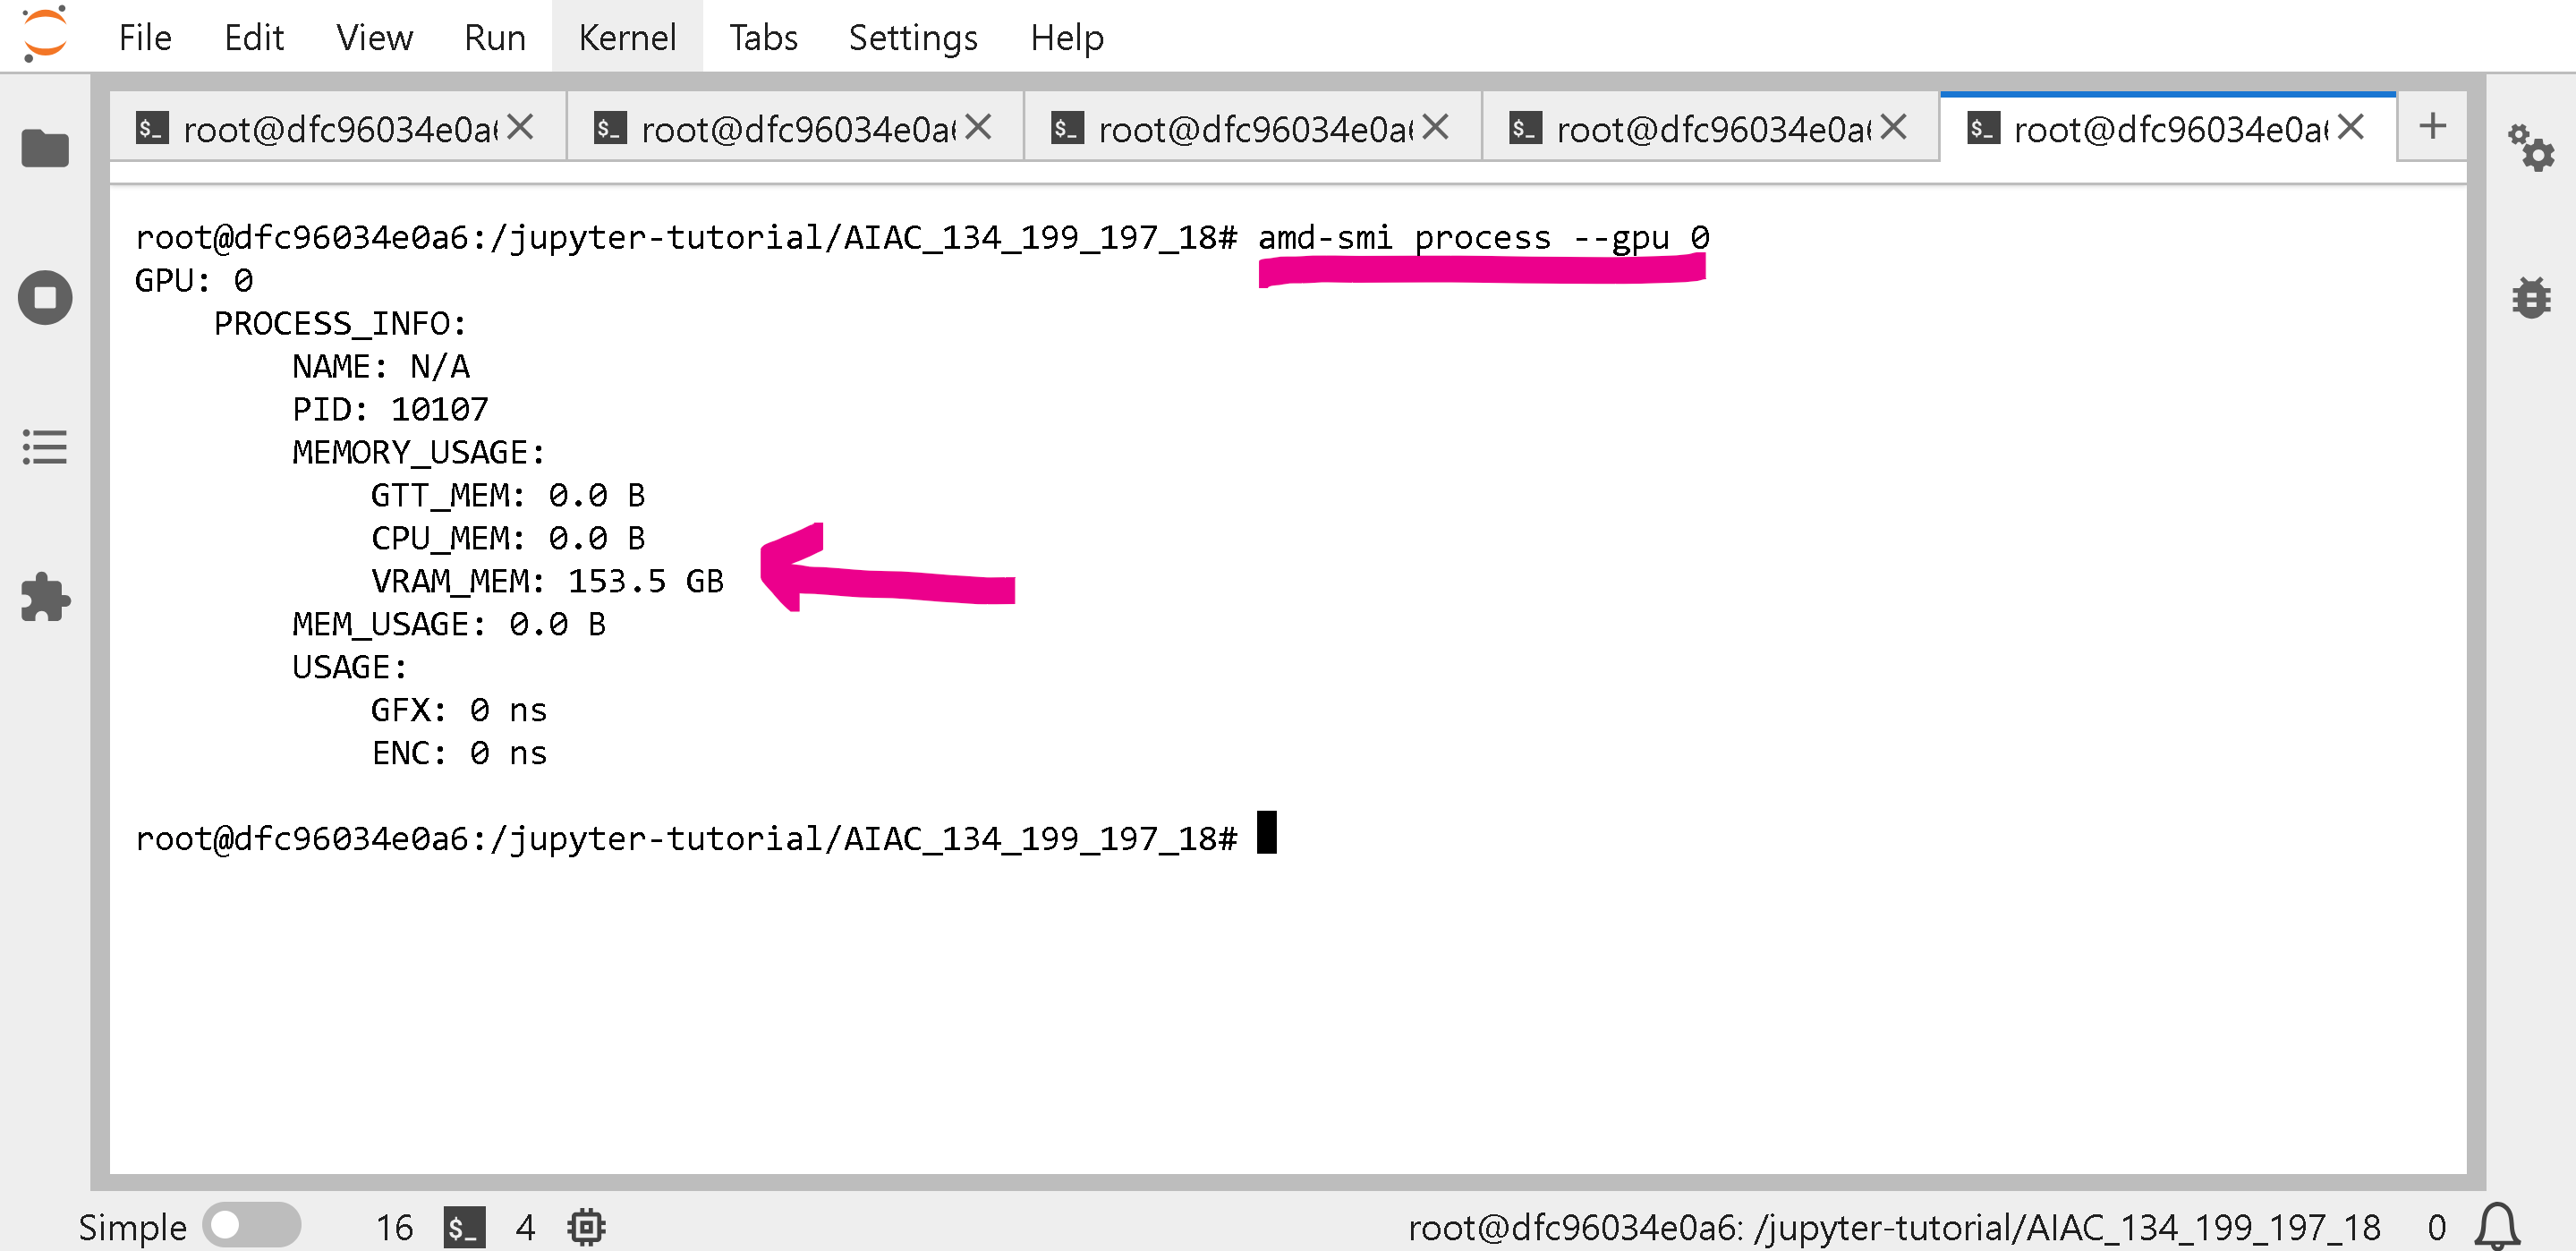
另外尝试 `amd-smi process --gpu 0` 以列出所有进程以及使用该 GPU 的所有进程的 VRAM 使用情况:
### :pencil:torch.OutOfMemoryError: HIP out of memory RuntimeError: Engine process failed to start.
请参见 [#how-do-i-free-amd-gpu-memory](#how-do-i-free-amd-gpu-memory "mention") 用于检查你的 GPU 是否正在使用另一个进程的内存,并尝试删除那个正在使用内存的进程。
另外尝试 `amd-smi process --gpu 0` 以列出所有进程以及使用该 GPU 的所有进程的 VRAM 使用情况:
 ### :arrow\_forward:未检测到 vLLM 平台,正在升级 vLLM,vLLM 上的 gpt-oss
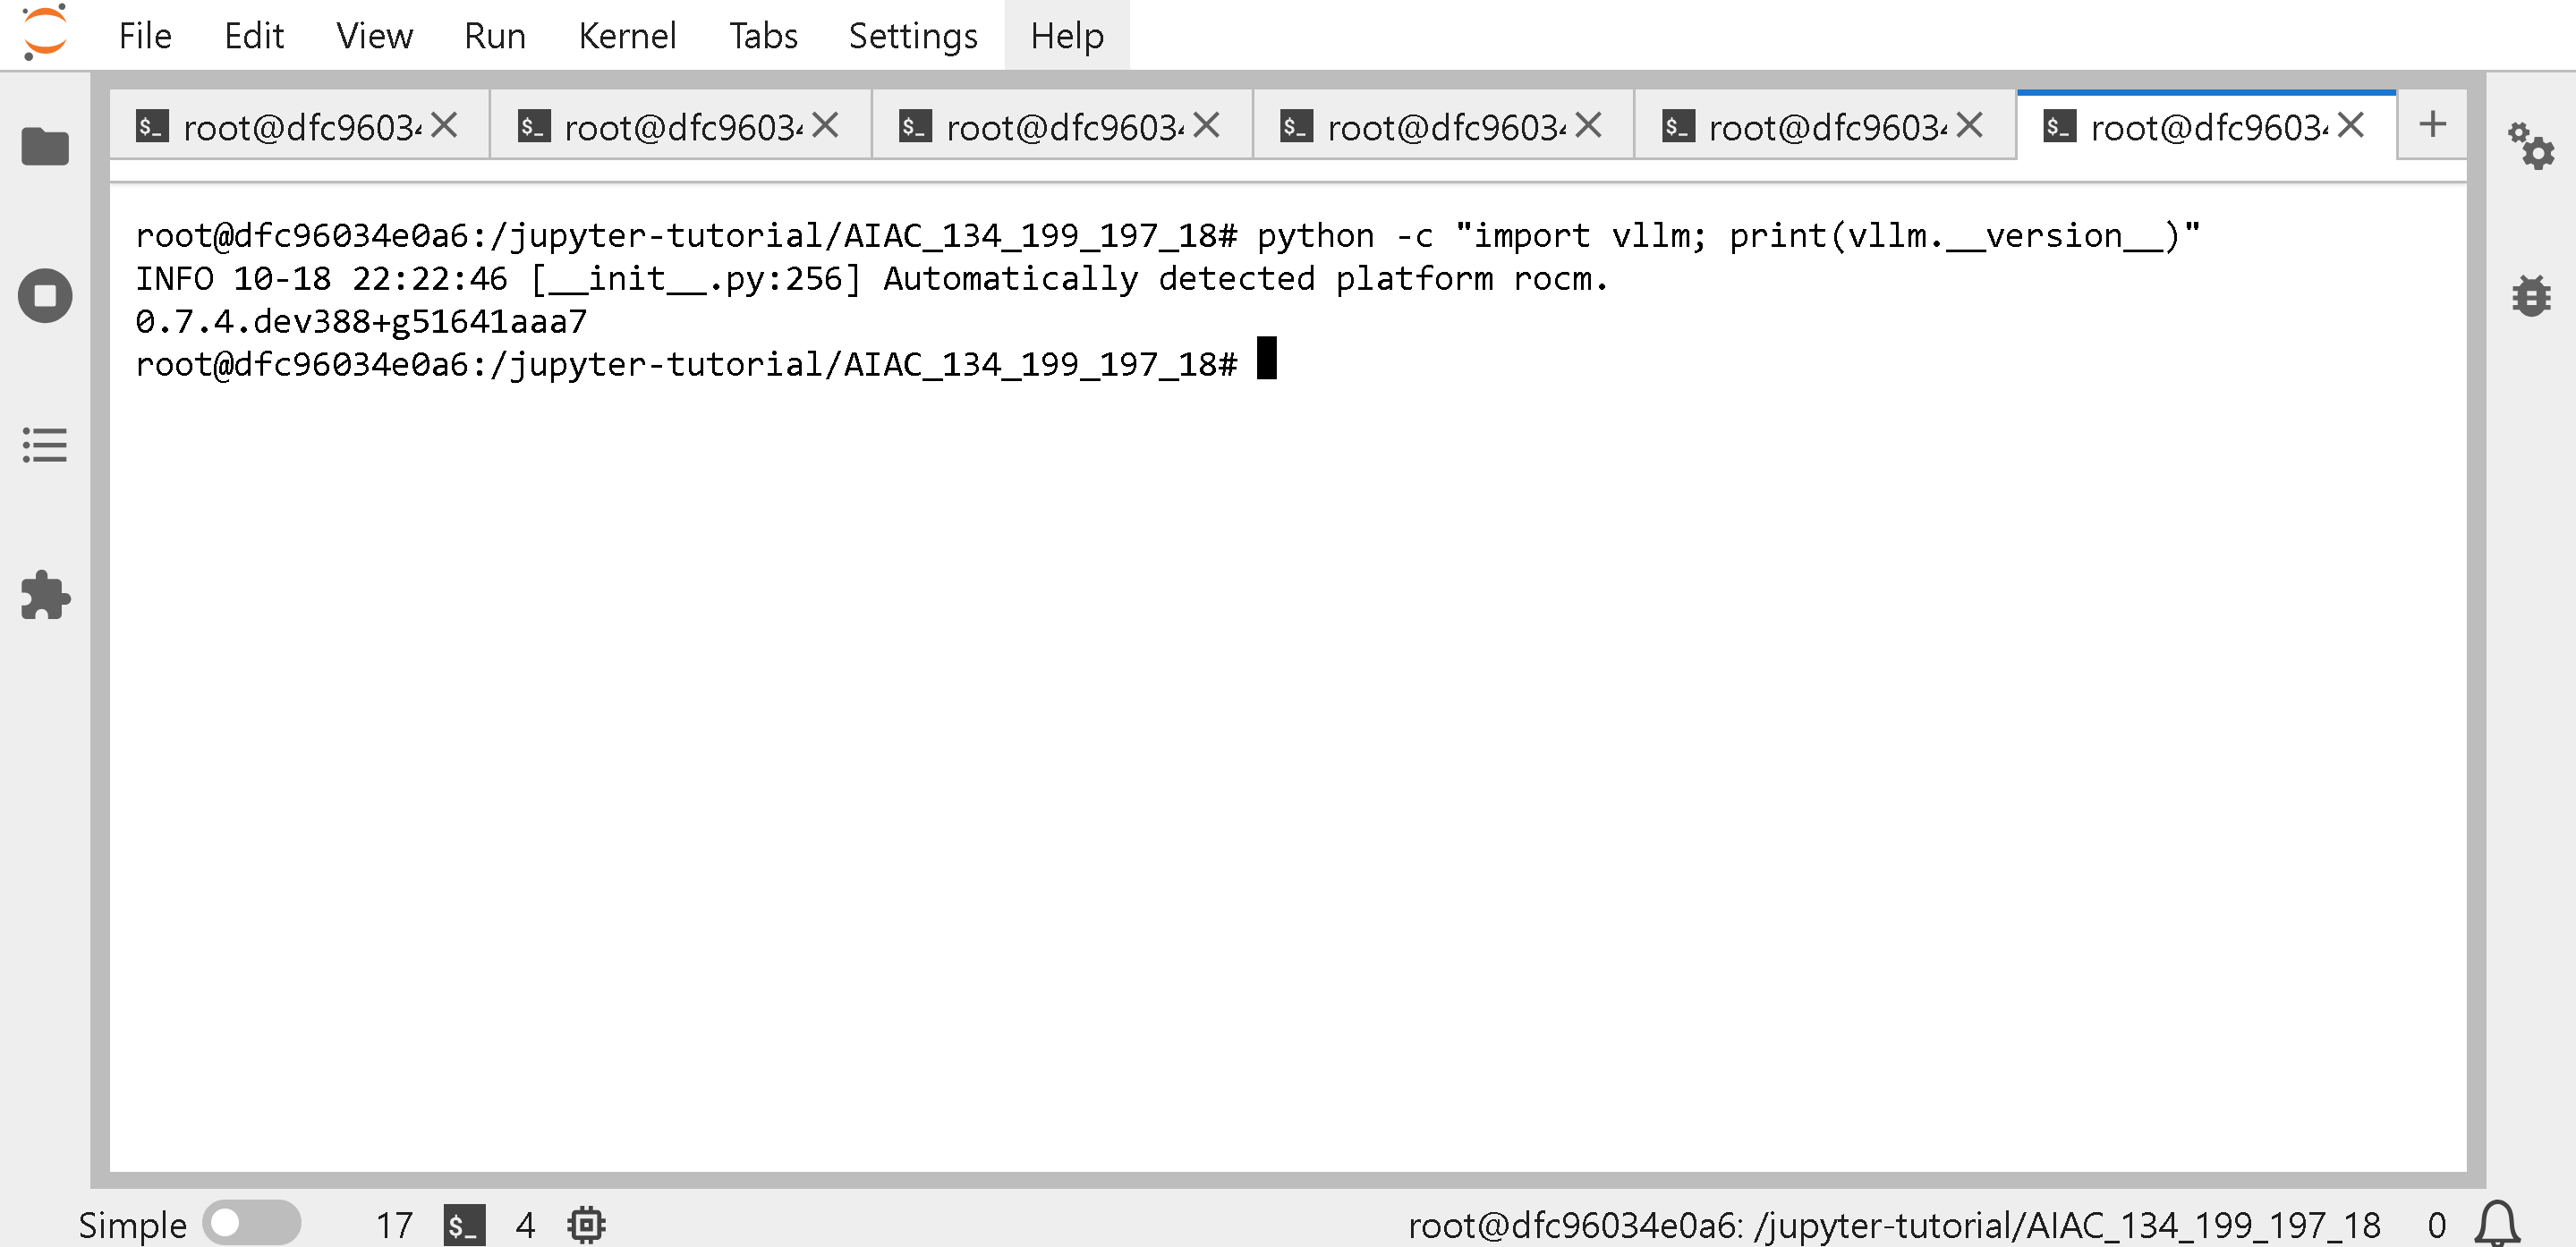
如果你正在运行 `vllm serve Unsloth/gpt-oss-20b` 你可能正在使用旧版本的 vLLM。 `python -c "import vllm; print(vllm.__version__)"` 以获取 vLLM 版本。
在预构建的 hackathon docker 中,你将得到 `0.7.4` ,不幸的是它不支持 GPT-OSS 这样的较新模型,不过,其他模型可以工作,例如 `vllm serve Unsloth/Llama-3.3-70B-Instruct --port 8001 --max-model-len 48000 --gpu-memory-utilization 0.85`
### :arrow\_forward:未检测到 vLLM 平台,正在升级 vLLM,vLLM 上的 gpt-oss
如果你正在运行 `vllm serve Unsloth/gpt-oss-20b` 你可能正在使用旧版本的 vLLM。 `python -c "import vllm; print(vllm.__version__)"` 以获取 vLLM 版本。
在预构建的 hackathon docker 中,你将得到 `0.7.4` ,不幸的是它不支持 GPT-OSS 这样的较新模型,不过,其他模型可以工作,例如 `vllm serve Unsloth/Llama-3.3-70B-Instruct --port 8001 --max-model-len 48000 --gpu-memory-utilization 0.85`
 ### :cupcake:在 AMD 上将 vLLM 更新到最新版本
{% hint style="warning" %}
**从源码构建后,GPT-OSS 目前还不能在 vLLM 中运行——目前请参见** [**https://rocm.blogs.amd.com/ecosystems-and-partners/openai-day-0/README.html**](https://rocm.blogs.amd.com/ecosystems-and-partners/openai-day-0/README.html) **用于运行 gpt-oss 的 Docker——遗憾的是 hackathon 不能在 Docker 内再运行 Docker。你可能会看到错误:**
{% code overflow="wrap" %}
```
ImportError: cannot import name 'GFX950MXScaleLayout' from 'triton_kernels.tensor_details.layout' (/usr/local/lib/python3.12/dist-packages/triton_kernels/tensor_details/layout.py)
(EngineCore_DP0 pid=44662) 进程 EngineCore_DP0:
```
{% endcode %}
{% endhint %}
要获取最新的 vLLM,请参见 ,具体来说,在通过以下命令清除所有使用 AMD GPU 的进程之后,运行下面的内容: [#how-do-i-free-amd-gpu-memory](#how-do-i-free-amd-gpu-memory "mention")
{% code overflow="wrap" %}
```bash
# 安装 PyTorch
pip uninstall torch -y
pip uninstall pytorch-triton-rocm -y
pip uninstall triton -y
pip install --upgrade torch==2.8.0 pytorch-triton-rocm torchvision torchaudio torchao==0.13.0 xformers --index-url https://download.pytorch.org/whl/rocm6.4
# 安装 OpenAI Triton 内核
pip install git+https://github.com/triton-lang/triton.git@05b2c186c1b6c9a08375389d5efe9cb4c401c075#subdirectory=python/triton_kernels
```
{% endcode %}
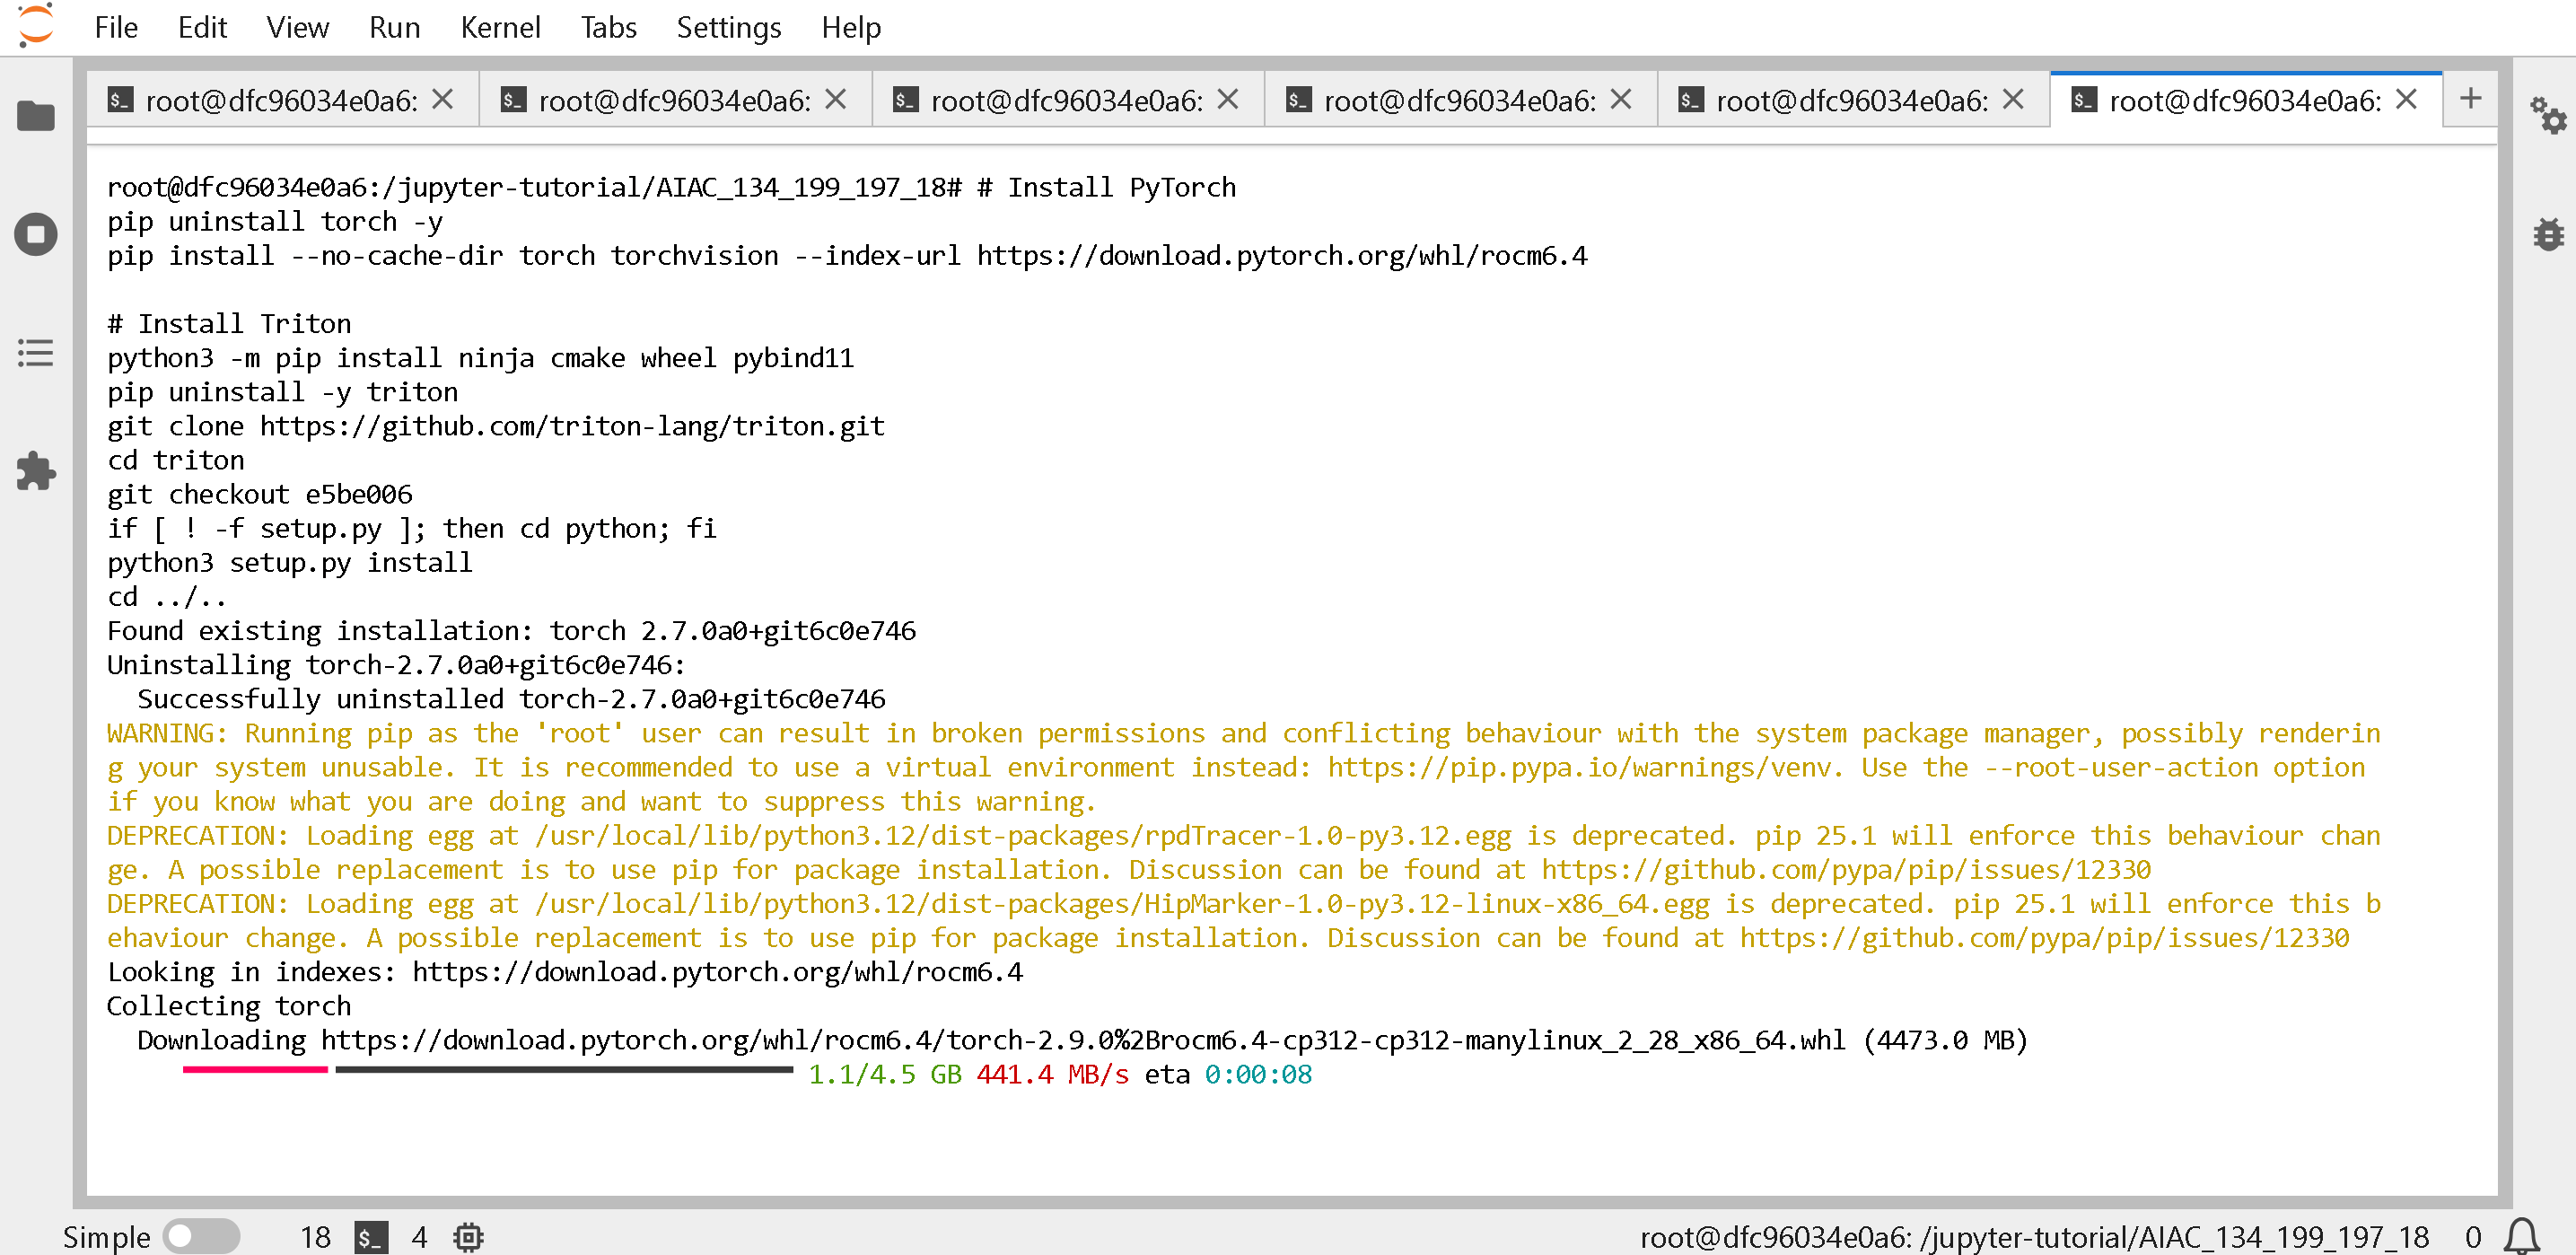
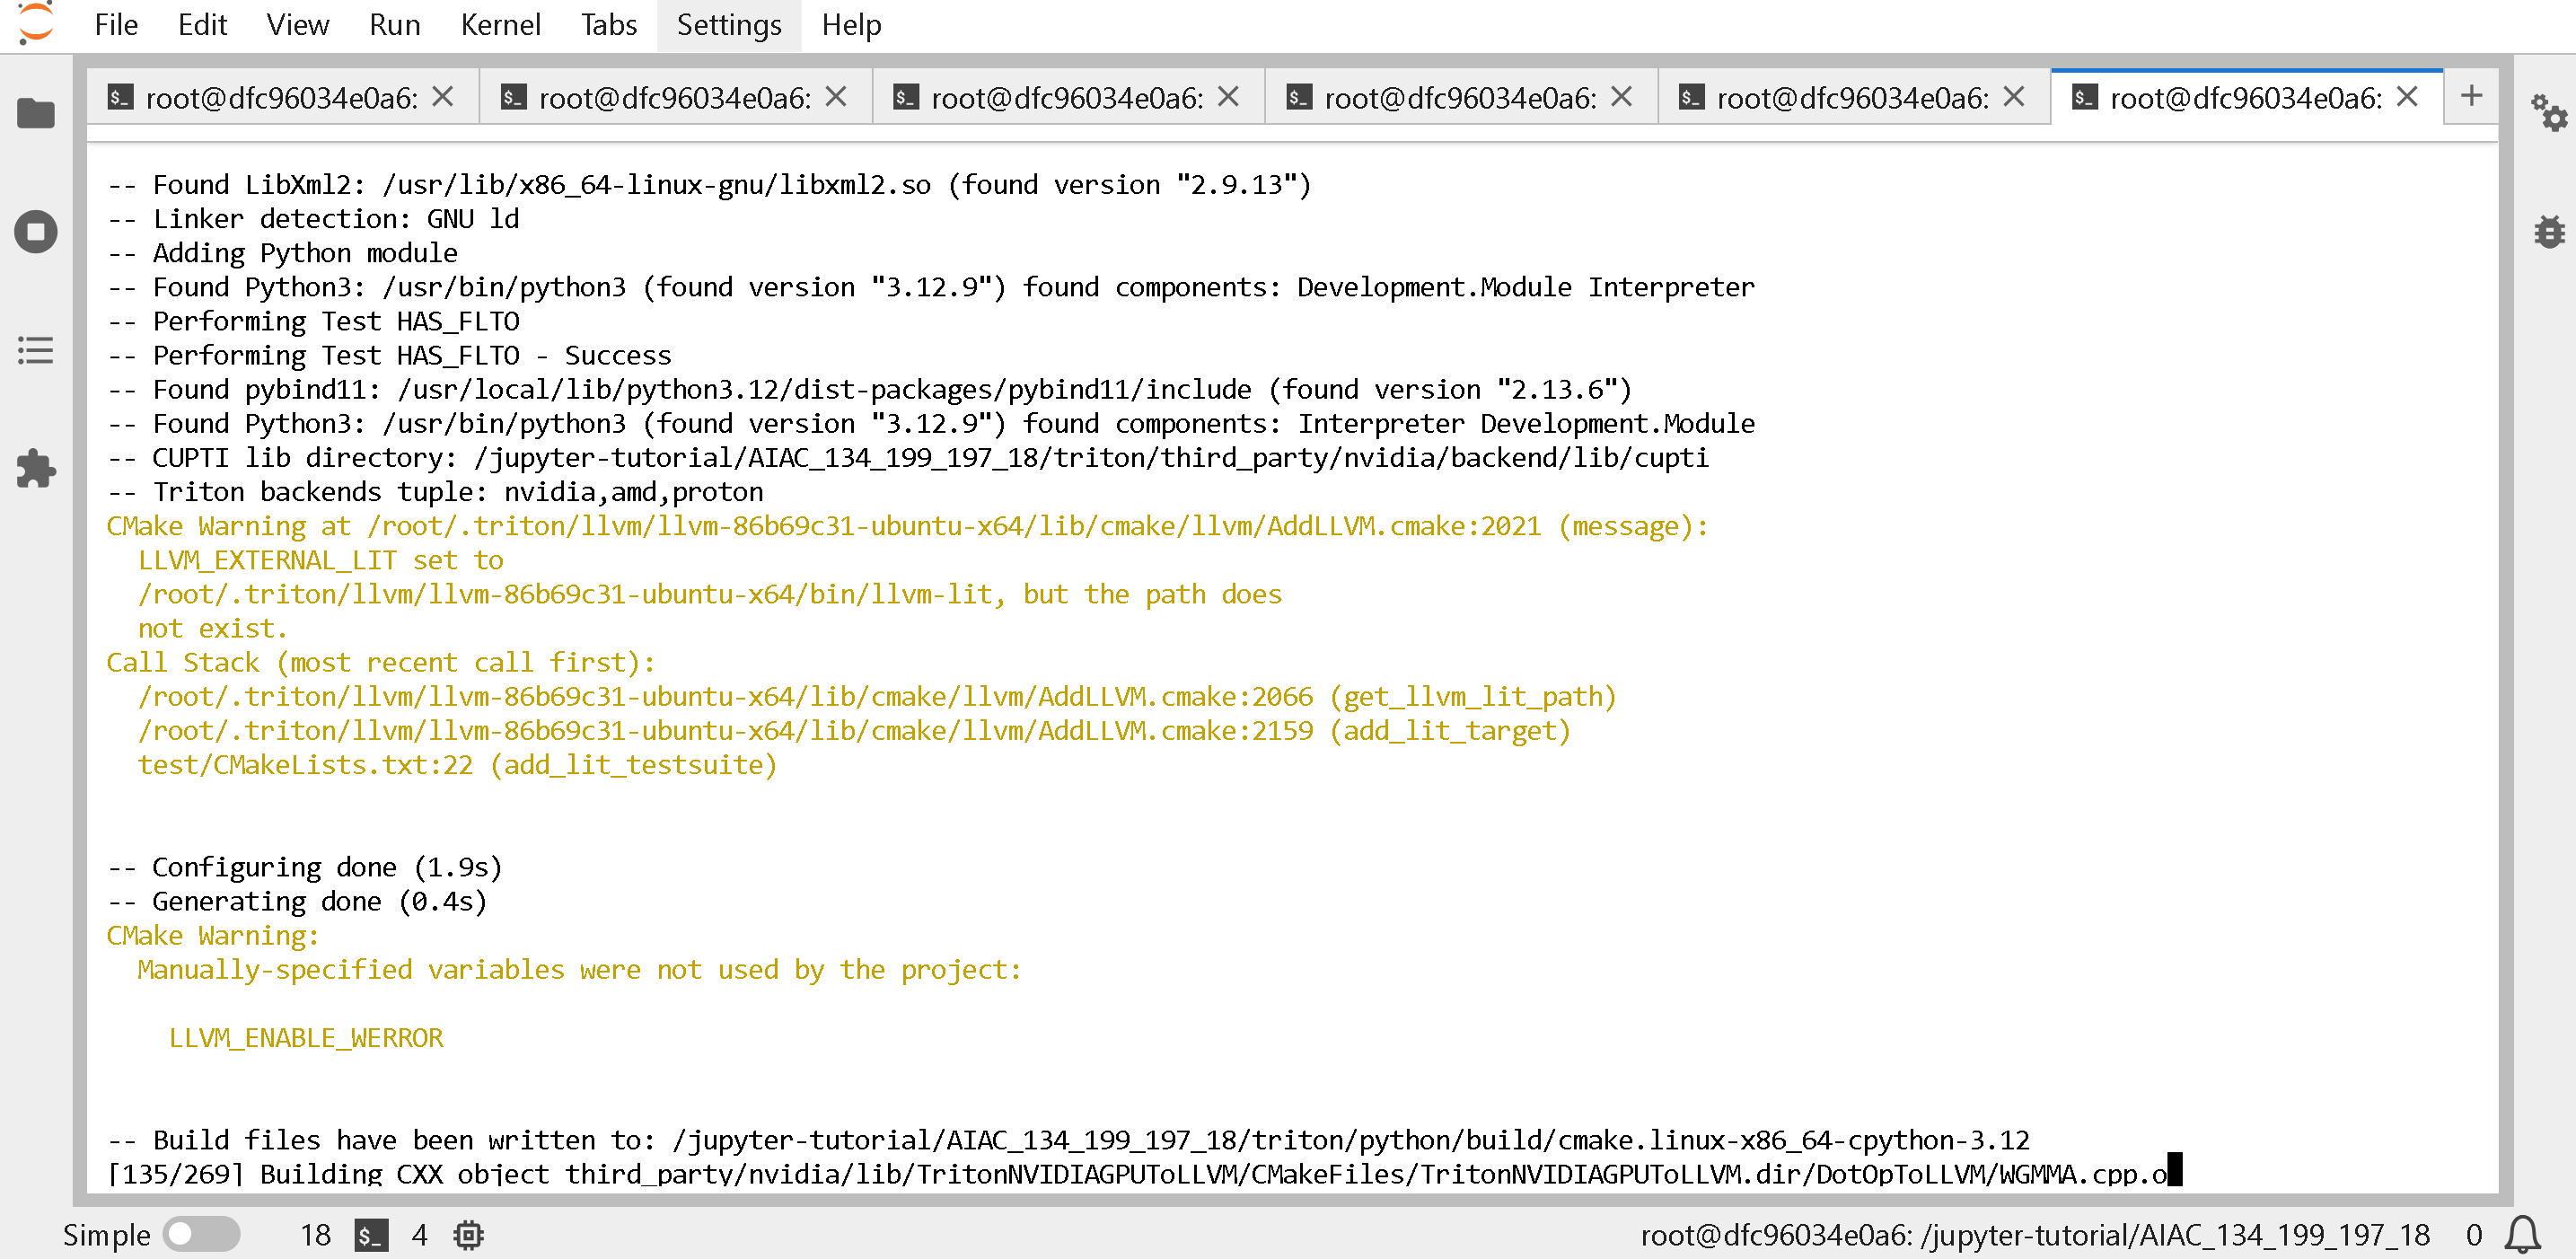
执行上述命令后会开始构建(提醒:先关闭所有使用 GPU 的进程!见 [#how-do-i-free-amd-gpu-memory](#how-do-i-free-amd-gpu-memory "mention"))
### :cupcake:在 AMD 上将 vLLM 更新到最新版本
{% hint style="warning" %}
**从源码构建后,GPT-OSS 目前还不能在 vLLM 中运行——目前请参见** [**https://rocm.blogs.amd.com/ecosystems-and-partners/openai-day-0/README.html**](https://rocm.blogs.amd.com/ecosystems-and-partners/openai-day-0/README.html) **用于运行 gpt-oss 的 Docker——遗憾的是 hackathon 不能在 Docker 内再运行 Docker。你可能会看到错误:**
{% code overflow="wrap" %}
```
ImportError: cannot import name 'GFX950MXScaleLayout' from 'triton_kernels.tensor_details.layout' (/usr/local/lib/python3.12/dist-packages/triton_kernels/tensor_details/layout.py)
(EngineCore_DP0 pid=44662) 进程 EngineCore_DP0:
```
{% endcode %}
{% endhint %}
要获取最新的 vLLM,请参见 ,具体来说,在通过以下命令清除所有使用 AMD GPU 的进程之后,运行下面的内容: [#how-do-i-free-amd-gpu-memory](#how-do-i-free-amd-gpu-memory "mention")
{% code overflow="wrap" %}
```bash
# 安装 PyTorch
pip uninstall torch -y
pip uninstall pytorch-triton-rocm -y
pip uninstall triton -y
pip install --upgrade torch==2.8.0 pytorch-triton-rocm torchvision torchaudio torchao==0.13.0 xformers --index-url https://download.pytorch.org/whl/rocm6.4
# 安装 OpenAI Triton 内核
pip install git+https://github.com/triton-lang/triton.git@05b2c186c1b6c9a08375389d5efe9cb4c401c075#subdirectory=python/triton_kernels
```
{% endcode %}
执行上述命令后会开始构建(提醒:先关闭所有使用 GPU 的进程!见 [#how-do-i-free-amd-gpu-memory](#how-do-i-free-amd-gpu-memory "mention"))
(可选,可折叠代码) 若要 构建 Flash Attention 通过(这将花费 30 分钟到 1 小时)因此,如果你不想等待 30 分钟到 1 小时,这一步是可选的! 一般来说我会跳过这个过程。 如果你想安装 Flash Attention,请展开此单元格。
{% code overflow="wrap" %}
```bash
# ********可选********* 你可能得等 1 小时!!
# ********可选********* 你可能得等 1 小时!!
git clone https://github.com/Dao-AILab/flash-attention.git
cd flash-attention
git checkout 1a7f4dfa
git submodule update --init
# ********可选********* 你可能得等 1 小时!!
# ********可选********* 你可能得等 1 小时!!
ARCH=$(rocminfo | grep -m1 -oE 'gfx[0-9]+[a-z]*')
echo "检测到的 GPU 架构:$ARCH"
GPU_ARCHS="$ARCH" python3 setup.py install
cd ..
# ********可选********* 你可能得等 1 小时!!
```
{% endcode %}
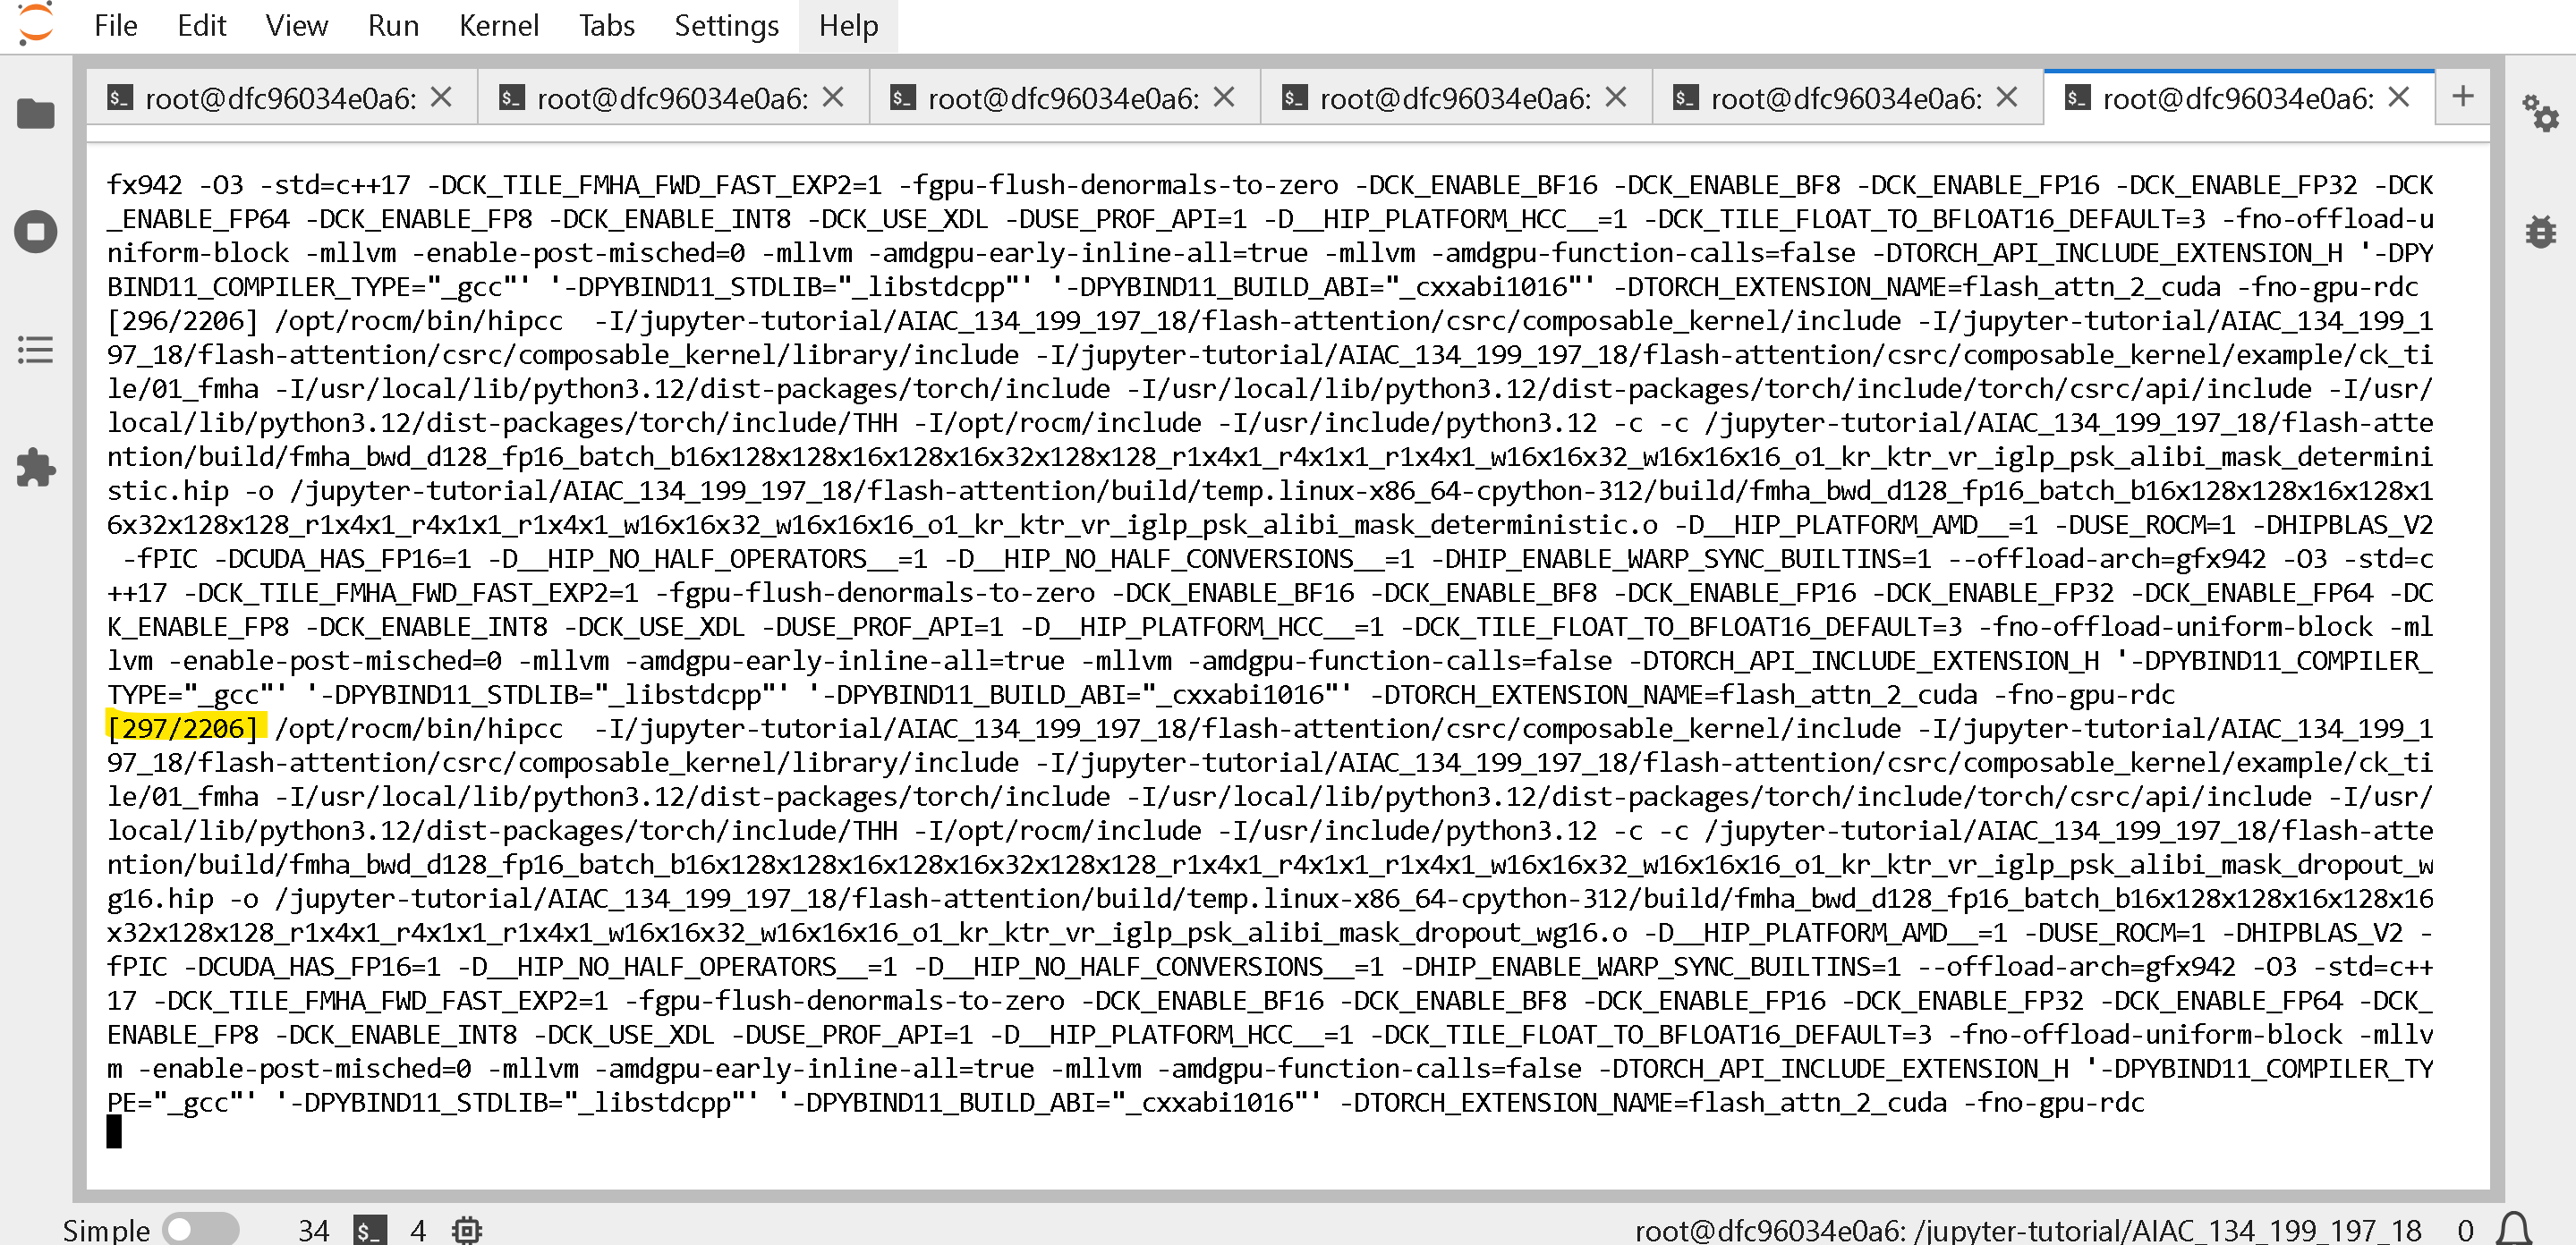
你会看到:
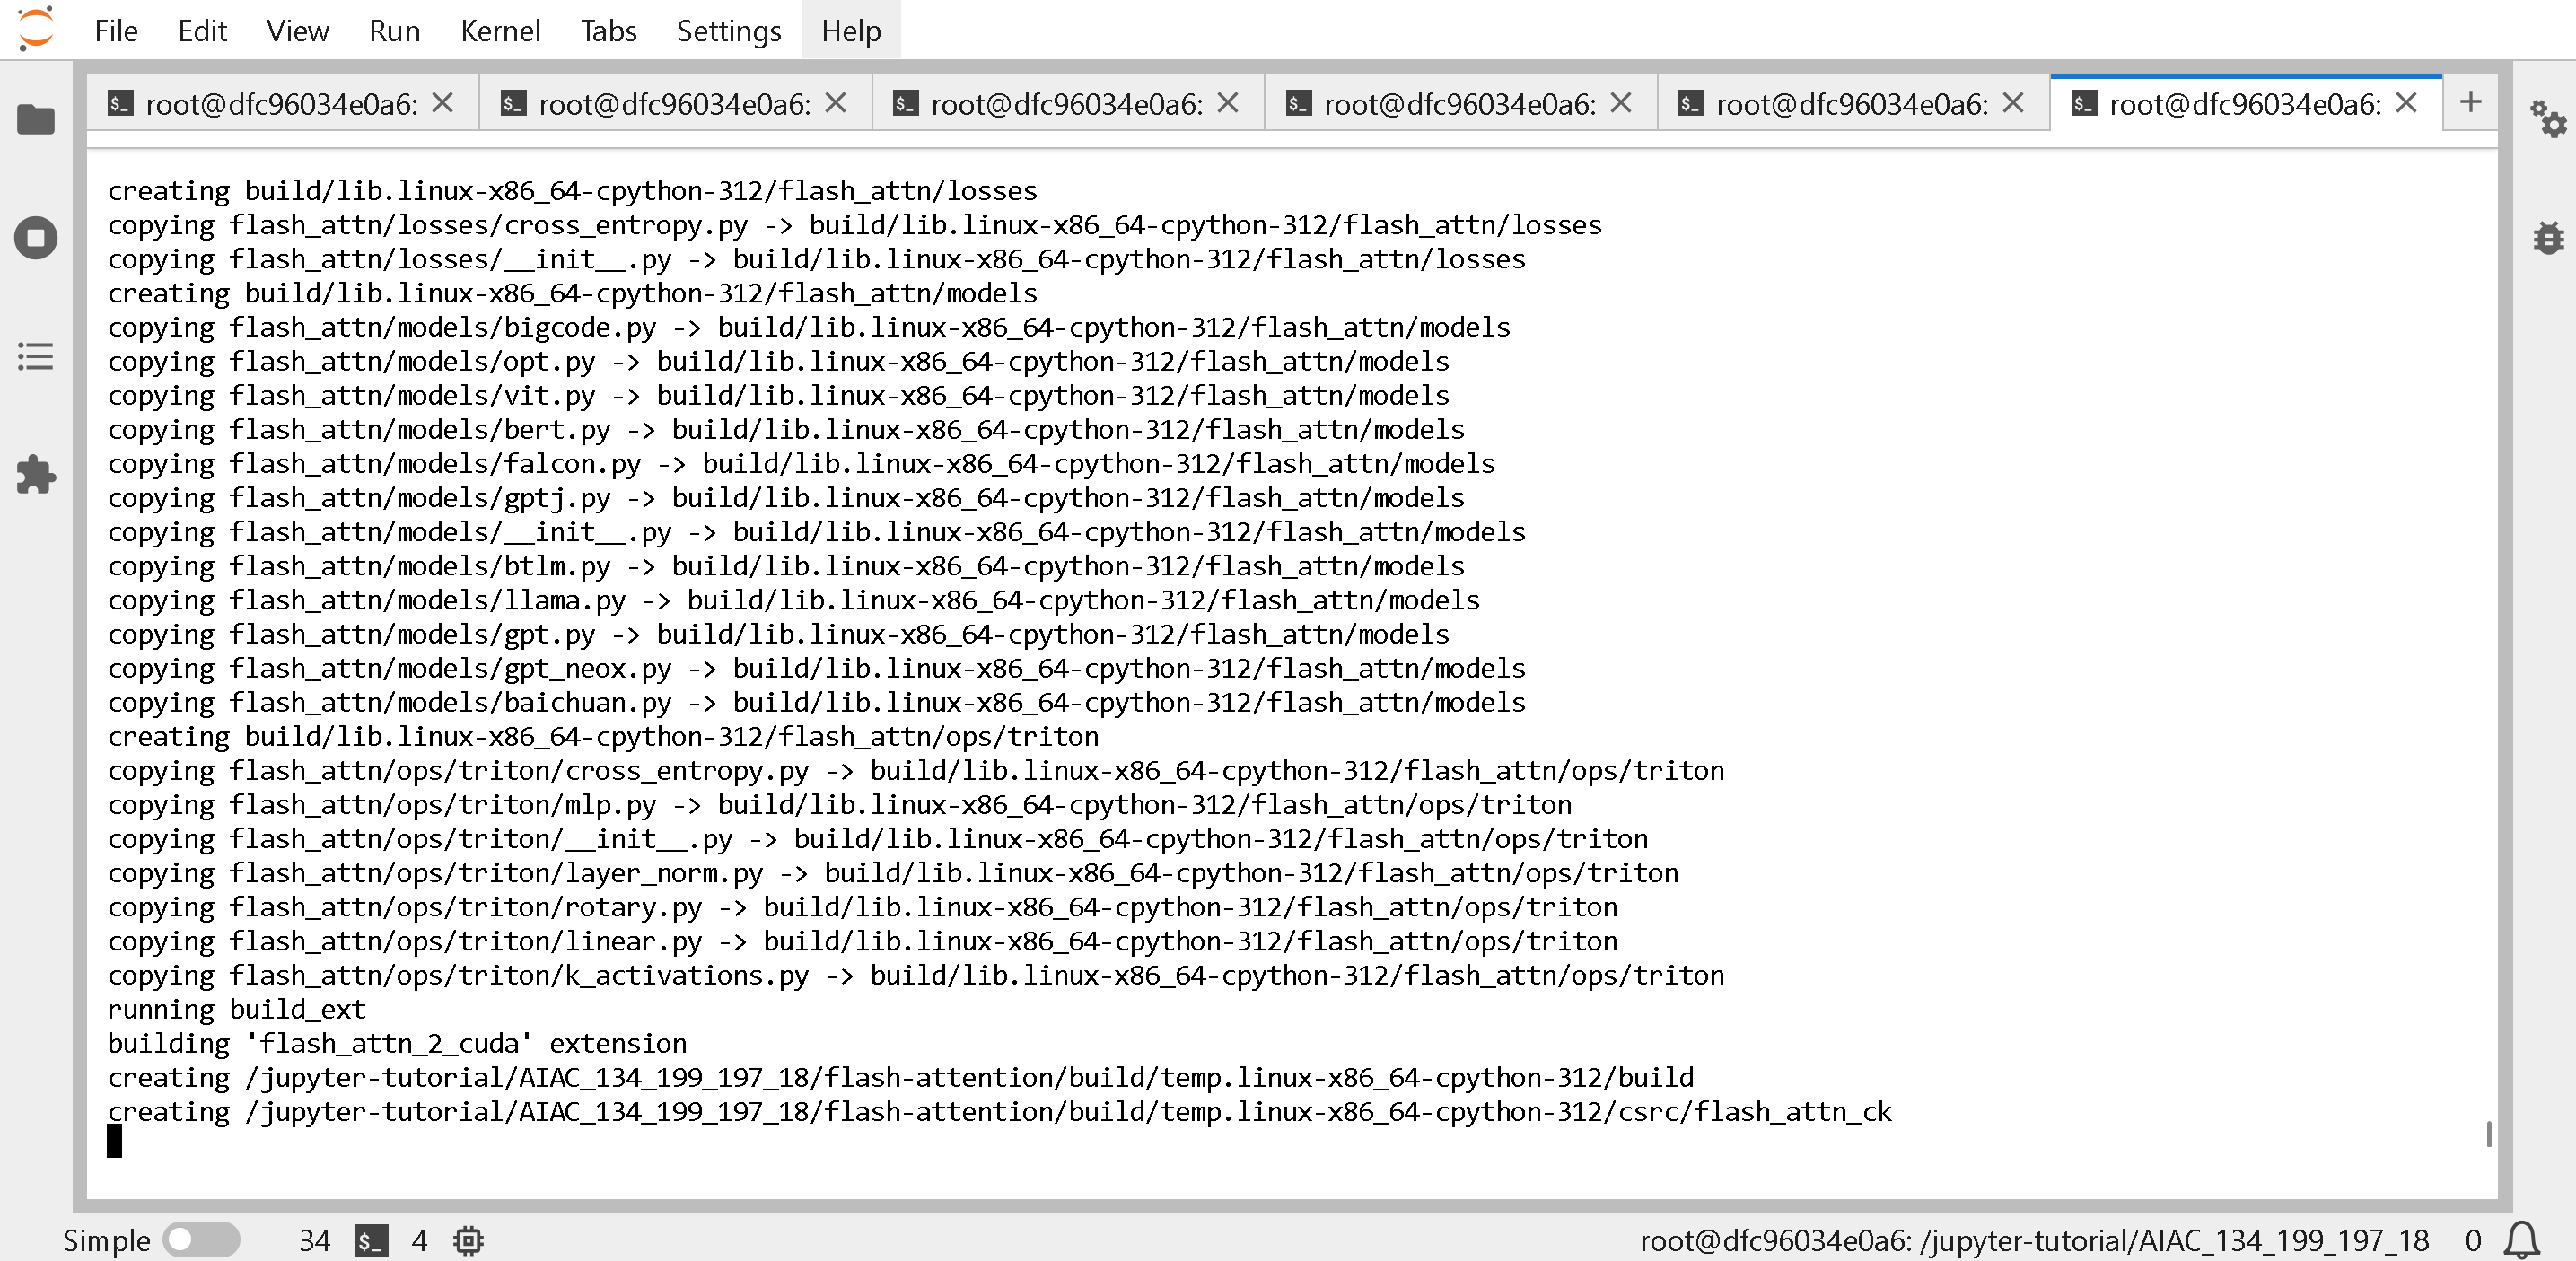 要监控 Flash-Attention 的进度(这可能非常长),请关注 \[296/2206] 的进度。
**(非可选)** 然后构建 aiter [ROCm 的 AI Tensor Engine](https://github.com/ROCm/aiter) (这将花费 5 分钟)
{% code overflow="wrap" %}
```bash
python3 -m pip uninstall -y aiter
git clone --recursive https://github.com/ROCm/aiter.git
cd aiter
git checkout $AITER_BRANCH_OR_COMMIT
git submodule sync; git submodule update --init --recursive
python3 setup.py develop
cd ..
```
{% endcode %}
**(非可选)** 然后构建 vLLM:
```bash
pip install --upgrade pip
pip uninstall vllm -y
pip install --upgrade -qqq --no-cache-dir --force-reinstall --no-deps unsloth unsloth_zoo
pip uninstall bitsandbytes -y
pip install "unsloth[amd] @ git+https://github.com/unslothai/unsloth"
# 构建并安装 AMD SMI
pip install /opt/rocm/share/amd_smi
# 安装依赖项
pip install --upgrade numba \
scipy \
huggingface-hub[cli,hf_transfer] \
setuptools_scm
git clone --depth 1 --branch "v0.11.0" https://github.com/vllm-project/vllm.git vllm_build
cd vllm_build
pip install -r requirements/rocm.txt
# 为 MI210/MI250/MI300 构建 vLLM。
export PYTORCH_ROCM_ARCH="$(rocminfo | grep -m1 -oE 'gfx[0-9]+[a-z]*')"
python3 setup.py develop
cd ..
```
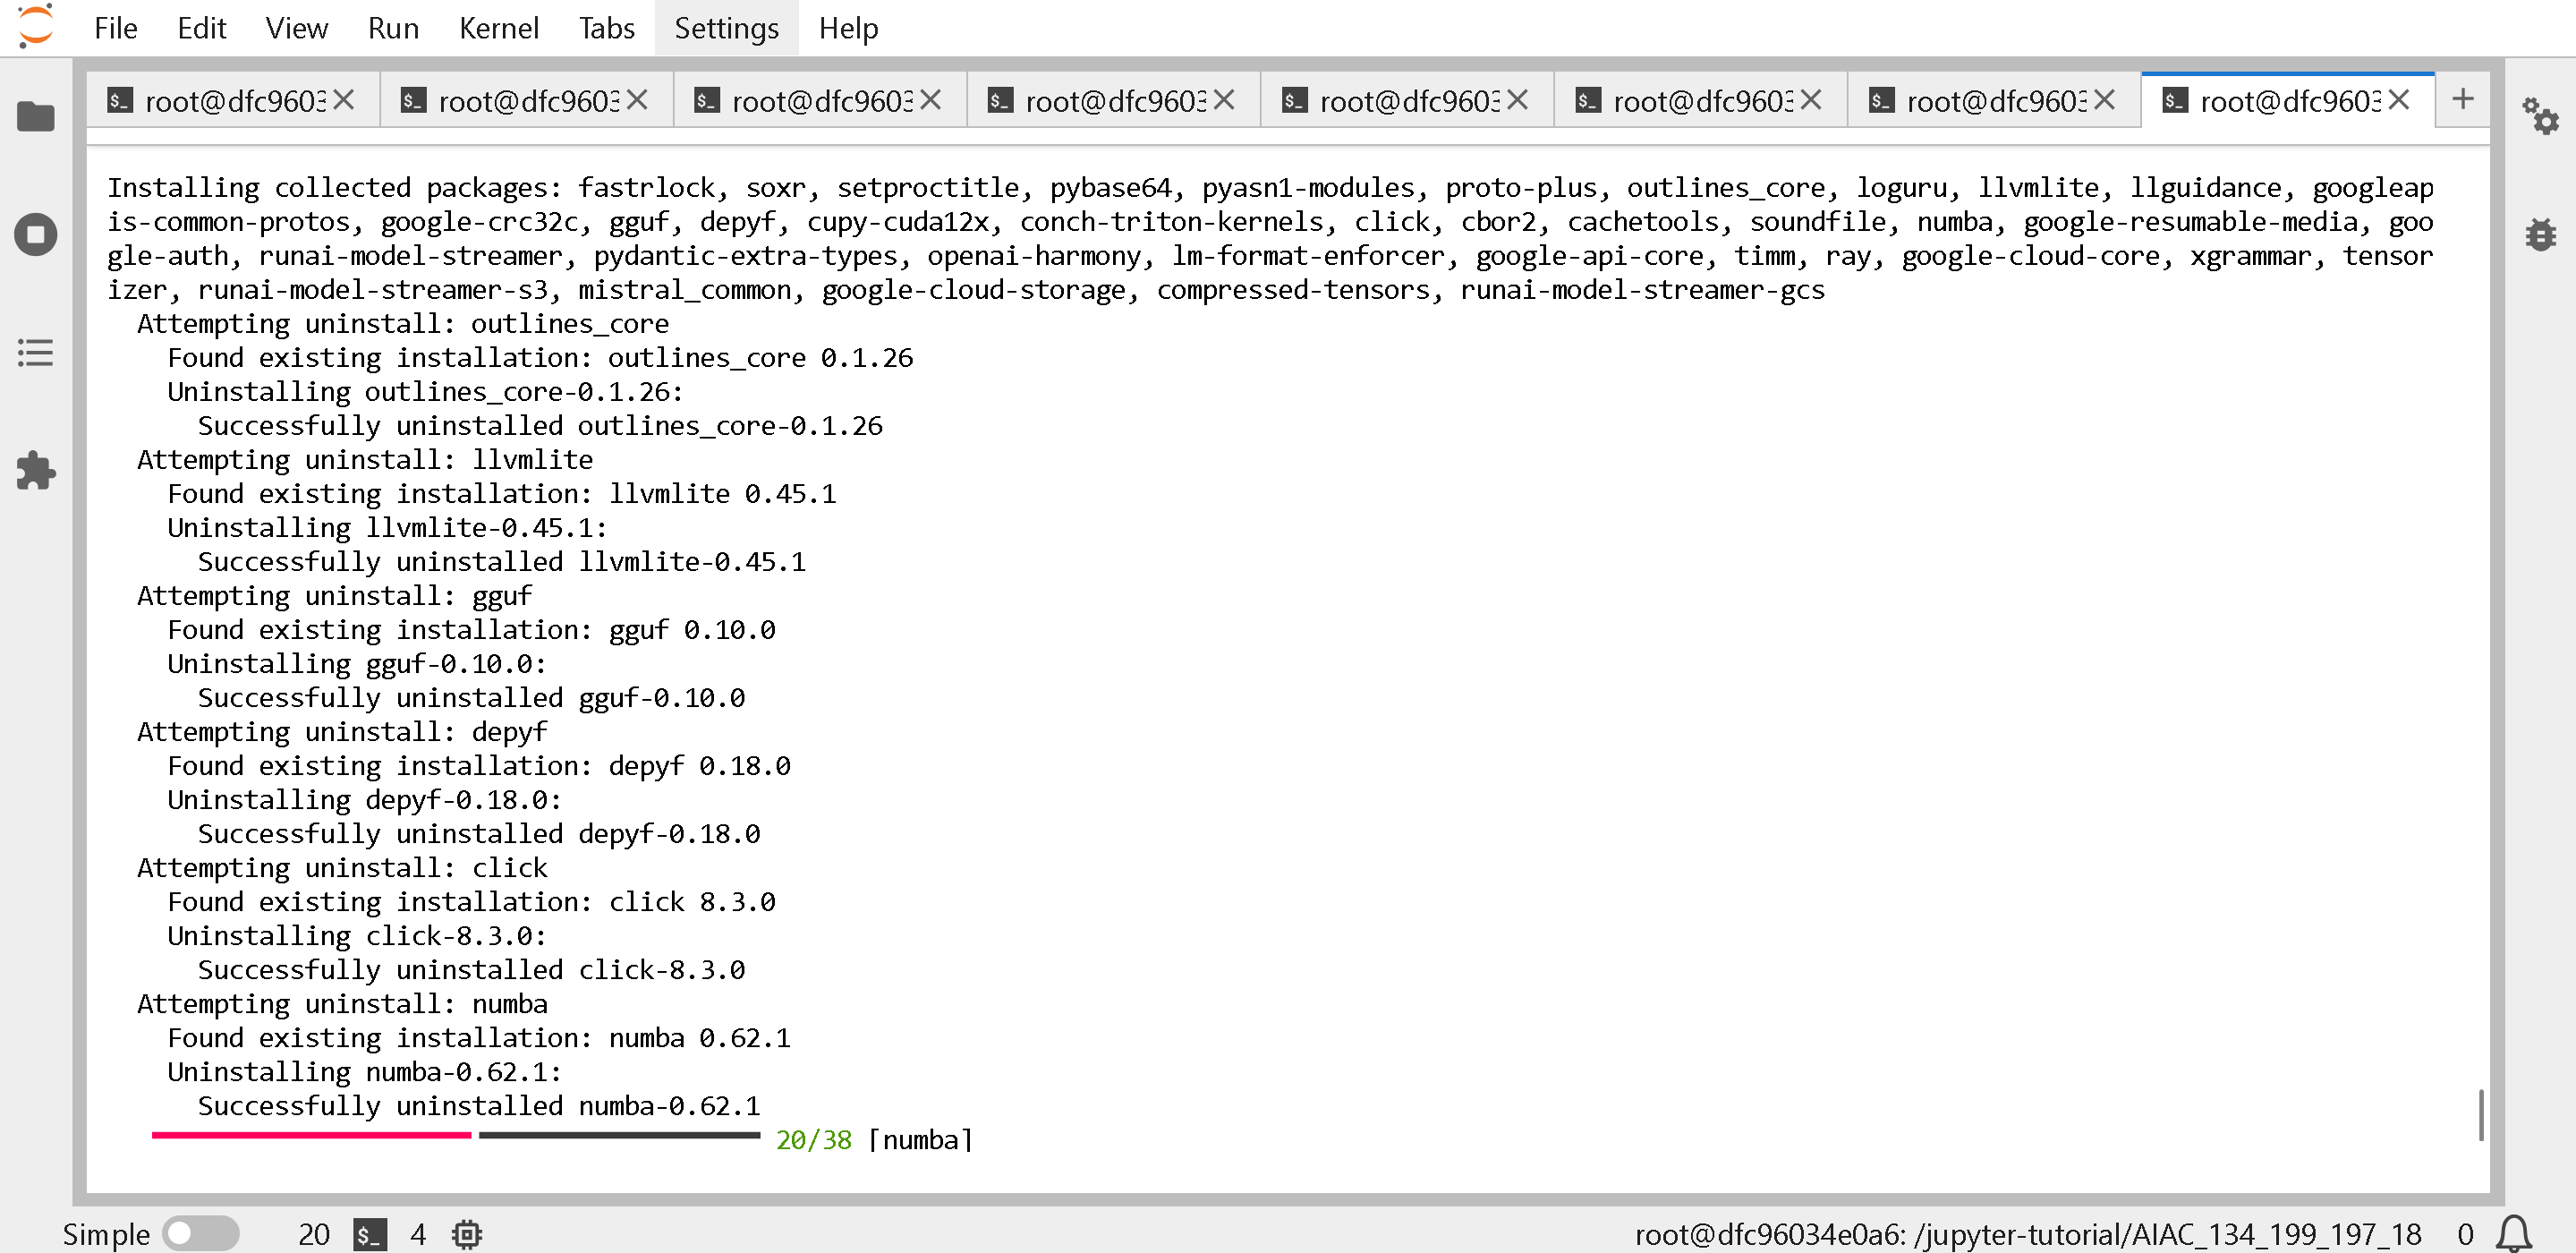
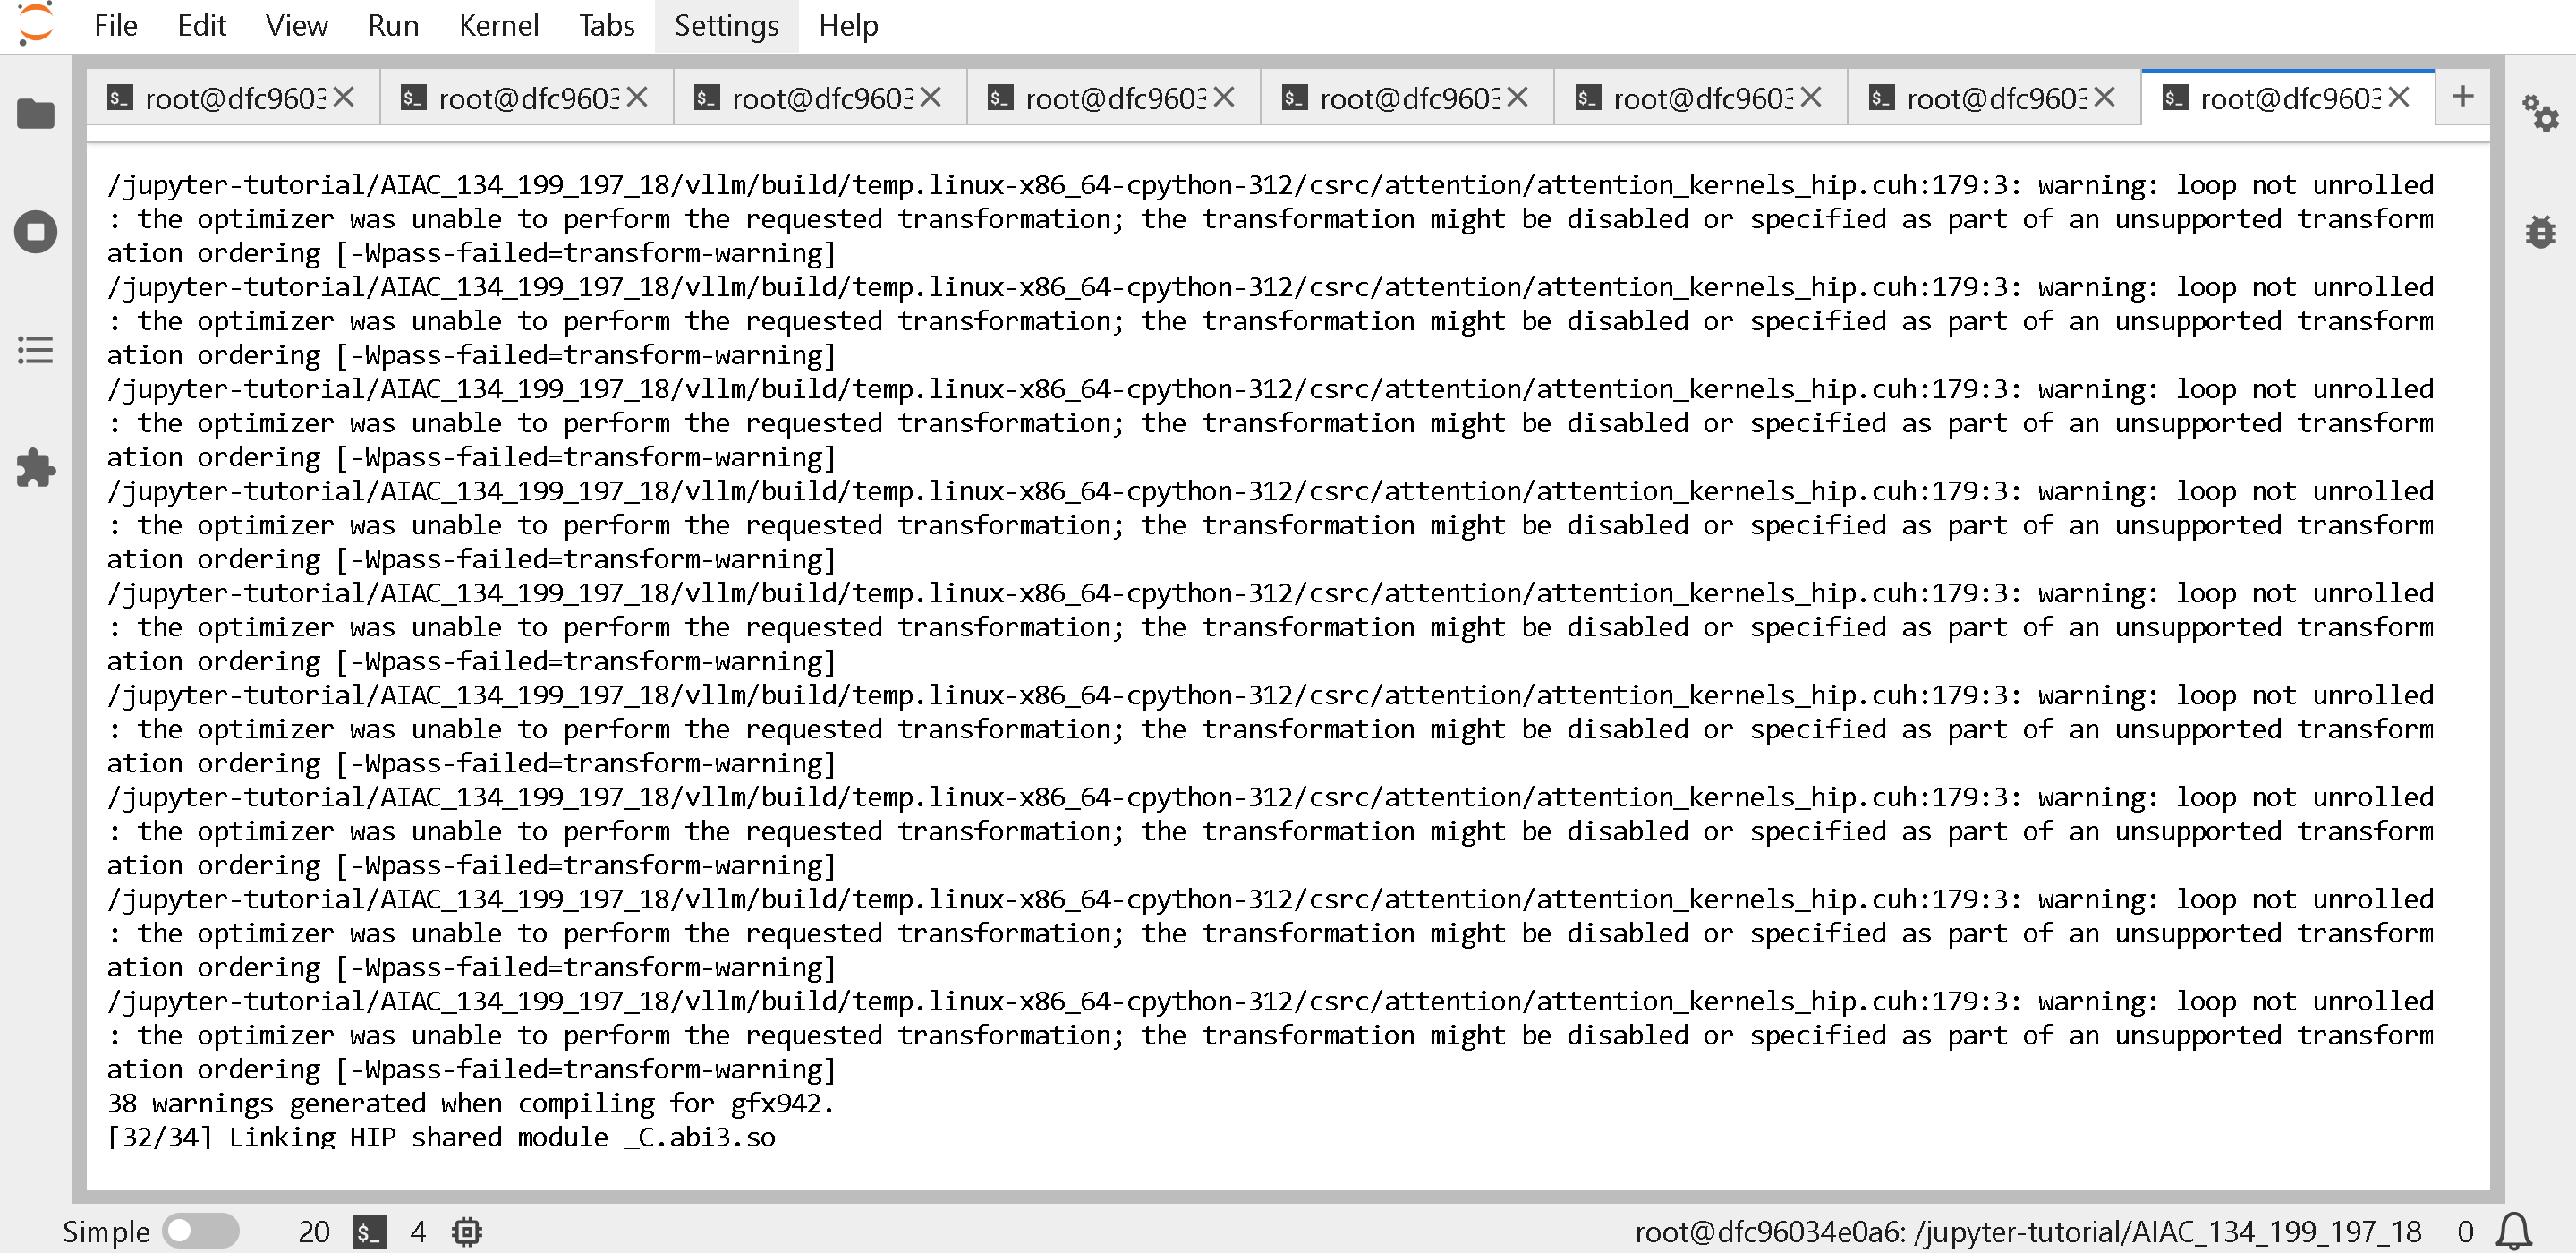
你会看到下面的内容(**请等待 5 到 10 分钟!**)
 通过以下方式确认 vLLM、torch 已更新
{% code overflow="wrap" %}
```bash
python -c "import vllm, torch, unsloth; print(vllm.__version__); print(torch.__version__); print(unsloth.__version__);"
vllm
```
{% endcode %}
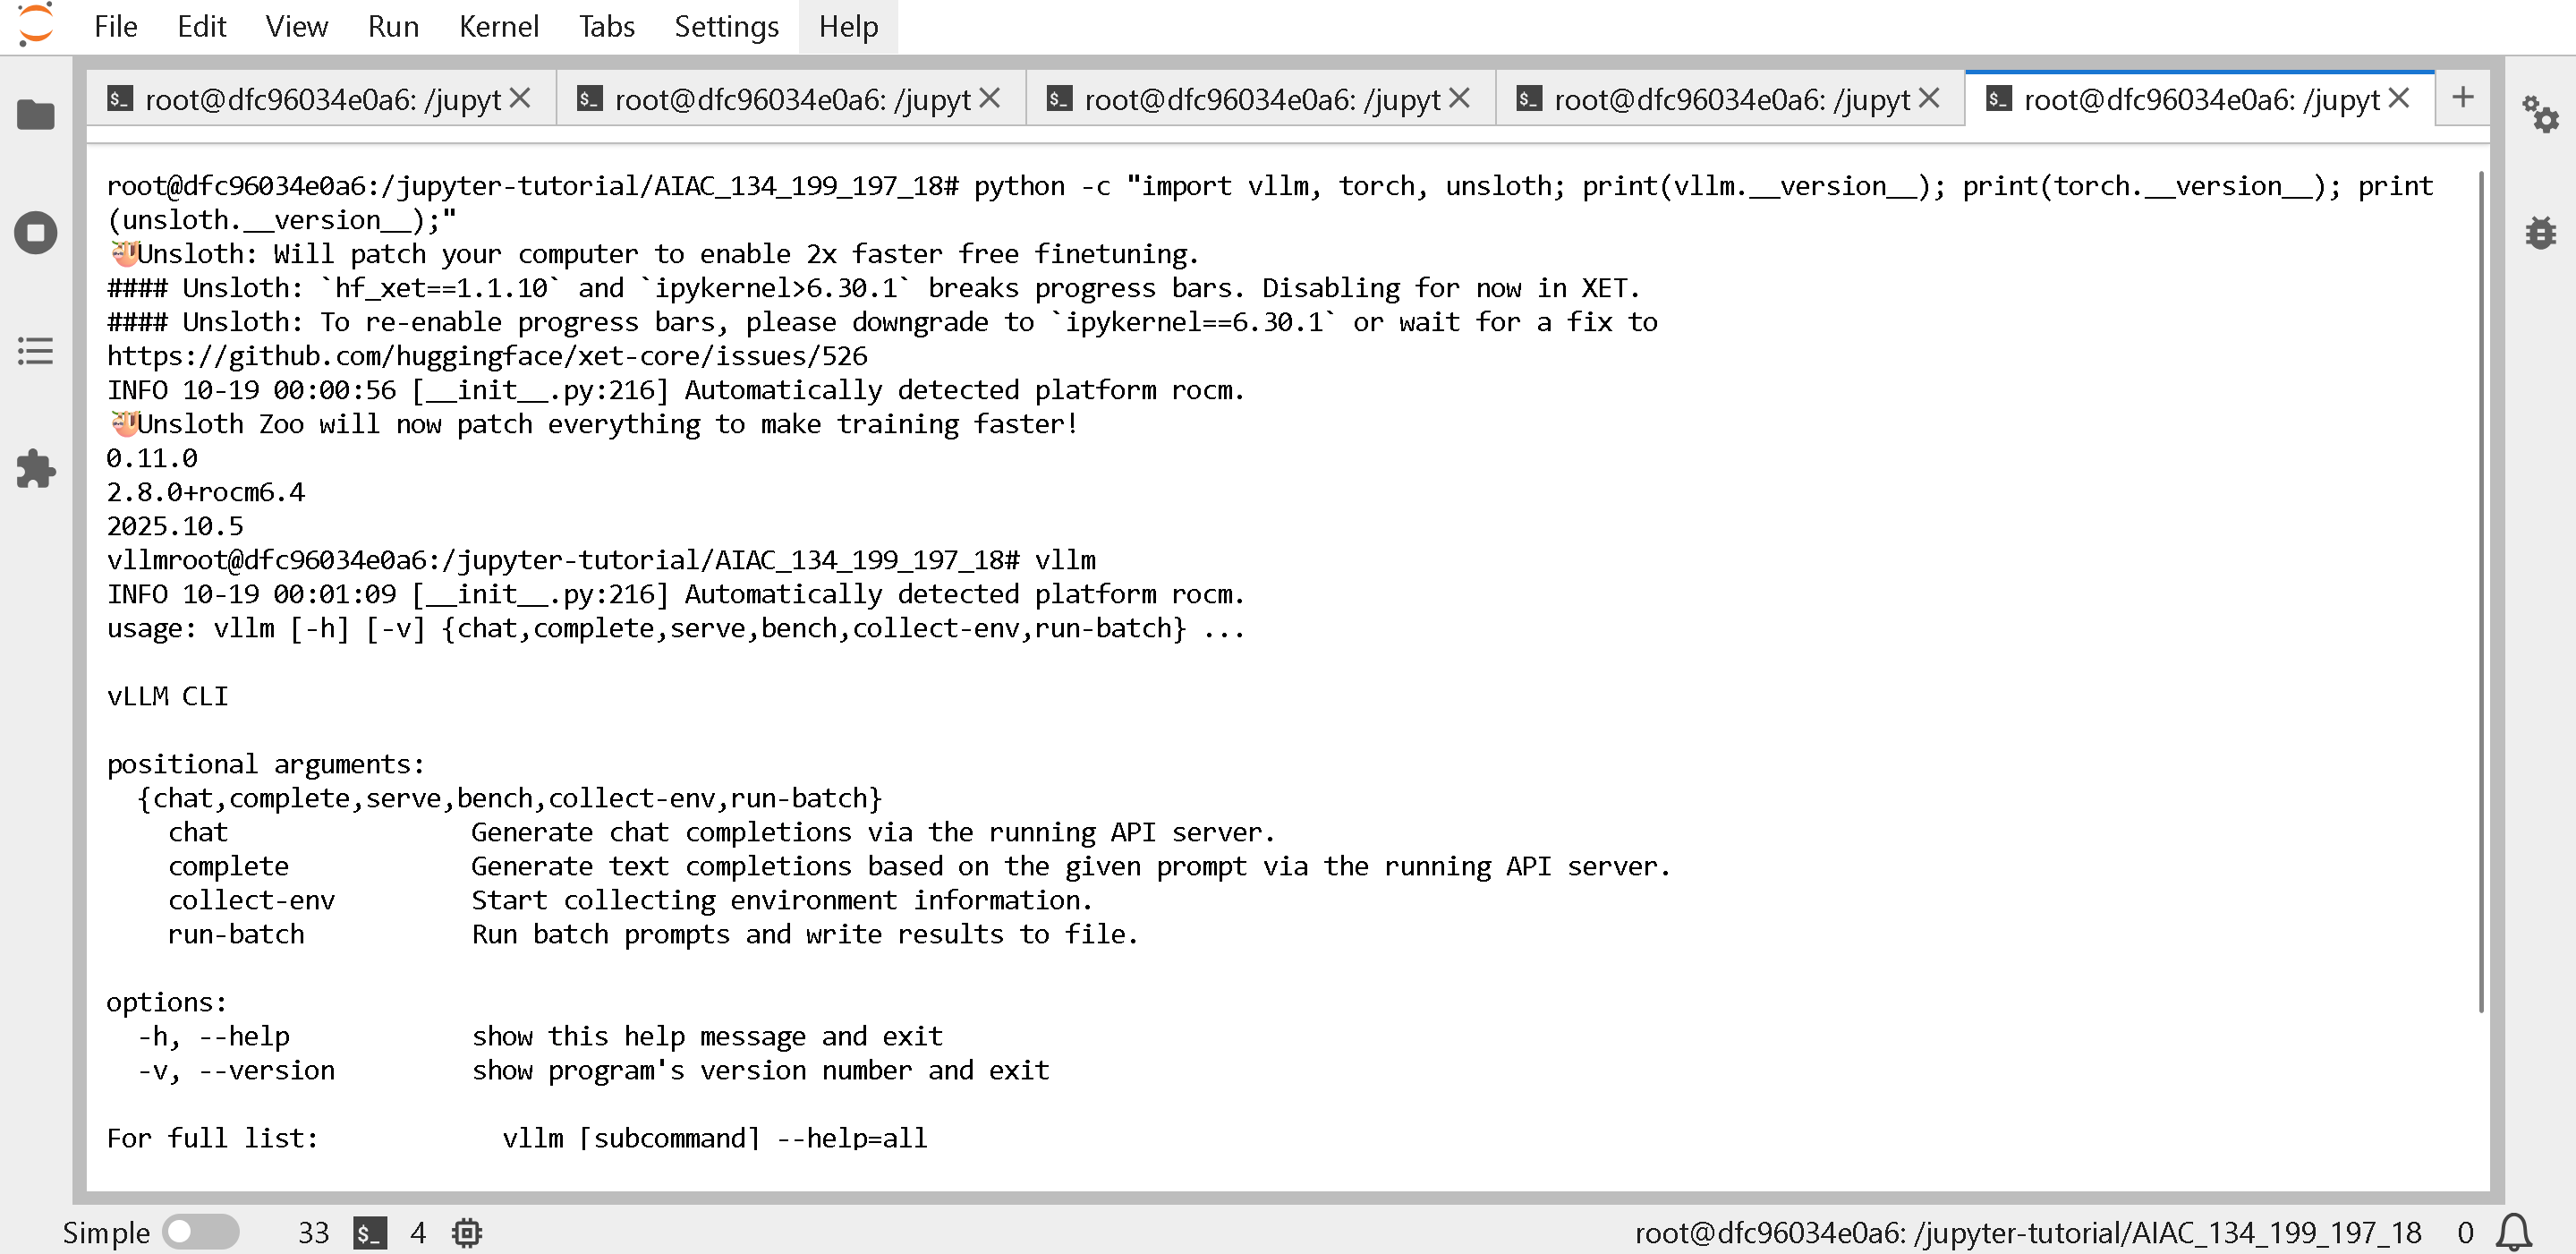
这应该显示 vLLM 为 0.11.0 或更高版本,并且截至 2025 年 10 月,torch 必须是 2.8.0。输入 `vllm` 以确认 vLLM 按预期工作。
```
🦥 Unsloth Zoo 现在会修补一切,以使训练更快!
0.11.0
2.8.0+rocm6.4
2025.10.6
```
通过以下方式确认 vLLM、torch 已更新
{% code overflow="wrap" %}
```bash
python -c "import vllm, torch, unsloth; print(vllm.__version__); print(torch.__version__); print(unsloth.__version__);"
vllm
```
{% endcode %}
这应该显示 vLLM 为 0.11.0 或更高版本,并且截至 2025 年 10 月,torch 必须是 2.8.0。输入 `vllm` 以确认 vLLM 按预期工作。
```
🦥 Unsloth Zoo 现在会修补一切,以使训练更快!
0.11.0
2.8.0+rocm6.4
2025.10.6
```
 ### :book:在 vLLM 中运行 unsloth/gpt-oss-20b
{% hint style="warning" %}
**从源码构建后,GPT-OSS 目前还不能在 vLLM 中运行——目前请参见** [**https://rocm.blogs.amd.com/ecosystems-and-partners/openai-day-0/README.html**](https://rocm.blogs.amd.com/ecosystems-and-partners/openai-day-0/README.html) **用于运行 gpt-oss 的 Docker——遗憾的是 hackathon 不能在 Docker 内再运行 Docker。你可能会看到错误:**
{% code overflow="wrap" %}
```
ImportError: cannot import name 'GFX950MXScaleLayout' from 'triton_kernels.tensor_details.layout' (/usr/local/lib/python3.12/dist-packages/triton_kernels/tensor_details/layout.py)
(EngineCore_DP0 pid=44662) 进程 EngineCore_DP0:
```
{% endcode %}
{% endhint %}
通过以下方式更新 vLLM 之后 [#updating-vllm-to-the-latest-on-amd](#updating-vllm-to-the-latest-on-amd "mention"),你可以运行 [gpt-oss-20b](https://huggingface.co/unsloth/gpt-oss-20b)!请参见 [#optimal-vllm-commands-on-amd](#optimal-vllm-commands-on-amd "mention") 以获取在 AMD GPU 上运行 vllm 的更优命令(你可能会获得更快的推理!)
{% code overflow="wrap" %}
```bash
export VLLM_ROCM_USE_AITER=1
export VLLM_ROCM_USE_AITER_MHA=0
vllm serve unsloth/gpt-oss-20b \
--no-enable-prefix-caching \
--compilation-config '{"full_cuda_graph": true}' \
--port 8001 \\
--max-model-len 48000 \
--gpu-memory-utilization 0.85
```
{% endcode %}
### :interrobang:RuntimeError:用户指定了不支持的 autocast device\_type 'hip'
### :book:在 vLLM 中运行 unsloth/gpt-oss-20b
{% hint style="warning" %}
**从源码构建后,GPT-OSS 目前还不能在 vLLM 中运行——目前请参见** [**https://rocm.blogs.amd.com/ecosystems-and-partners/openai-day-0/README.html**](https://rocm.blogs.amd.com/ecosystems-and-partners/openai-day-0/README.html) **用于运行 gpt-oss 的 Docker——遗憾的是 hackathon 不能在 Docker 内再运行 Docker。你可能会看到错误:**
{% code overflow="wrap" %}
```
ImportError: cannot import name 'GFX950MXScaleLayout' from 'triton_kernels.tensor_details.layout' (/usr/local/lib/python3.12/dist-packages/triton_kernels/tensor_details/layout.py)
(EngineCore_DP0 pid=44662) 进程 EngineCore_DP0:
```
{% endcode %}
{% endhint %}
通过以下方式更新 vLLM 之后 [#updating-vllm-to-the-latest-on-amd](#updating-vllm-to-the-latest-on-amd "mention"),你可以运行 [gpt-oss-20b](https://huggingface.co/unsloth/gpt-oss-20b)!请参见 [#optimal-vllm-commands-on-amd](#optimal-vllm-commands-on-amd "mention") 以获取在 AMD GPU 上运行 vllm 的更优命令(你可能会获得更快的推理!)
{% code overflow="wrap" %}
```bash
export VLLM_ROCM_USE_AITER=1
export VLLM_ROCM_USE_AITER_MHA=0
vllm serve unsloth/gpt-oss-20b \
--no-enable-prefix-caching \
--compilation-config '{"full_cuda_graph": true}' \
--port 8001 \\
--max-model-len 48000 \
--gpu-memory-utilization 0.85
```
{% endcode %}
### :interrobang:RuntimeError:用户指定了不支持的 autocast device\_type 'hip'
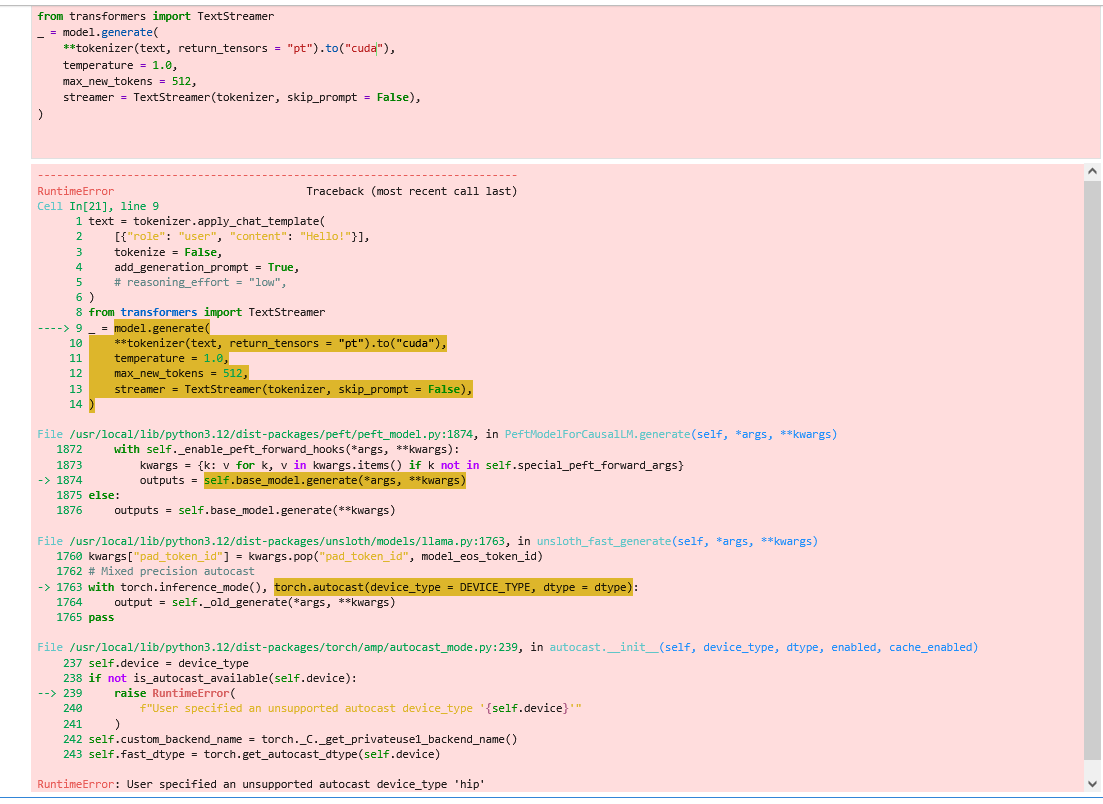 **请更新 Unsloth!** 见下文 [#updating-unsloth](#updating-unsloth "mention")
### :bug:NotImplementedError:Unsloth 当前正常
**请更新 Unsloth!** 见下文 [#updating-unsloth](#updating-unsloth "mention")
### :bug:NotImplementedError:Unsloth 当前正常
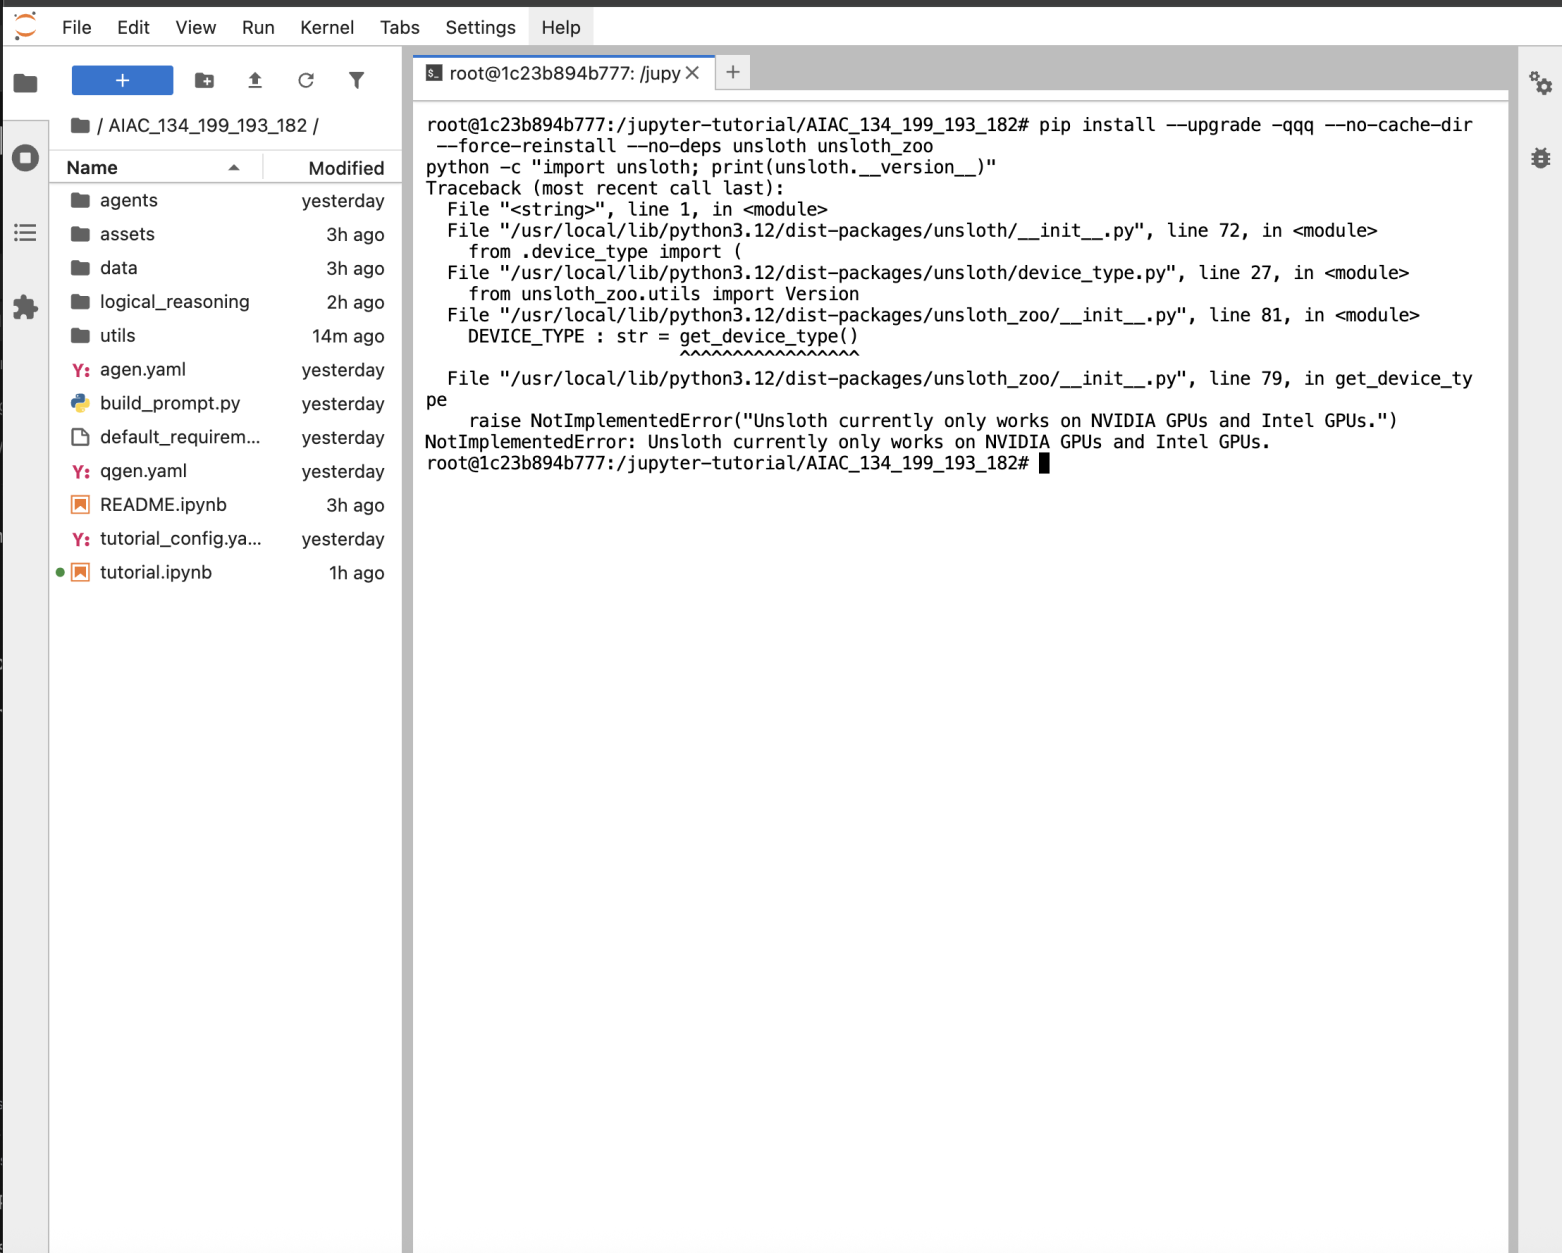 ### :new:更新 Unsloth
**首先,更新 Unsloth** 并确认一切按预期运行——点击 **终端**
然后在下面的 **终端** 用于更新 Unsloth - **确保版本为 2025.10.5 或更高。**
```
pip install --upgrade -qqq --no-cache-dir --force-reinstall --no-deps unsloth unsloth_zoo
pip uninstall bitsandbytes -y
pip install "unsloth[amd] @ git+https://github.com/unslothai/unsloth"
python -c "import unsloth; print(unsloth.__version__)"
```
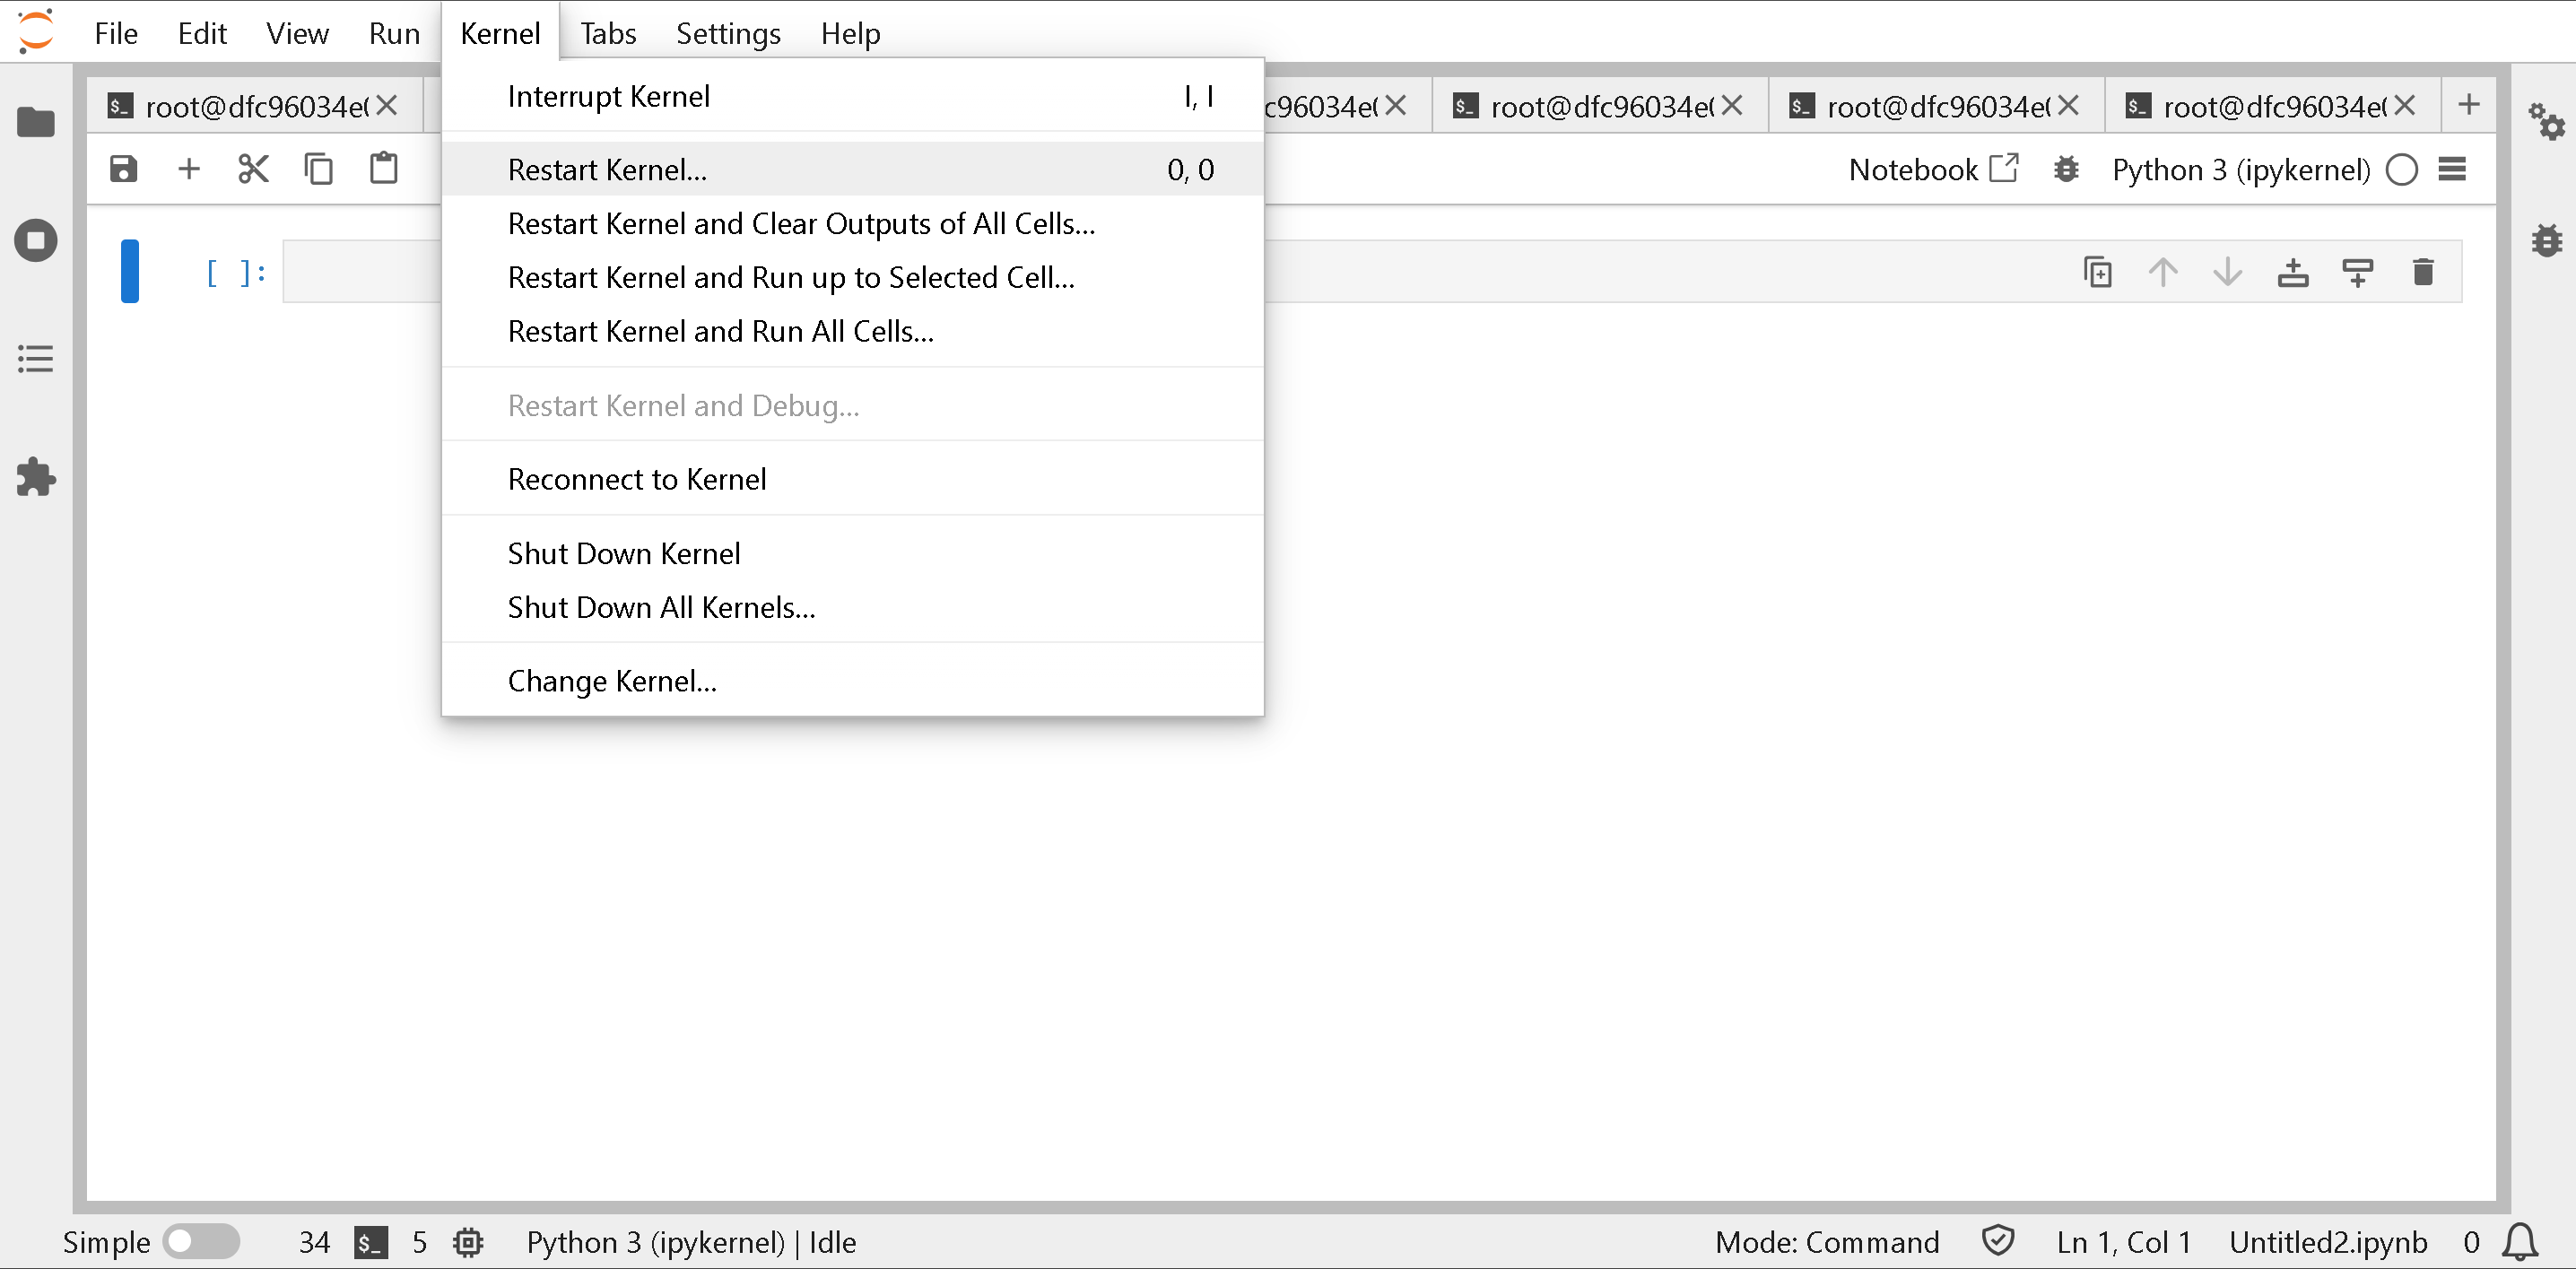
**你还必须重启运行时**
### :new:更新 Unsloth
**首先,更新 Unsloth** 并确认一切按预期运行——点击 **终端**
然后在下面的 **终端** 用于更新 Unsloth - **确保版本为 2025.10.5 或更高。**
```
pip install --upgrade -qqq --no-cache-dir --force-reinstall --no-deps unsloth unsloth_zoo
pip uninstall bitsandbytes -y
pip install "unsloth[amd] @ git+https://github.com/unslothai/unsloth"
python -c "import unsloth; print(unsloth.__version__)"
```
**你还必须重启运行时**
 ### :interrobang:在抛出一个 'std::logic\_error' 实例后调用了 terminate(),what()
请确认你使用的是 `torch==2.8.0`。重新运行下面内容:
{% code overflow="wrap" %}
```bash
pip install --upgrade torch==2.8.0 pytorch-triton-rocm torchvision torchaudio torchao==0.13.0 xformers --index-url https://download.pytorch.org/whl/rocm6.4
```
{% endcode %}
### :interrobang:在抛出一个 'std::logic\_error' 实例后调用了 terminate(),what()
请确认你使用的是 `torch==2.8.0`。重新运行下面内容:
{% code overflow="wrap" %}
```bash
pip install --upgrade torch==2.8.0 pytorch-triton-rocm torchvision torchaudio torchao==0.13.0 xformers --index-url https://download.pytorch.org/whl/rocm6.4
```
{% endcode %}
 ### :question:系统尚未启动,无法连接到总线
你可能会看到下面的内容:
```
root@270fa7fa9157:/jupyter-tutorial/AIAC_129_212_183_103/assets# reboot
系统未使用 systemd 作为初始化系统启动(PID 1)。无法操作。
无法连接到总线:主机已关闭
无法与 init 守护进程通信。
```
请联系我们,这样我们就可以重启机器!
### :bug:未找到已配置的 ROCm 二进制文件 - get\_native\_library()
这表明 bitsandbytes 没有正确安装,如下所示:
{% code overflow="wrap" %}
```
Traceback (most recent call last):
File "/usr/local/lib/python3.12/dist-packages/bitsandbytes/cextension.py", line 313, in
lib = get_native_library()
^^^^^^^^^^^^^^^^^^^^
File "/usr/local/lib/python3.12/dist-packages/bitsandbytes/cextension.py", line 282, in get_native_library
raise RuntimeError(f"Configured {BNB_BACKEND} binary not found at {cuda_binary_path}")
RuntimeError:在 /usr/local/lib/python3.12/dist-packages/bitsandbytes/libbitsandbytes_rocm64.so 找不到已配置的 ROCm 二进制文件
```
{% endcode %}
请参见 [#updating-unsloth](#updating-unsloth "mention")以更新 bitsandbytes 和 Unsloth!
### :exclamation:NotImplementedError:无法从 meta tensor 复制出去;没有数据!
这意味着你内存不足。请参见 [#how-do-i-free-amd-gpu-memory](#how-do-i-free-amd-gpu-memory "mention") 以释放 GPU 内存。
{% code overflow="wrap" %}
```
--------------------------------------------------------------------------
NotImplementedError Traceback (most recent call last)
Cell In[18], line 8
5 tokenizer.pad_token_id = tokenizer.eos_token_id
7 # 使用适合 ROCm 的设置和正确的数据处理来设置训练器
----> 8 trainer = SFTTrainer(
9 model=model,
...
--> 235 lm_head_bad = lm_head_bad.cpu().float().numpy().round(3)
236 from collections import Counter
237 counter = Counter()
NotImplementedError:无法从 meta tensor 复制出去;没有数据!
```
{% endcode %}
### :thought\_balloon:从 vllm.\_C 导入失败,错误为 ModuleNotFoundError("没有名为 'vllm.\_C' 的模块")
请重新安装 vLLM。请使用 `vllm_build` 作为你执行 git clone 的文件夹,而不是 `vllm`. [#updating-vllm-to-the-latest-on-amd](#updating-vllm-to-the-latest-on-amd "mention")
### :hushed:ModuleNotFoundError:没有名为 'vllm' 的模块
请不要 `rm -rf vllm_build` 你构建的文件夹。或者通过以下方式重新安装 vllm [#updating-vllm-to-the-latest-on-amd](#updating-vllm-to-the-latest-on-amd "mention")
### :ledger:ipykernel>6.30.1 会破坏进度条。
如果你看到下面的内容:
{% code overflow="wrap" %}
```
🦥 Unsloth:将修补你的电脑以启用快 2 倍的免费微调。
#### Unsloth:`hf_xet==1.1.10` 和 `ipykernel>6.30.1` 会破坏进度条。暂时在 XET 中禁用。
#### Unsloth:要重新启用进度条,请降级到 `ipykernel==6.30.1`,或者等待修复
https://github.com/huggingface/xet-core/issues/526
```
{% endcode %}
目前先忽略它——你只是不会看到下载模型和上传时的进度条。
### :bug:AssertionError:没有 MXFP4 MoE 后端
如果你正在运行 gpt-oss-20b 并在 vLLM 期间看到这个,请通过以下方式重新安装 vLLM [#updating-vllm-to-the-latest-on-amd](#updating-vllm-to-the-latest-on-amd "mention")
### :head\_bandage:NotImplementedError:无法运行 \`aten::empty\_strided\`
### :question:系统尚未启动,无法连接到总线
你可能会看到下面的内容:
```
root@270fa7fa9157:/jupyter-tutorial/AIAC_129_212_183_103/assets# reboot
系统未使用 systemd 作为初始化系统启动(PID 1)。无法操作。
无法连接到总线:主机已关闭
无法与 init 守护进程通信。
```
请联系我们,这样我们就可以重启机器!
### :bug:未找到已配置的 ROCm 二进制文件 - get\_native\_library()
这表明 bitsandbytes 没有正确安装,如下所示:
{% code overflow="wrap" %}
```
Traceback (most recent call last):
File "/usr/local/lib/python3.12/dist-packages/bitsandbytes/cextension.py", line 313, in
lib = get_native_library()
^^^^^^^^^^^^^^^^^^^^
File "/usr/local/lib/python3.12/dist-packages/bitsandbytes/cextension.py", line 282, in get_native_library
raise RuntimeError(f"Configured {BNB_BACKEND} binary not found at {cuda_binary_path}")
RuntimeError:在 /usr/local/lib/python3.12/dist-packages/bitsandbytes/libbitsandbytes_rocm64.so 找不到已配置的 ROCm 二进制文件
```
{% endcode %}
请参见 [#updating-unsloth](#updating-unsloth "mention")以更新 bitsandbytes 和 Unsloth!
### :exclamation:NotImplementedError:无法从 meta tensor 复制出去;没有数据!
这意味着你内存不足。请参见 [#how-do-i-free-amd-gpu-memory](#how-do-i-free-amd-gpu-memory "mention") 以释放 GPU 内存。
{% code overflow="wrap" %}
```
--------------------------------------------------------------------------
NotImplementedError Traceback (most recent call last)
Cell In[18], line 8
5 tokenizer.pad_token_id = tokenizer.eos_token_id
7 # 使用适合 ROCm 的设置和正确的数据处理来设置训练器
----> 8 trainer = SFTTrainer(
9 model=model,
...
--> 235 lm_head_bad = lm_head_bad.cpu().float().numpy().round(3)
236 from collections import Counter
237 counter = Counter()
NotImplementedError:无法从 meta tensor 复制出去;没有数据!
```
{% endcode %}
### :thought\_balloon:从 vllm.\_C 导入失败,错误为 ModuleNotFoundError("没有名为 'vllm.\_C' 的模块")
请重新安装 vLLM。请使用 `vllm_build` 作为你执行 git clone 的文件夹,而不是 `vllm`. [#updating-vllm-to-the-latest-on-amd](#updating-vllm-to-the-latest-on-amd "mention")
### :hushed:ModuleNotFoundError:没有名为 'vllm' 的模块
请不要 `rm -rf vllm_build` 你构建的文件夹。或者通过以下方式重新安装 vllm [#updating-vllm-to-the-latest-on-amd](#updating-vllm-to-the-latest-on-amd "mention")
### :ledger:ipykernel>6.30.1 会破坏进度条。
如果你看到下面的内容:
{% code overflow="wrap" %}
```
🦥 Unsloth:将修补你的电脑以启用快 2 倍的免费微调。
#### Unsloth:`hf_xet==1.1.10` 和 `ipykernel>6.30.1` 会破坏进度条。暂时在 XET 中禁用。
#### Unsloth:要重新启用进度条,请降级到 `ipykernel==6.30.1`,或者等待修复
https://github.com/huggingface/xet-core/issues/526
```
{% endcode %}
目前先忽略它——你只是不会看到下载模型和上传时的进度条。
### :bug:AssertionError:没有 MXFP4 MoE 后端
如果你正在运行 gpt-oss-20b 并在 vLLM 期间看到这个,请通过以下方式重新安装 vLLM [#updating-vllm-to-the-latest-on-amd](#updating-vllm-to-the-latest-on-amd "mention")
### :head\_bandage:NotImplementedError:无法运行 \`aten::empty\_strided\`
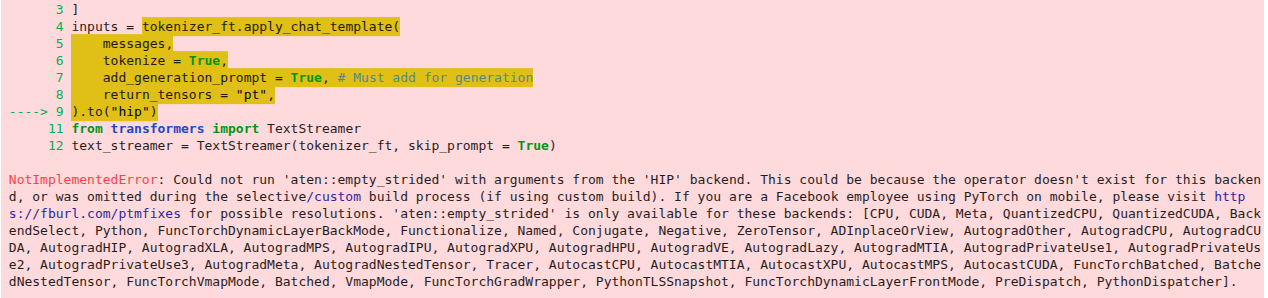 请使用 `.to("cuda")` 而不是 `.to("hip")` 同时更新 Unsloth [#updating-unsloth](#updating-unsloth "mention")
### :bug:NotImplementedError:无法运行 'aten::empty.memory\_format'
请参见 [#updating-unsloth](#updating-unsloth "mention")以更新 bitsandbytes 和 Unsloth!
---
# Agent Instructions
This documentation is published with GitBook. GitBook is the documentation platform designed so that both humans and AI agents can read, navigate, and reason over technical content effectively. Learn more at gitbook.com.
## Querying This Documentation
If you need additional information that is not directly available in this page, you can query the documentation by asking a question.
Perform an HTTP GET request on the following URL with the `ask` and `goal` query parameters:
```
GET https://unsloth.ai/docs/zh/bo-ke/unsloth-amd-pytorch-synthetic-data-hackathon.md?ask=&goal=
```
`ask` is the immediate question: it should be specific, self-contained, and written in natural language.
`goal` is what the user is ultimately trying to achieve, the reason they need the answer. Sharing it helps GitBook give you a better, more relevant answer. A goal is most helpful when it describes the outcome the user wants rather than restating the question. For example, with `ask=how do I create an API token`, a goal like `automate deployments from our CI pipeline` lets GitBook tailor the answer to that use case.
The response will contain a direct answer to the question and relevant excerpts and sources from the documentation.
Use this mechanism when the answer is not explicitly present in the current page, you need clarification or additional context, or you want to retrieve related documentation sections.
请使用 `.to("cuda")` 而不是 `.to("hip")` 同时更新 Unsloth [#updating-unsloth](#updating-unsloth "mention")
### :bug:NotImplementedError:无法运行 'aten::empty.memory\_format'
请参见 [#updating-unsloth](#updating-unsloth "mention")以更新 bitsandbytes 和 Unsloth!
---
# Agent Instructions
This documentation is published with GitBook. GitBook is the documentation platform designed so that both humans and AI agents can read, navigate, and reason over technical content effectively. Learn more at gitbook.com.
## Querying This Documentation
If you need additional information that is not directly available in this page, you can query the documentation by asking a question.
Perform an HTTP GET request on the following URL with the `ask` and `goal` query parameters:
```
GET https://unsloth.ai/docs/zh/bo-ke/unsloth-amd-pytorch-synthetic-data-hackathon.md?ask=&goal=
```
`ask` is the immediate question: it should be specific, self-contained, and written in natural language.
`goal` is what the user is ultimately trying to achieve, the reason they need the answer. Sharing it helps GitBook give you a better, more relevant answer. A goal is most helpful when it describes the outcome the user wants rather than restating the question. For example, with `ask=how do I create an API token`, a goal like `automate deployments from our CI pipeline` lets GitBook tailor the answer to that use case.
The response will contain a direct answer to the question and relevant excerpts and sources from the documentation.
Use this mechanism when the answer is not explicitly present in the current page, you need clarification or additional context, or you want to retrieve related documentation sections.