> For the complete documentation index, see [llms.txt](https://unsloth.ai/docs/llms.txt). Markdown versions of documentation pages are available by appending `.md` to page URLs; this page is available as [Markdown](https://unsloth.ai/docs/jp/burogu/unsloth-amd-pytorch-synthetic-data-hackathon.md).
# Unsloth AMD PyTorch Synthetic Data ハッカソン
AMD GPU で Unsloth を実行するためのヒントとコツ、トラブルシューティング、ガイド。
MI300 マシンへのアクセス権を得ると、Jupyter Notebook のインターフェースが表示されます:
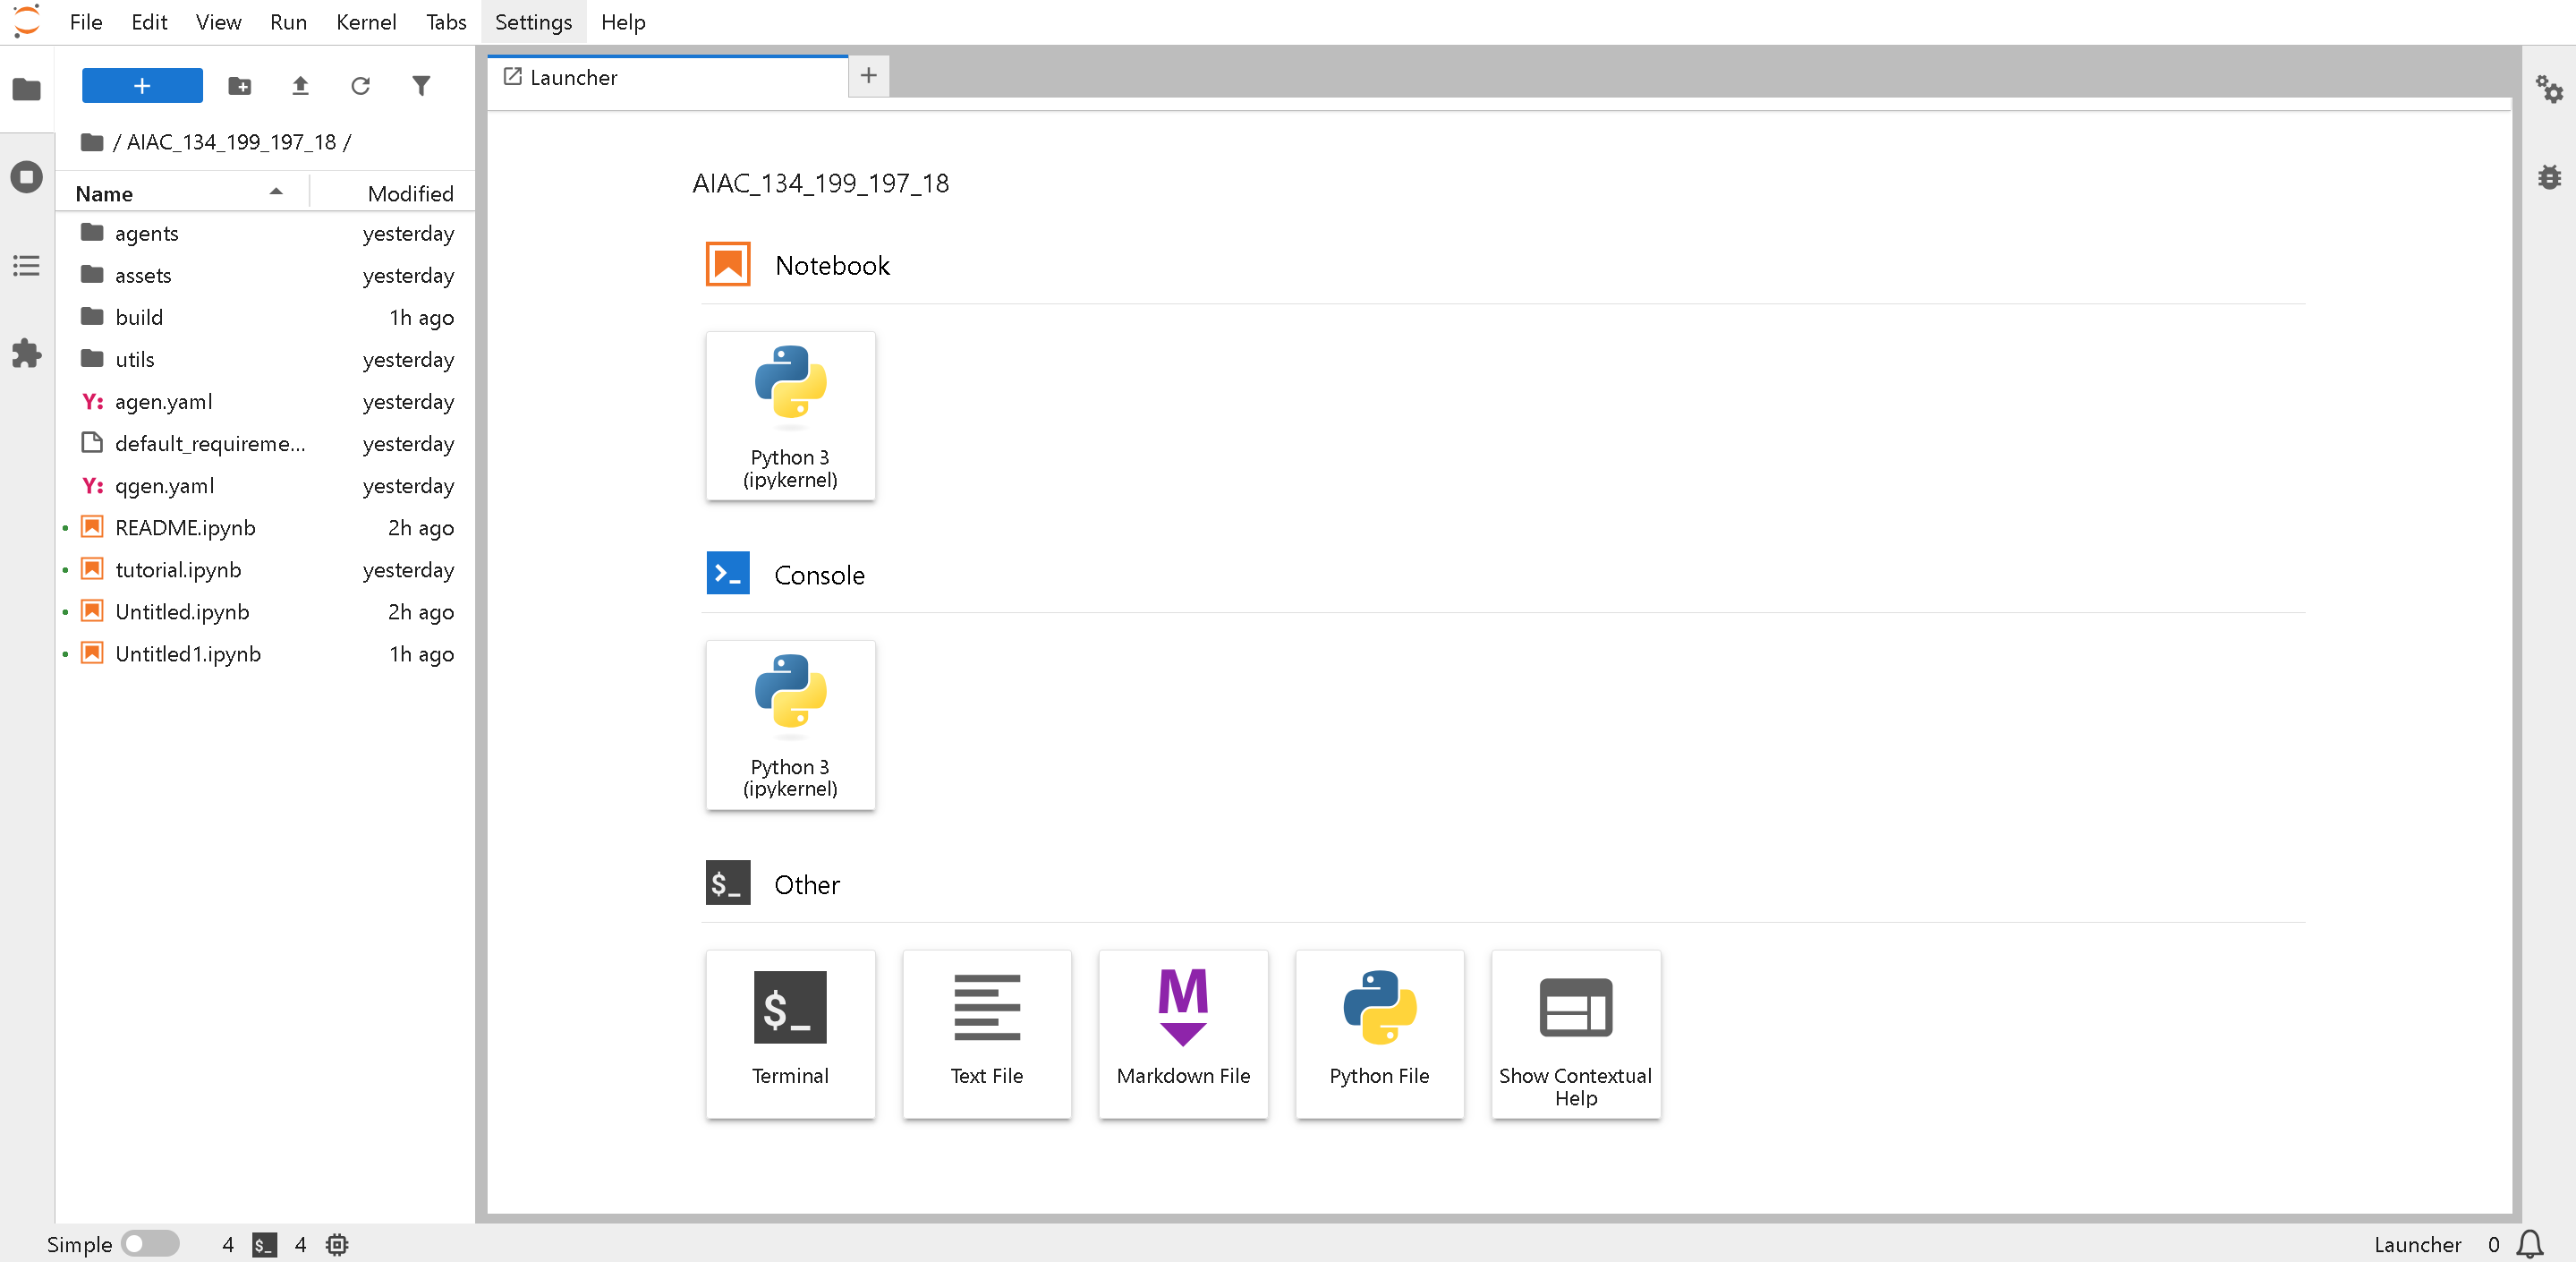 **まず、Unsloth を更新します** そして、すべてが期待どおりに動作することを確認します - 次をクリックしてください **ターミナル**
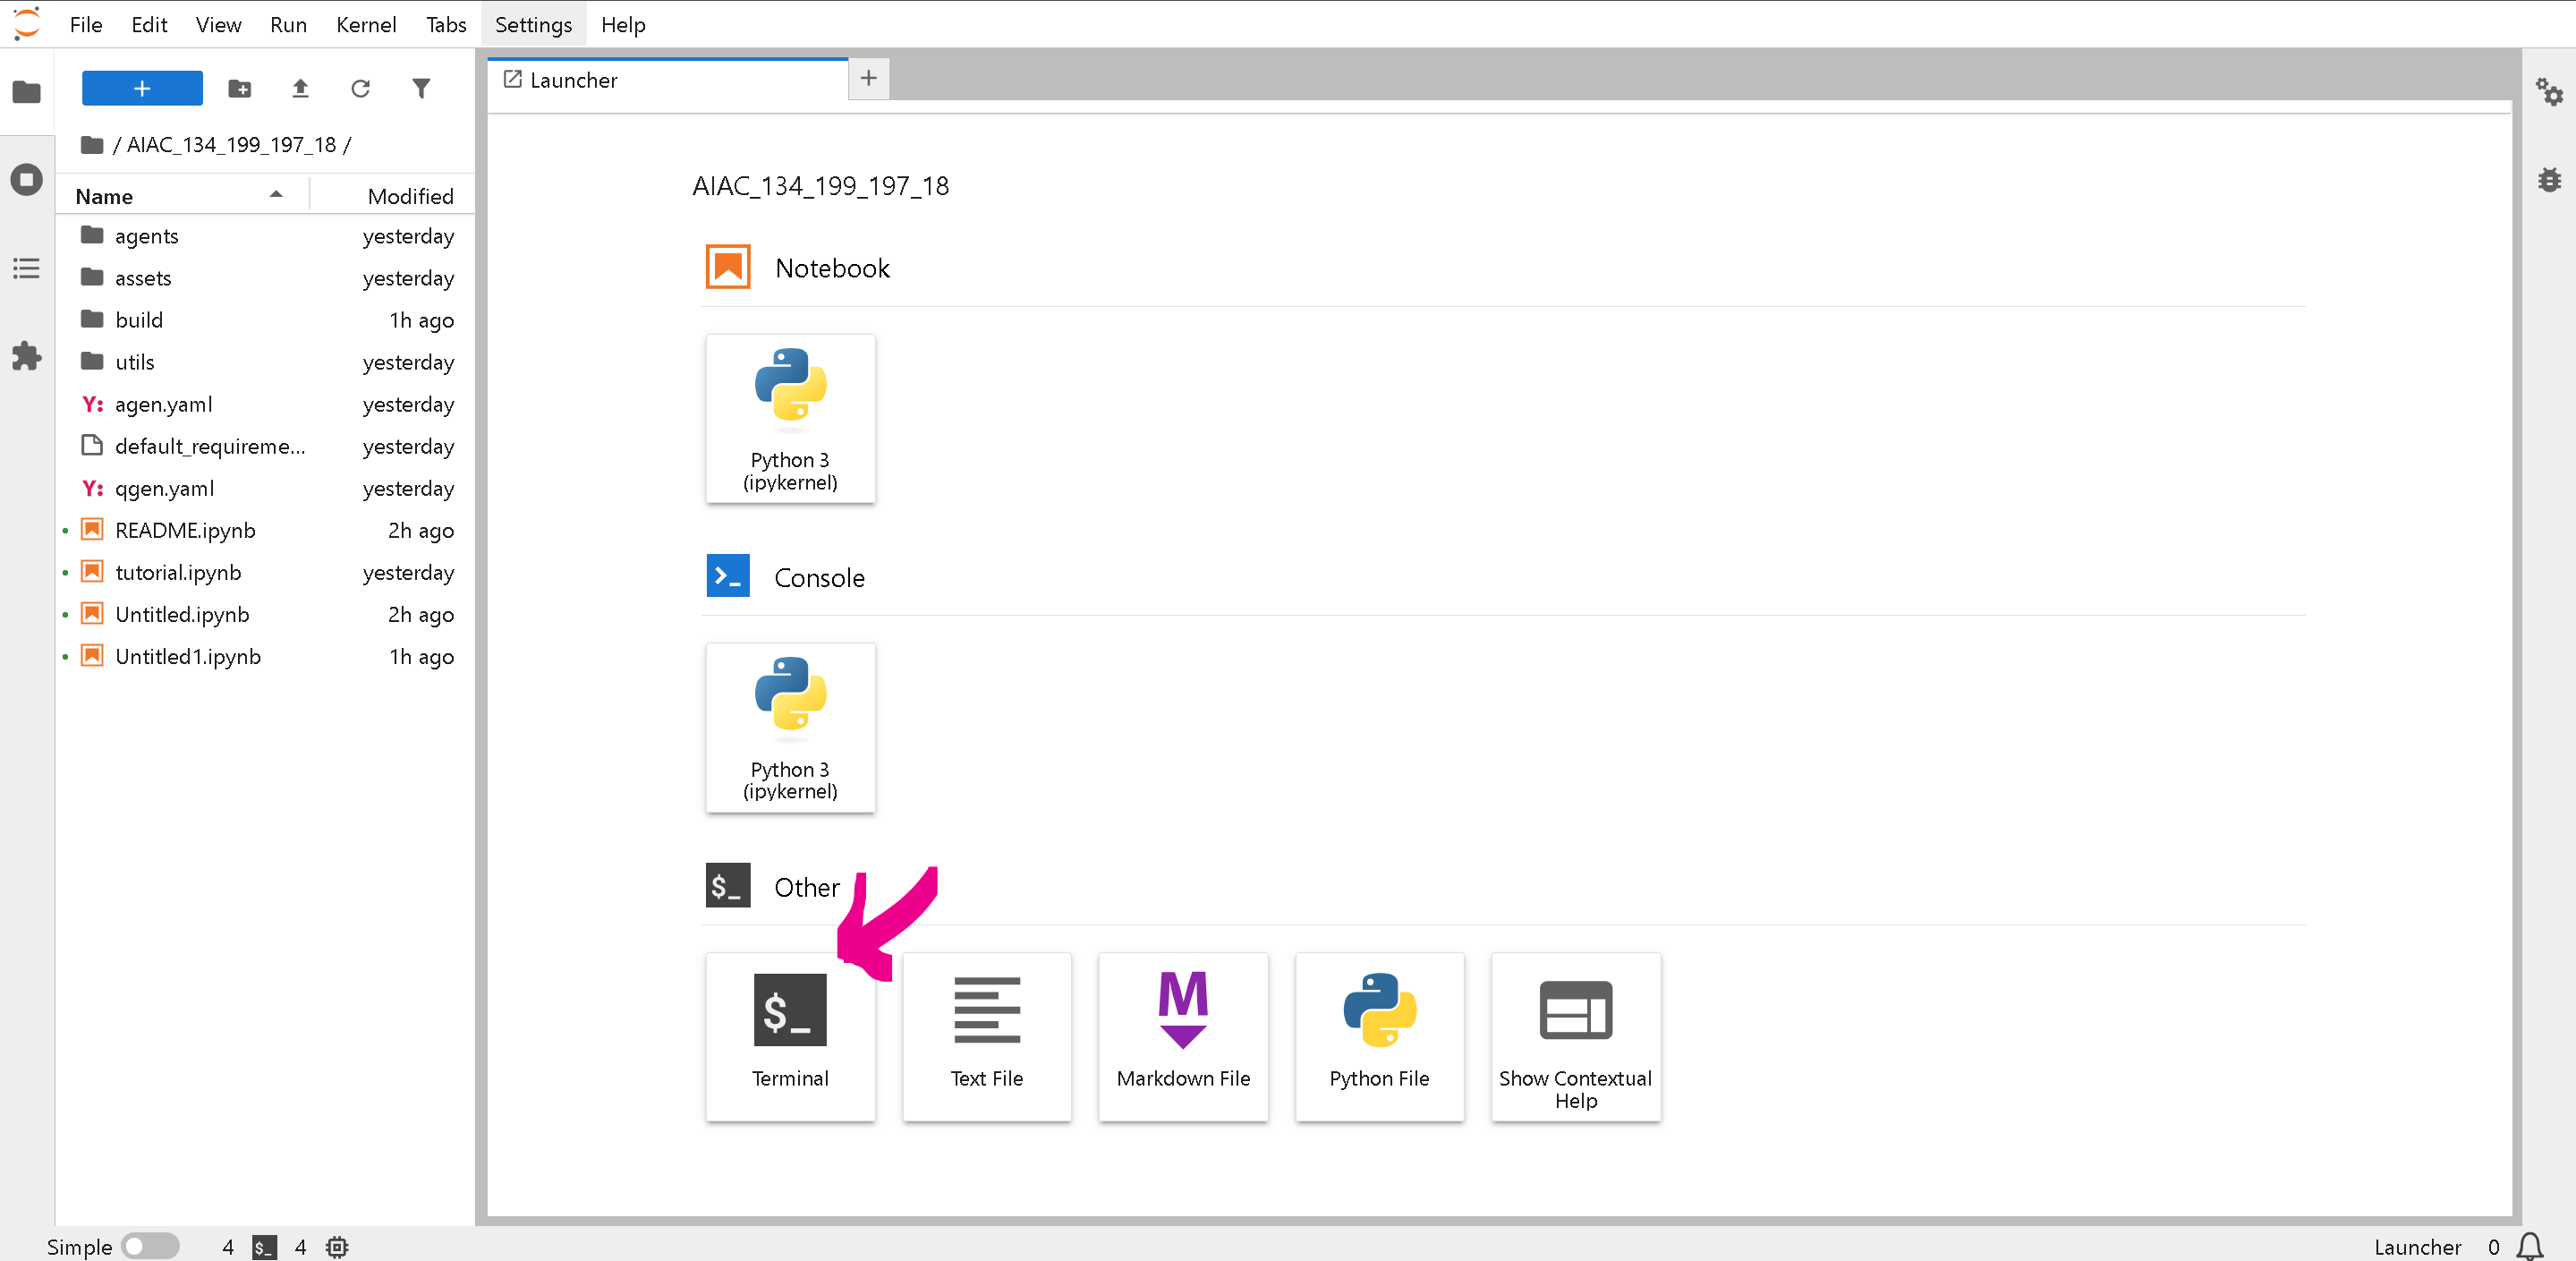 次に、以下を実行します **ターミナル** Unsloth を更新するには - バージョンが **2025.10.5** 以上であることを確認してください。
```
pip install --upgrade -qqq --no-cache-dir --force-reinstall --no-deps unsloth unsloth_zoo
python -c "import unsloth; print(unsloth.__version__)"
```
次に、以下を実行します **ターミナル** Unsloth を更新するには - バージョンが **2025.10.5** 以上であることを確認してください。
```
pip install --upgrade -qqq --no-cache-dir --force-reinstall --no-deps unsloth unsloth_zoo
python -c "import unsloth; print(unsloth.__version__)"
```
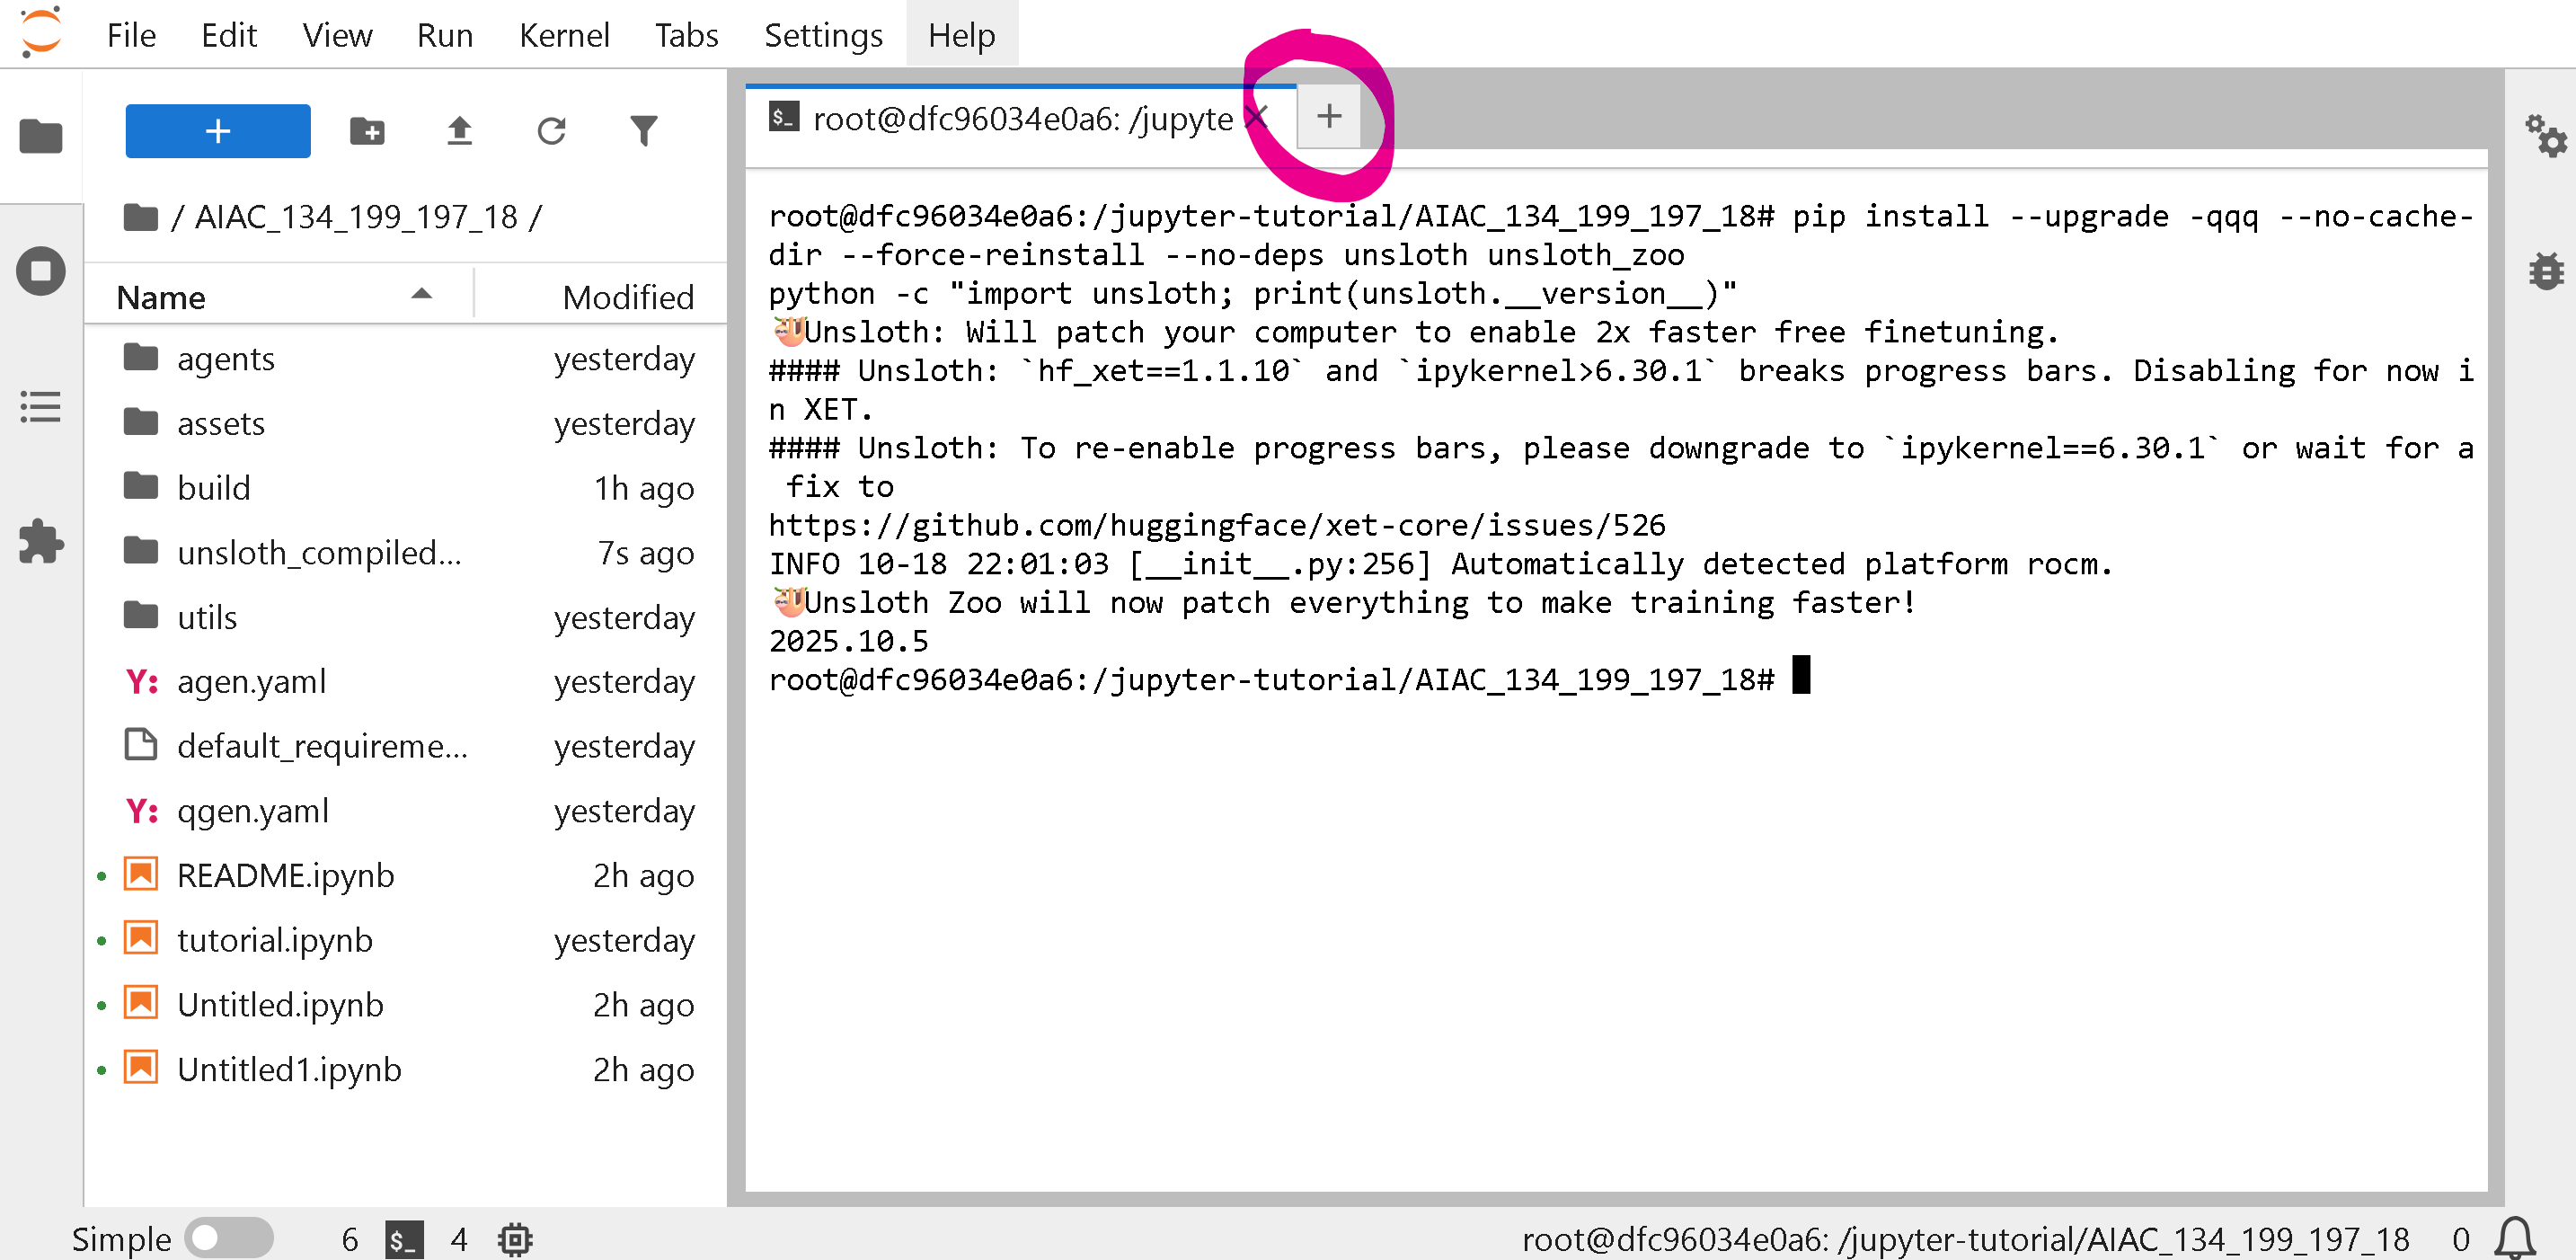
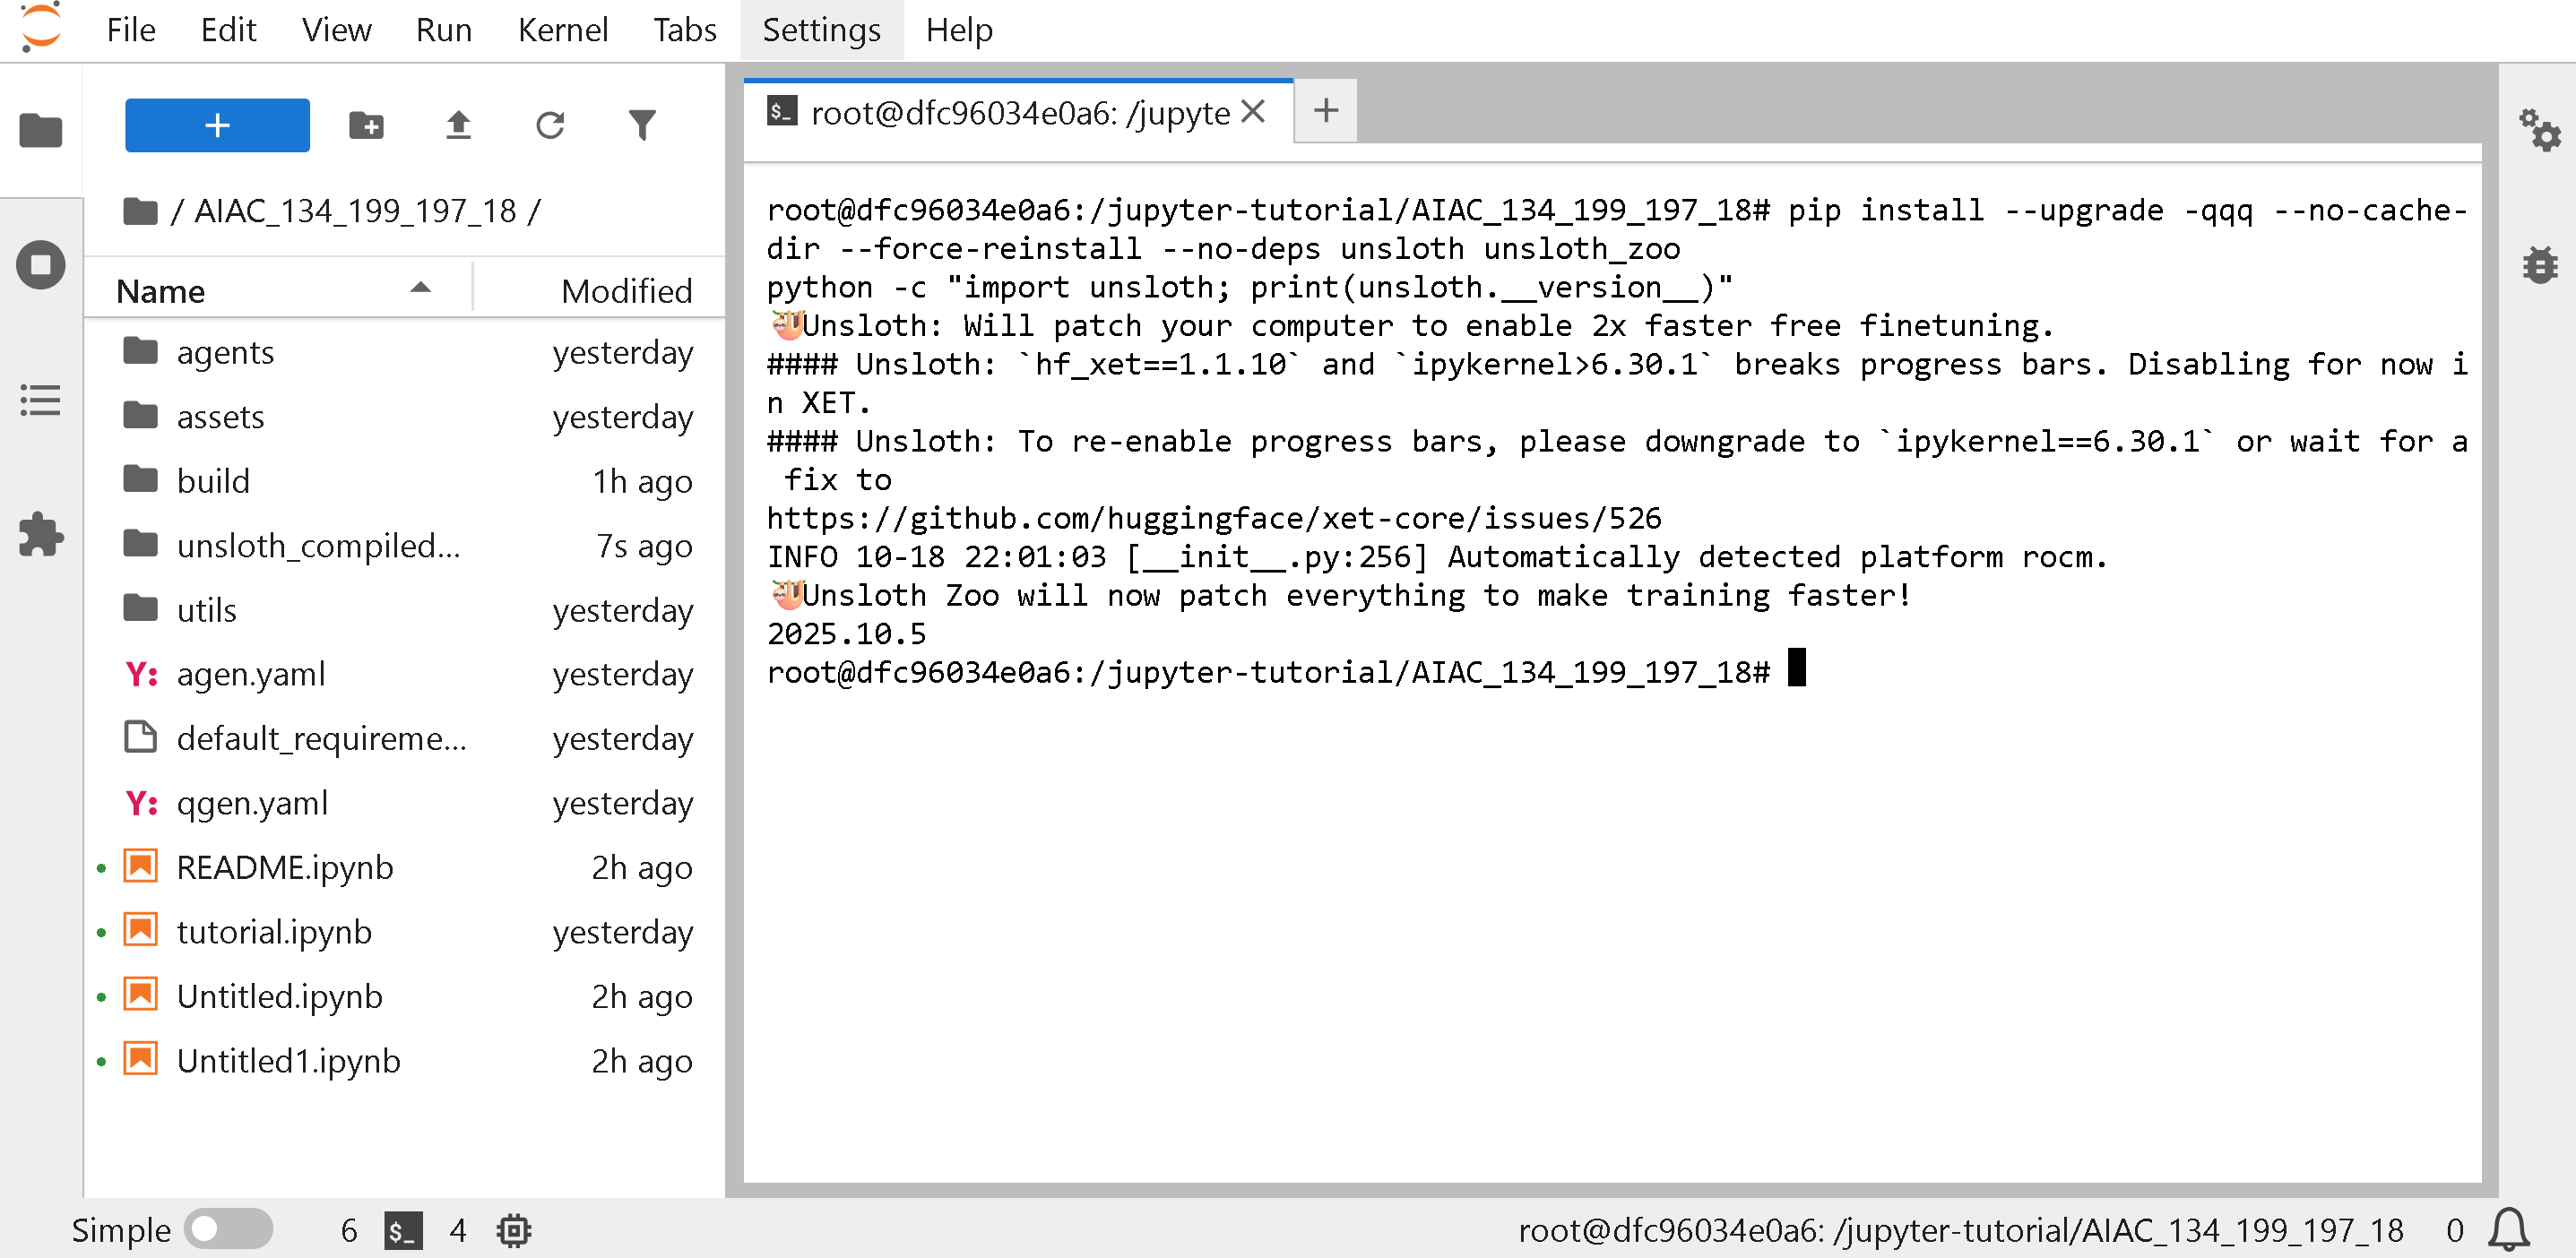 新しい Notebook または Terminal を作成するには、PLUS ボタンをクリックします
 {% hint style="success" %}
**README.ipynb ファイルを開いて、手順と評価基準を確認します**
{% endhint %}
### :butterfly:チュートリアル 1: Unsloth が動作することの確認
シンプルな Llama 3.2 1B / 3B の会話用 notebook が、新しい環境で期待どおりに動作することを確認します **ターミナル**.
{% code overflow="wrap" %}
```bash
wget "https://raw.githubusercontent.com/unslothai/notebooks/refs/heads/main/python_scripts/Llama3.2_(1B_and_3B)-Conversational.py" -O llama_basic.py
python llama_basic.py
```
{% endcode %}
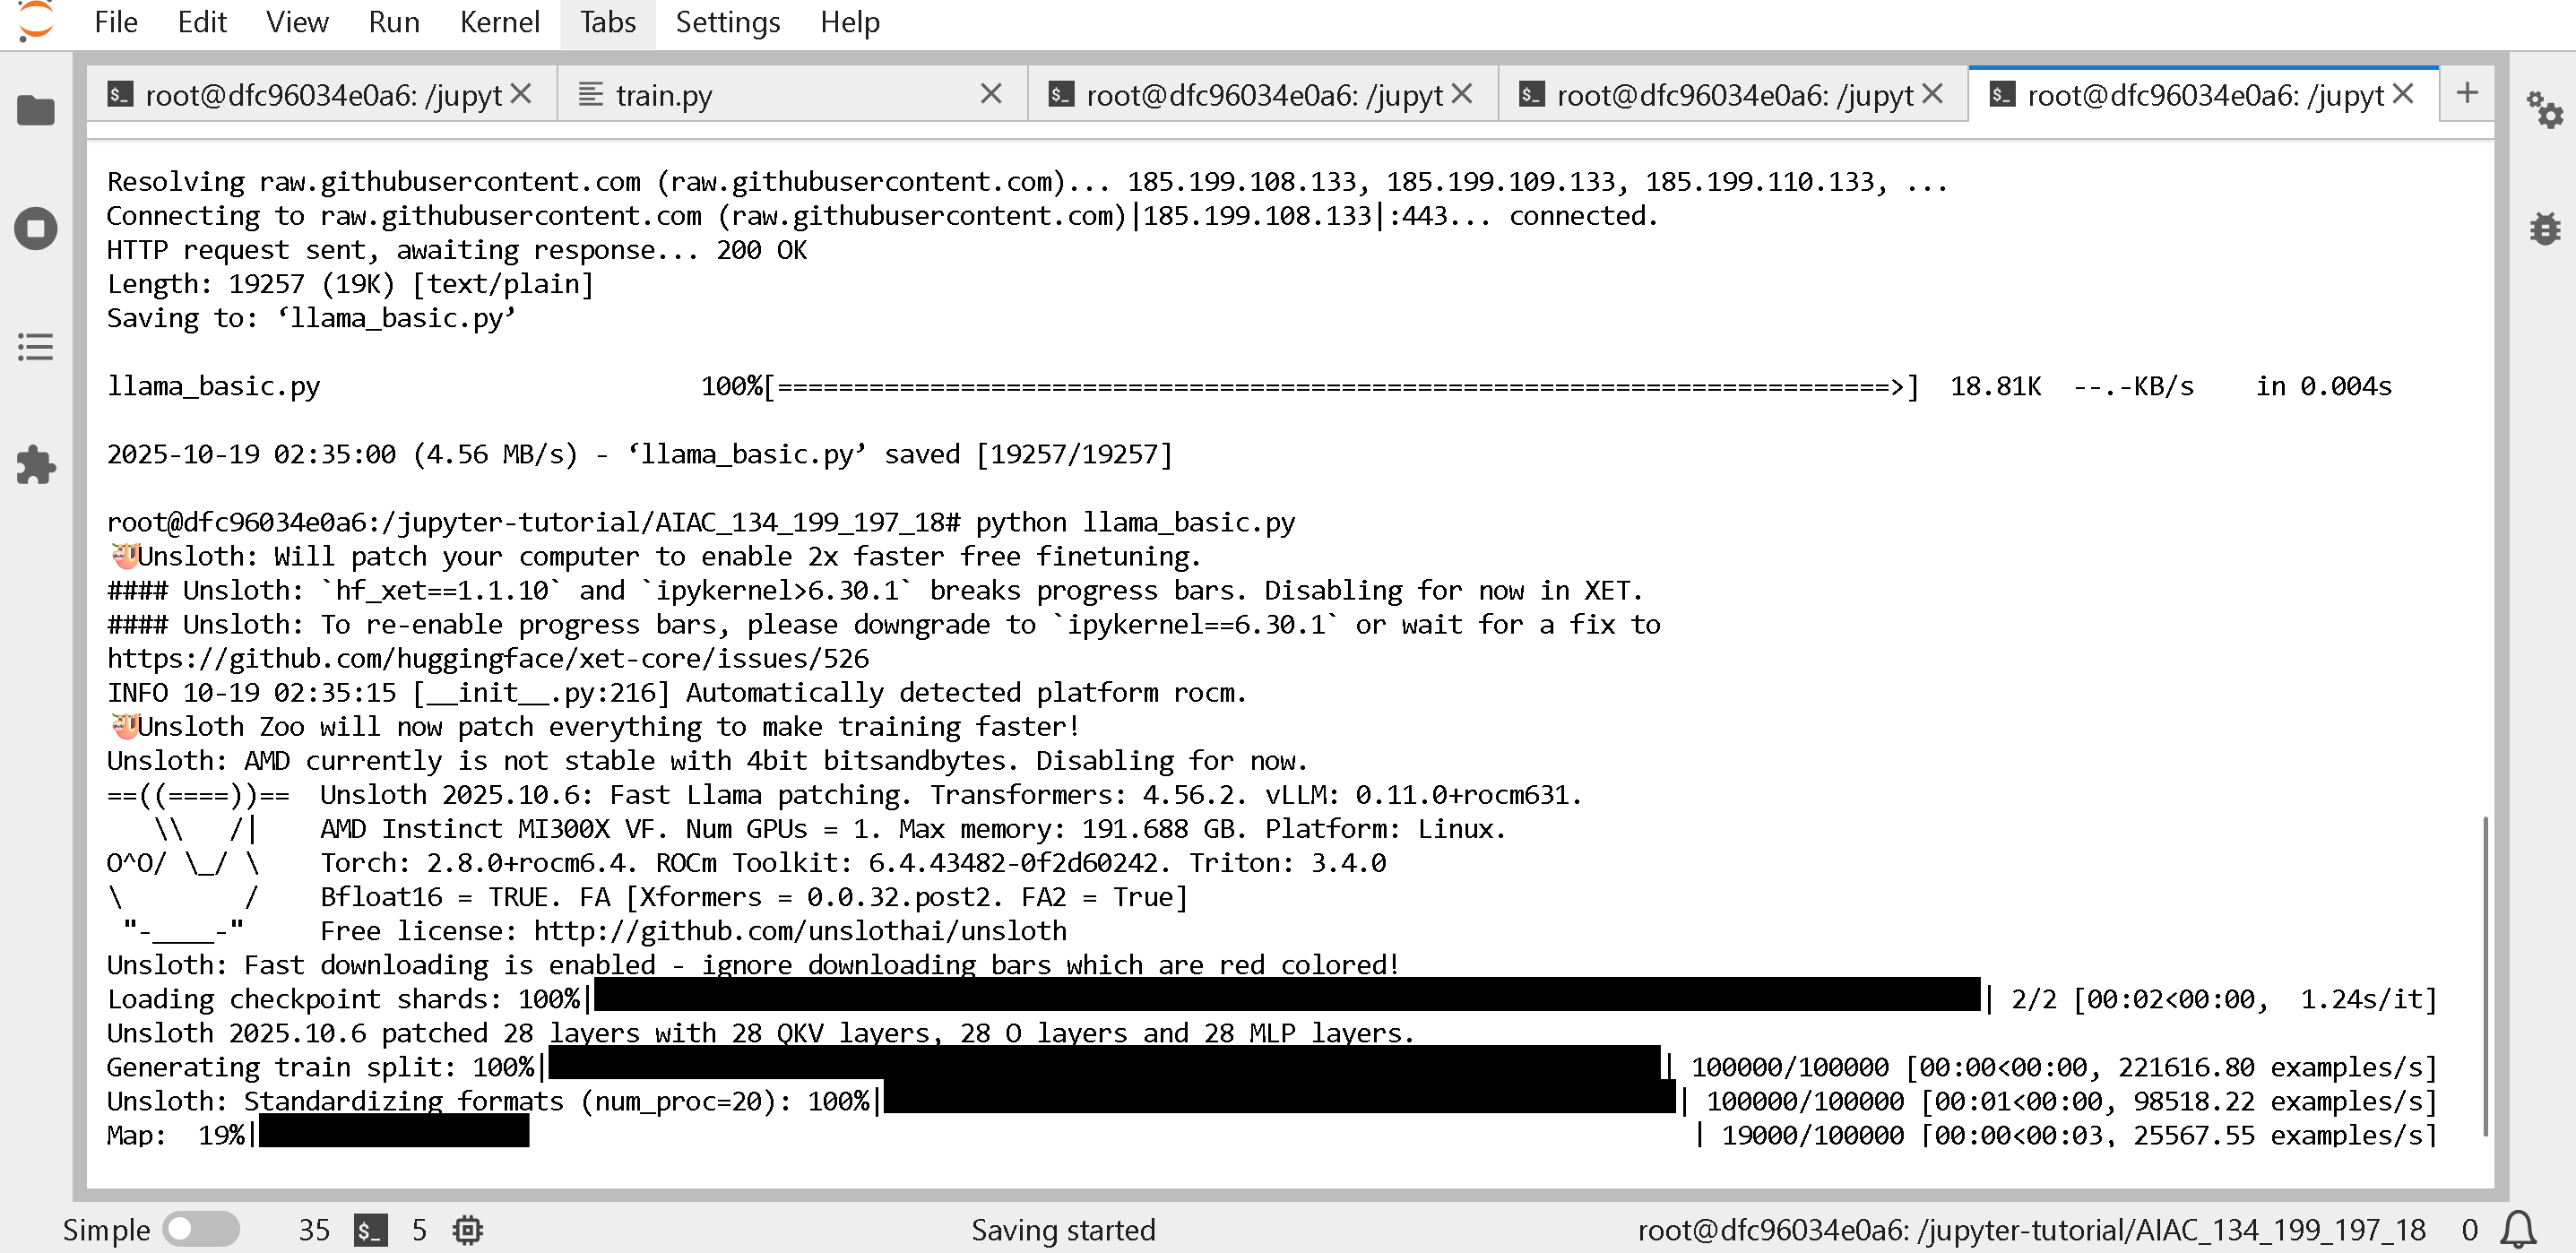
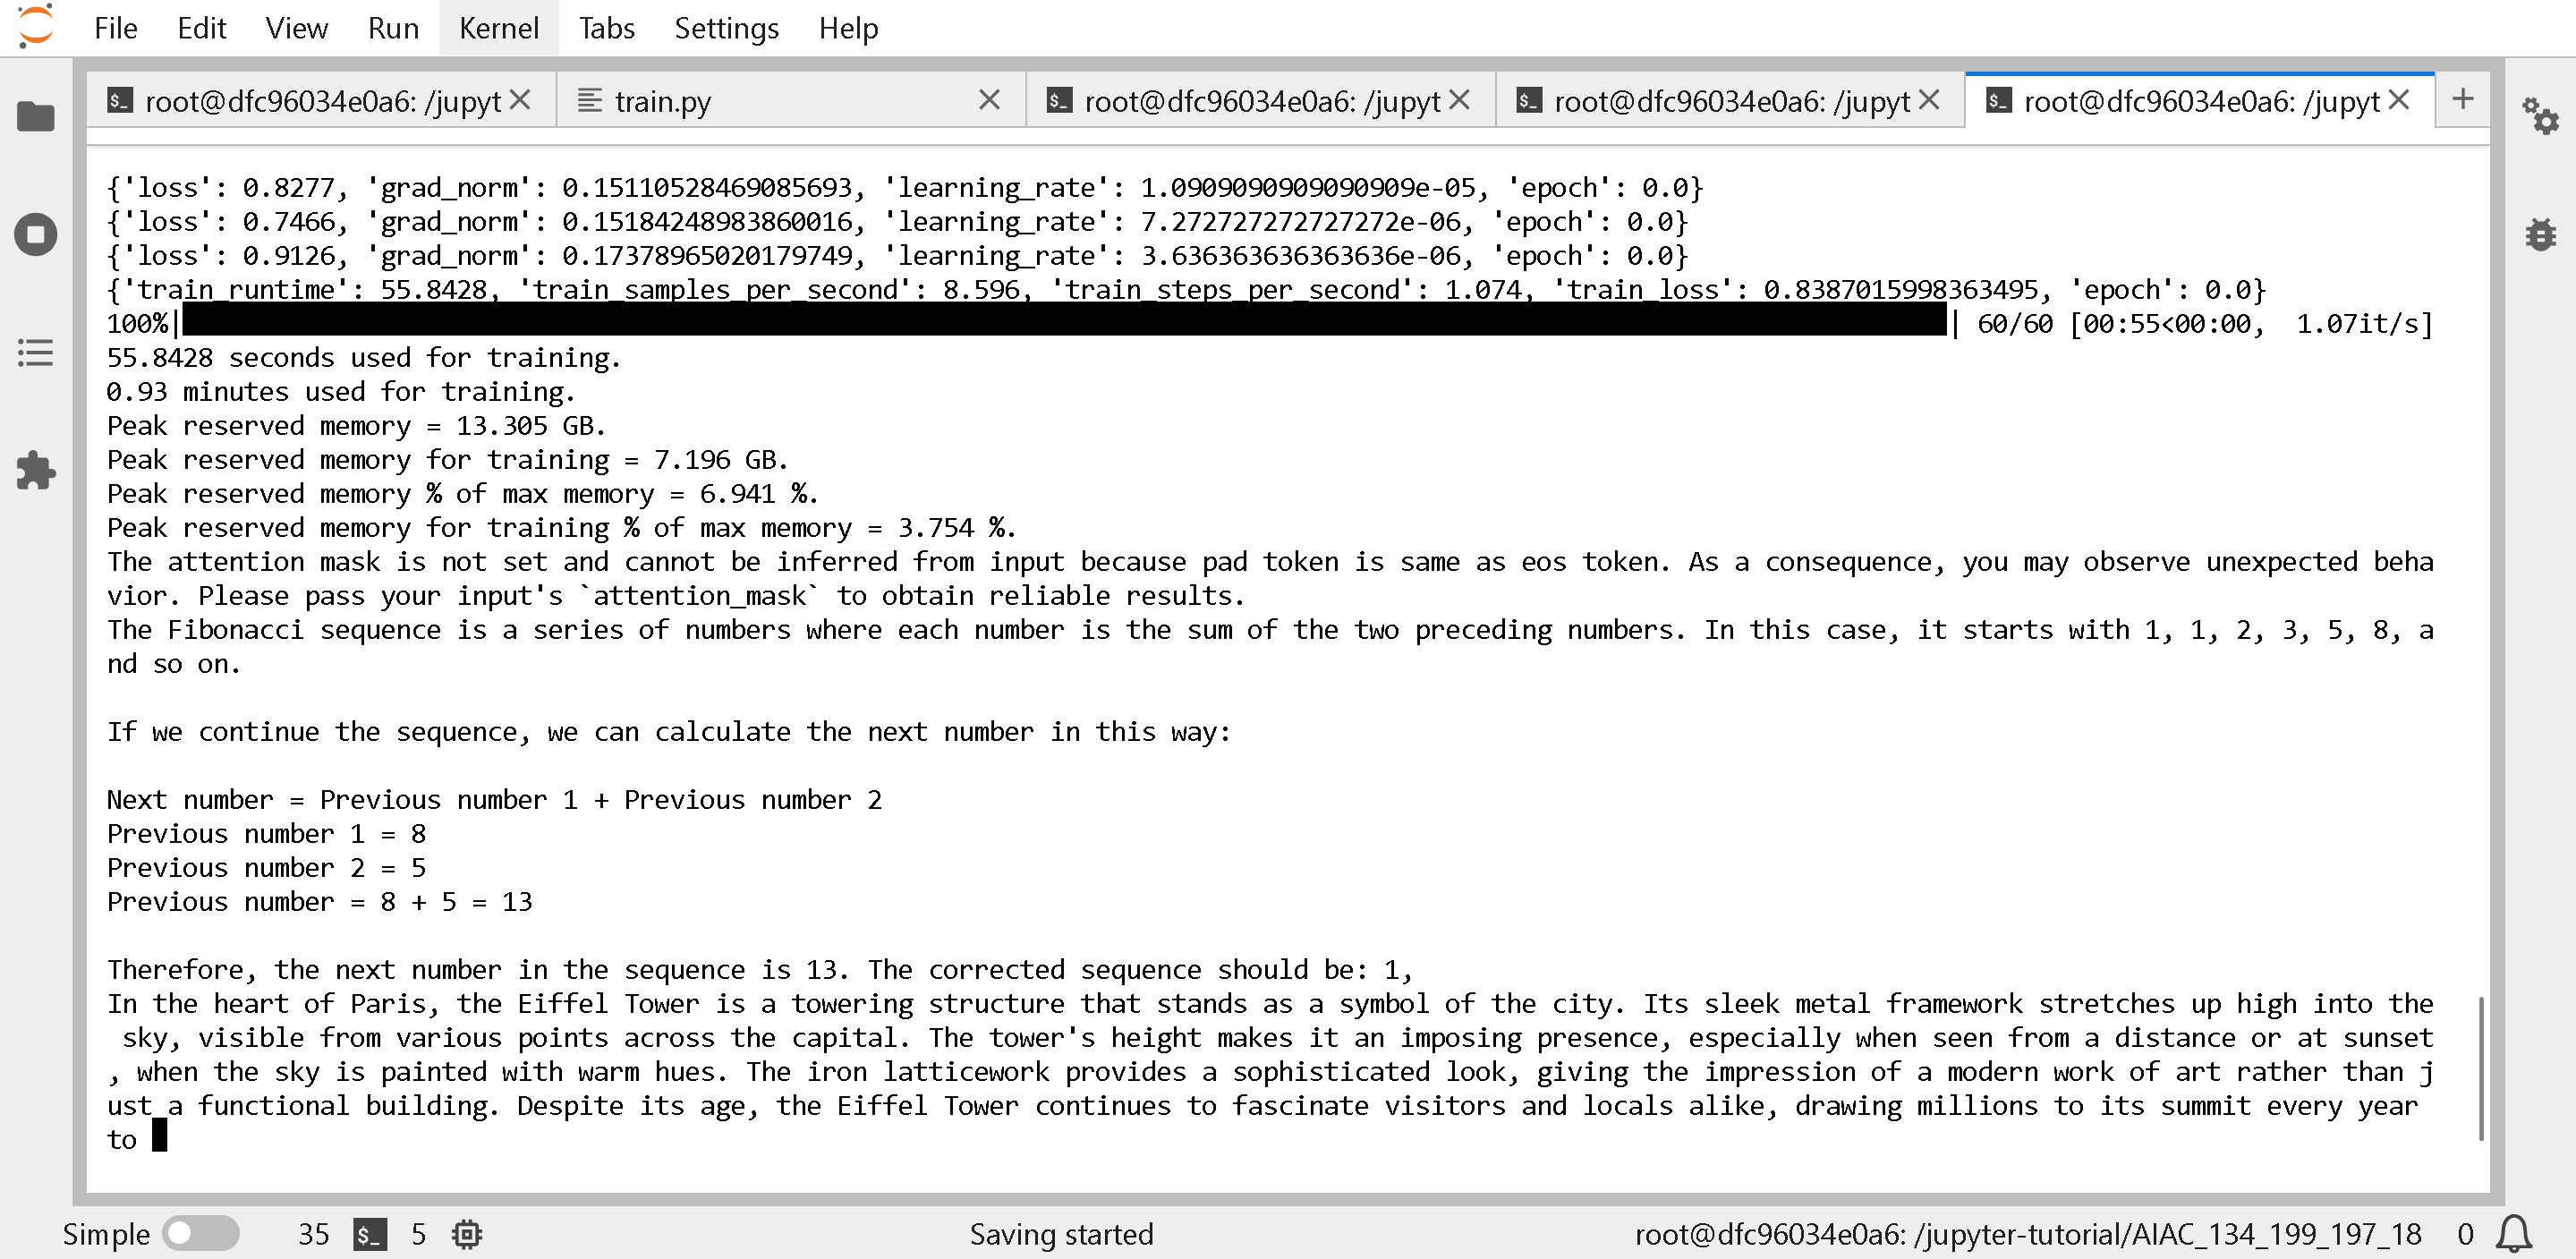
以下が表示されるはずです(2分かかります)。何か壊れた場合は、まず次を使って Unsloth を更新してみてください
{% code overflow="wrap" %}
```bash
pip install --upgrade -qqq --no-cache-dir --force-reinstall --no-deps unsloth unsloth_zoo
python -c "import unsloth; print(unsloth.__version__)"
```
{% endcode %}
{% hint style="success" %}
**README.ipynb ファイルを開いて、手順と評価基準を確認します**
{% endhint %}
### :butterfly:チュートリアル 1: Unsloth が動作することの確認
シンプルな Llama 3.2 1B / 3B の会話用 notebook が、新しい環境で期待どおりに動作することを確認します **ターミナル**.
{% code overflow="wrap" %}
```bash
wget "https://raw.githubusercontent.com/unslothai/notebooks/refs/heads/main/python_scripts/Llama3.2_(1B_and_3B)-Conversational.py" -O llama_basic.py
python llama_basic.py
```
{% endcode %}
以下が表示されるはずです(2分かかります)。何か壊れた場合は、まず次を使って Unsloth を更新してみてください
{% code overflow="wrap" %}
```bash
pip install --upgrade -qqq --no-cache-dir --force-reinstall --no-deps unsloth unsloth_zoo
python -c "import unsloth; print(unsloth.__version__)"
```
{% endcode %}
 ### :sloth:チュートリアル 2: 合成データ生成の実行
{% hint style="success" %}
**tutorial.ipynb も実行できます。以下を見なくても、マシン上にすぐにあるはずです:**
{% endhint %}
では、以下の例を試してみましょう および
まず新しいものを作成します **ターミナル** もう一度 - PLUS ボタンで新しい **ターミナル**.
vLLM を実行して、新しい環境で Llama 3.3 70B Instruct を読み込みます **ターミナル** (新しい Terminal には PLUS ボタンを使ってください)
{% code overflow="wrap" %}
```
vllm serve Unsloth/Llama-3.3-70B-Instruct --port 8001 --max-model-len 48000 --gpu-memory-utilization 0.85
```
{% endcode %}
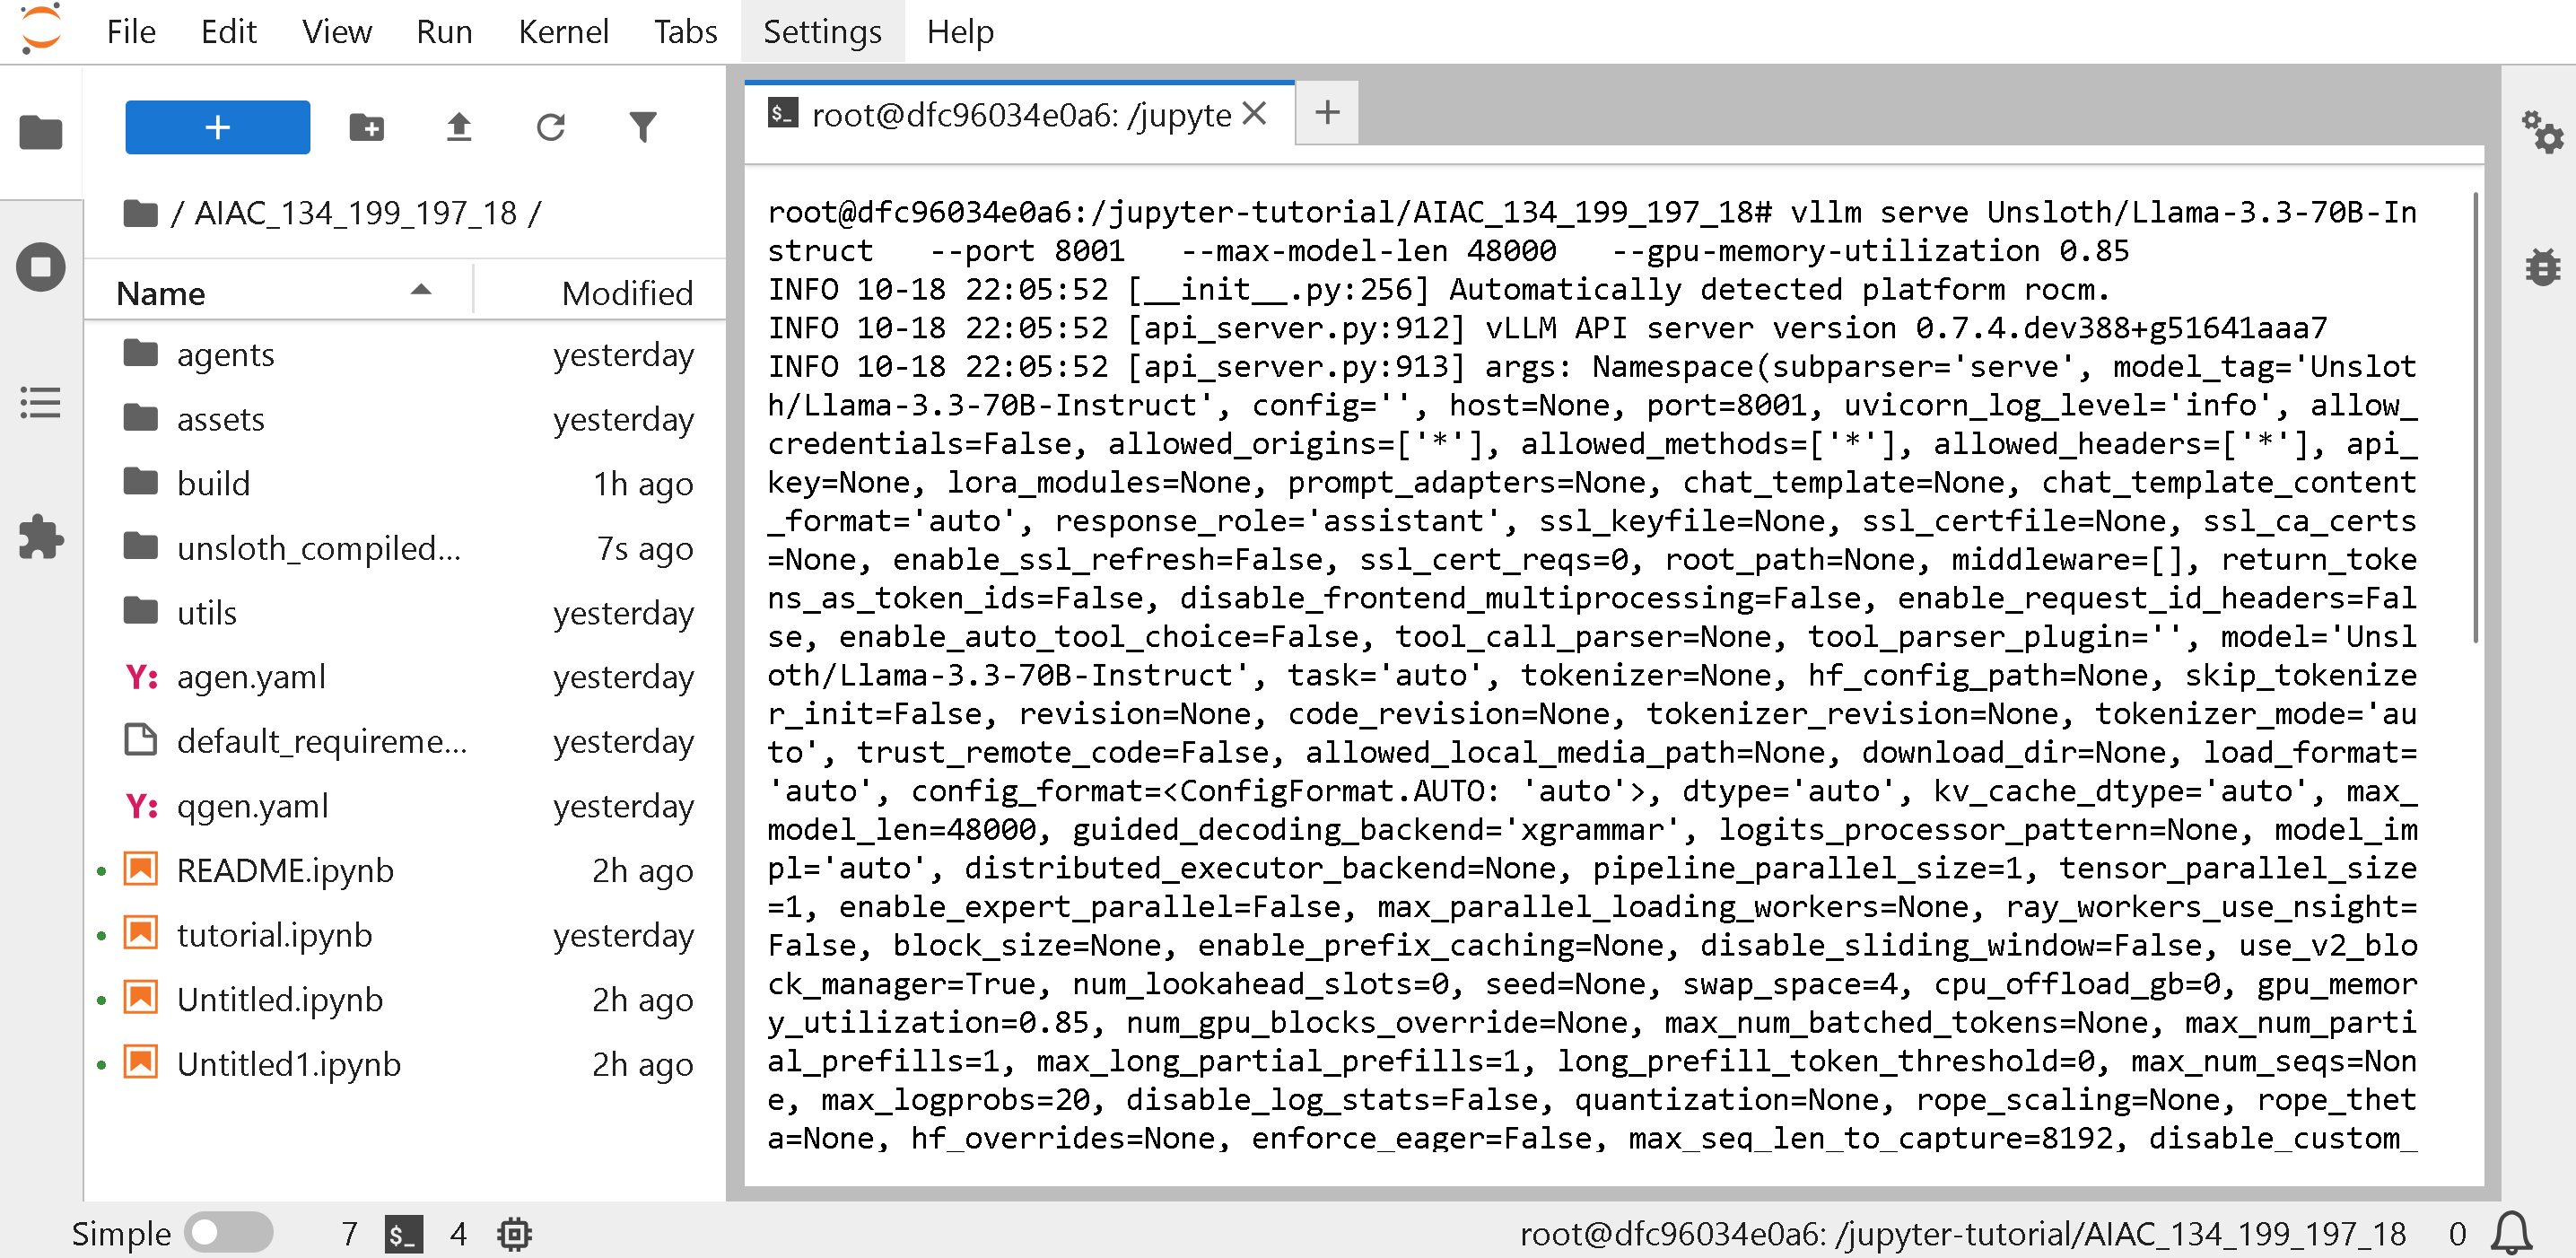
以下が表示されます:
### :sloth:チュートリアル 2: 合成データ生成の実行
{% hint style="success" %}
**tutorial.ipynb も実行できます。以下を見なくても、マシン上にすぐにあるはずです:**
{% endhint %}
では、以下の例を試してみましょう および
まず新しいものを作成します **ターミナル** もう一度 - PLUS ボタンで新しい **ターミナル**.
vLLM を実行して、新しい環境で Llama 3.3 70B Instruct を読み込みます **ターミナル** (新しい Terminal には PLUS ボタンを使ってください)
{% code overflow="wrap" %}
```
vllm serve Unsloth/Llama-3.3-70B-Instruct --port 8001 --max-model-len 48000 --gpu-memory-utilization 0.85
```
{% endcode %}
以下が表示されます:
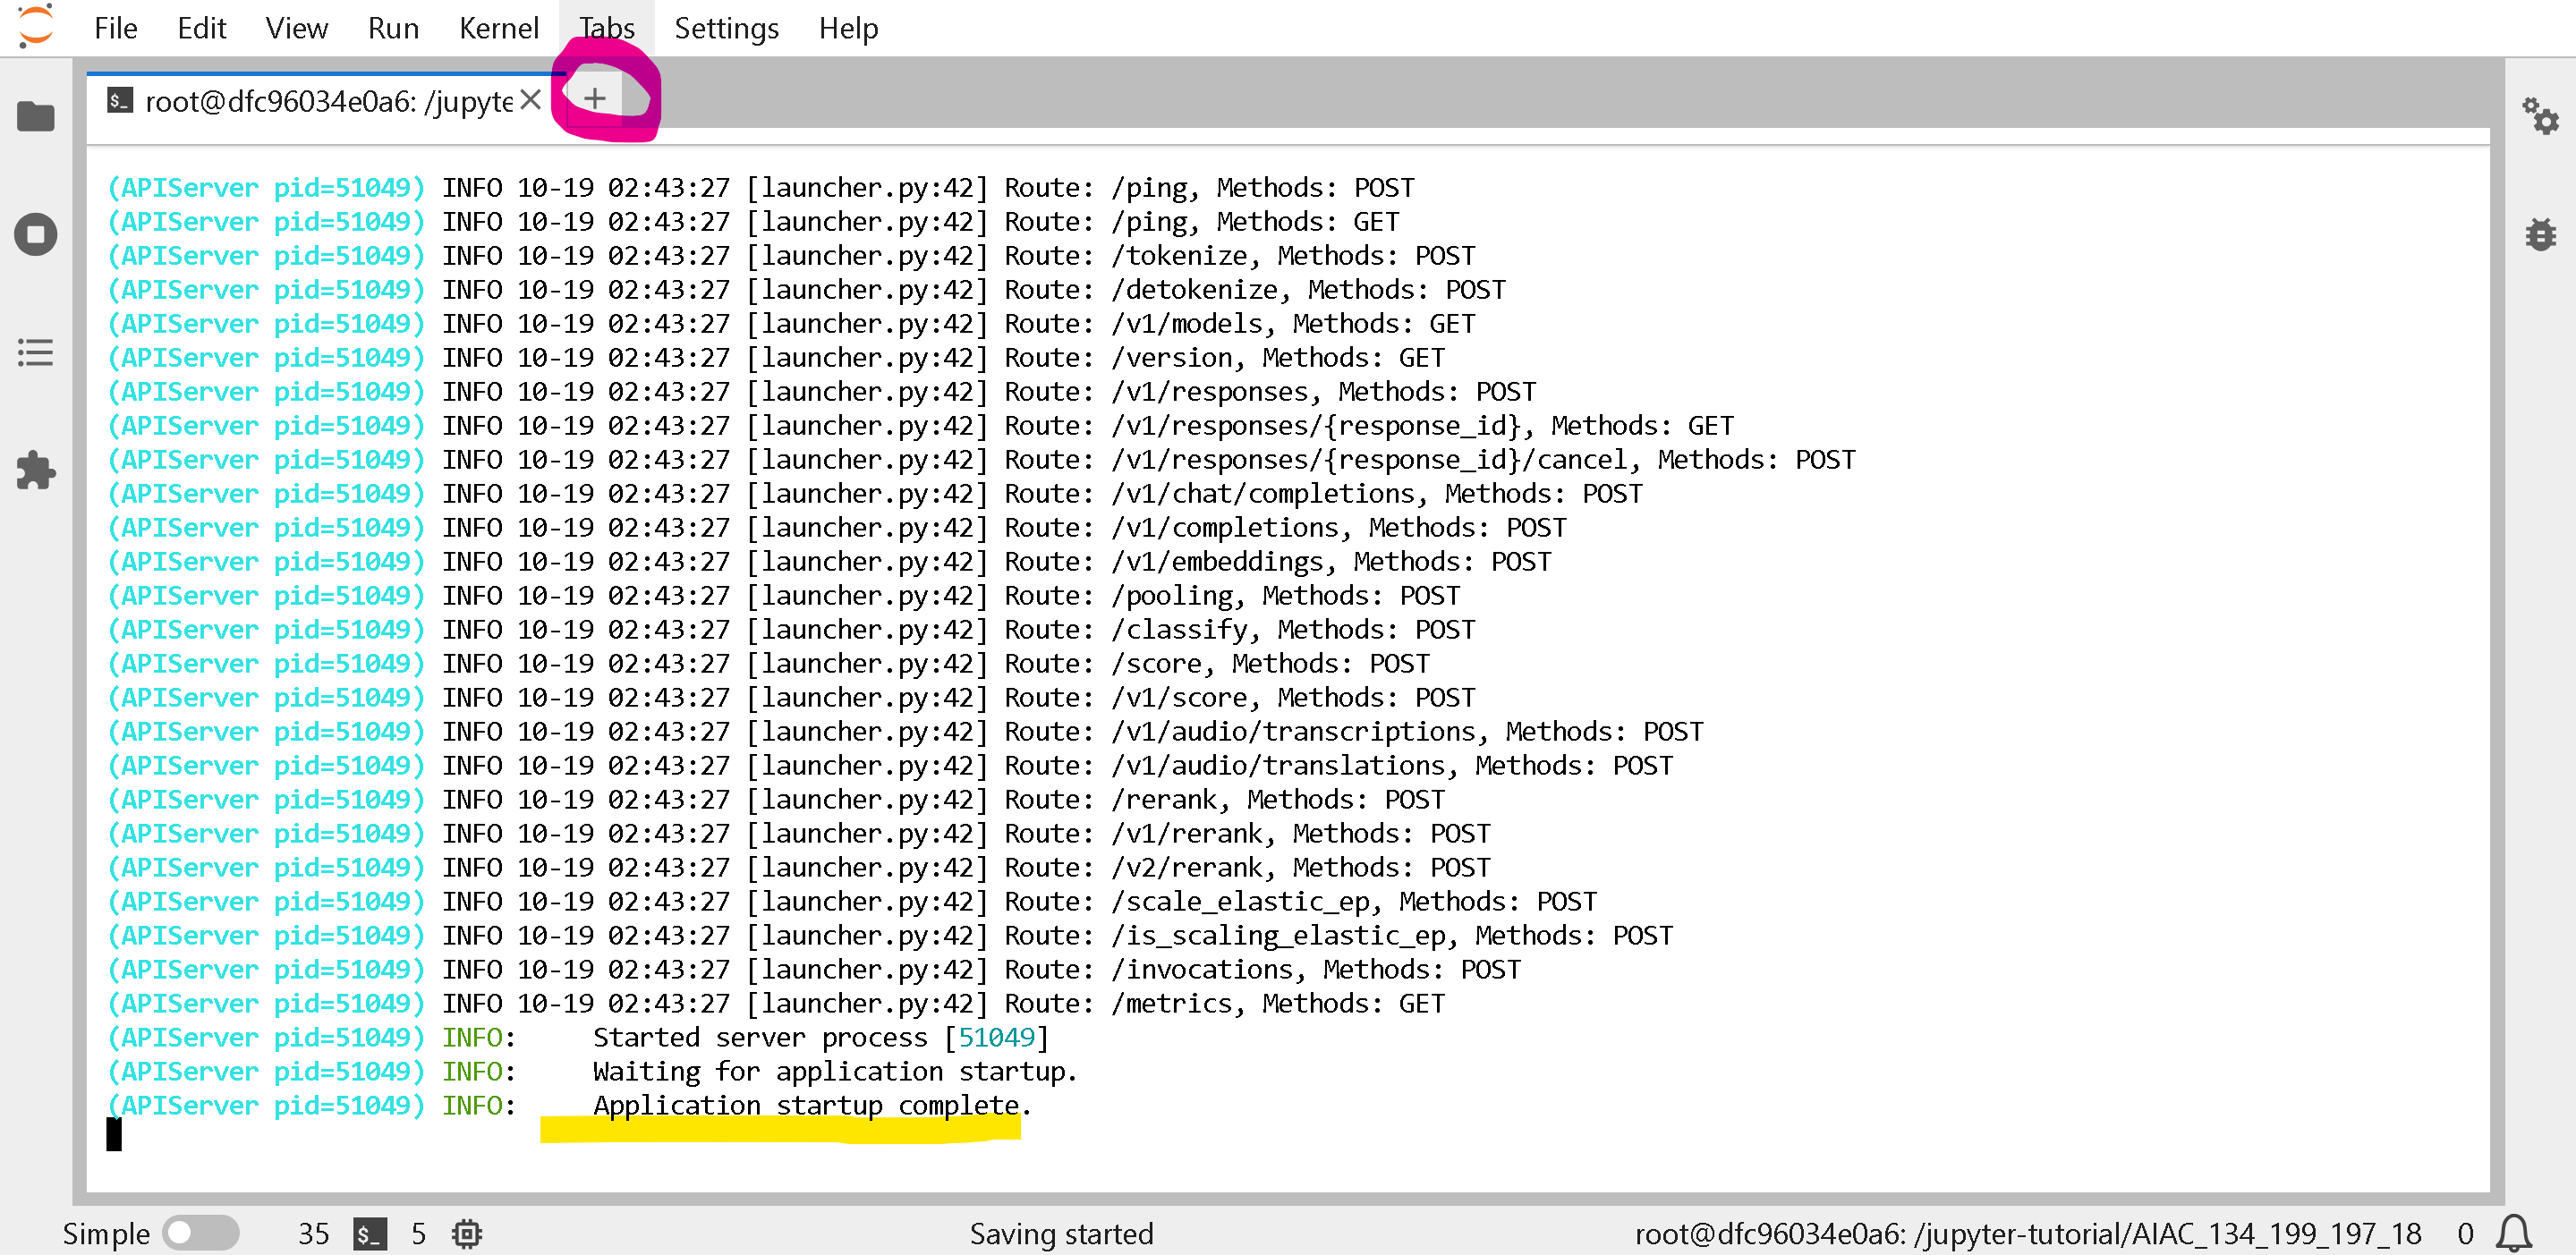
 以下が見えるまで待ちます `INFO: Application startup complete.` その後、PLUS ボタンをクリックして新しいタブを開きます
 インストール **synthetic-data-kit** 新しい **ターミナル** ウィンドウで。
```
pip install --upgrade synthetic-data-kit
```
インストール **synthetic-data-kit** 新しい **ターミナル** ウィンドウで。
```
pip install --upgrade synthetic-data-kit
```
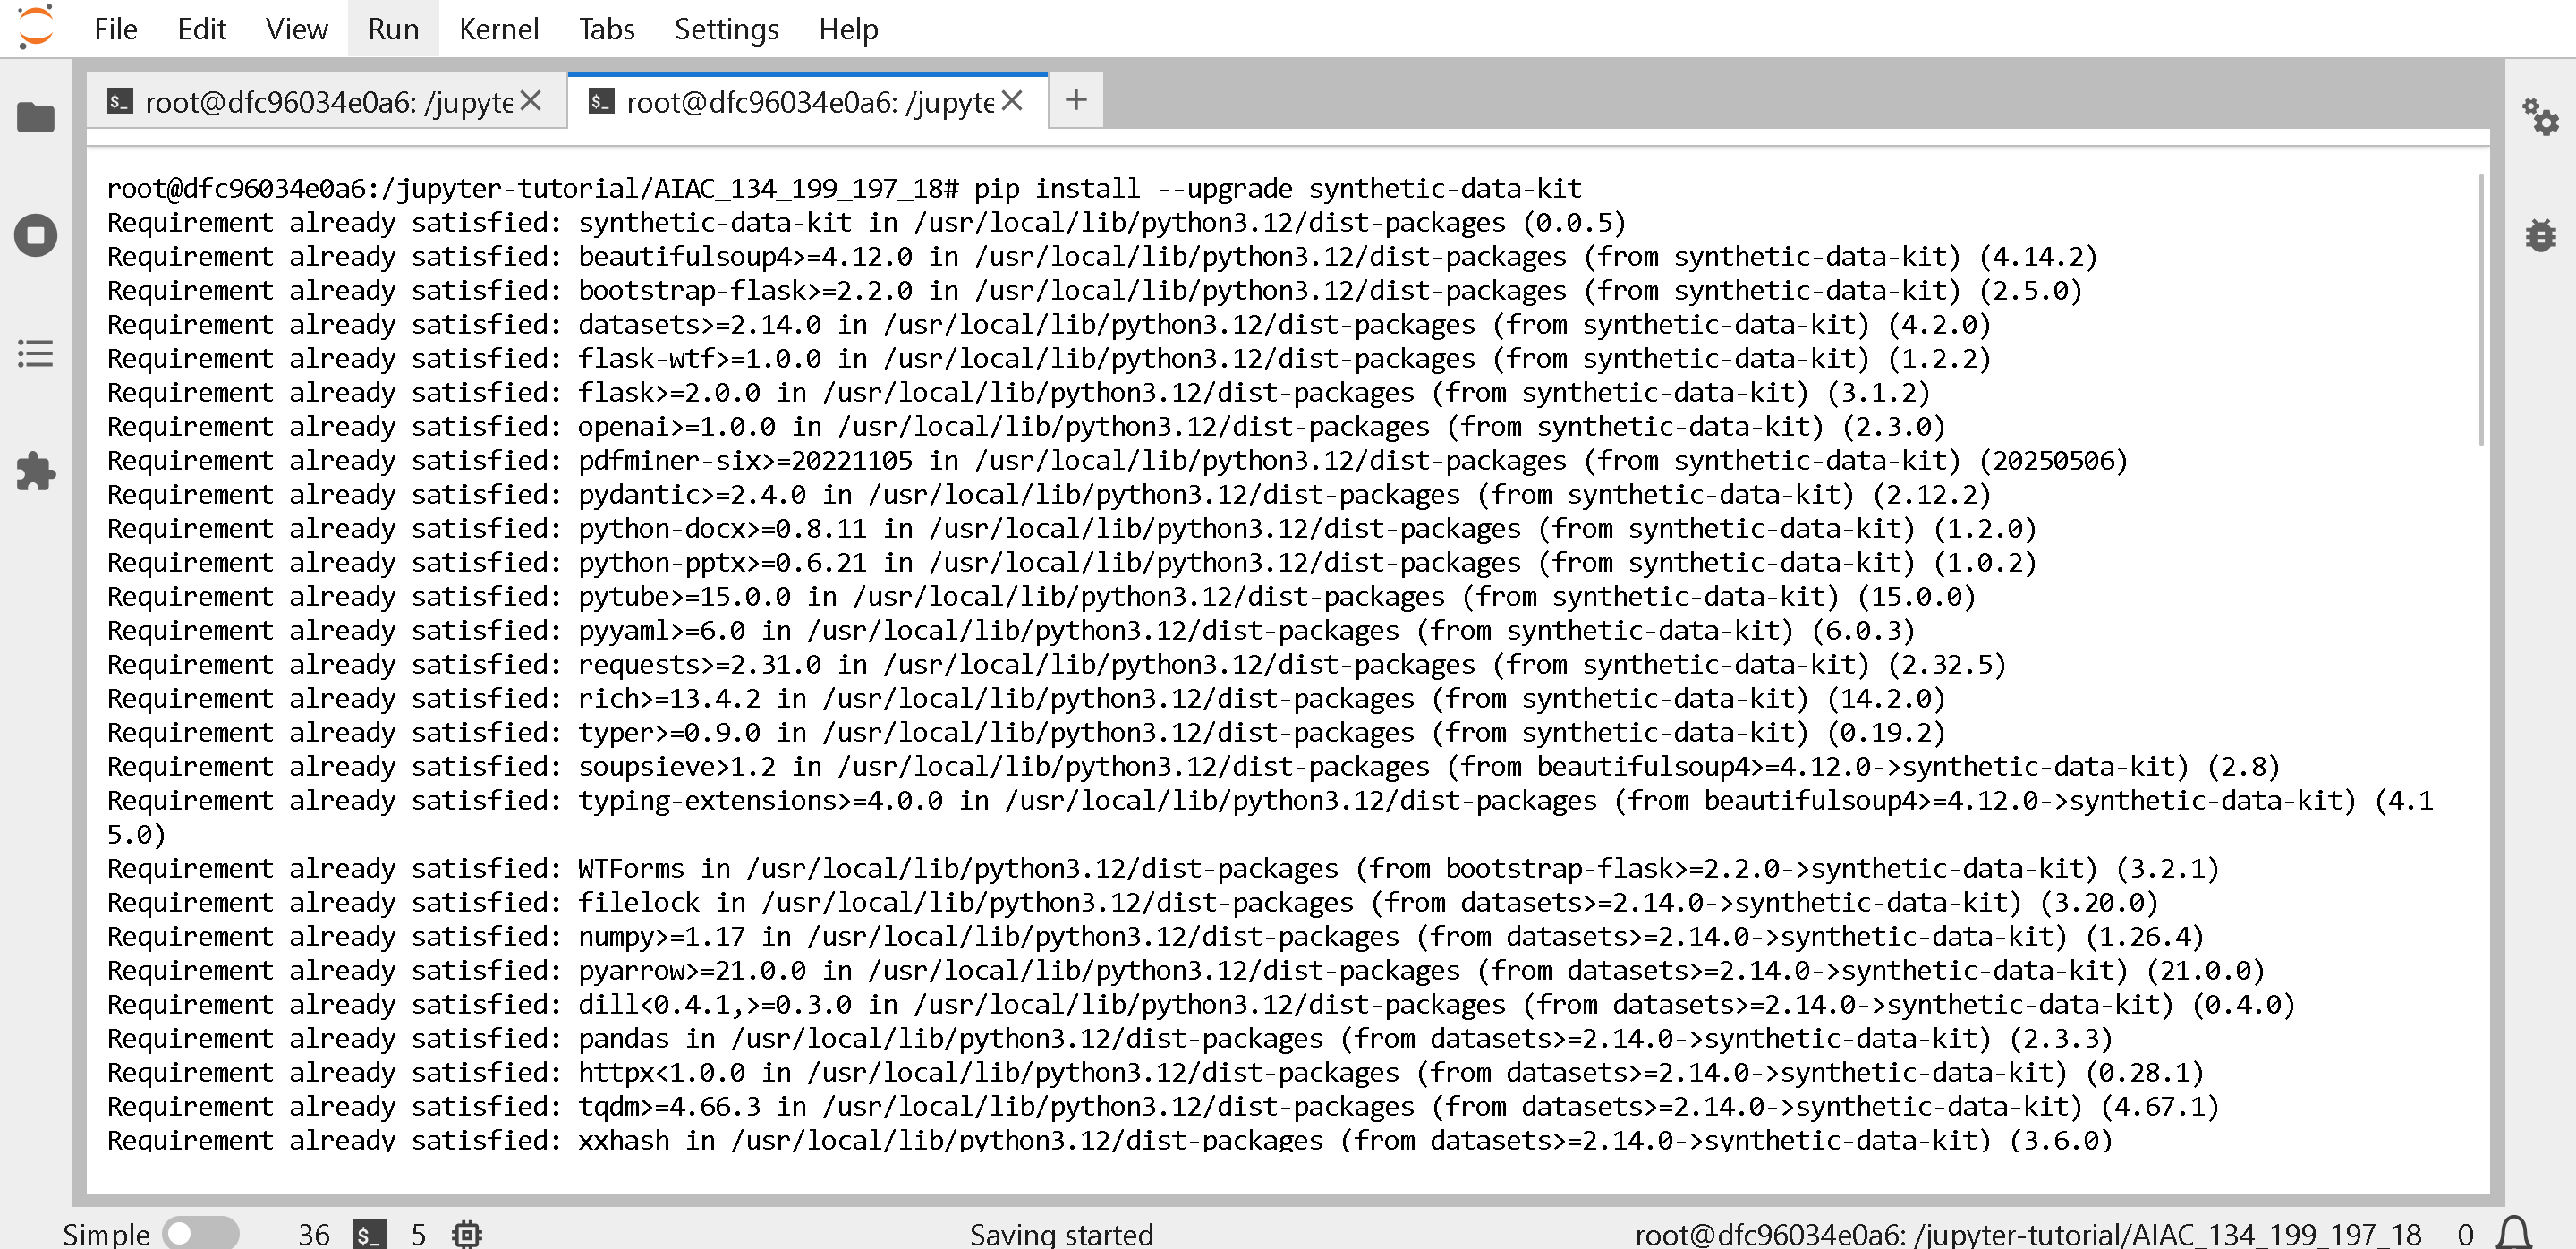 取得してください `config.yaml` 次のいずれかから 、または以下から:
{% file src="/files/a17c4fb67a8bedef9f7d478f779aeb0152438510" %}
{% code overflow="wrap" %}
```bash
wget https://raw.githubusercontent.com/edamamez/Unsloth-AMD-Fine-Tuning-Synthetic-Data/refs/heads/main/config.yaml -O config.yaml
```
{% endcode %}
synthetic data kit が動作したか確認します。エラーが出る場合は、1 番目のセルで vLLM が実行中か確認してください。
{% code overflow="wrap" %}
```bash
synthetic-data-kit -c config.yaml system-check
```
{% endcode %}
取得してください `config.yaml` 次のいずれかから 、または以下から:
{% file src="/files/a17c4fb67a8bedef9f7d478f779aeb0152438510" %}
{% code overflow="wrap" %}
```bash
wget https://raw.githubusercontent.com/edamamez/Unsloth-AMD-Fine-Tuning-Synthetic-Data/refs/heads/main/config.yaml -O config.yaml
```
{% endcode %}
synthetic data kit が動作したか確認します。エラーが出る場合は、1 番目のセルで vLLM が実行中か確認してください。
{% code overflow="wrap" %}
```bash
synthetic-data-kit -c config.yaml system-check
```
{% endcode %}
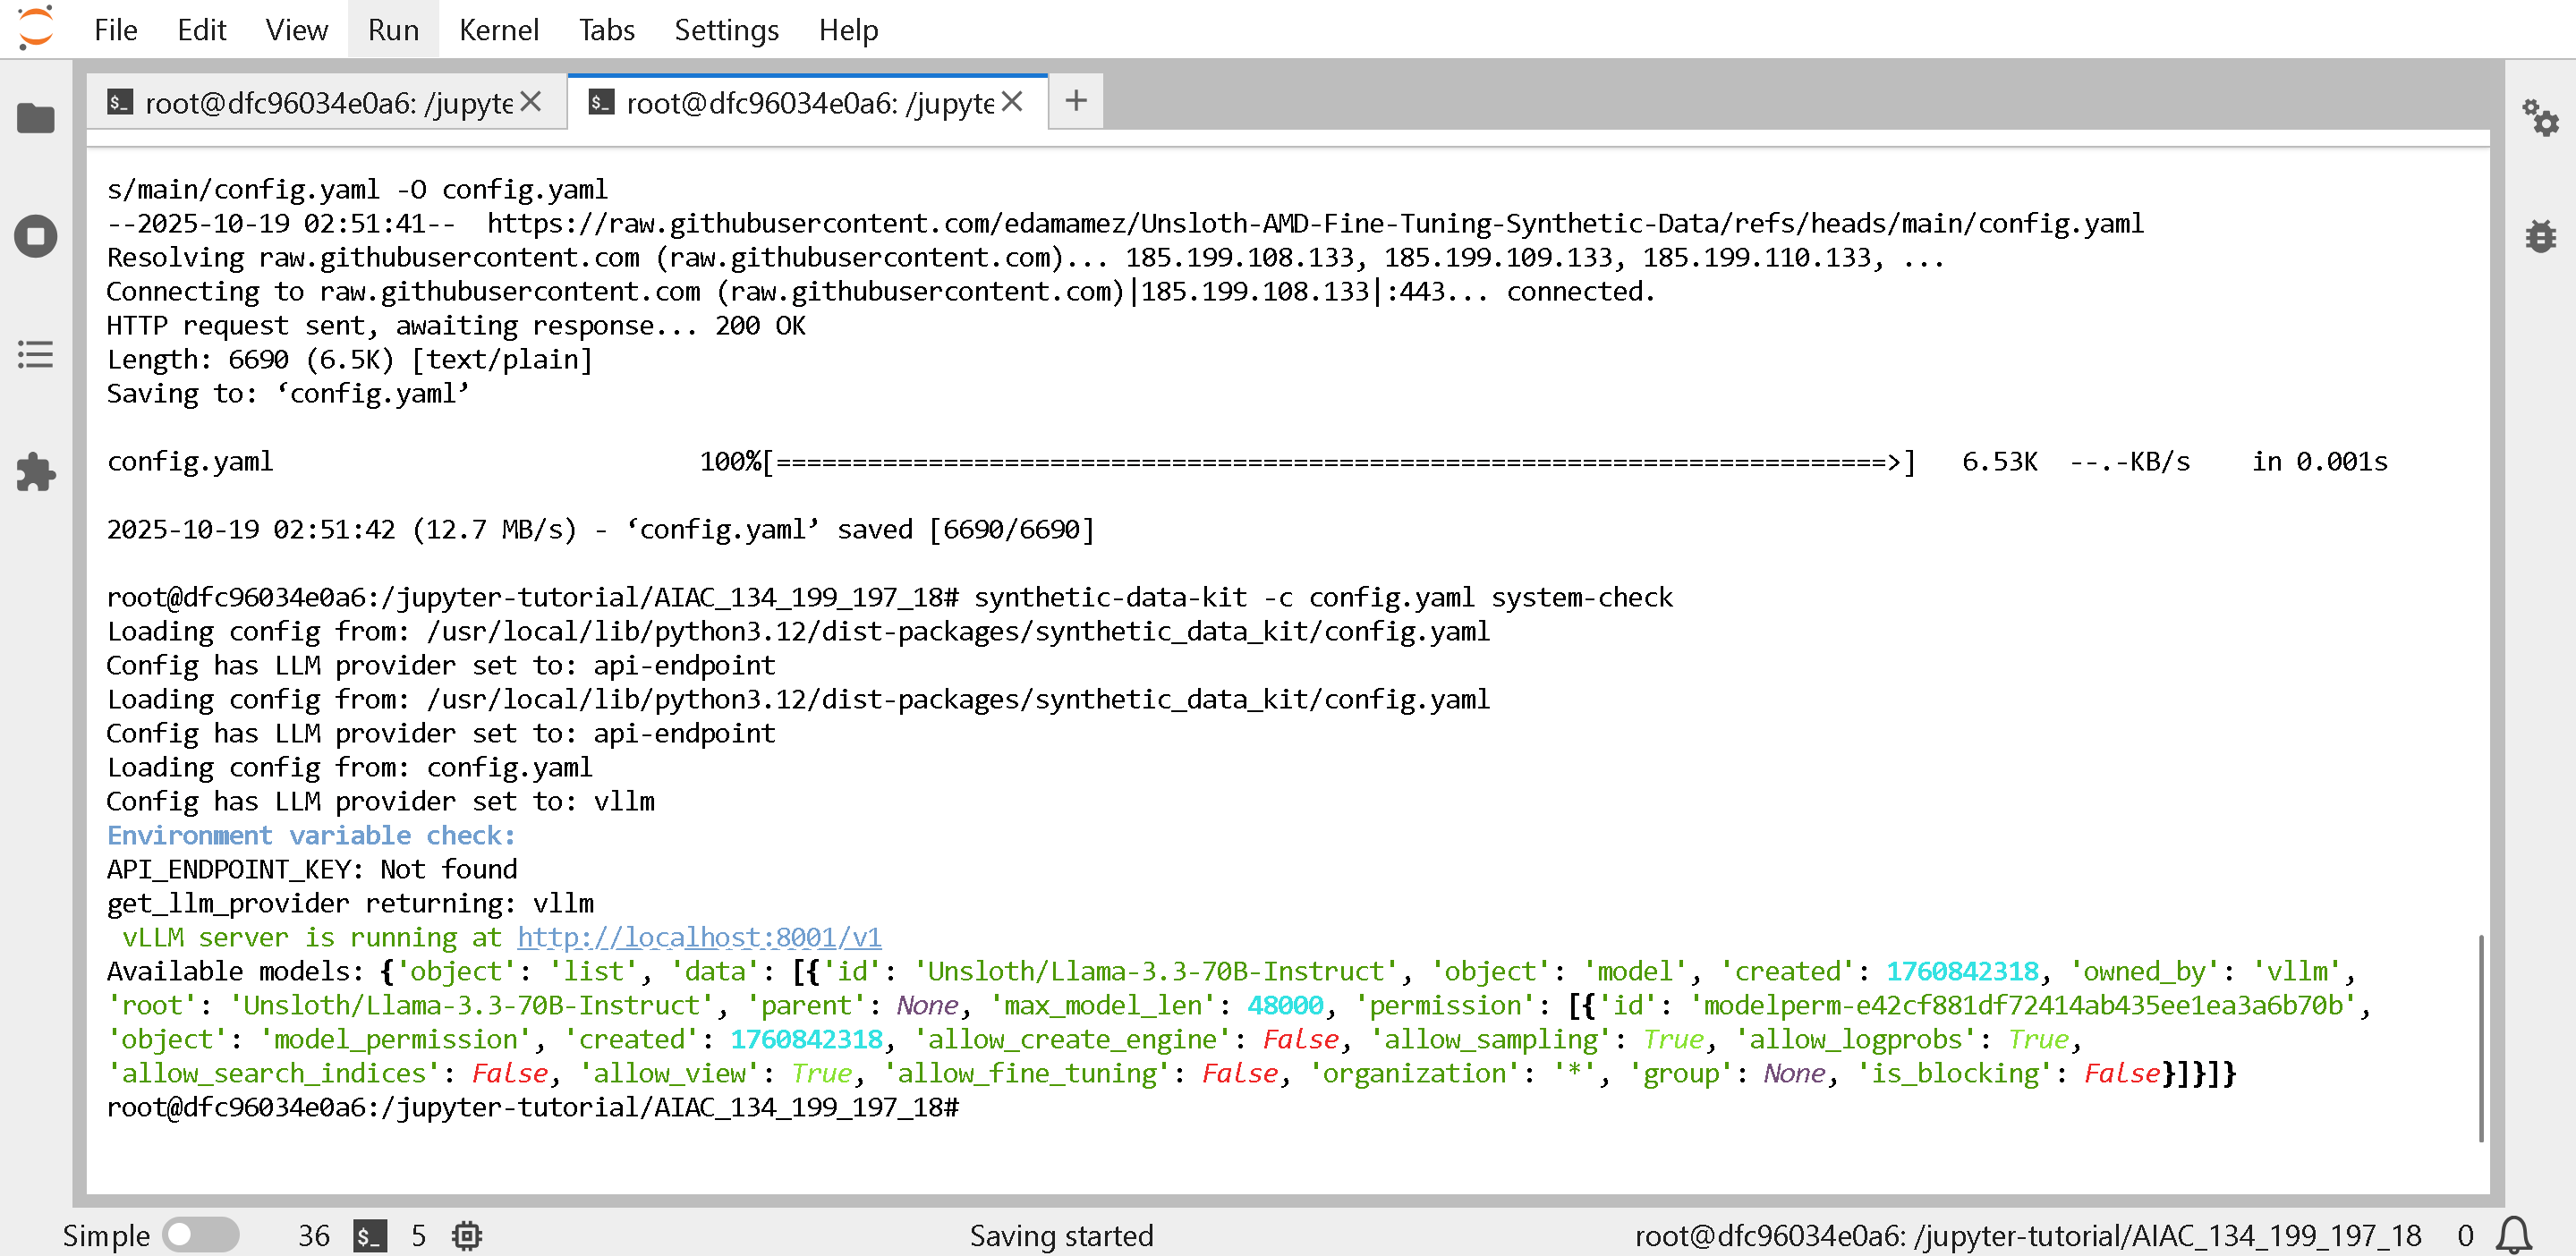 では、処理に使うファイルをいくつか取得しましょう:
{% code overflow="wrap" %}
```bash
# PDF を使い、例を保存するリポジトリを作成します
mkdir -p logical_reasoning/{sources,data/{input,parsed,generated,curated,final}}
wget -P logical_reasoning/sources/ -q --show-progress "https://www.csus.edu/indiv/d/dowdenb/4/logical-reasoning-archives/logical-reasoning-2017-12-02.pdf" "https://people.cs.umass.edu/~pthomas/solutions/Liar_Truth.pdf"
cp logical_reasoning/sources/* logical_reasoning/data/input/
cp config.yaml logical_reasoning
```
{% endcode %}
では、処理に使うファイルをいくつか取得しましょう:
{% code overflow="wrap" %}
```bash
# PDF を使い、例を保存するリポジトリを作成します
mkdir -p logical_reasoning/{sources,data/{input,parsed,generated,curated,final}}
wget -P logical_reasoning/sources/ -q --show-progress "https://www.csus.edu/indiv/d/dowdenb/4/logical-reasoning-archives/logical-reasoning-2017-12-02.pdf" "https://people.cs.umass.edu/~pthomas/solutions/Liar_Truth.pdf"
cp logical_reasoning/sources/* logical_reasoning/data/input/
cp config.yaml logical_reasoning
```
{% endcode %}
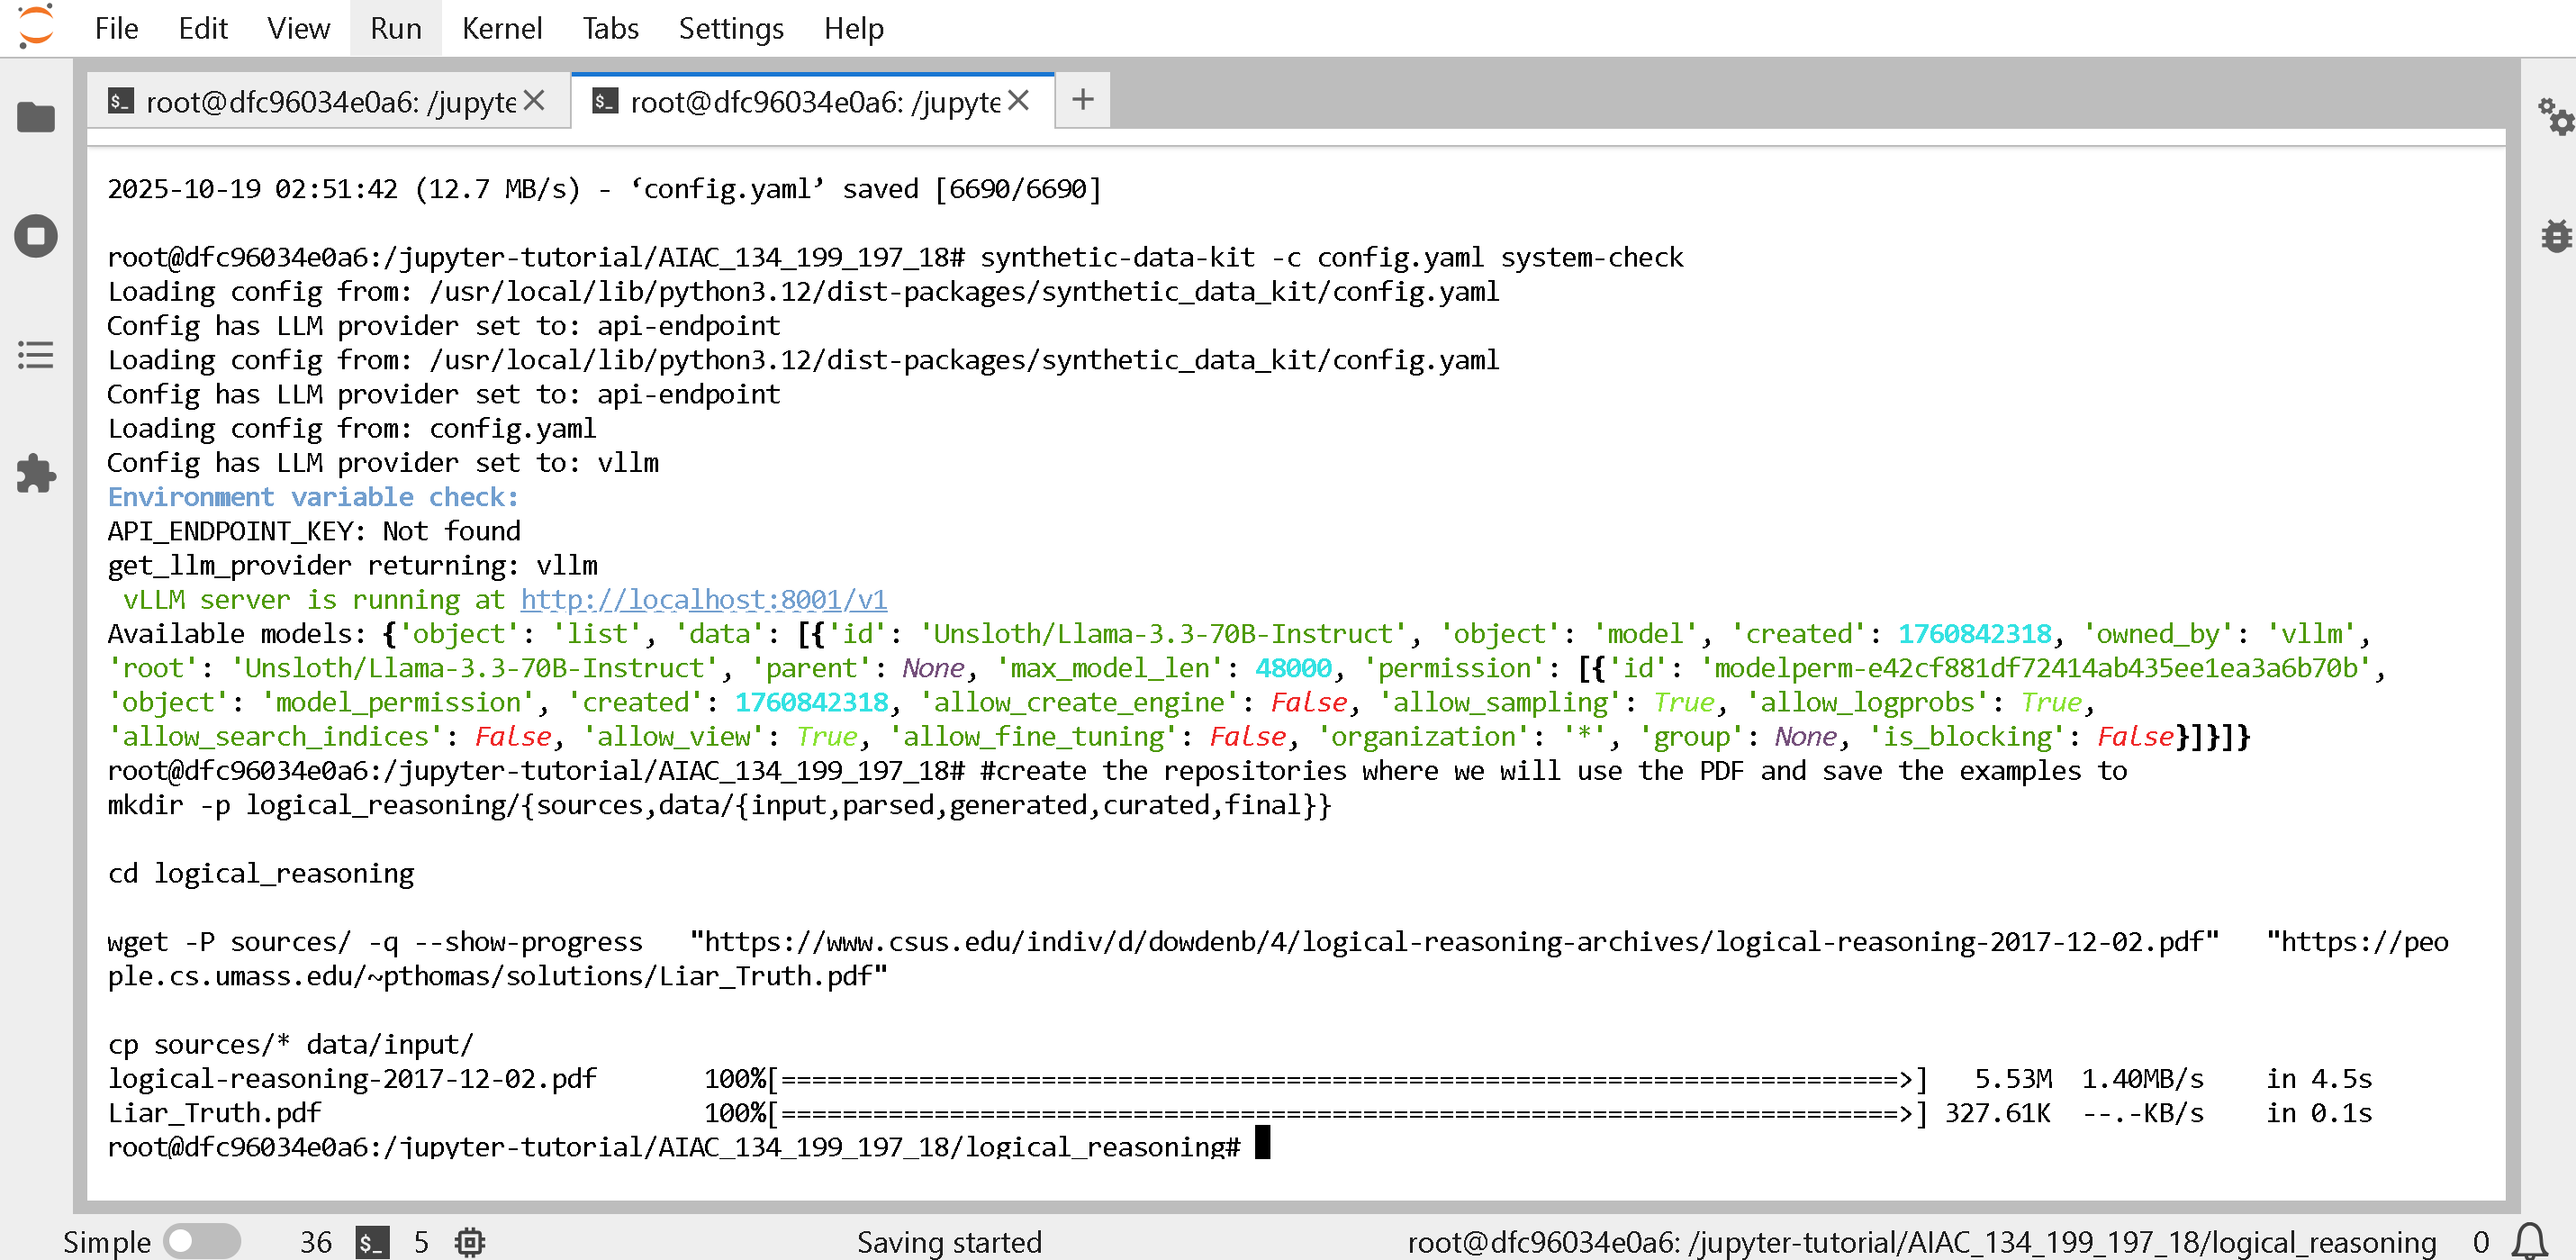 では、データを取り込んで処理してみましょう:
{% code overflow="wrap" %}
```bash
cd logical_reasoning
synthetic-data-kit ingest ./data/input/ --verbose
```
{% endcode %}
では、Q\&A(質問と回答のペア)または CoT(思考連鎖)ペアを作成します(3分ほどかかる場合があります)
{% code overflow="wrap" %}
```bash
synthetic-data-kit -c ../config.yaml create ./data/parsed/ --type qa --num-pairs 15 --verbose
##### または #####
synthetic-data-kit -c ../config.yaml create ./data/parsed/ --type cot --num-pairs 15 --verbose
```
{% endcode %}
では、データを取り込んで処理してみましょう:
{% code overflow="wrap" %}
```bash
cd logical_reasoning
synthetic-data-kit ingest ./data/input/ --verbose
```
{% endcode %}
では、Q\&A(質問と回答のペア)または CoT(思考連鎖)ペアを作成します(3分ほどかかる場合があります)
{% code overflow="wrap" %}
```bash
synthetic-data-kit -c ../config.yaml create ./data/parsed/ --type qa --num-pairs 15 --verbose
##### または #####
synthetic-data-kit -c ../config.yaml create ./data/parsed/ --type cot --num-pairs 15 --verbose
```
{% endcode %}
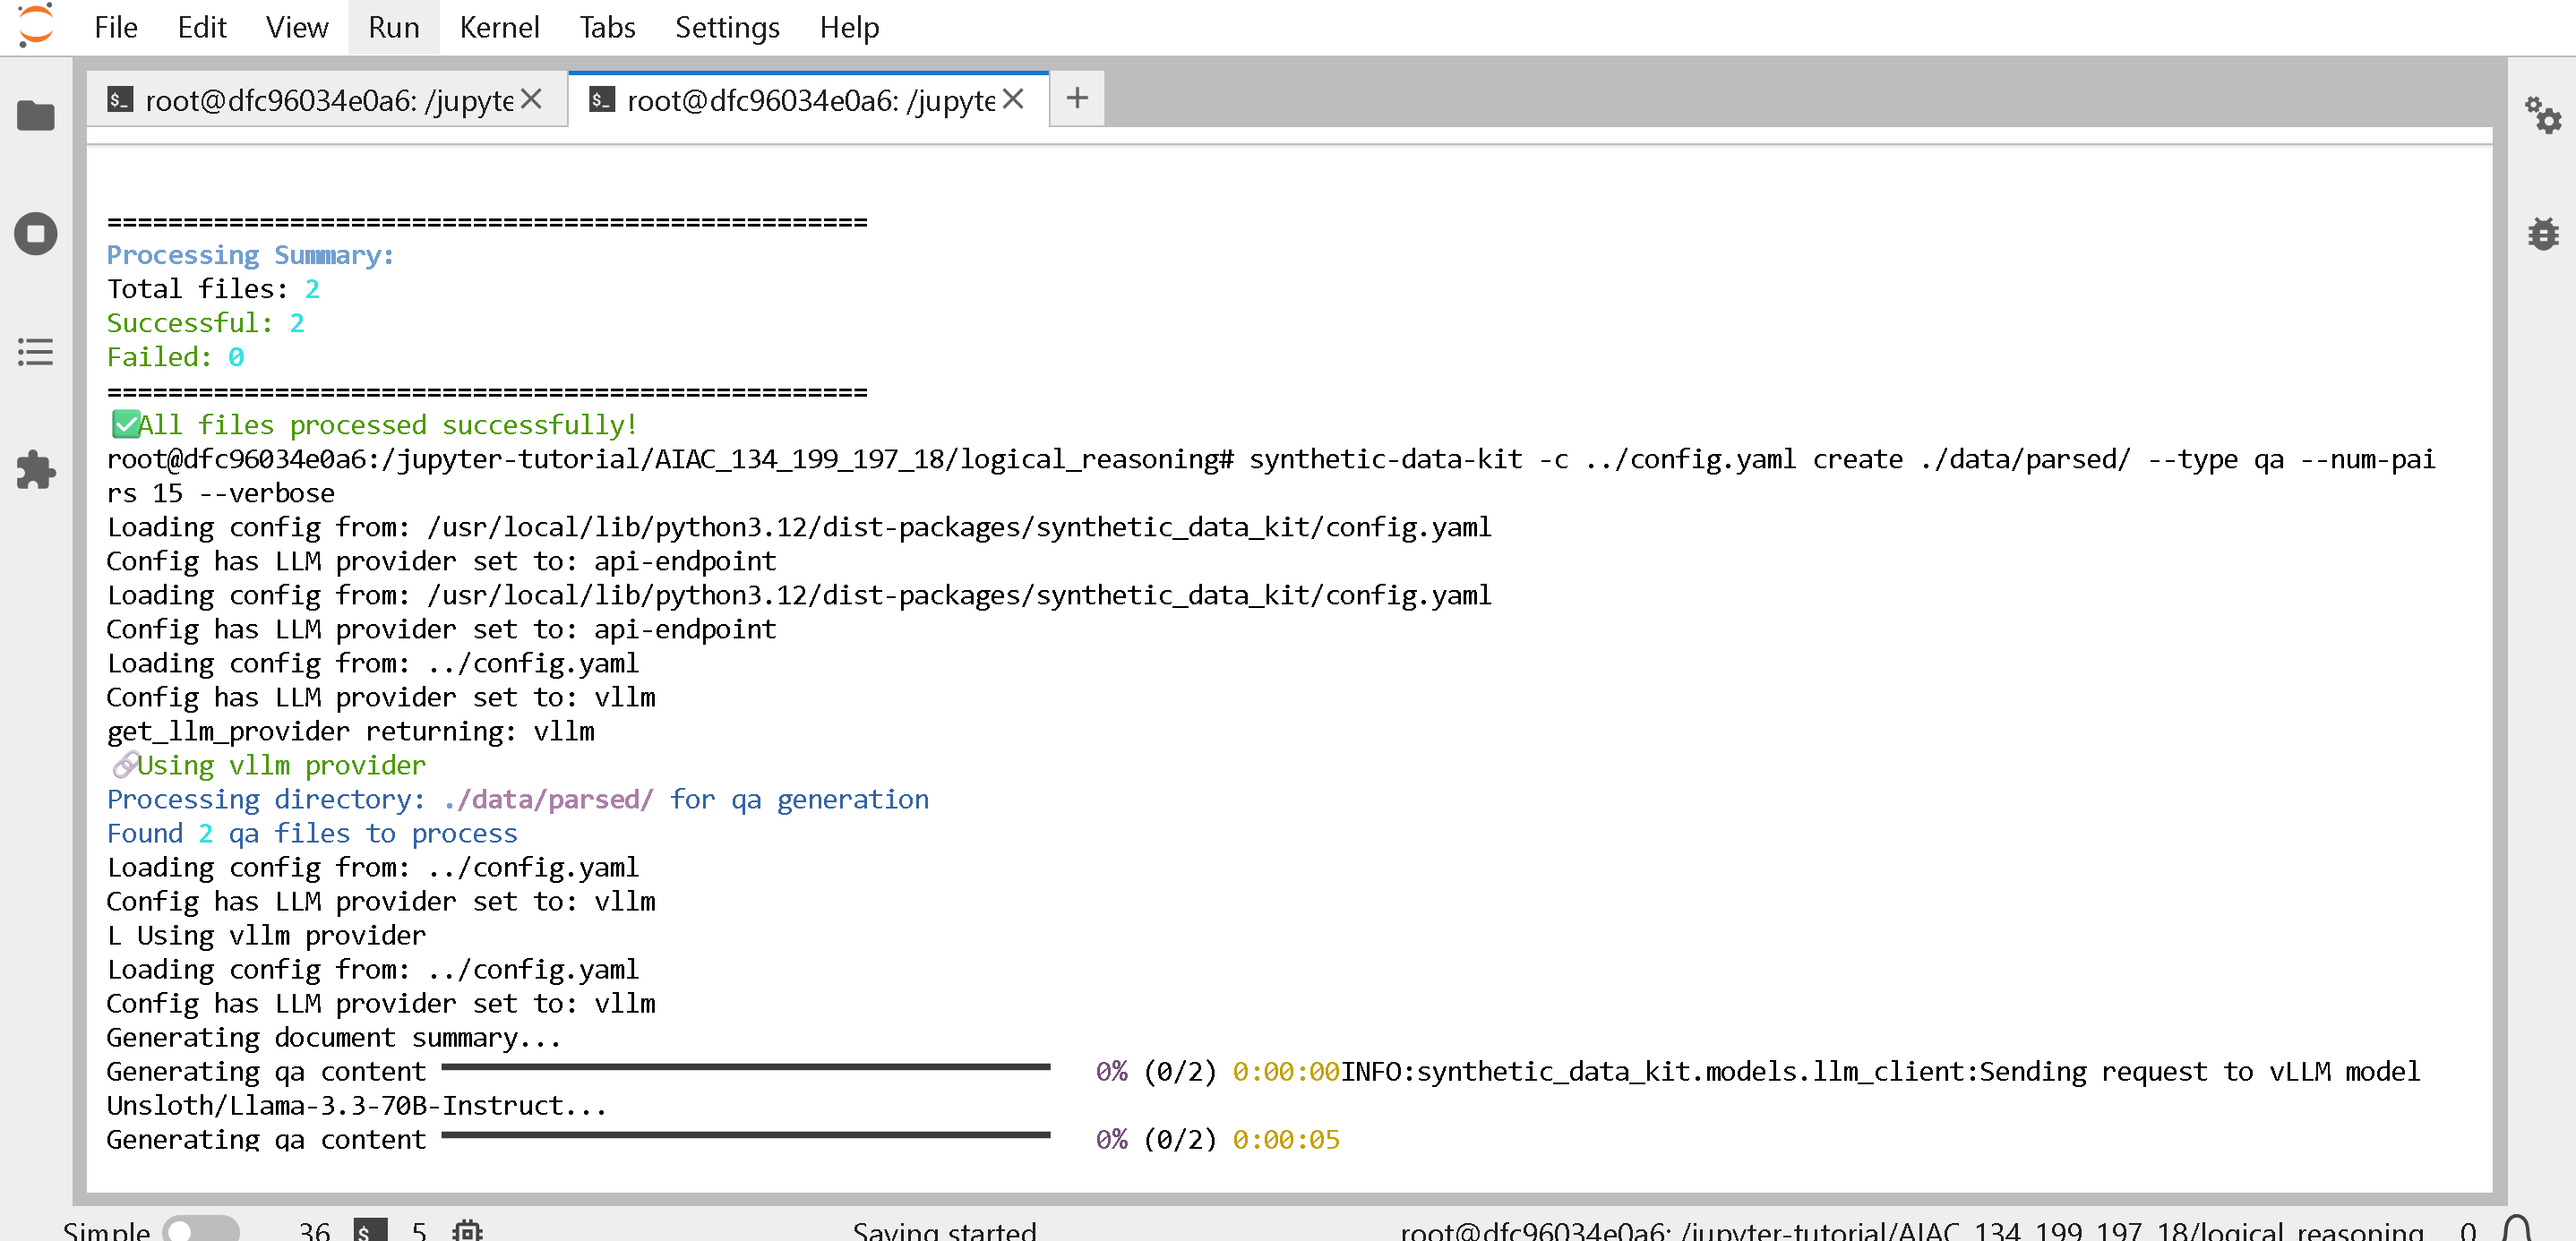 では、LLM にデータを精選させ、LLM を審査員として使って望ましくない合成データ行を削除し、その後出力を保存します。3分ほどかかる場合があります
{% code overflow="wrap" %}
```bash
synthetic-data-kit -c ../config.yaml curate ./data/generated/ --threshold 7.0 --verbose
synthetic-data-kit save-as ./data/curated/ --format ft --verbose
```
{% endcode %}
では、LLM にデータを精選させ、LLM を審査員として使って望ましくない合成データ行を削除し、その後出力を保存します。3分ほどかかる場合があります
{% code overflow="wrap" %}
```bash
synthetic-data-kit -c ../config.yaml curate ./data/generated/ --threshold 7.0 --verbose
synthetic-data-kit save-as ./data/curated/ --format ft --verbose
```
{% endcode %}
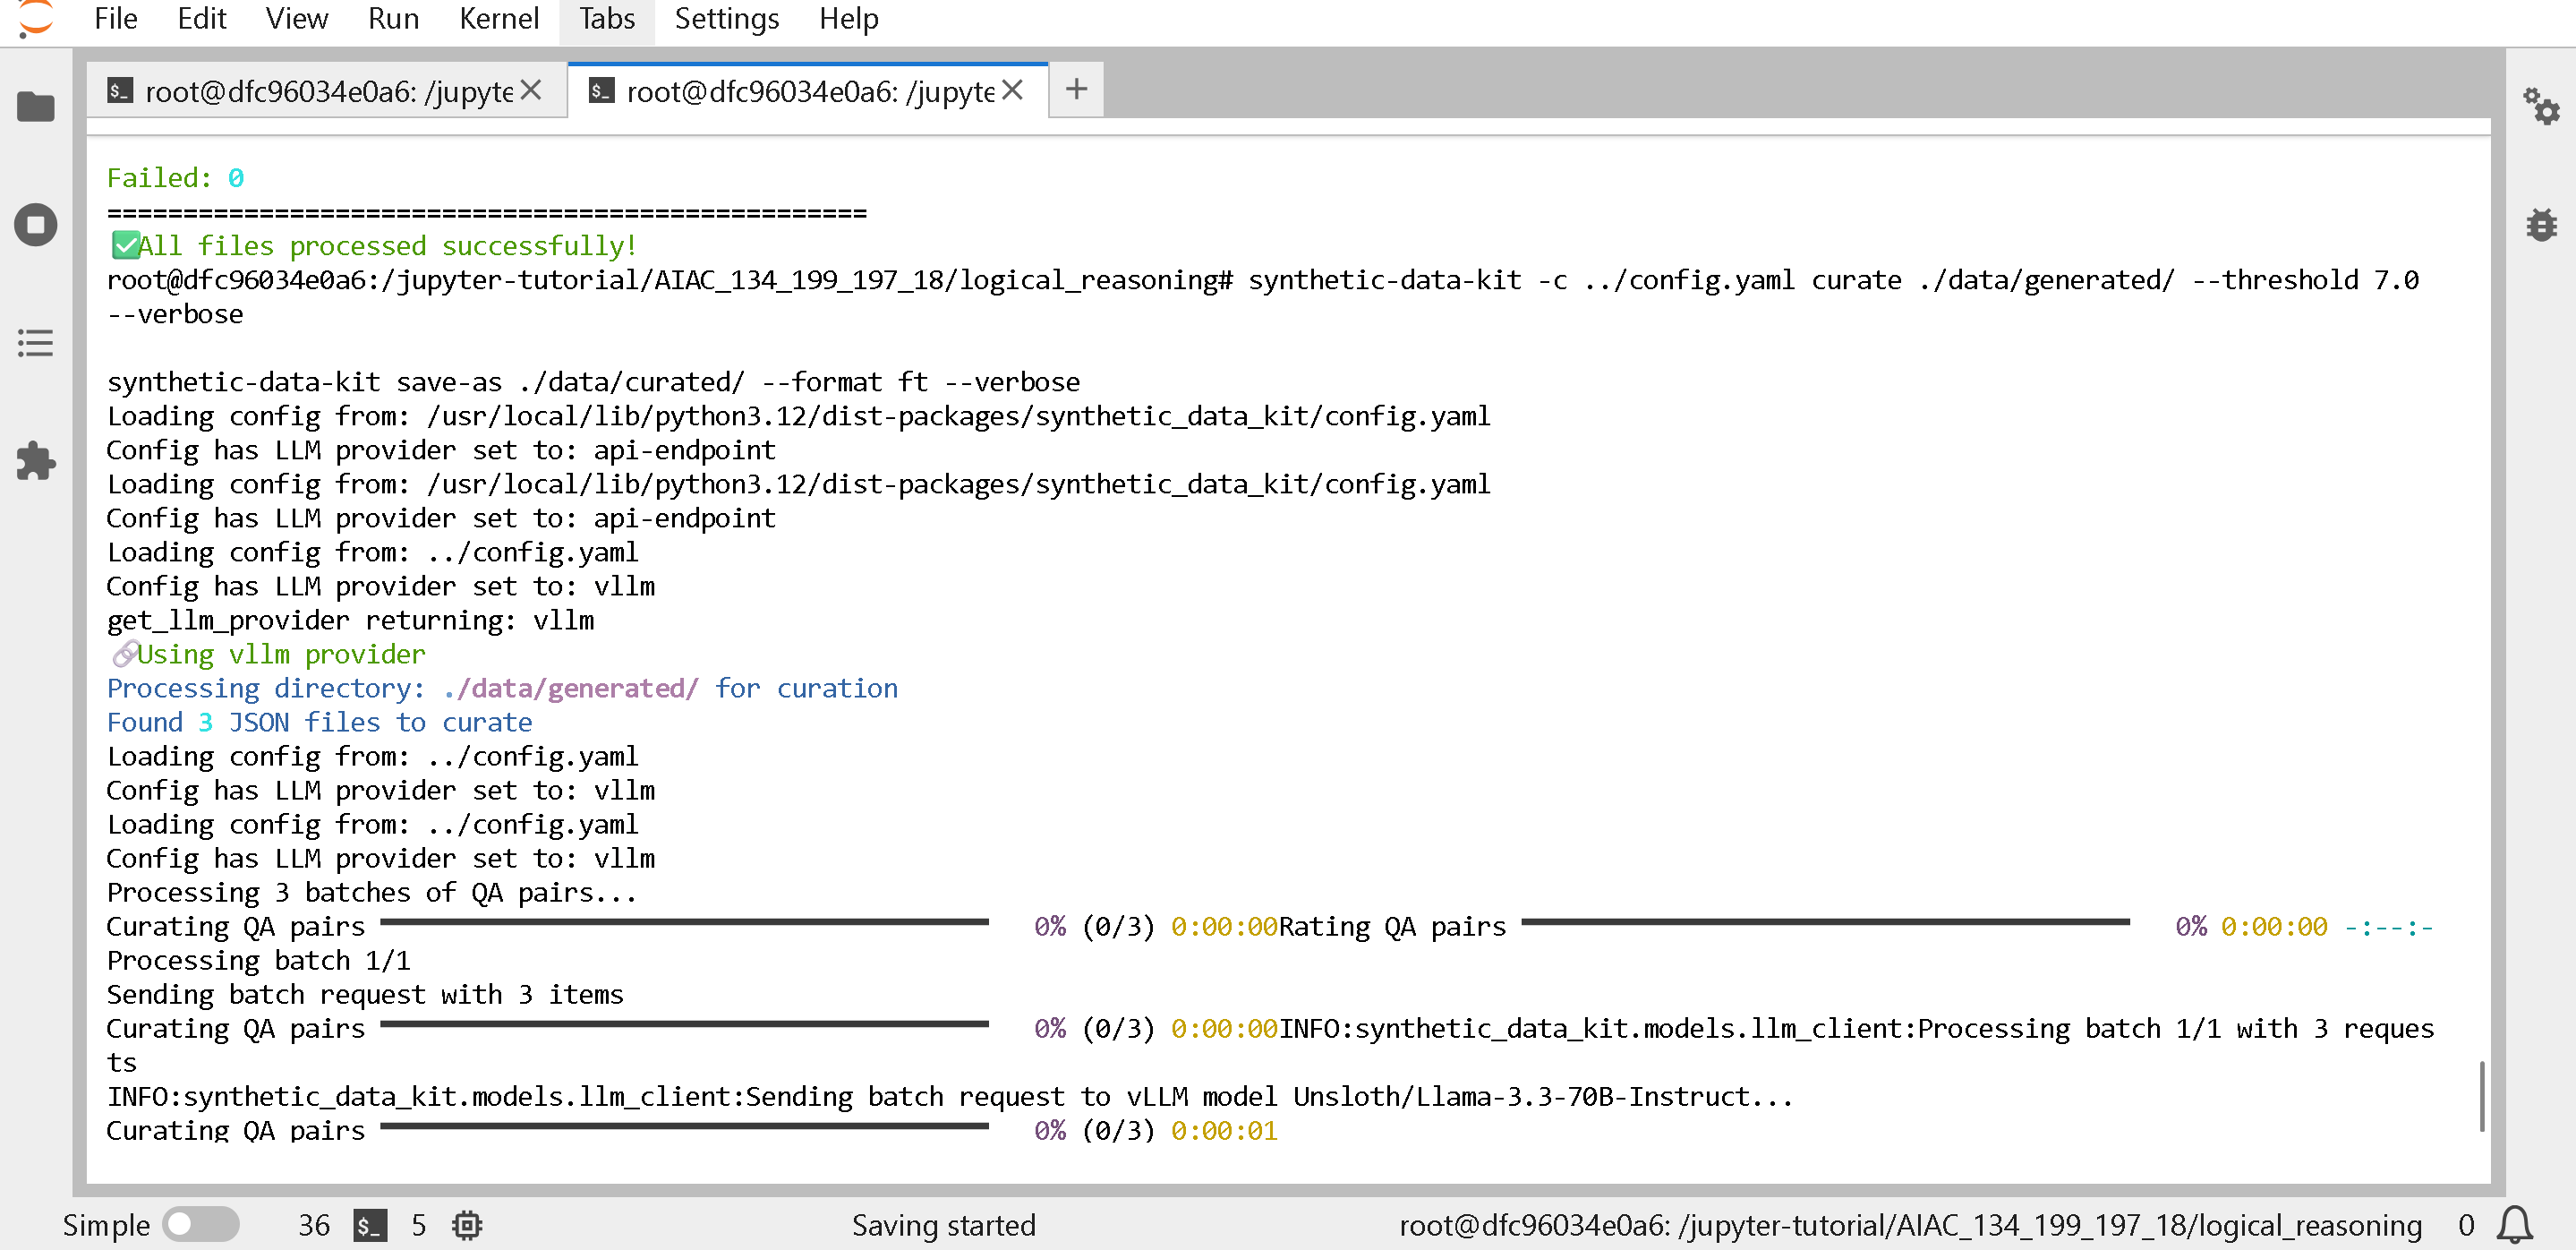 もう一度、 **vLLM サービスを SHUT DOWN して VRAM を節約しましょう!!! ひとつ前のタブに移動し、CTRL+C を 3 回押します。あるいは、次を参照してください** [#how-do-i-free-amd-gpu-memory](#how-do-i-free-amd-gpu-memory "mention")
次に、実行する notebook を取得します :
{% code overflow="wrap" %}
```bash
wget "https://github.com/unslothai/notebooks/raw/refs/heads/main/nb/Synthetic_Data_Hackathon.ipynb" -O "Synthetic_Data_Hackathon.ipynb"
```
{% endcode %}
{% hint style="info" %}
メモリ不足エラーが出る場合は、vLLM インスタンスを停止してください - 次を参照 [#how-do-i-free-amd-gpu-memory](#how-do-i-free-amd-gpu-memory "mention")
{% endhint %}
左側のフォルダボタンをクリックして "Synthetic\_Data\_Hackathon.ipynb" を開きます(ダブルクリック)
もう一度、 **vLLM サービスを SHUT DOWN して VRAM を節約しましょう!!! ひとつ前のタブに移動し、CTRL+C を 3 回押します。あるいは、次を参照してください** [#how-do-i-free-amd-gpu-memory](#how-do-i-free-amd-gpu-memory "mention")
次に、実行する notebook を取得します :
{% code overflow="wrap" %}
```bash
wget "https://github.com/unslothai/notebooks/raw/refs/heads/main/nb/Synthetic_Data_Hackathon.ipynb" -O "Synthetic_Data_Hackathon.ipynb"
```
{% endcode %}
{% hint style="info" %}
メモリ不足エラーが出る場合は、vLLM インスタンスを停止してください - 次を参照 [#how-do-i-free-amd-gpu-memory](#how-do-i-free-amd-gpu-memory "mention")
{% endhint %}
左側のフォルダボタンをクリックして "Synthetic\_Data\_Hackathon.ipynb" を開きます(ダブルクリック)
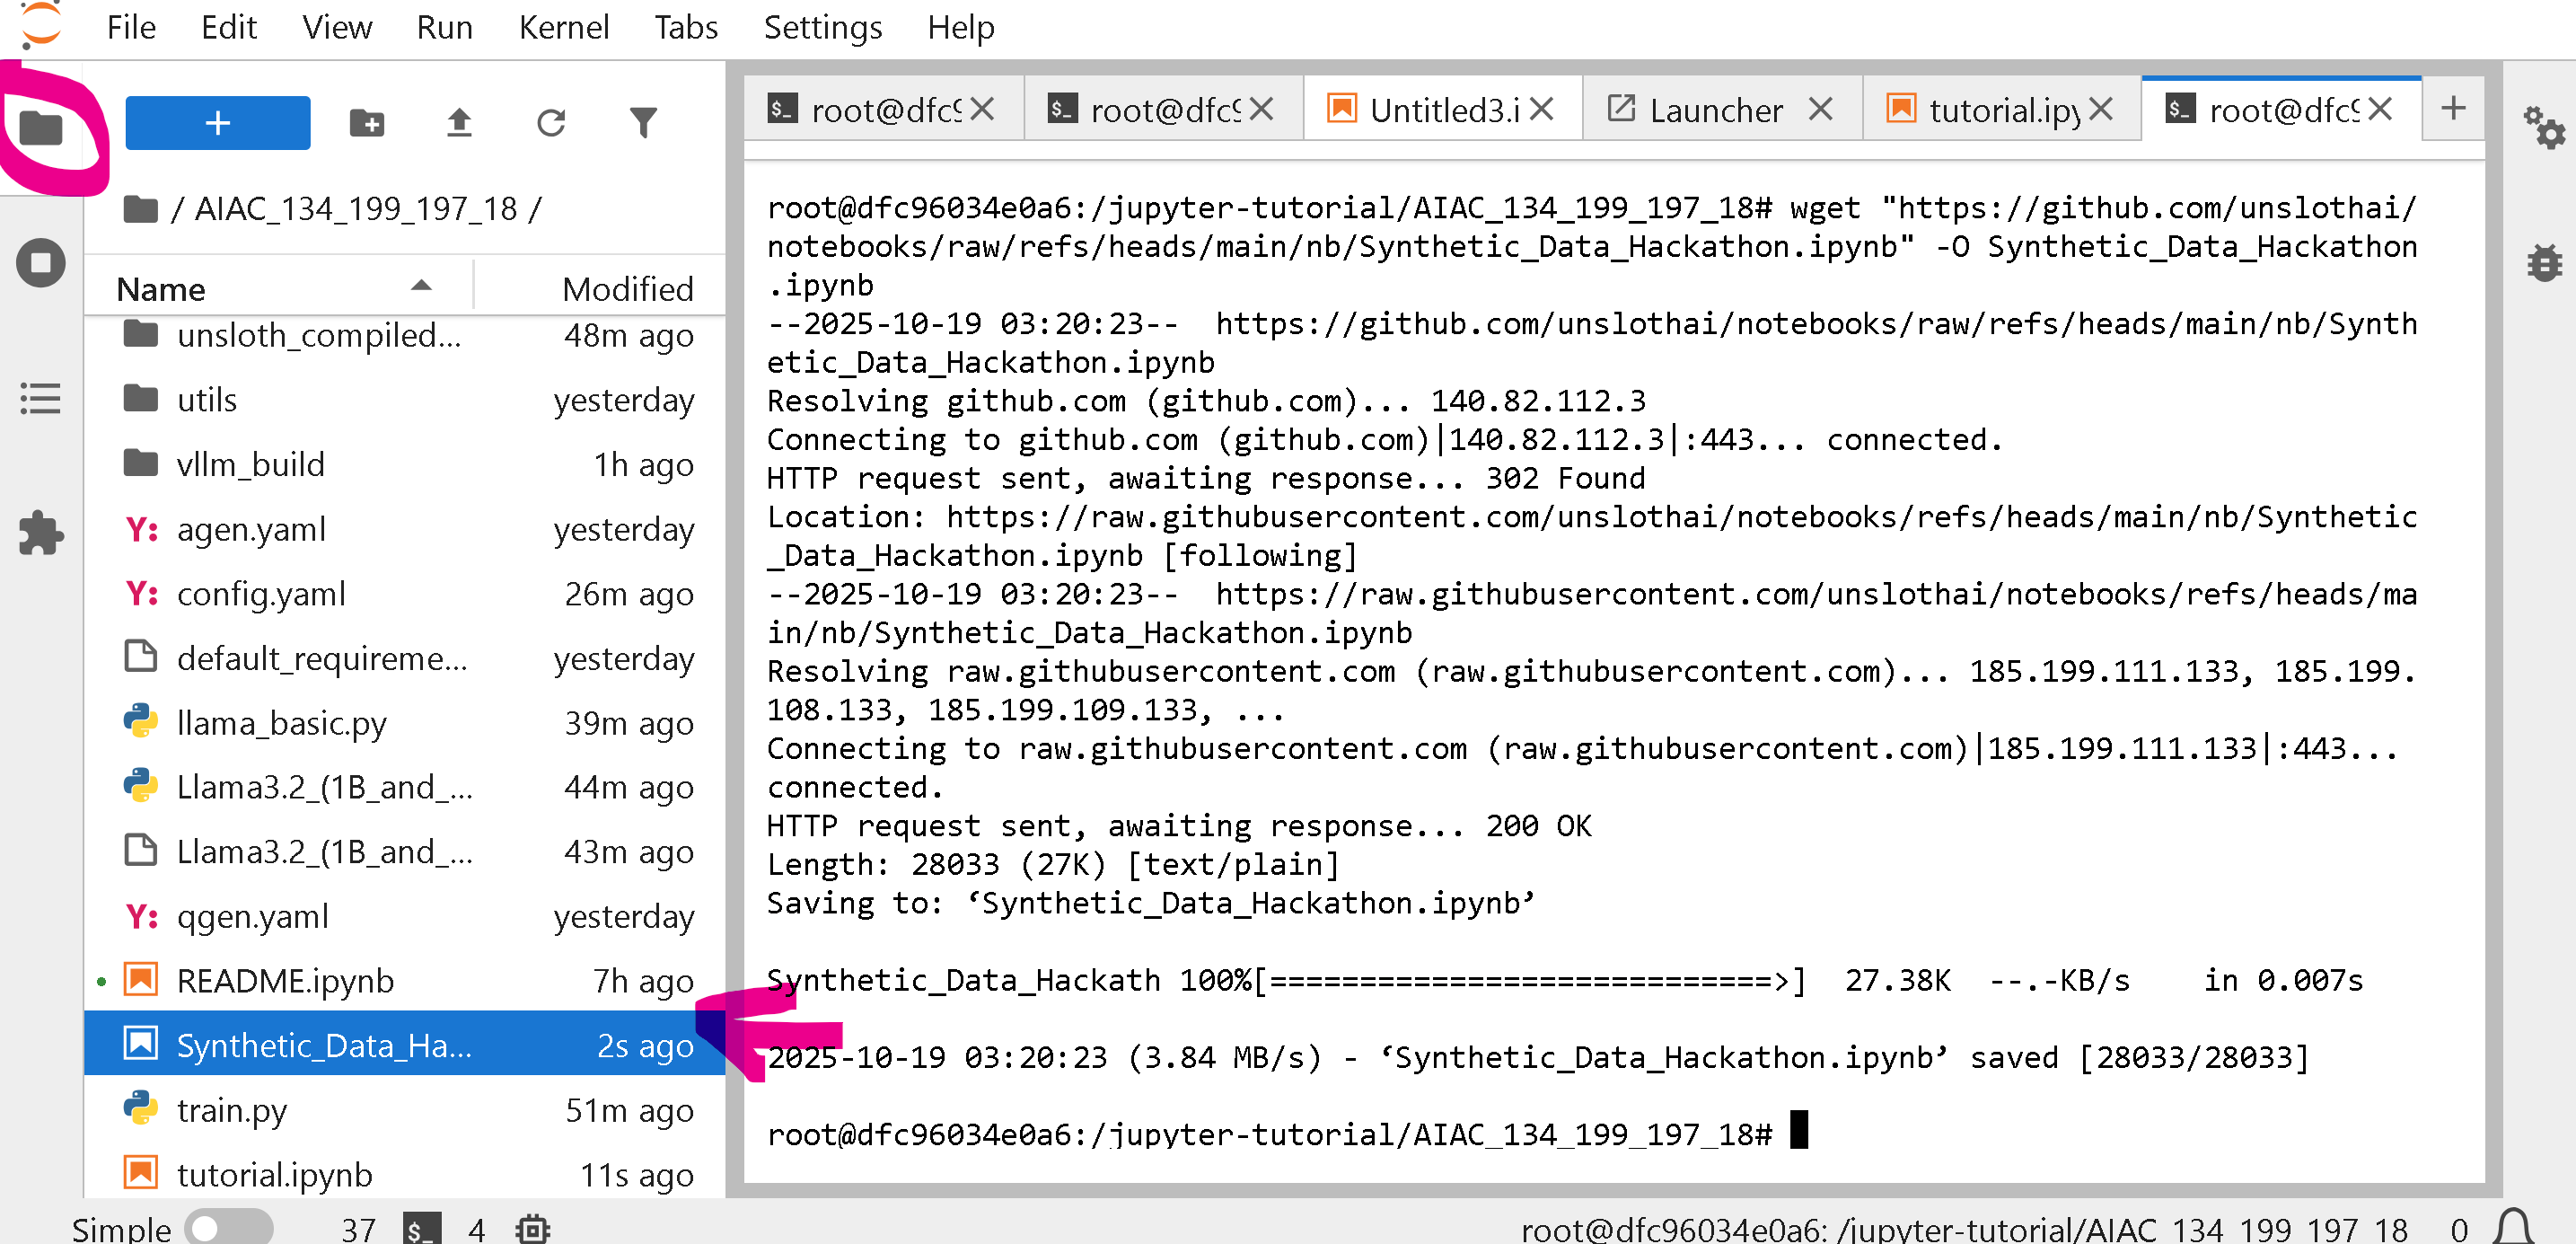 その後、すべて実行してください!
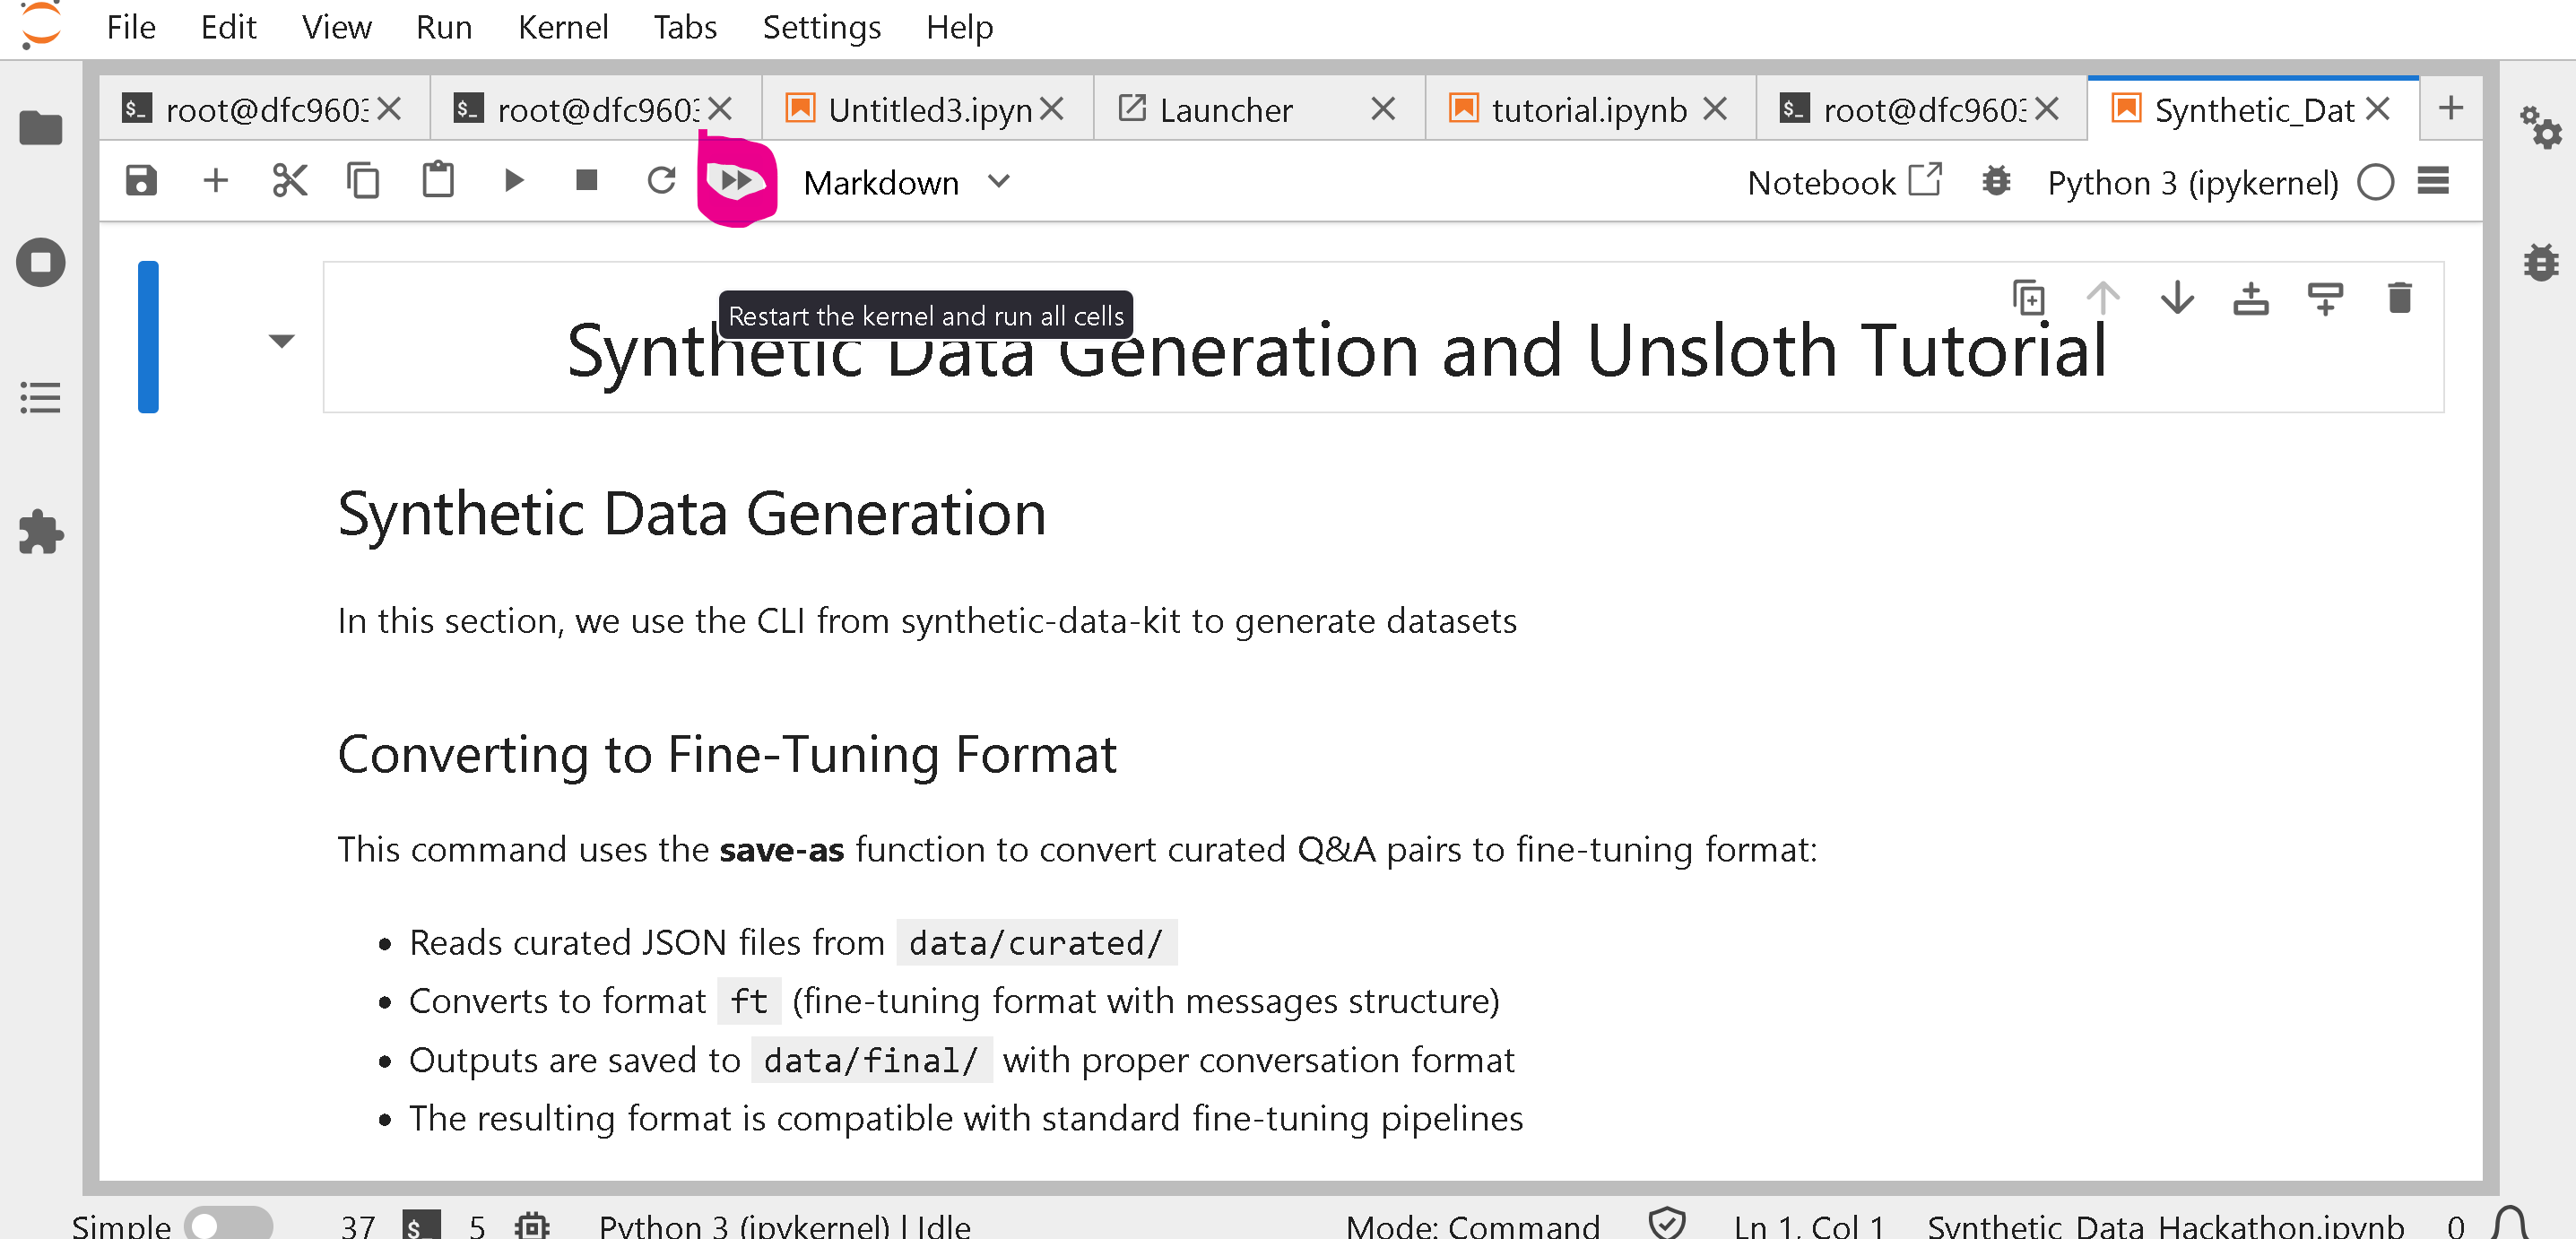 notebook の中央に次が表示されます:
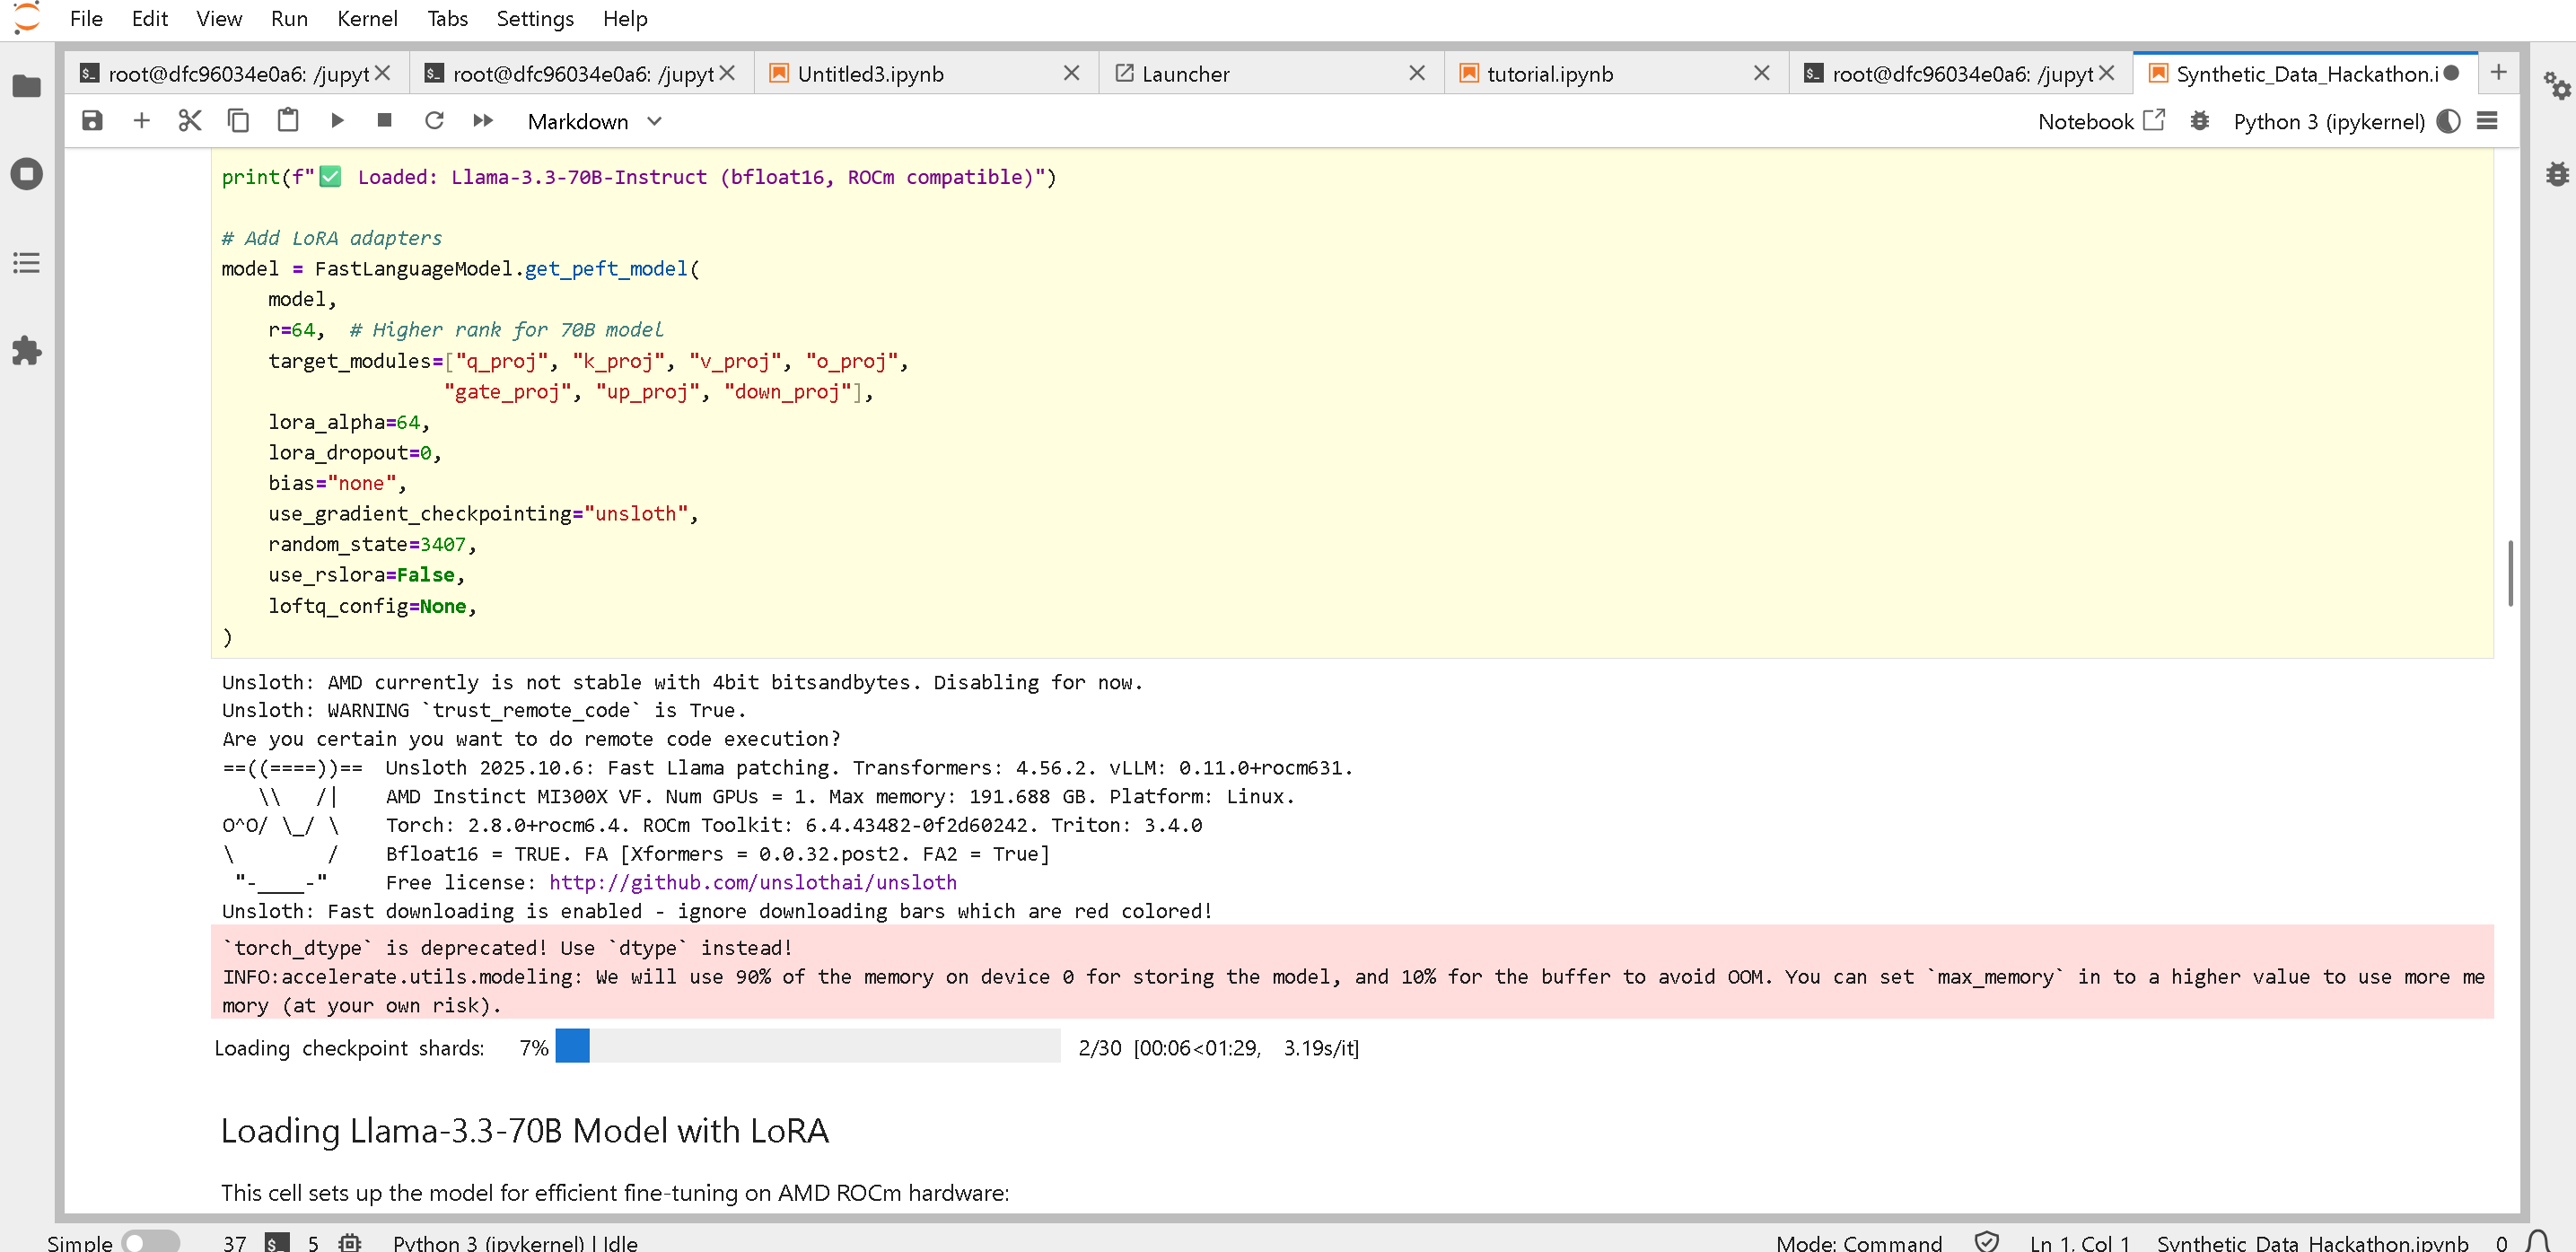 こちらを参照 詳細については
### :dolphin:チュートリアル 3: GPT-OSS 強化学習による自動カーネル作成
これは notebook としても、Python スクリプトとしても実行できます!
Python スクリプト:
Notebook:
{% code overflow="wrap" %}
```bash
wget "https://raw.githubusercontent.com/unslothai/notebooks/refs/heads/main/nb/gpt_oss_(20B)_GRPO_BF16.ipynb" -O "Auto_Kernels_RL.ipynb"
```
{% endcode %}
それからチュートリアル 2 と同様に、ファイル "Auto\_Kernels\_RL.ipynb" を開いて、再起動して、すべて実行します!
こちらを参照 詳細については
### :dolphin:チュートリアル 3: GPT-OSS 強化学習による自動カーネル作成
これは notebook としても、Python スクリプトとしても実行できます!
Python スクリプト:
Notebook:
{% code overflow="wrap" %}
```bash
wget "https://raw.githubusercontent.com/unslothai/notebooks/refs/heads/main/nb/gpt_oss_(20B)_GRPO_BF16.ipynb" -O "Auto_Kernels_RL.ipynb"
```
{% endcode %}
それからチュートリアル 2 と同様に、ファイル "Auto\_Kernels\_RL.ipynb" を開いて、再起動して、すべて実行します!
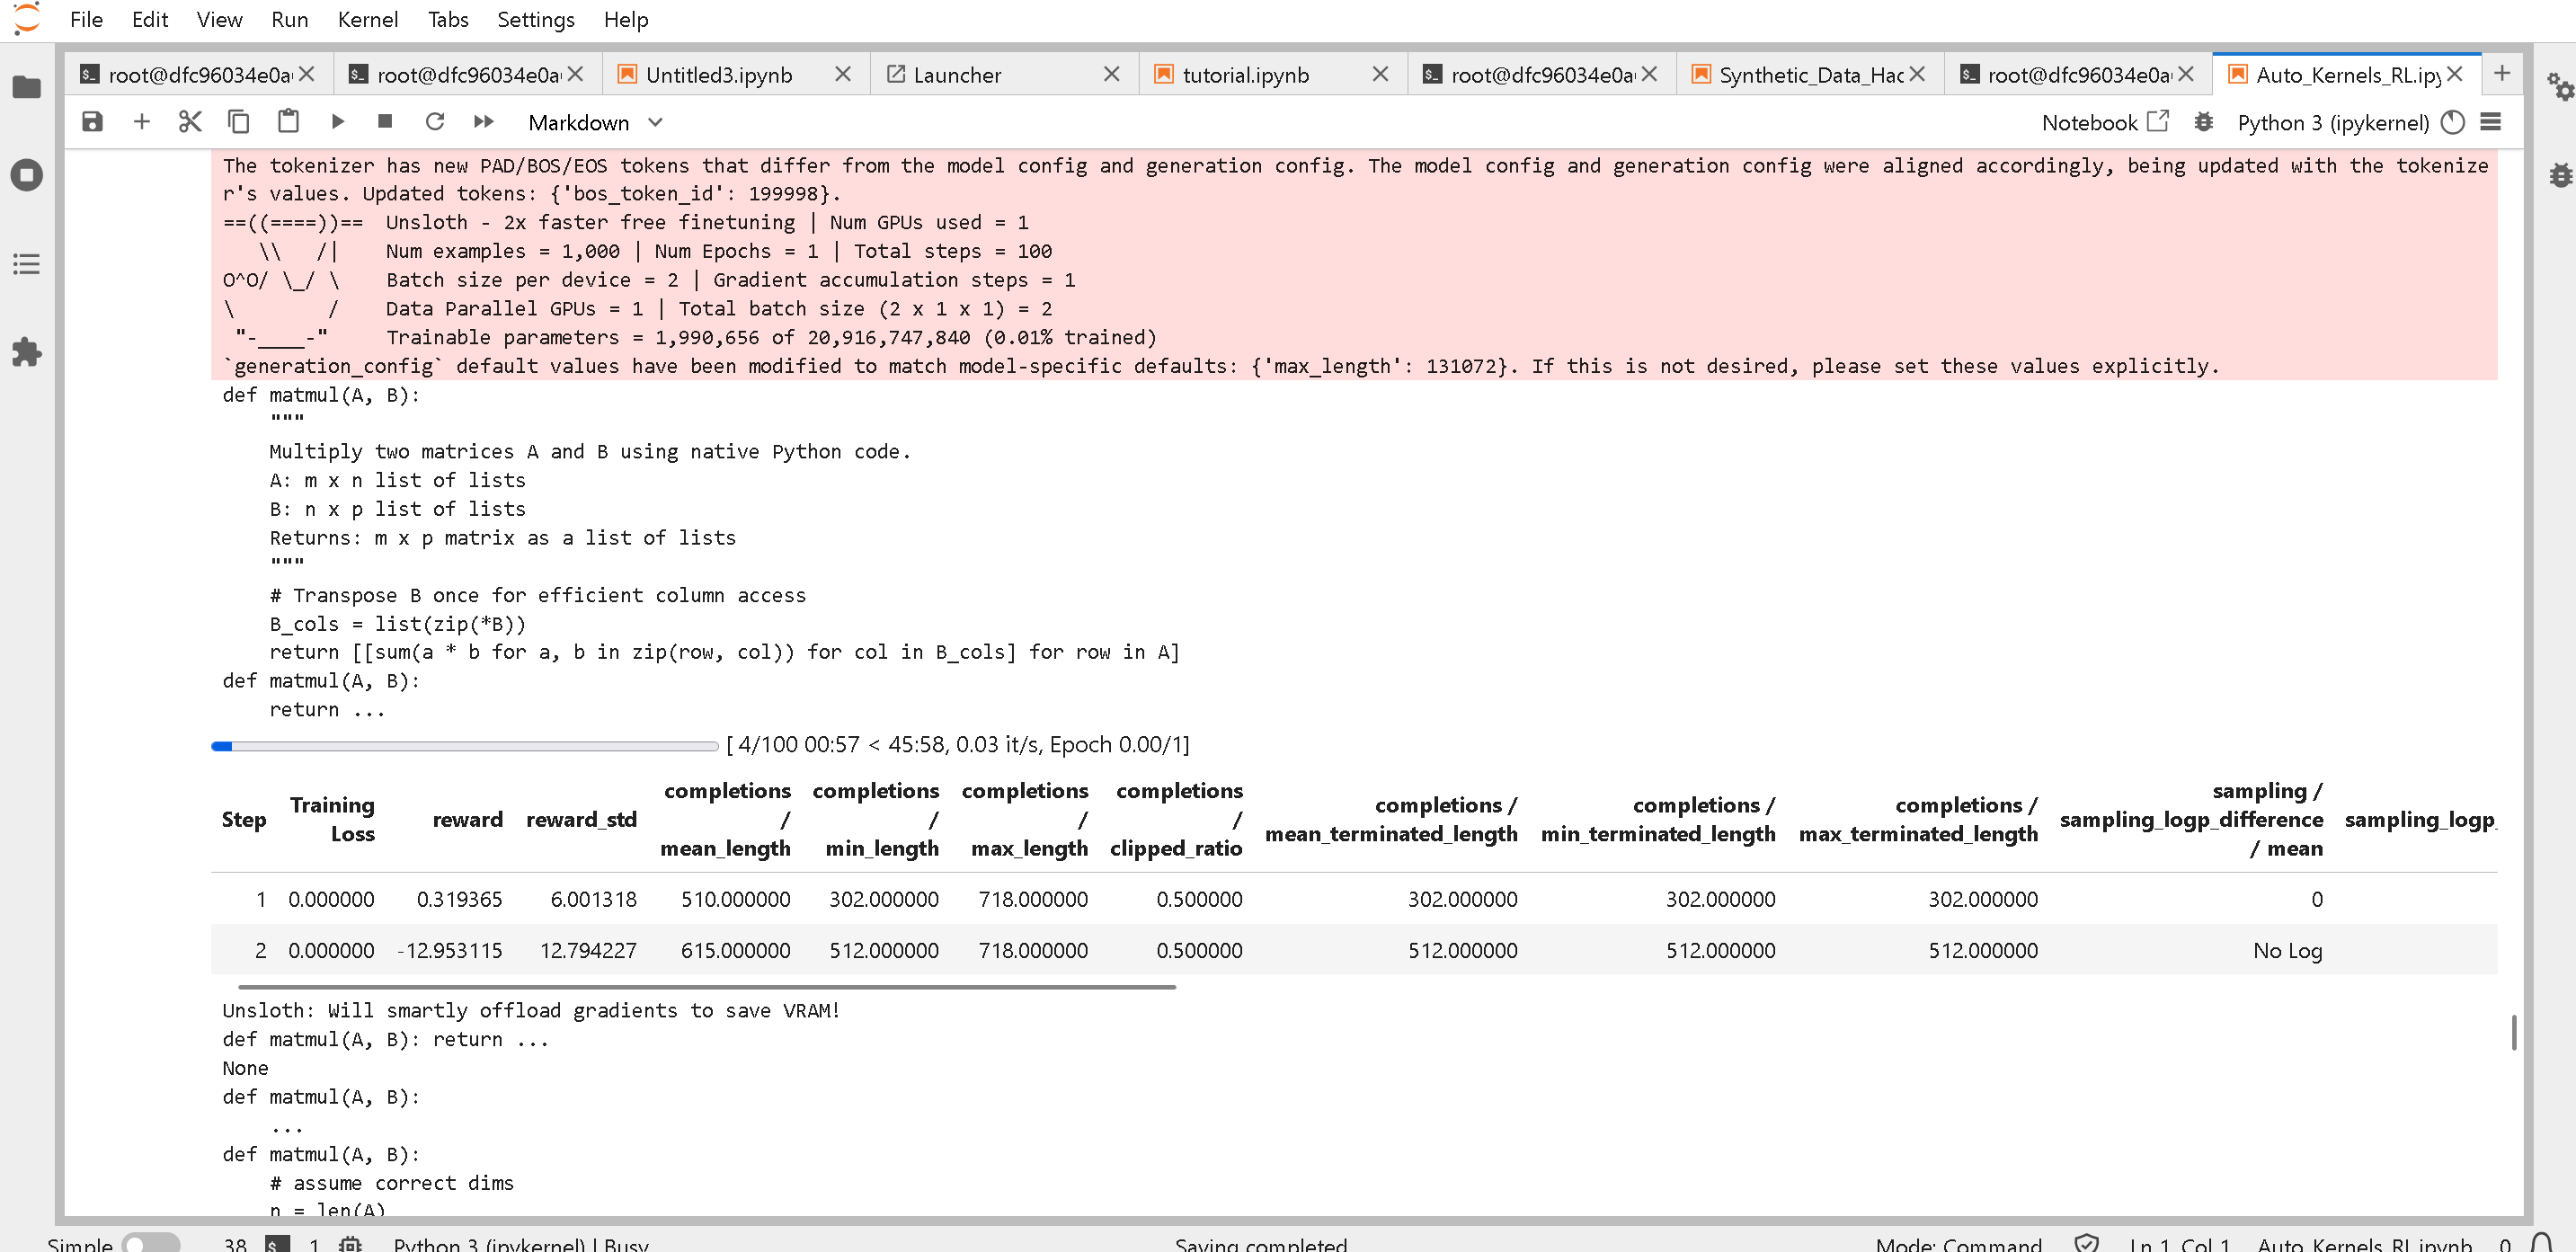
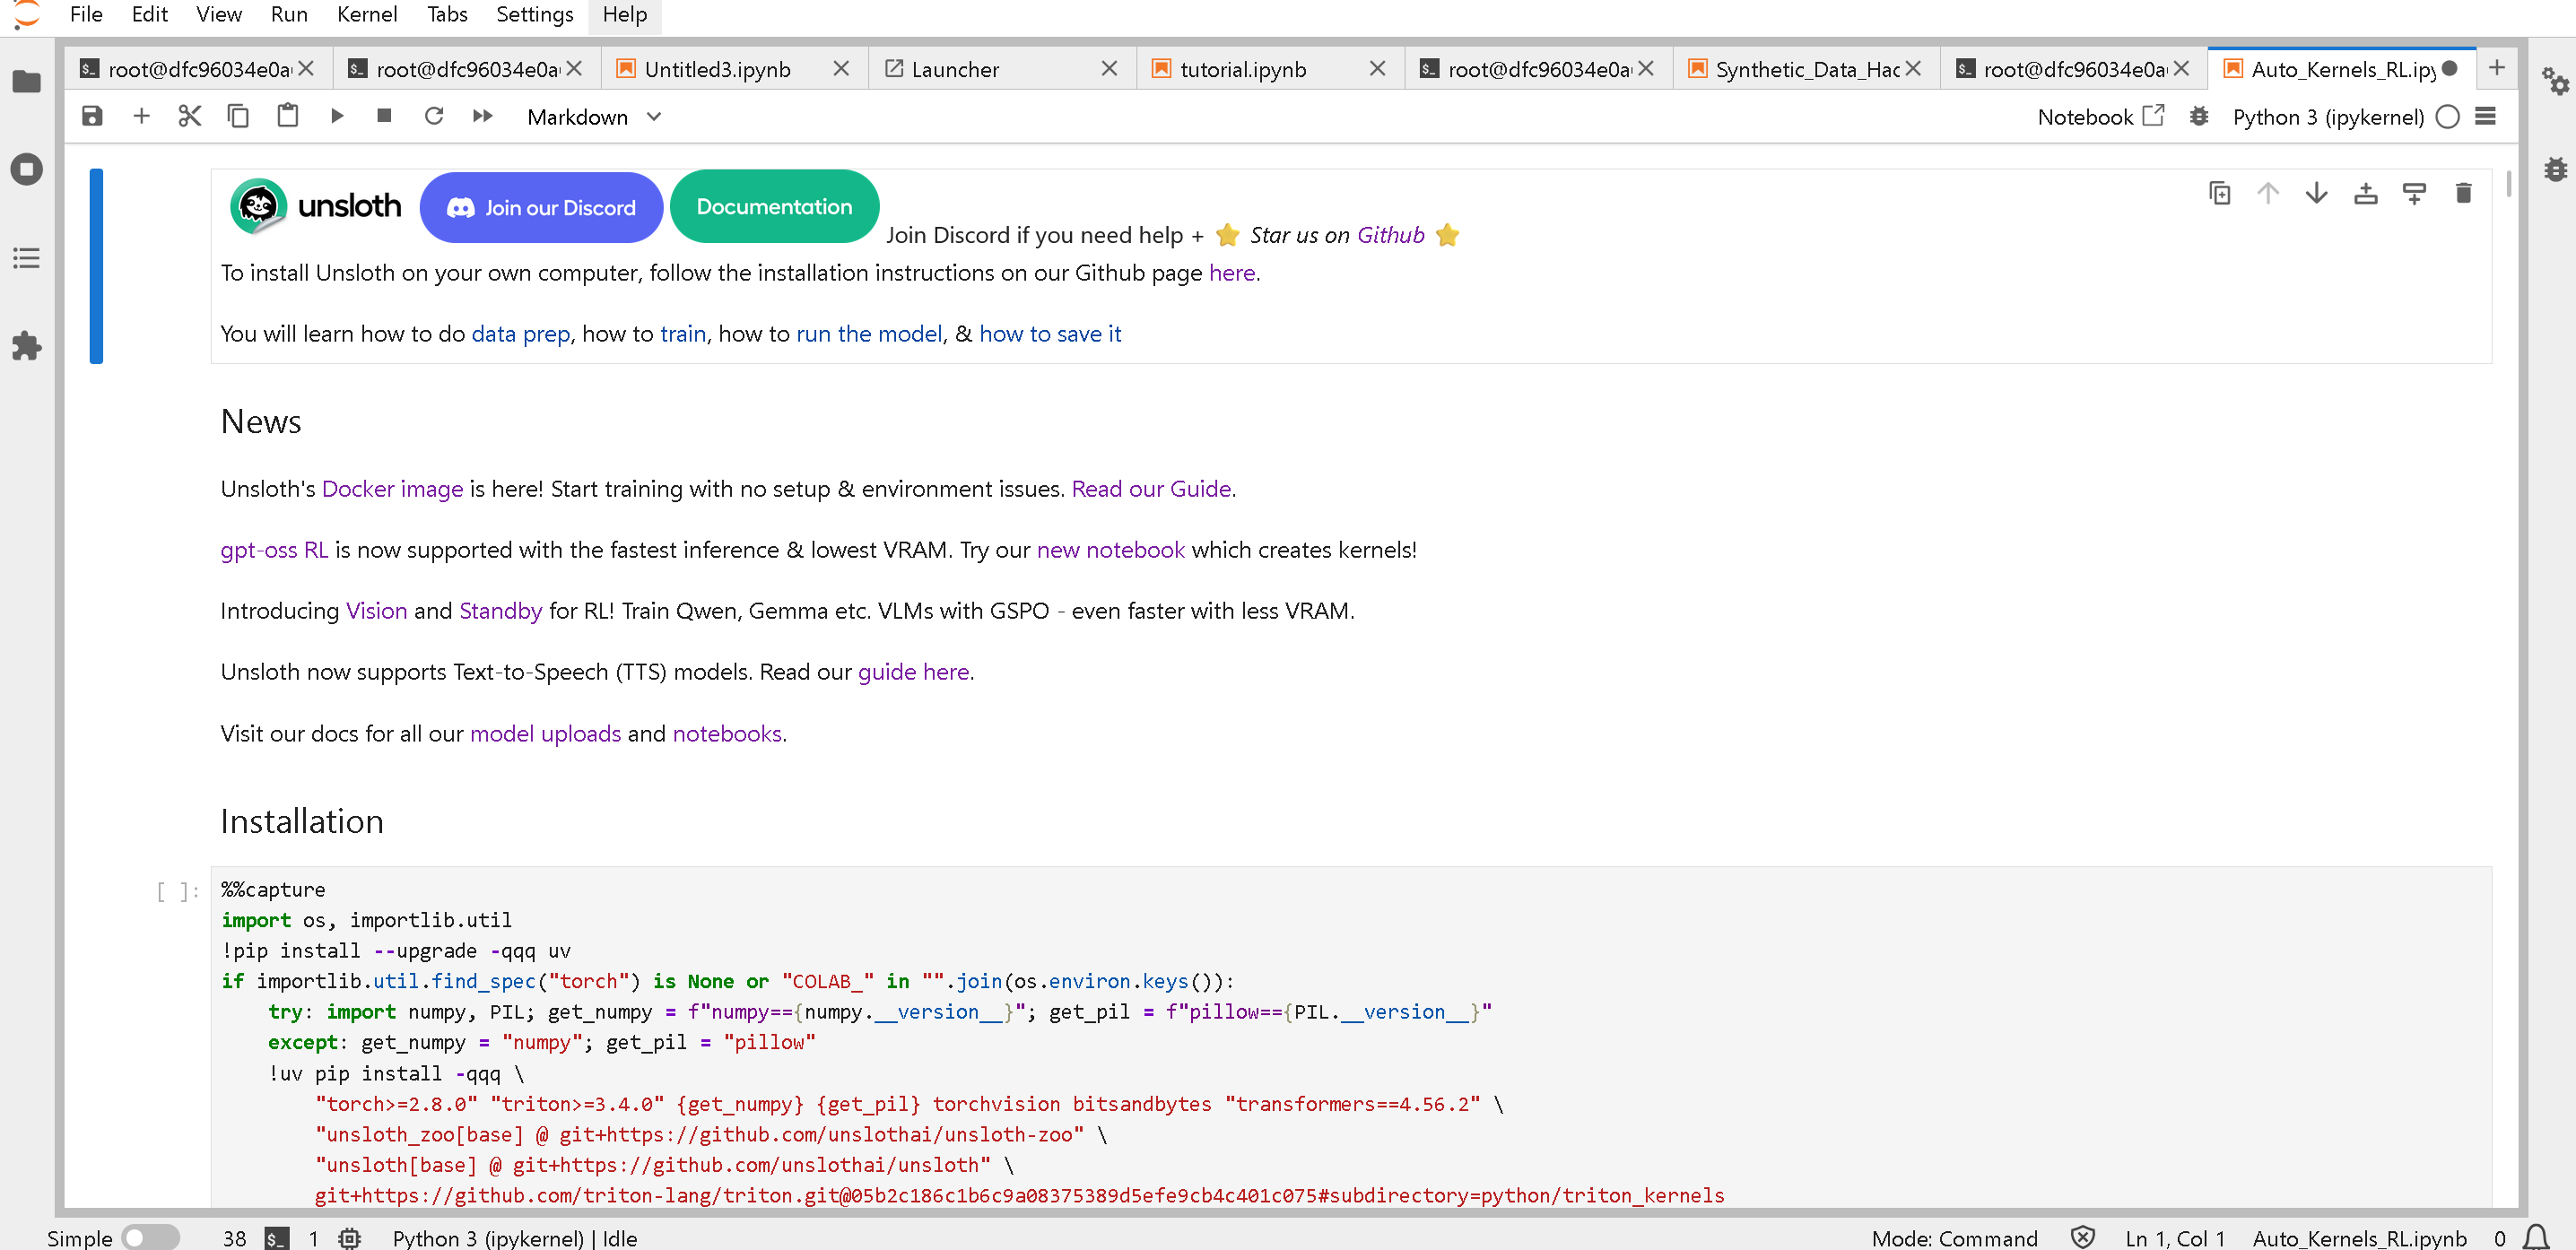 実行して下にスクロールすると、RL によって自動生成された戦略で 2048 のゲームが実行されているのが見えます:
 ### :diamonds:チュートリアル 4: GPT-OSS 強化学習 2048 ゲーム
これは notebook としても、Python スクリプトとしても実行できます!
Python スクリプト:
Notebook:
{% code overflow="wrap" %}
```bash
wget "https://github.com/unslothai/notebooks/raw/refs/heads/main/nb/gpt_oss_(20B)_Reinforcement_Learning_2048_Game_BF16.ipynb" -O "RL_2048_Game.ipynb"
```
{% endcode %}
それからチュートリアル 3 と同様に、ファイル "Auto\_Kernels\_RL.ipynb" を開いて、再起動して、すべて実行します!
### :diamonds:チュートリアル 4: GPT-OSS 強化学習 2048 ゲーム
これは notebook としても、Python スクリプトとしても実行できます!
Python スクリプト:
Notebook:
{% code overflow="wrap" %}
```bash
wget "https://github.com/unslothai/notebooks/raw/refs/heads/main/nb/gpt_oss_(20B)_Reinforcement_Learning_2048_Game_BF16.ipynb" -O "RL_2048_Game.ipynb"
```
{% endcode %}
それからチュートリアル 3 と同様に、ファイル "Auto\_Kernels\_RL.ipynb" を開いて、再起動して、すべて実行します!
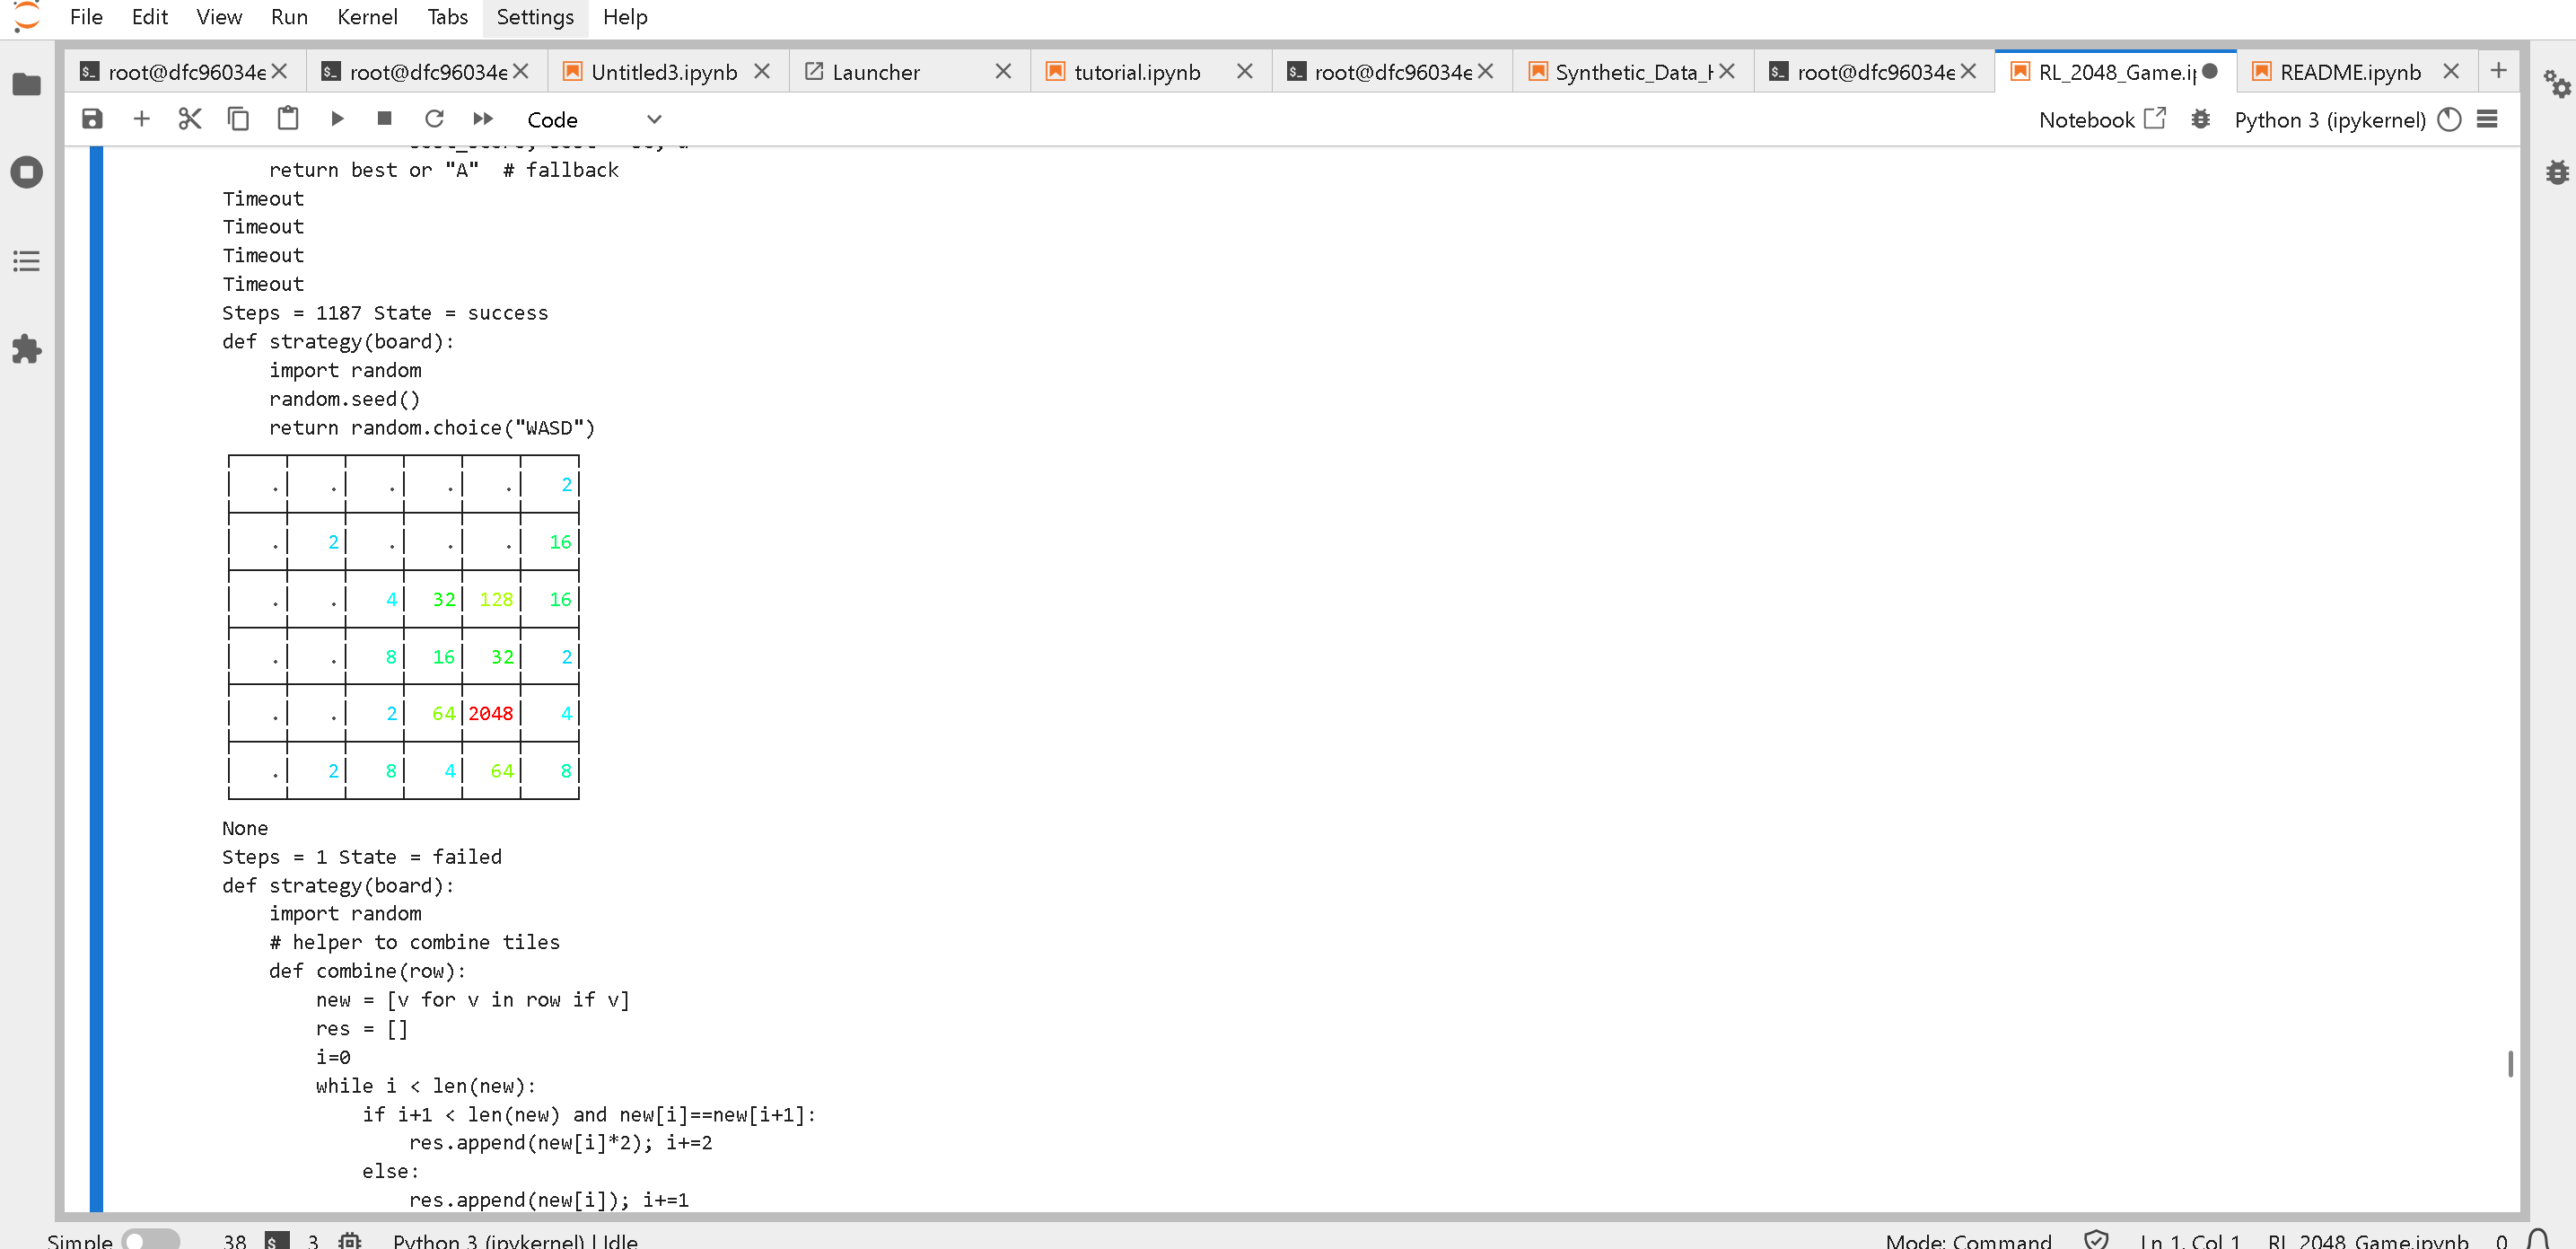
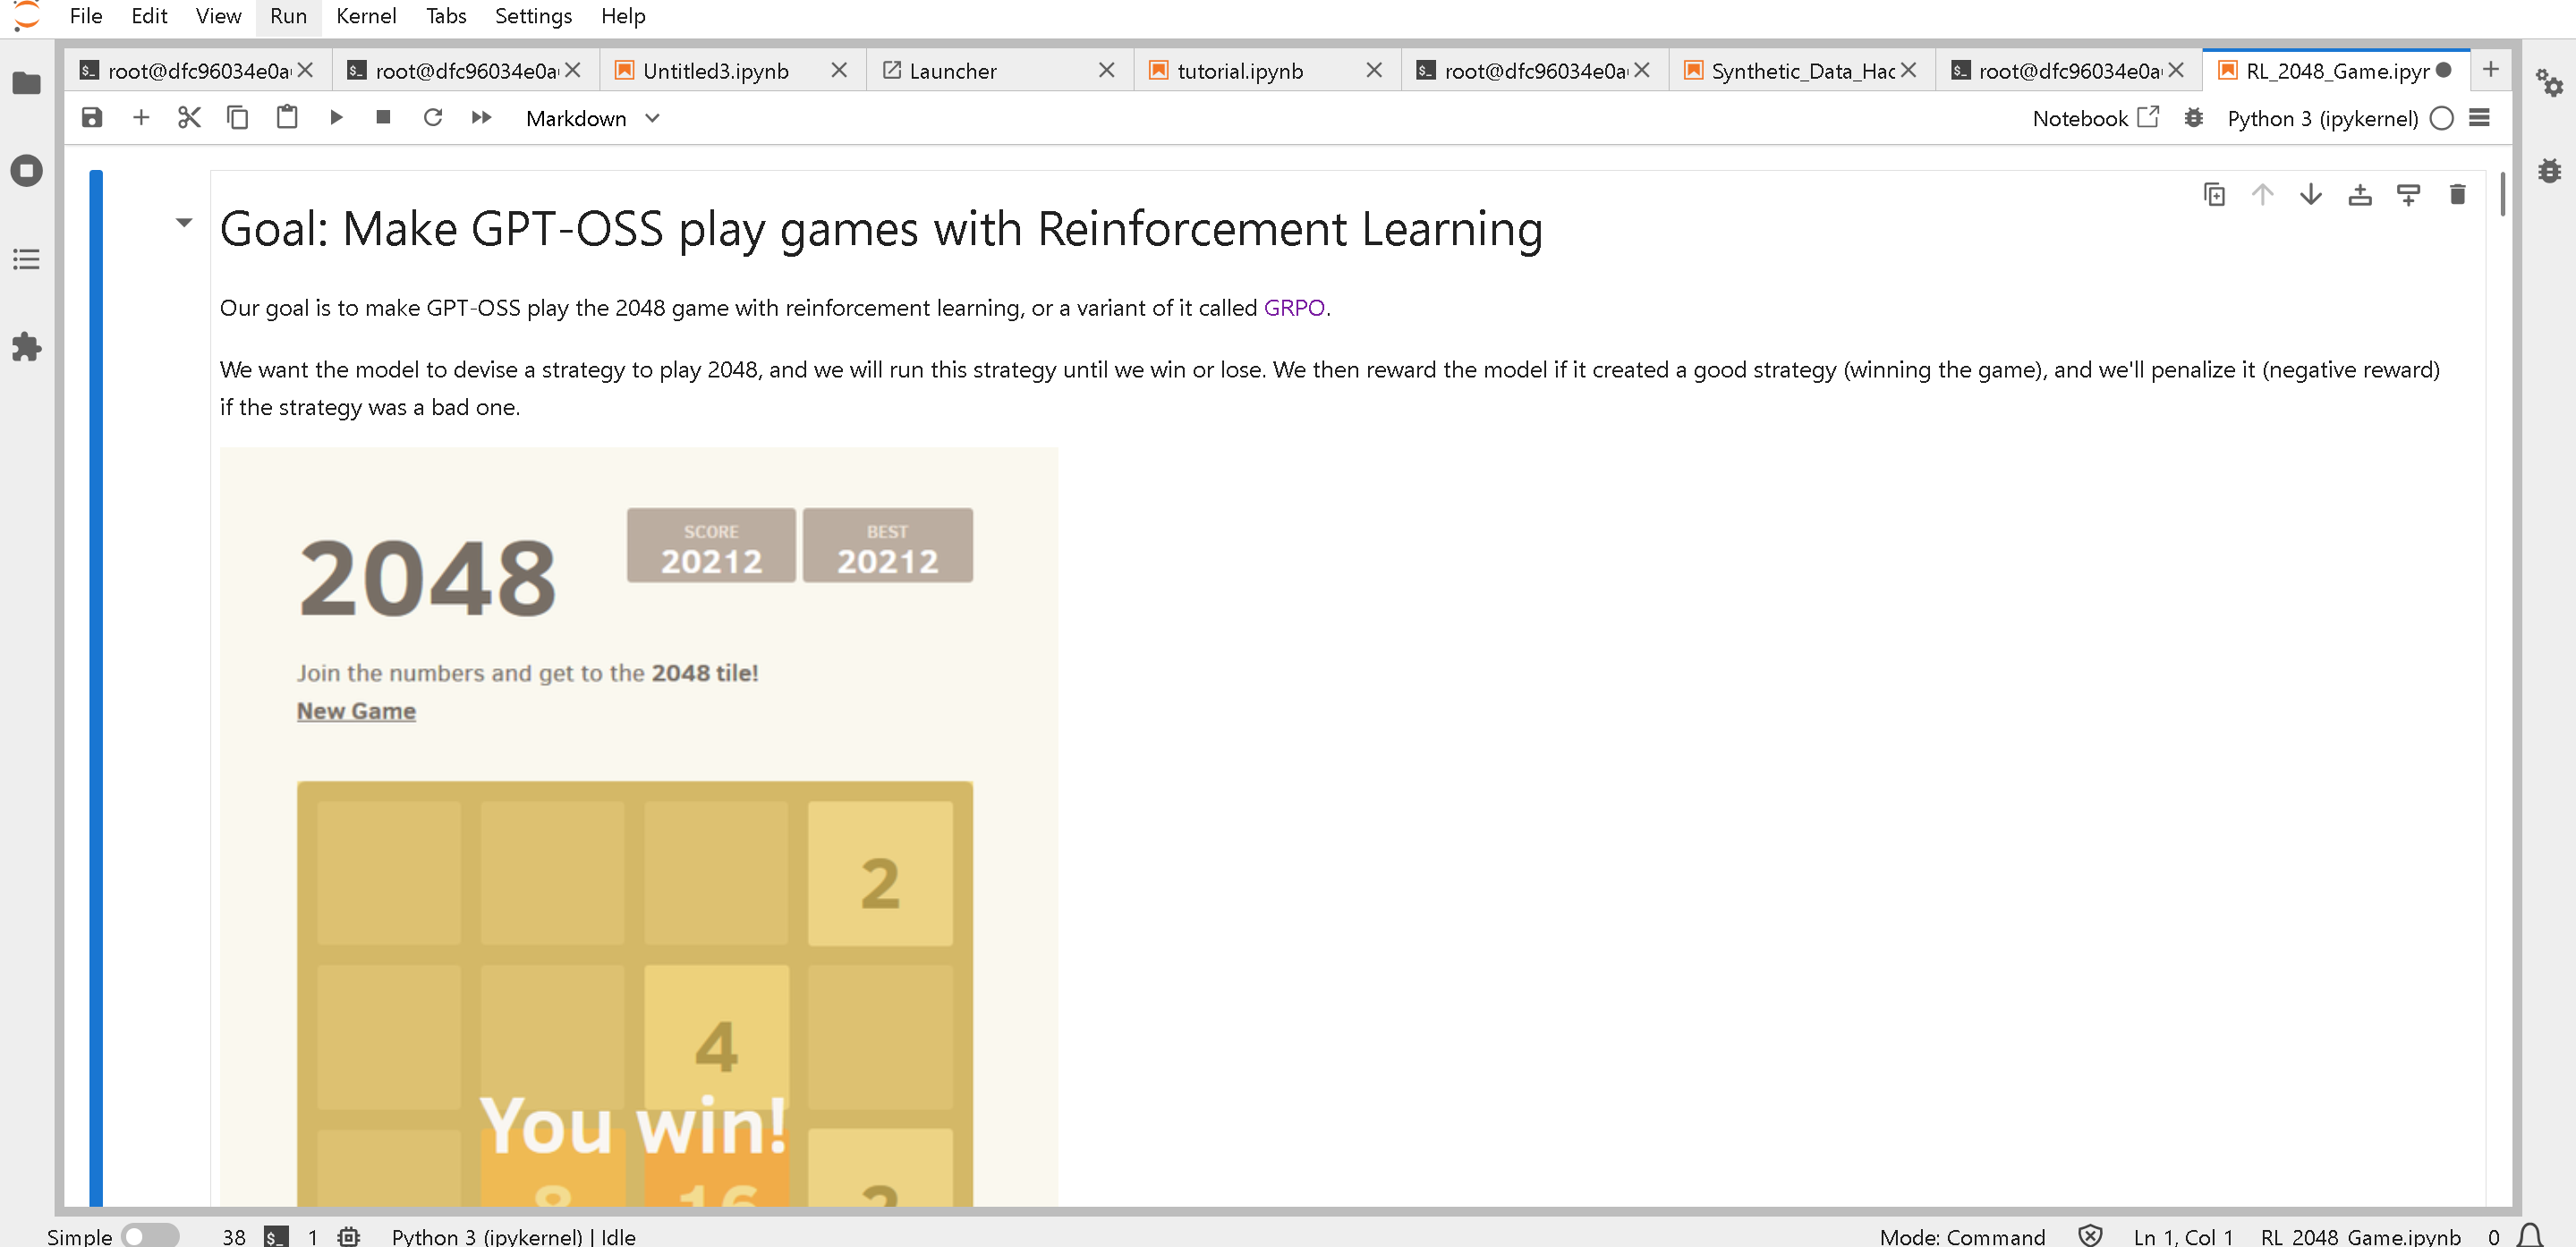 下にスクロールすると、RL アルゴリズムが 2048 に勝つための戦略を自動作成しているのが見えます!
 ### :sunflower:AMD 上での最適な vLLM コマンド
AMD GPU 上でモデルを提供するには、性能を向上させる以下のコマンドを使用してください。aiter と flash-attention がインストールされていることを確認するか、次を参照してください [#updating-vllm-to-the-latest-on-amd](#updating-vllm-to-the-latest-on-amd "mention")
MI300X、MI325X、および Radeon GPU の場合:
```bash
export VLLM_ROCM_USE_AITER=1
# VLLM_USE_AITER_UNIFIED_ATTENTION は Flash Attention がインストールされている場合にのみ動作します
export VLLM_USE_AITER_UNIFIED_ATTENTION=0
export VLLM_ROCM_USE_AITER_MHA=0
vllm serve unsloth/gpt-oss-20b \
--no-enable-prefix-caching \
--compilation-config '{"full_cuda_graph": true}'
```
MI355X の場合は、以下を実行してください:
```bash
export VLLM_ROCM_USE_AITER=1
# VLLM_USE_AITER_UNIFIED_ATTENTION は Flash Attention がインストールされている場合にのみ動作します
export VLLM_USE_AITER_UNIFIED_ATTENTION=0
export VLLM_ROCM_USE_AITER_MHA=0
export VLLM_USE_AITER_TRITON_FUSED_SPLIT_QKV_ROPE=1
export VLLM_USE_AITER_TRITON_FUSED_ADD_RMSNORM_PAD=1
export TRITON_HIP_PRESHUFFLE_SCALES=1
export VLLM_USE_AITER_TRITON_GEMM=1
vllm serve unsloth/gpt-oss-120b \
--no-enable-prefix-caching \
--compilation-config '{"compile_sizes": [1, 2, 4, 8, 16, 24, 32, 64, 128, 256, 4096, 8192], "full_cuda_graph": true}' \
--block-size 64
```
## :tools:トラブルシューティングと FAQ
### :free:AMD GPU のメモリを解放するには?
Docker イメージ(ハッカソンのようなもの)を使っている場合は、以下を新しい環境で実行してください **ターミナル** `rocm-smi -d 0 --showpids` ローカルマシン上の場合
```bash
# /dev/kfd または /dev/dri/render* を開いているローカル PID を一覧表示
for p in /proc/[0-9]*; do
readlink -f "$p/fd"/* 2>/dev/null | grep -qE '/dev/(kfd|dri/render)' || continue
cmd=$(tr -d '\0' < "$p/cmdline" 2>/dev/null | sed 's/ \+/ /g')
printf "%-8s %s\n" "${p##*/}" "${cmd:-[unknown]}"
done | sort -n
```
ローカルマシンなら、単純に次を実行します `rocm-smi -d 0 --showpids` そして実行 `sudo kill -9 XXXX` ここで `XXXX` は、最も VRAM を使用している特定のプロセスに対して一覧表示された PID です。
### :sunflower:AMD 上での最適な vLLM コマンド
AMD GPU 上でモデルを提供するには、性能を向上させる以下のコマンドを使用してください。aiter と flash-attention がインストールされていることを確認するか、次を参照してください [#updating-vllm-to-the-latest-on-amd](#updating-vllm-to-the-latest-on-amd "mention")
MI300X、MI325X、および Radeon GPU の場合:
```bash
export VLLM_ROCM_USE_AITER=1
# VLLM_USE_AITER_UNIFIED_ATTENTION は Flash Attention がインストールされている場合にのみ動作します
export VLLM_USE_AITER_UNIFIED_ATTENTION=0
export VLLM_ROCM_USE_AITER_MHA=0
vllm serve unsloth/gpt-oss-20b \
--no-enable-prefix-caching \
--compilation-config '{"full_cuda_graph": true}'
```
MI355X の場合は、以下を実行してください:
```bash
export VLLM_ROCM_USE_AITER=1
# VLLM_USE_AITER_UNIFIED_ATTENTION は Flash Attention がインストールされている場合にのみ動作します
export VLLM_USE_AITER_UNIFIED_ATTENTION=0
export VLLM_ROCM_USE_AITER_MHA=0
export VLLM_USE_AITER_TRITON_FUSED_SPLIT_QKV_ROPE=1
export VLLM_USE_AITER_TRITON_FUSED_ADD_RMSNORM_PAD=1
export TRITON_HIP_PRESHUFFLE_SCALES=1
export VLLM_USE_AITER_TRITON_GEMM=1
vllm serve unsloth/gpt-oss-120b \
--no-enable-prefix-caching \
--compilation-config '{"compile_sizes": [1, 2, 4, 8, 16, 24, 32, 64, 128, 256, 4096, 8192], "full_cuda_graph": true}' \
--block-size 64
```
## :tools:トラブルシューティングと FAQ
### :free:AMD GPU のメモリを解放するには?
Docker イメージ(ハッカソンのようなもの)を使っている場合は、以下を新しい環境で実行してください **ターミナル** `rocm-smi -d 0 --showpids` ローカルマシン上の場合
```bash
# /dev/kfd または /dev/dri/render* を開いているローカル PID を一覧表示
for p in /proc/[0-9]*; do
readlink -f "$p/fd"/* 2>/dev/null | grep -qE '/dev/(kfd|dri/render)' || continue
cmd=$(tr -d '\0' < "$p/cmdline" 2>/dev/null | sed 's/ \+/ /g')
printf "%-8s %s\n" "${p##*/}" "${cmd:-[unknown]}"
done | sort -n
```
ローカルマシンなら、単純に次を実行します `rocm-smi -d 0 --showpids` そして実行 `sudo kill -9 XXXX` ここで `XXXX` は、最も VRAM を使用している特定のプロセスに対して一覧表示された PID です。
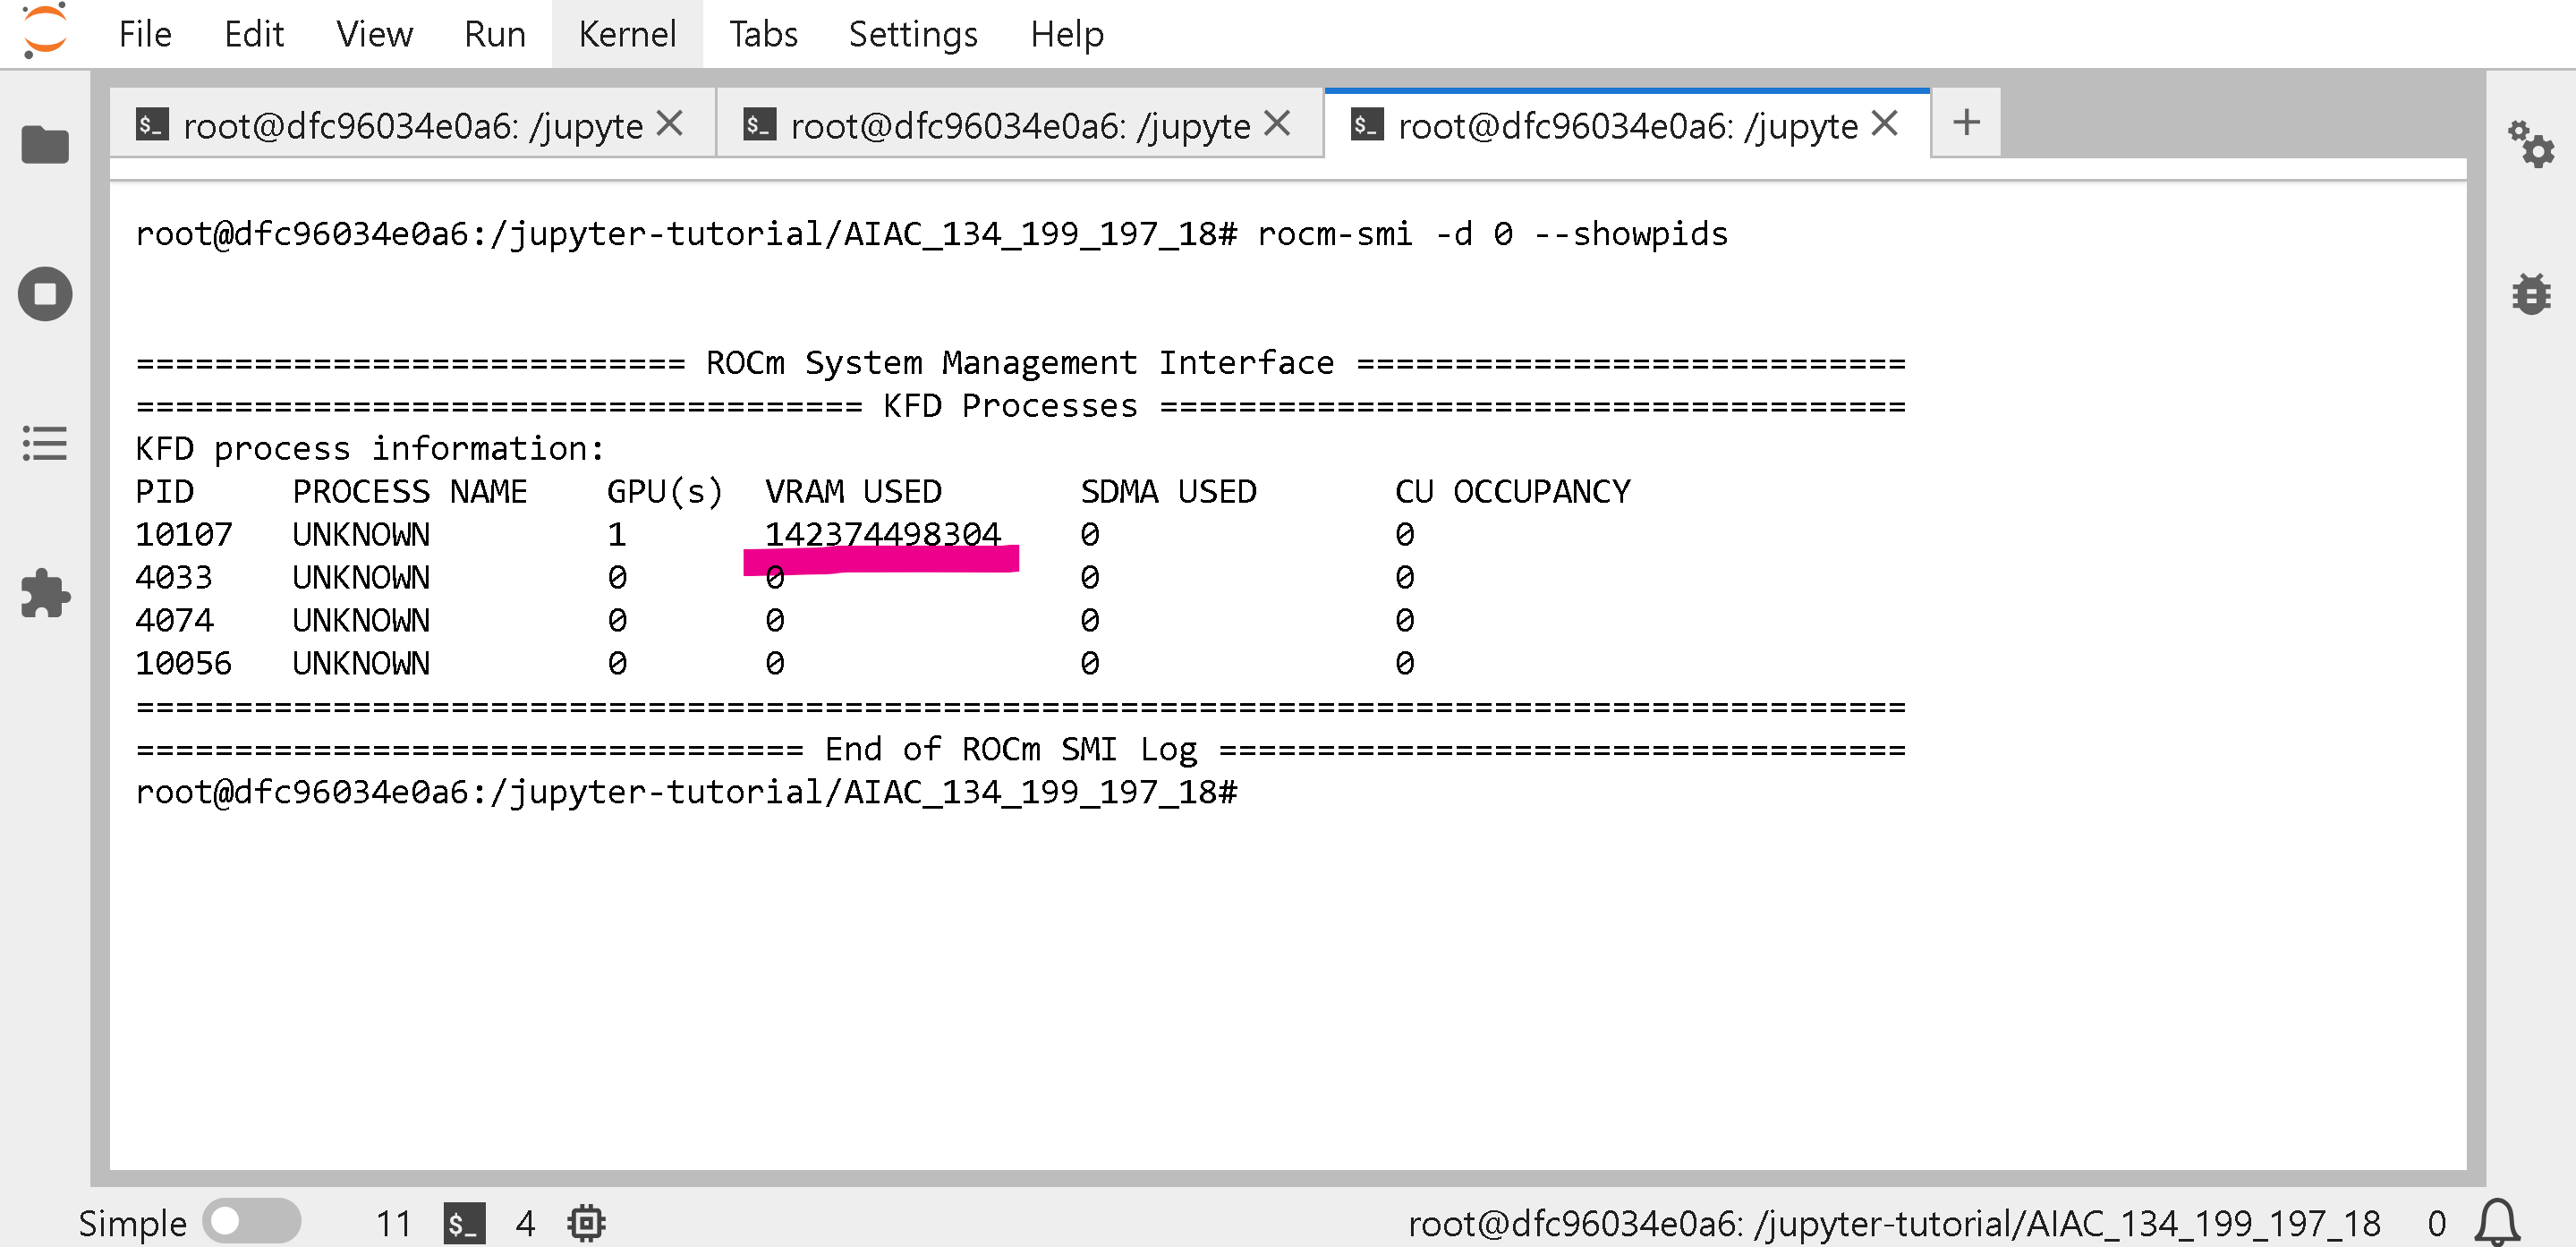 ハッカソンのような Docker イメージの場合、最初のセルを実行した後に、以下のようなものが表示されることがあります:
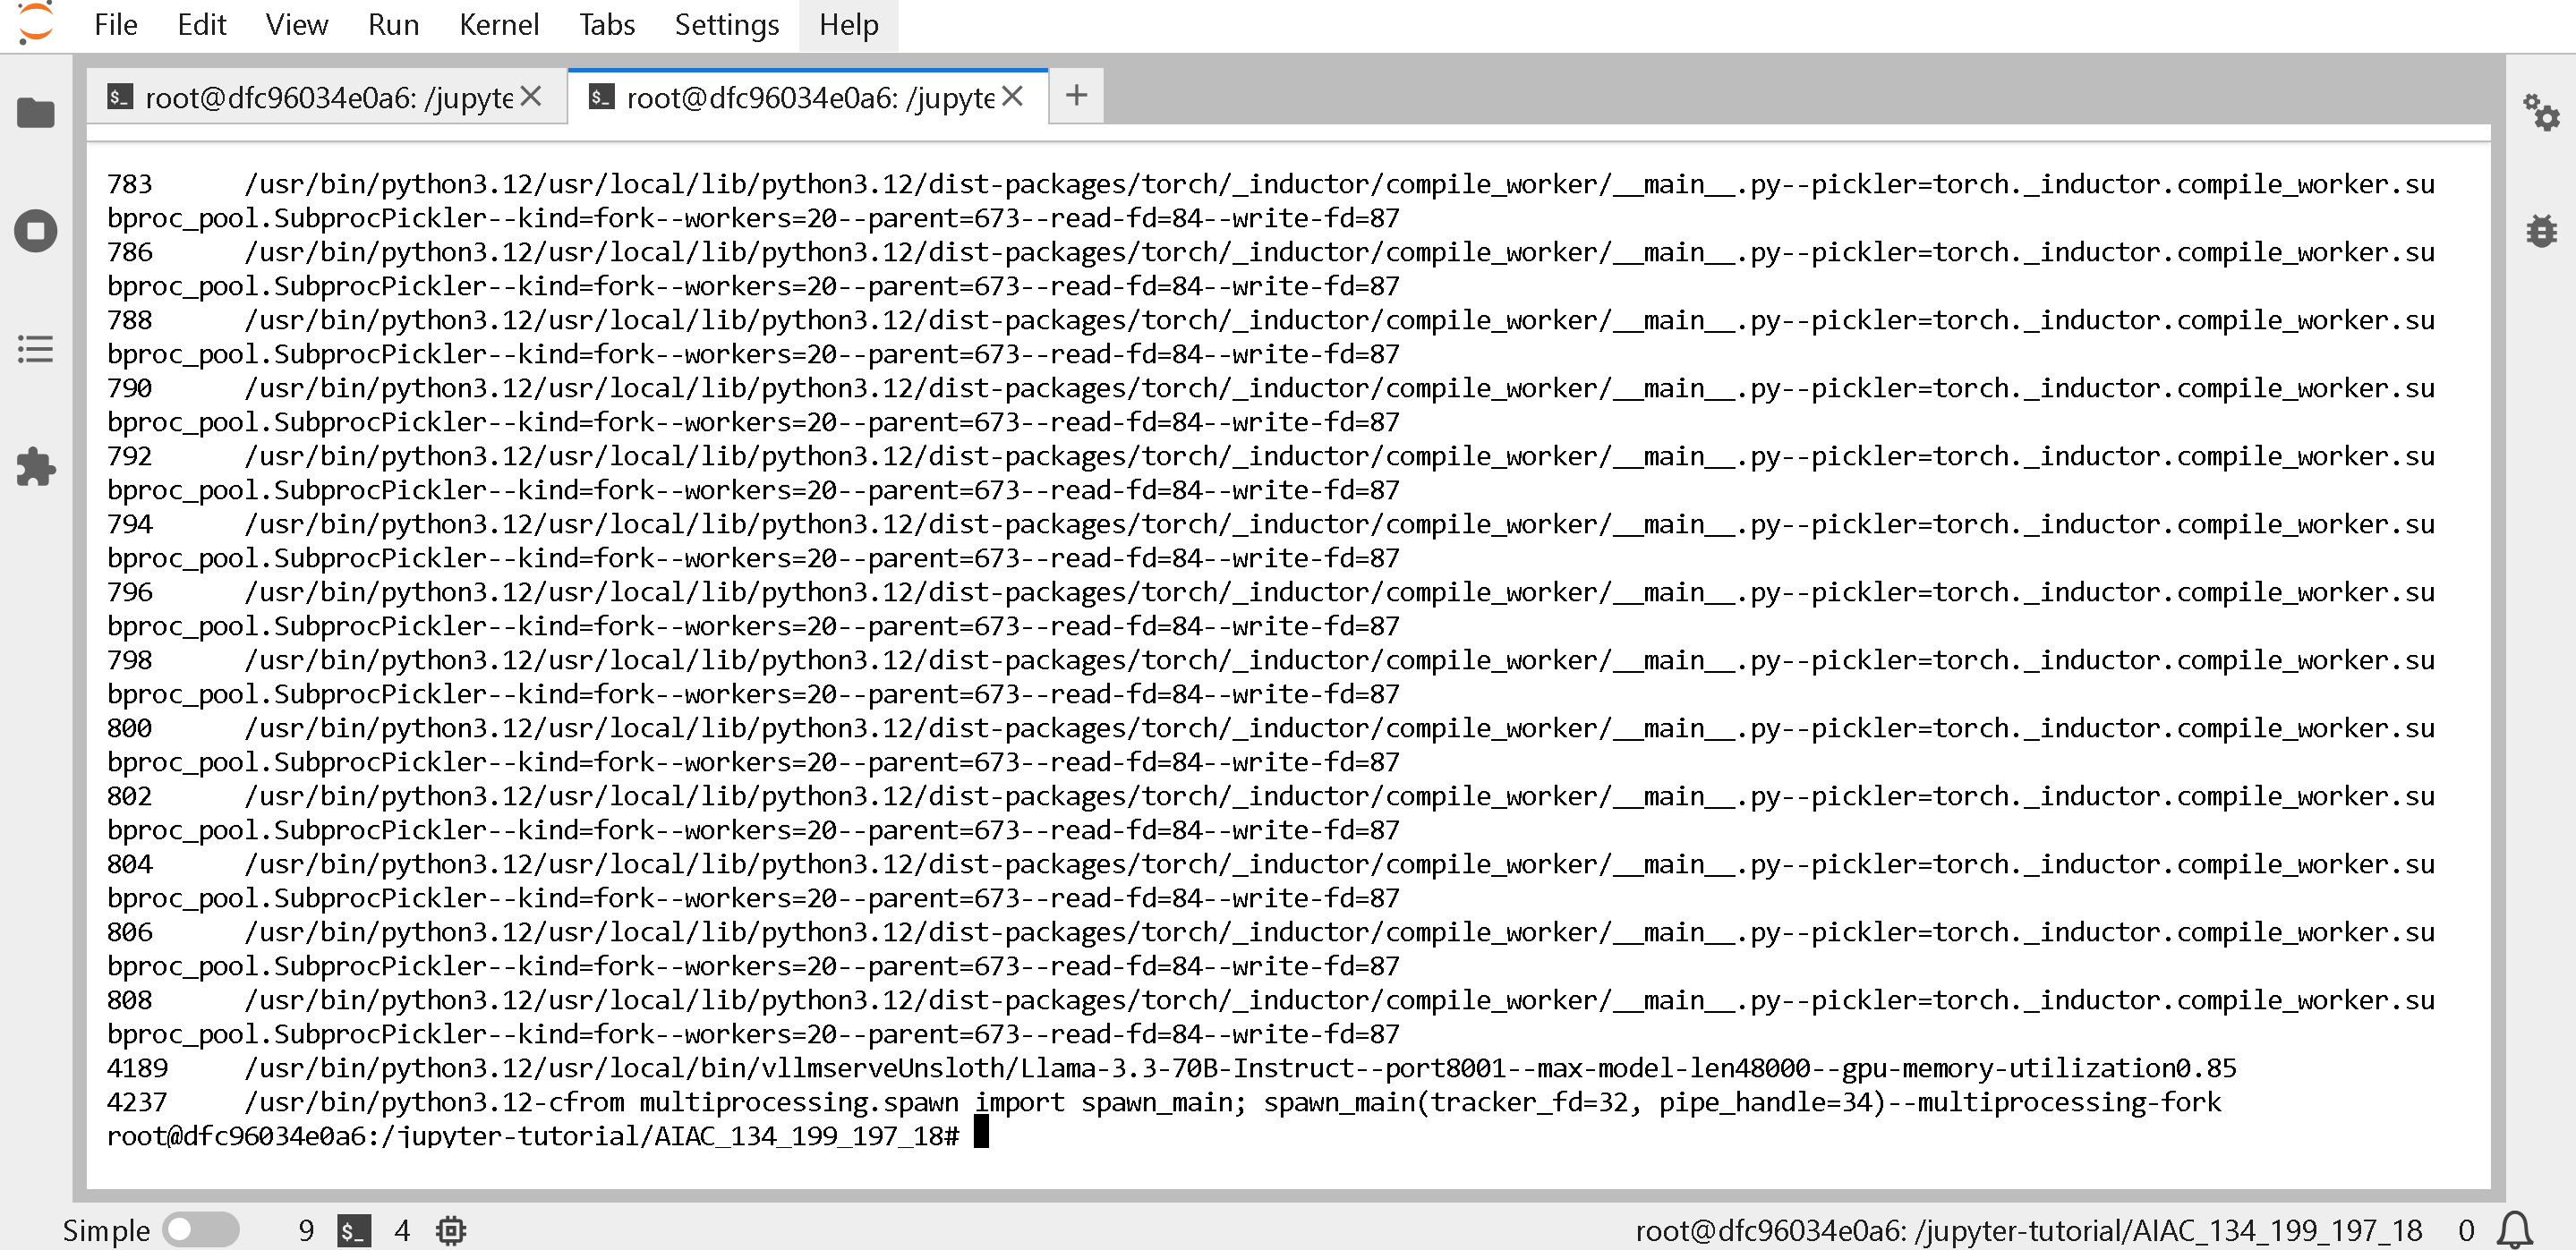 次に VRAM を使用しているプロセス(vLLM など)を探して、次を入力します `sudo kill -9 XXXX` ここで `XXXX` は、以下のように左列に表示される PID です:
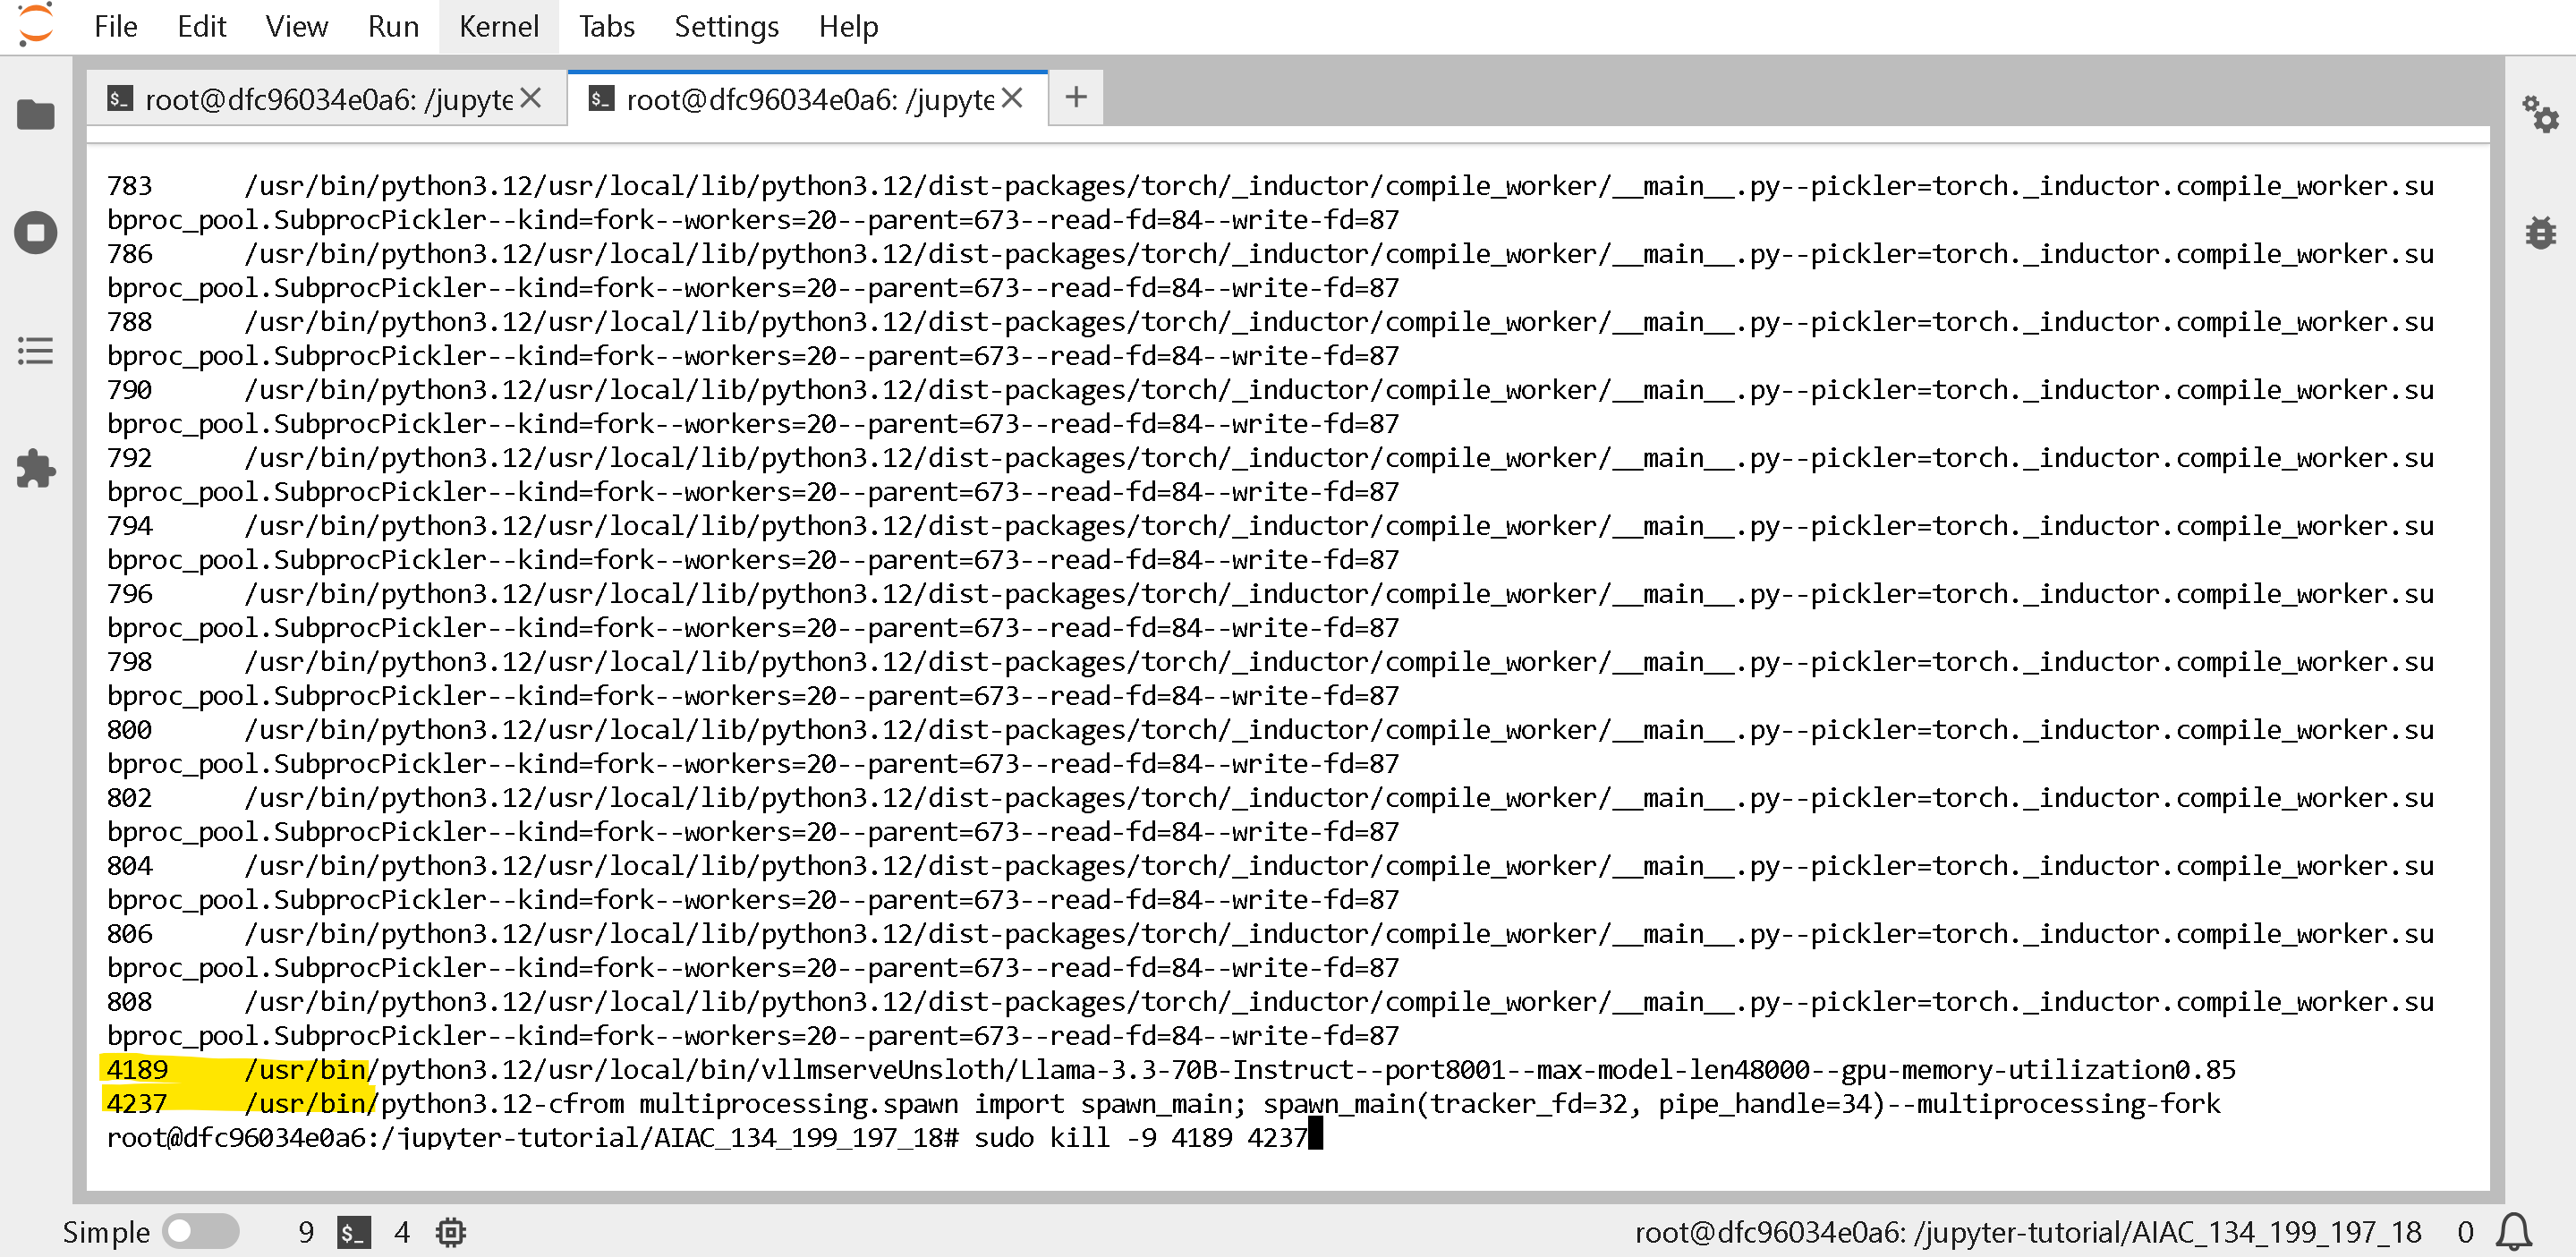 次を使って、すべての GPU メモリが解放されたことを確認します `rocm-smi -d 0 --showpids` たとえば以下はメモリ使用量 0 を示しています:
%20(1).png?alt=media) 一方で以下が表示される場合は、最初の Docker セルを再実行して、再度プロセスを終了してください。
一方で以下が表示される場合は、最初の Docker セルを再実行して、再度プロセスを終了してください。
%20(1).png?alt=media) ### :pencil:torch.OutOfMemoryError: HIP out of memory RuntimeError: Engine process failed to start.
ご覧ください [#how-do-i-free-amd-gpu-memory](#how-do-i-free-amd-gpu-memory "mention") GPU が別のプロセスによってメモリを使用しているかを確認し、メモリを使用しているそのプロセスを削除してみてください。
また、次も試してください `amd-smi process --gpu 0` GPU を使用しているすべてのプロセスと、その VRAM 使用量を一覧表示するには:
### :pencil:torch.OutOfMemoryError: HIP out of memory RuntimeError: Engine process failed to start.
ご覧ください [#how-do-i-free-amd-gpu-memory](#how-do-i-free-amd-gpu-memory "mention") GPU が別のプロセスによってメモリを使用しているかを確認し、メモリを使用しているそのプロセスを削除してみてください。
また、次も試してください `amd-smi process --gpu 0` GPU を使用しているすべてのプロセスと、その VRAM 使用量を一覧表示するには:
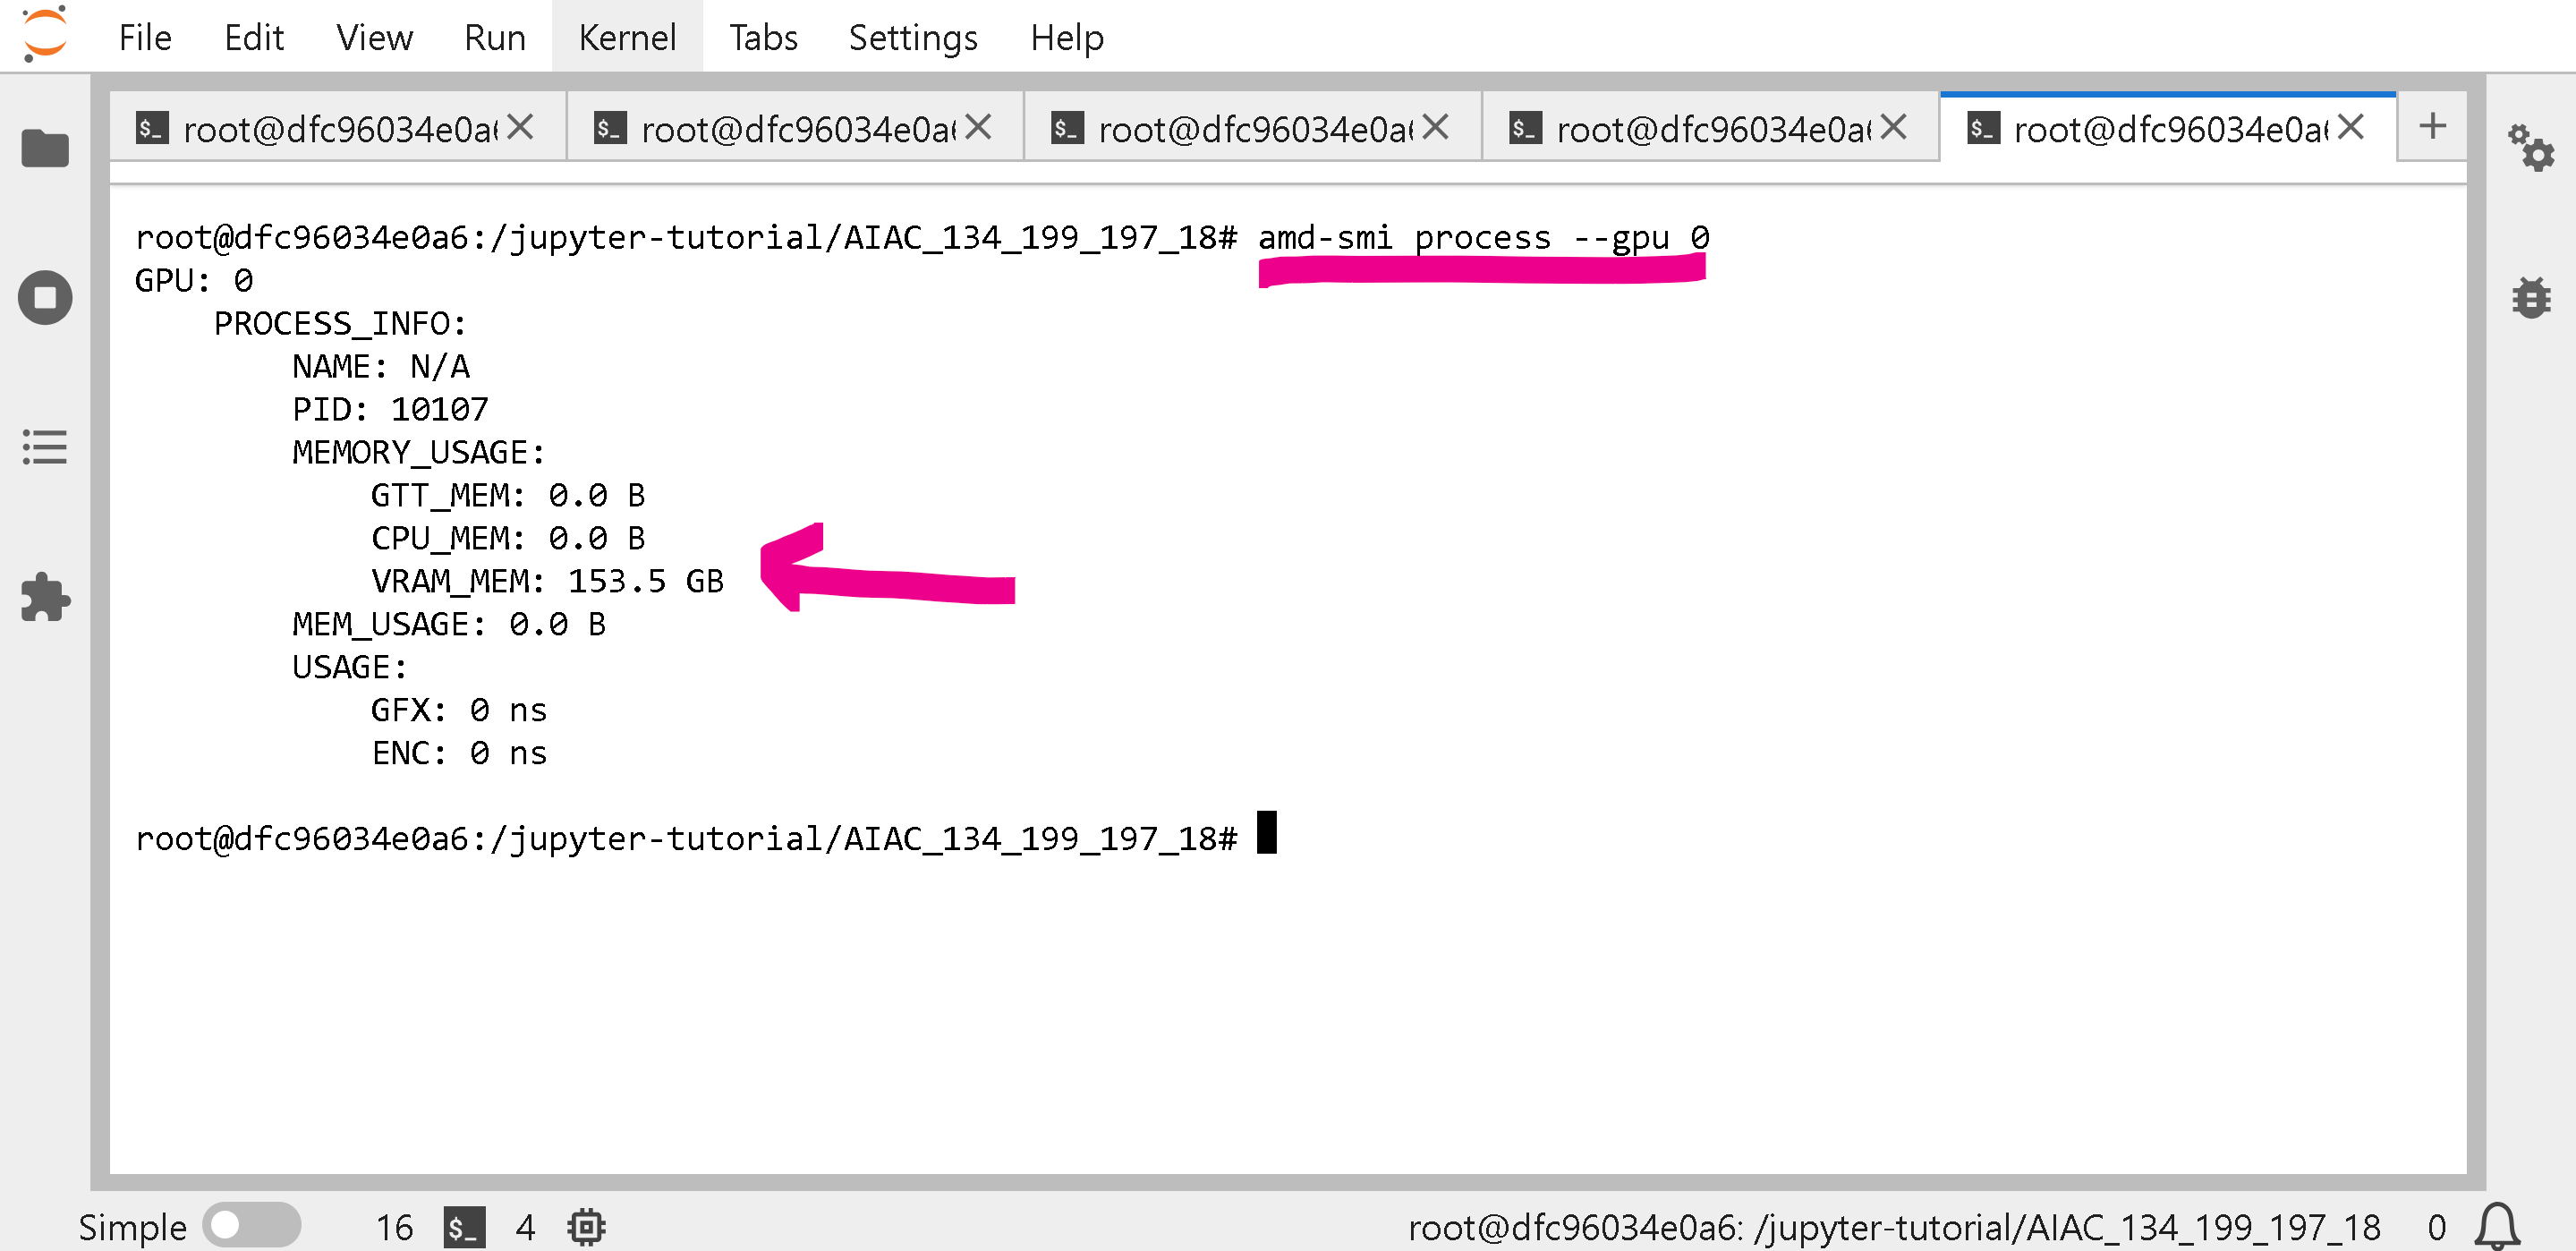 ### :arrow\_forward:vLLM のプラットフォームが検出されませんでした。vLLM と gpt-oss on vLLM をアップグレードしています
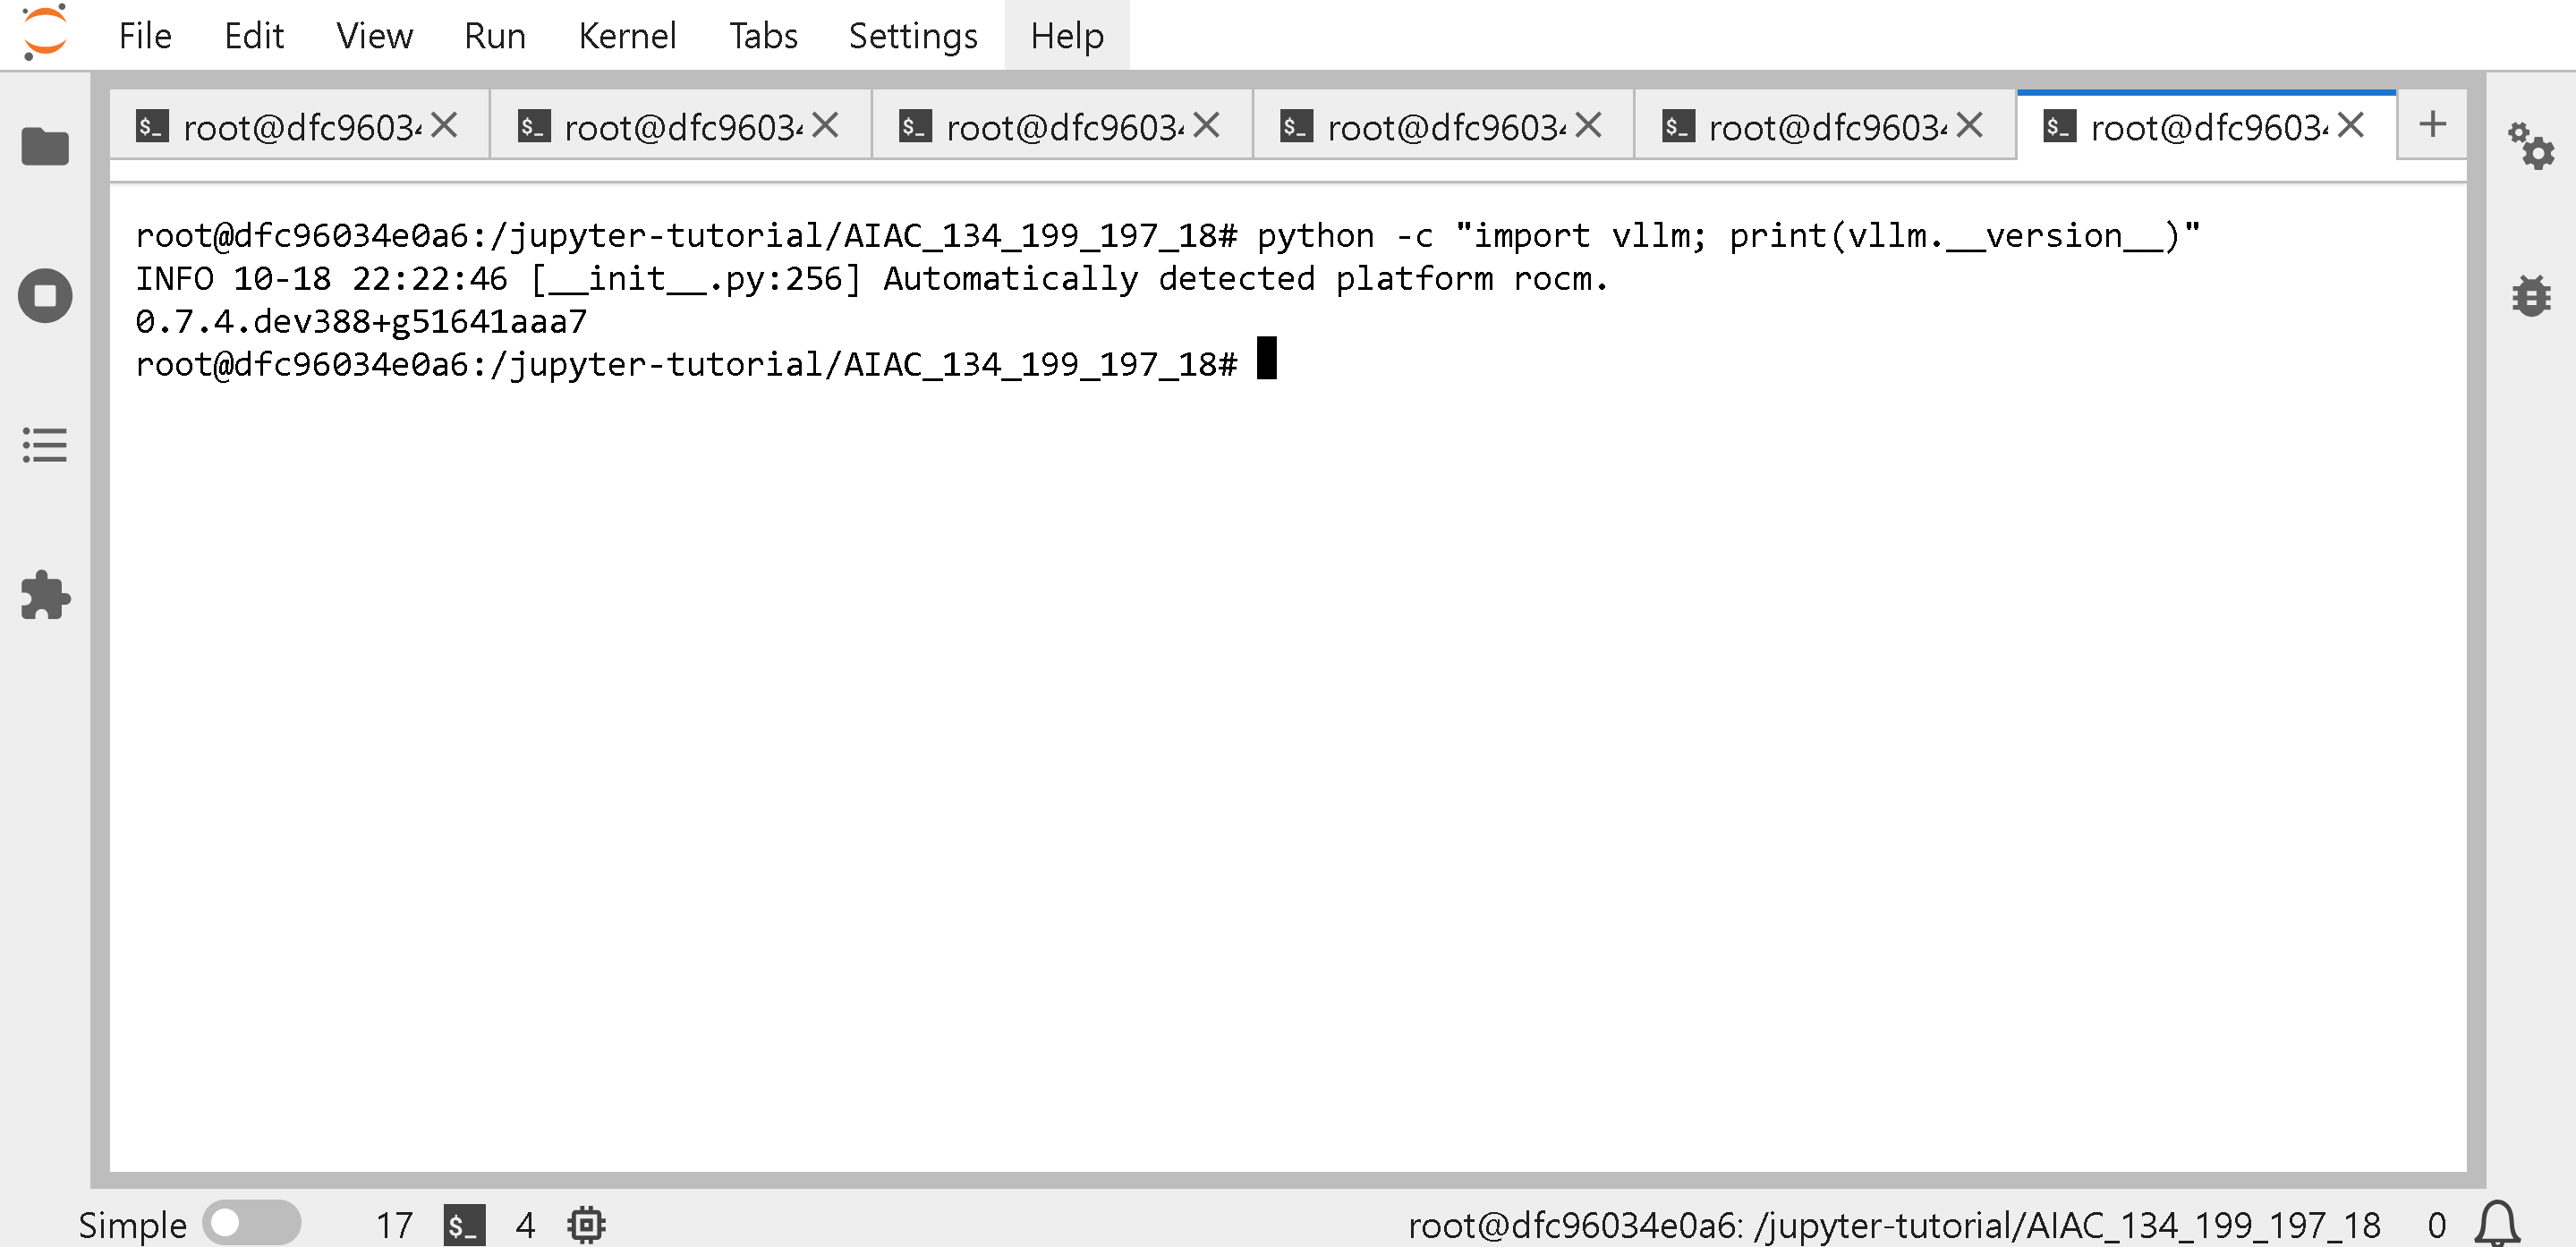
次を実行している場合 `vllm serve Unsloth/gpt-oss-20b` 古い vLLM バージョンを使っている可能性があります。 `python -c "import vllm; print(vllm.__version__)"` で vLLM のバージョンを取得します。
事前構築済みの hackathon 用 docker では、 `0.7.4` が返されます。残念ながら GPT-OSS のような新しいモデルはサポートしていませんが、次のような他のモデルは動作します `vllm serve Unsloth/Llama-3.3-70B-Instruct --port 8001 --max-model-len 48000 --gpu-memory-utilization 0.85`
### :arrow\_forward:vLLM のプラットフォームが検出されませんでした。vLLM と gpt-oss on vLLM をアップグレードしています
次を実行している場合 `vllm serve Unsloth/gpt-oss-20b` 古い vLLM バージョンを使っている可能性があります。 `python -c "import vllm; print(vllm.__version__)"` で vLLM のバージョンを取得します。
事前構築済みの hackathon 用 docker では、 `0.7.4` が返されます。残念ながら GPT-OSS のような新しいモデルはサポートしていませんが、次のような他のモデルは動作します `vllm serve Unsloth/Llama-3.3-70B-Instruct --port 8001 --max-model-len 48000 --gpu-memory-utilization 0.85`
 ### :cupcake:AMD 上で vLLM を最新に更新する
{% hint style="warning" %}
**ソースからビルドした後は、GPT-OSS はまだ vLLM で実行できません - 現時点では次を参照してください** [**https://rocm.blogs.amd.com/ecosystems-and-partners/openai-day-0/README.html**](https://rocm.blogs.amd.com/ecosystems-and-partners/openai-day-0/README.html) **Docker で gpt-oss を実行する場合 - 残念ながらハッカソンでは Docker の中の Docker は使えません。次のエラーが出ることがあります:**
{% code overflow="wrap" %}
```
ImportError: cannot import name 'GFX950MXScaleLayout' from 'triton_kernels.tensor_details.layout' (/usr/local/lib/python3.12/dist-packages/triton_kernels/tensor_details/layout.py)
(EngineCore_DP0 pid=44662) プロセス EngineCore_DP0:
```
{% endcode %}
{% endhint %}
最新の vLLM を入手するには、次を参照してください 、特に以下を実行してください。まず次を使って AMD GPU を使用しているすべてのプロセスを削除してから [#how-do-i-free-amd-gpu-memory](#how-do-i-free-amd-gpu-memory "mention")
{% code overflow="wrap" %}
```bash
# PyTorch をインストール
pip uninstall torch -y
pip uninstall pytorch-triton-rocm -y
pip uninstall triton -y
pip install --upgrade torch==2.8.0 pytorch-triton-rocm torchvision torchaudio torchao==0.13.0 xformers --index-url https://download.pytorch.org/whl/rocm6.4
# OpenAI Triton kernels をインストール
pip install git+https://github.com/triton-lang/triton.git@05b2c186c1b6c9a08375389d5efe9cb4c401c075#subdirectory=python/triton_kernels
```
{% endcode %}
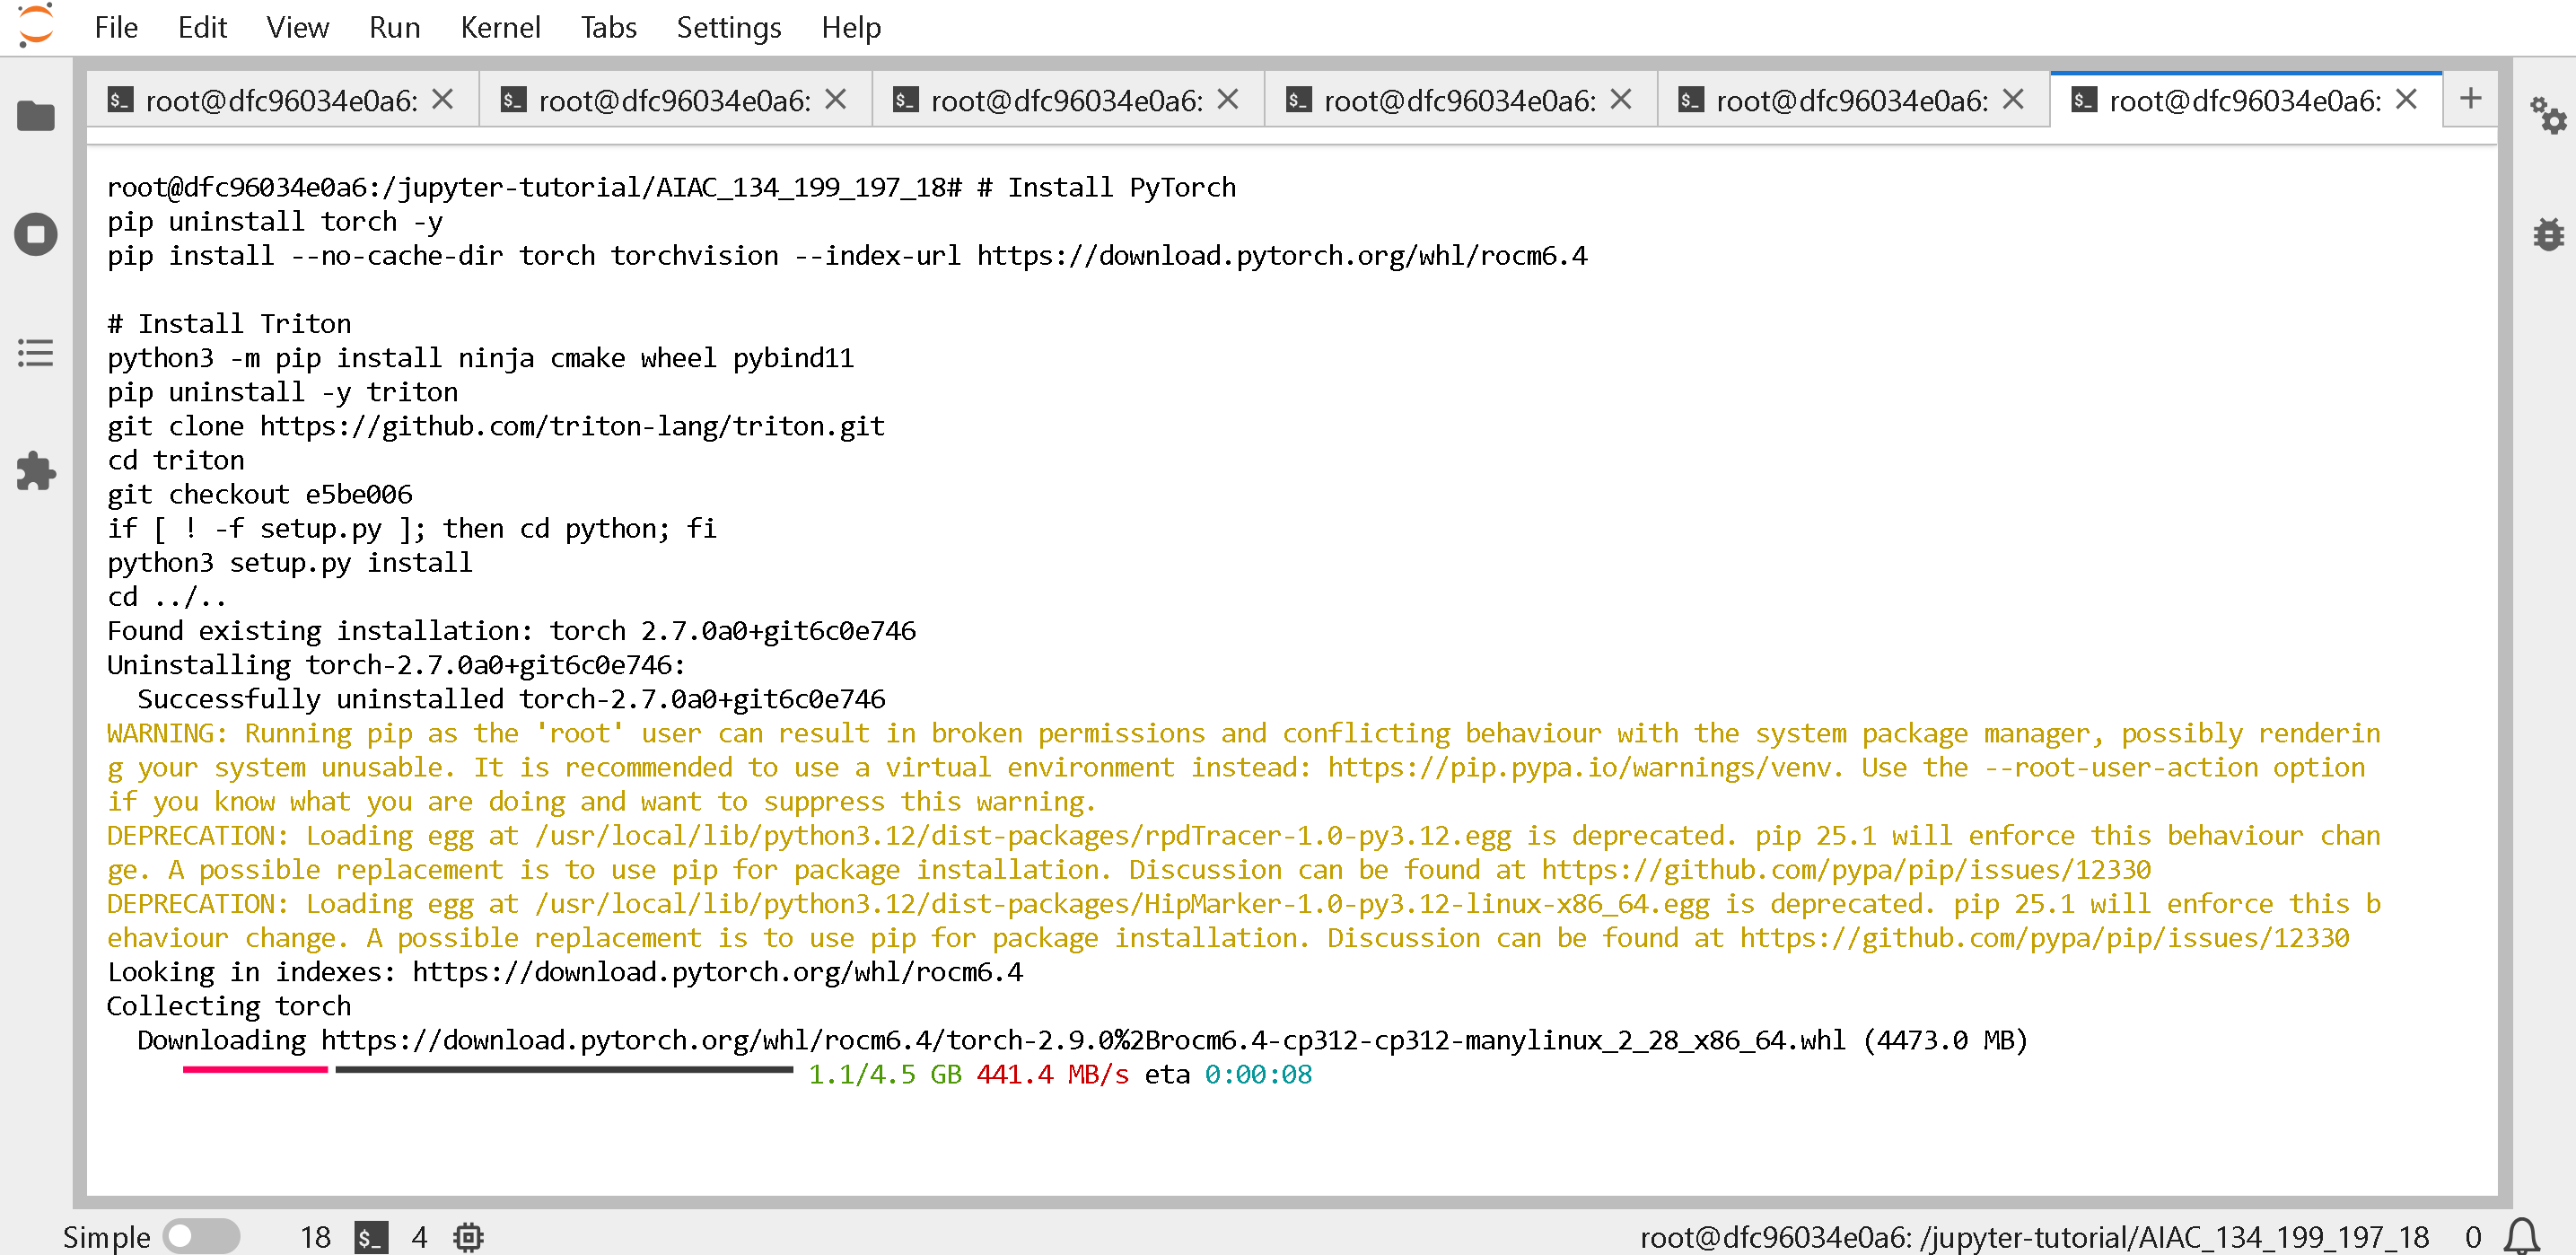
上記を実行すると表示されます(先に GPU を使用しているすべてのプロセスを停止するのを忘れないでください!次を参照 [#how-do-i-free-amd-gpu-memory](#how-do-i-free-amd-gpu-memory "mention"))
### :cupcake:AMD 上で vLLM を最新に更新する
{% hint style="warning" %}
**ソースからビルドした後は、GPT-OSS はまだ vLLM で実行できません - 現時点では次を参照してください** [**https://rocm.blogs.amd.com/ecosystems-and-partners/openai-day-0/README.html**](https://rocm.blogs.amd.com/ecosystems-and-partners/openai-day-0/README.html) **Docker で gpt-oss を実行する場合 - 残念ながらハッカソンでは Docker の中の Docker は使えません。次のエラーが出ることがあります:**
{% code overflow="wrap" %}
```
ImportError: cannot import name 'GFX950MXScaleLayout' from 'triton_kernels.tensor_details.layout' (/usr/local/lib/python3.12/dist-packages/triton_kernels/tensor_details/layout.py)
(EngineCore_DP0 pid=44662) プロセス EngineCore_DP0:
```
{% endcode %}
{% endhint %}
最新の vLLM を入手するには、次を参照してください 、特に以下を実行してください。まず次を使って AMD GPU を使用しているすべてのプロセスを削除してから [#how-do-i-free-amd-gpu-memory](#how-do-i-free-amd-gpu-memory "mention")
{% code overflow="wrap" %}
```bash
# PyTorch をインストール
pip uninstall torch -y
pip uninstall pytorch-triton-rocm -y
pip uninstall triton -y
pip install --upgrade torch==2.8.0 pytorch-triton-rocm torchvision torchaudio torchao==0.13.0 xformers --index-url https://download.pytorch.org/whl/rocm6.4
# OpenAI Triton kernels をインストール
pip install git+https://github.com/triton-lang/triton.git@05b2c186c1b6c9a08375389d5efe9cb4c401c075#subdirectory=python/triton_kernels
```
{% endcode %}
上記を実行すると表示されます(先に GPU を使用しているすべてのプロセスを停止するのを忘れないでください!次を参照 [#how-do-i-free-amd-gpu-memory](#how-do-i-free-amd-gpu-memory "mention"))
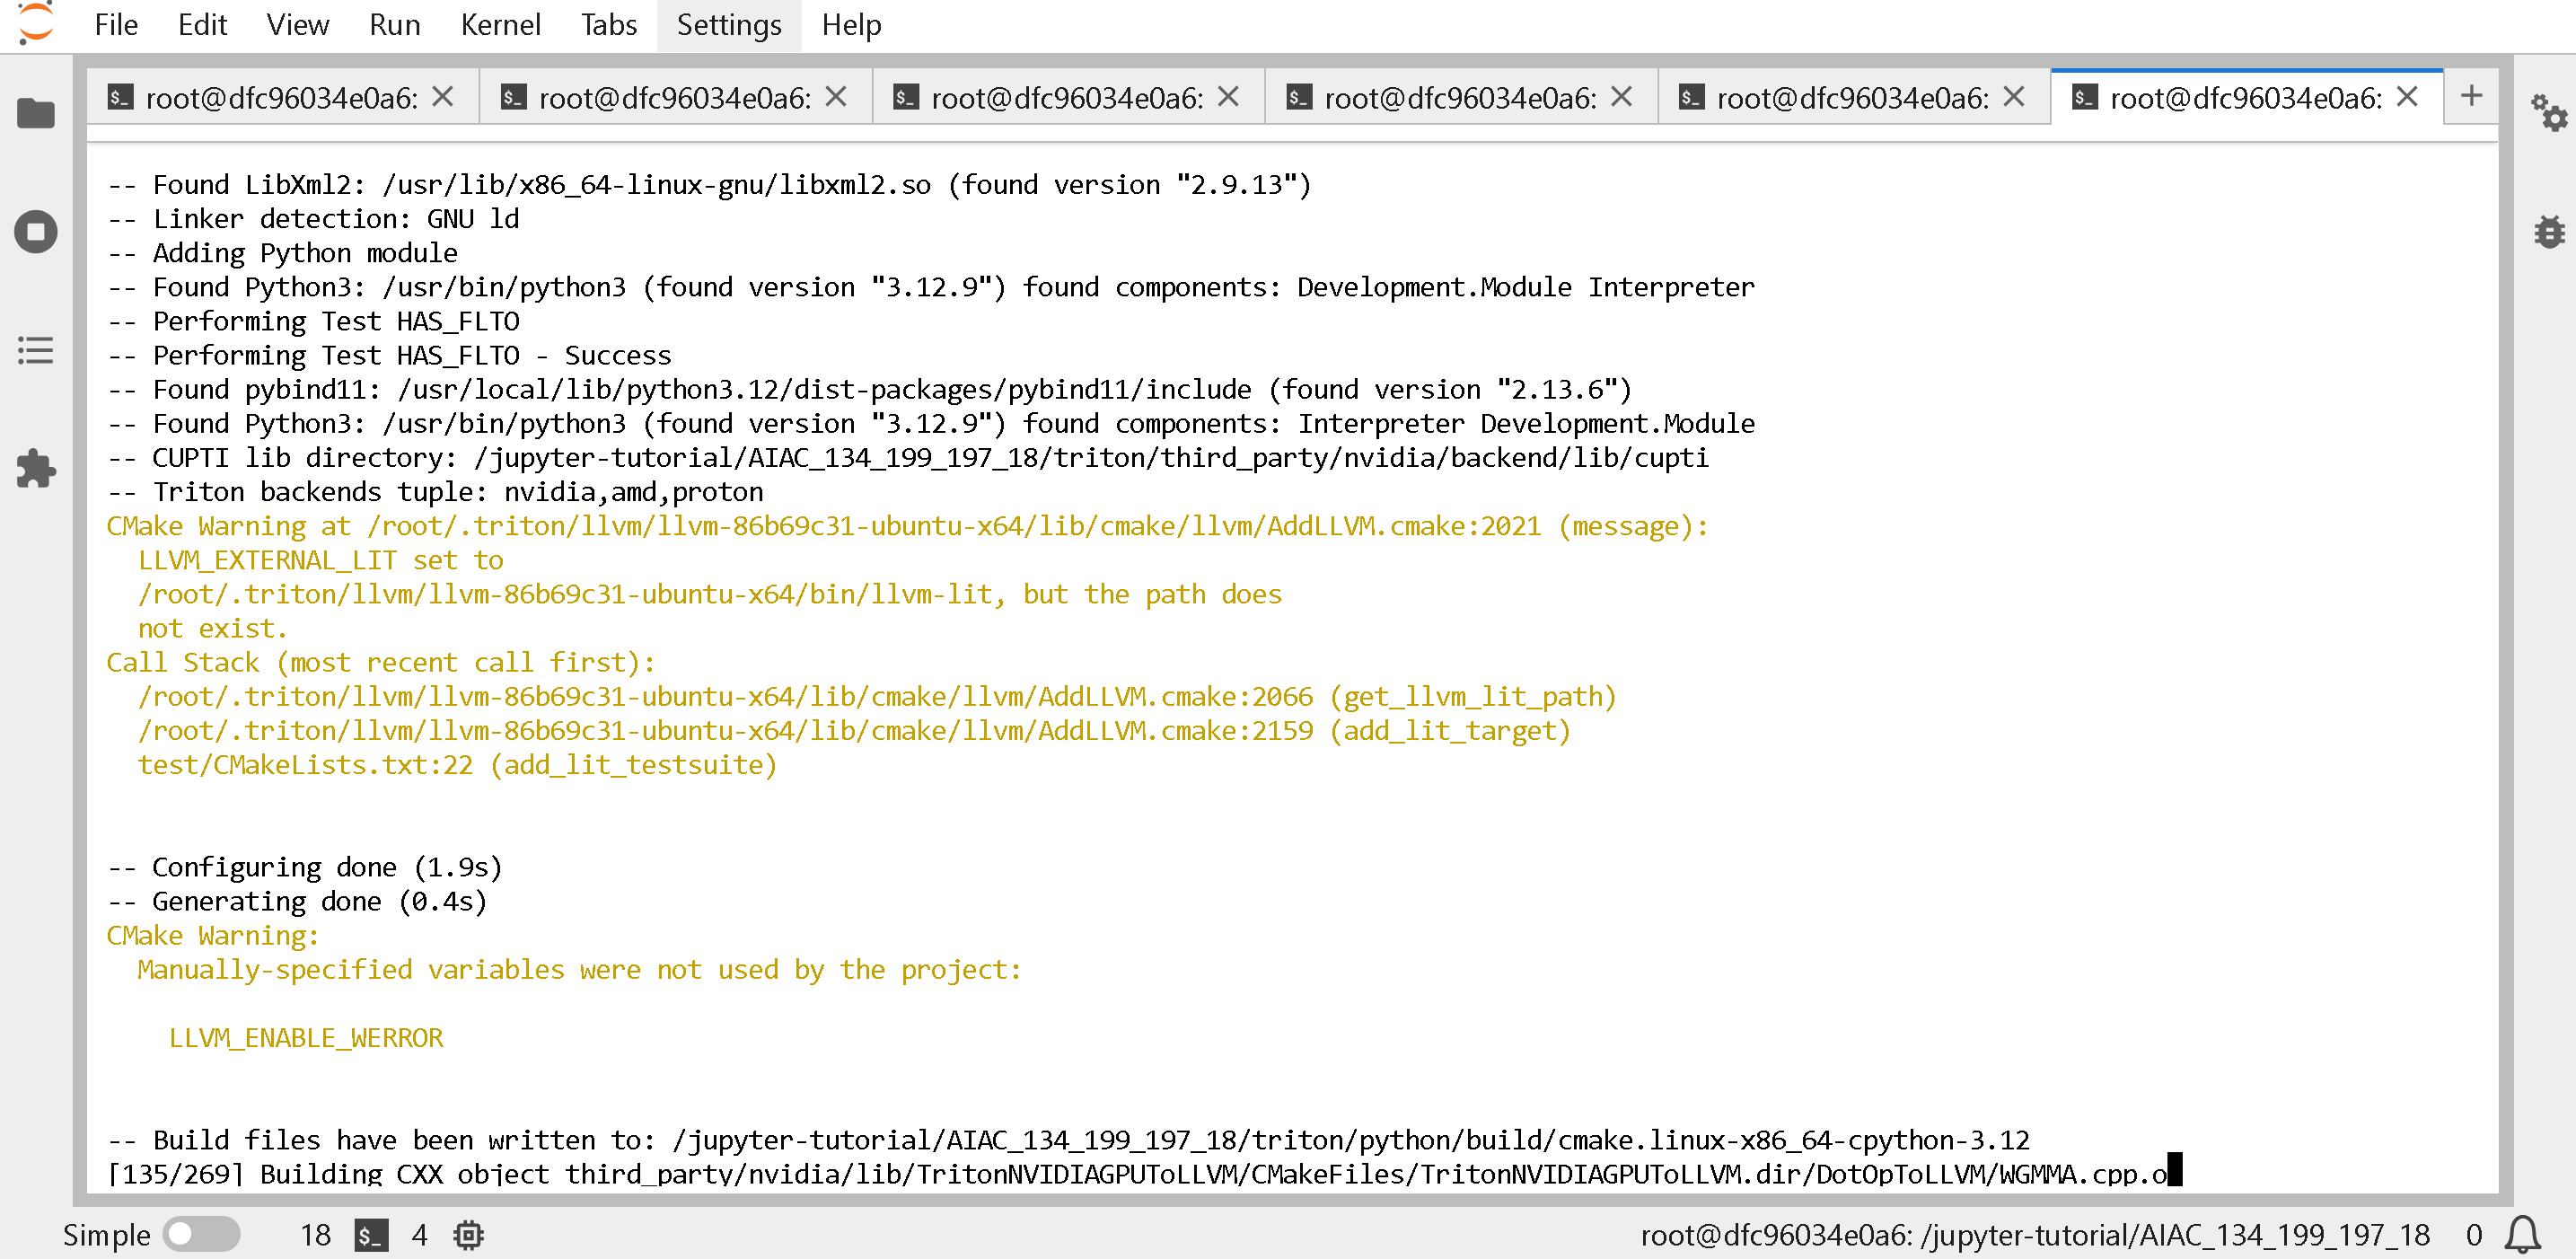
(折りたたみ可能なコード、任意) に Flash Attention をビルド 次を通じて(これには 30 分から 1 時間かかります)なので、30 分から 1 時間待ちたくない場合は任意です! 一般的にはこの手順は飛ばしてよいです。 Flash Attention をインストールしたい場合は、このセルを展開してください。
{% code overflow="wrap" %}
```bash
# ********任意********* 1 時間待つ必要があるかもしれません!!
# ********任意********* 1 時間待つ必要があるかもしれません!!
git clone https://github.com/Dao-AILab/flash-attention.git
cd flash-attention
git checkout 1a7f4dfa
git submodule update --init
# ********任意********* 1 時間待つ必要があるかもしれません!!
# ********任意********* 1 時間待つ必要があるかもしれません!!
ARCH=$(rocminfo | grep -m1 -oE 'gfx[0-9]+[a-z]*')
echo "Detected GPU arch: $ARCH"
GPU_ARCHS="$ARCH" python3 setup.py install
cd ..
# ********任意********* 1 時間待つ必要があるかもしれません!!
```
{% endcode %}
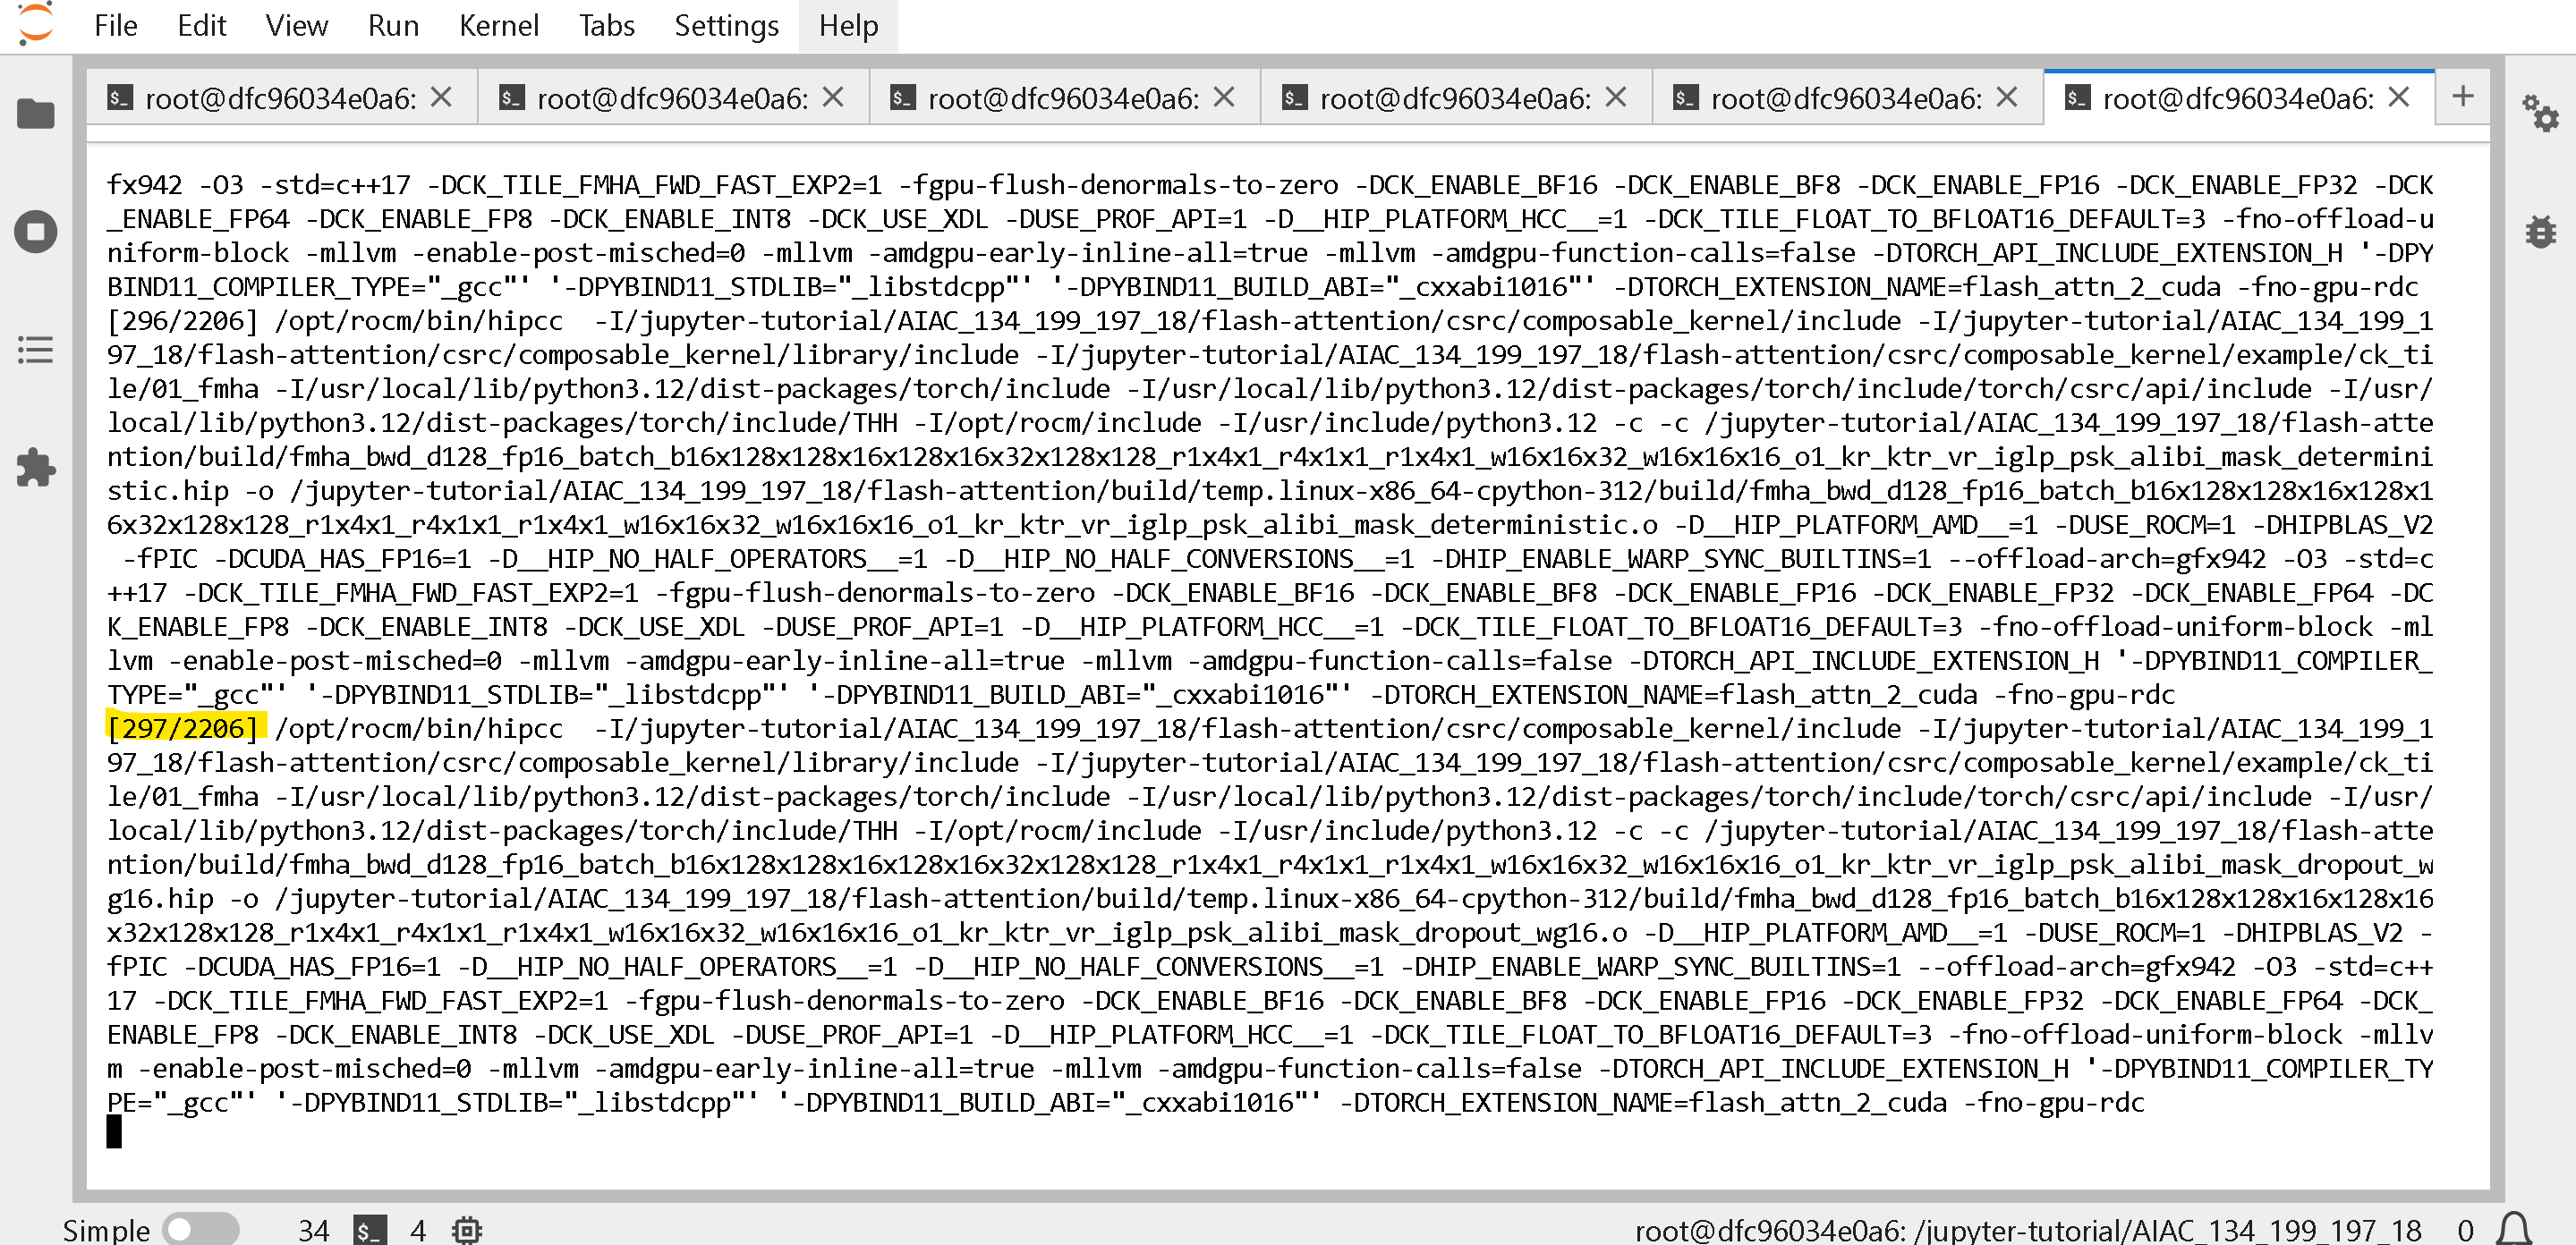
以下が表示されます:
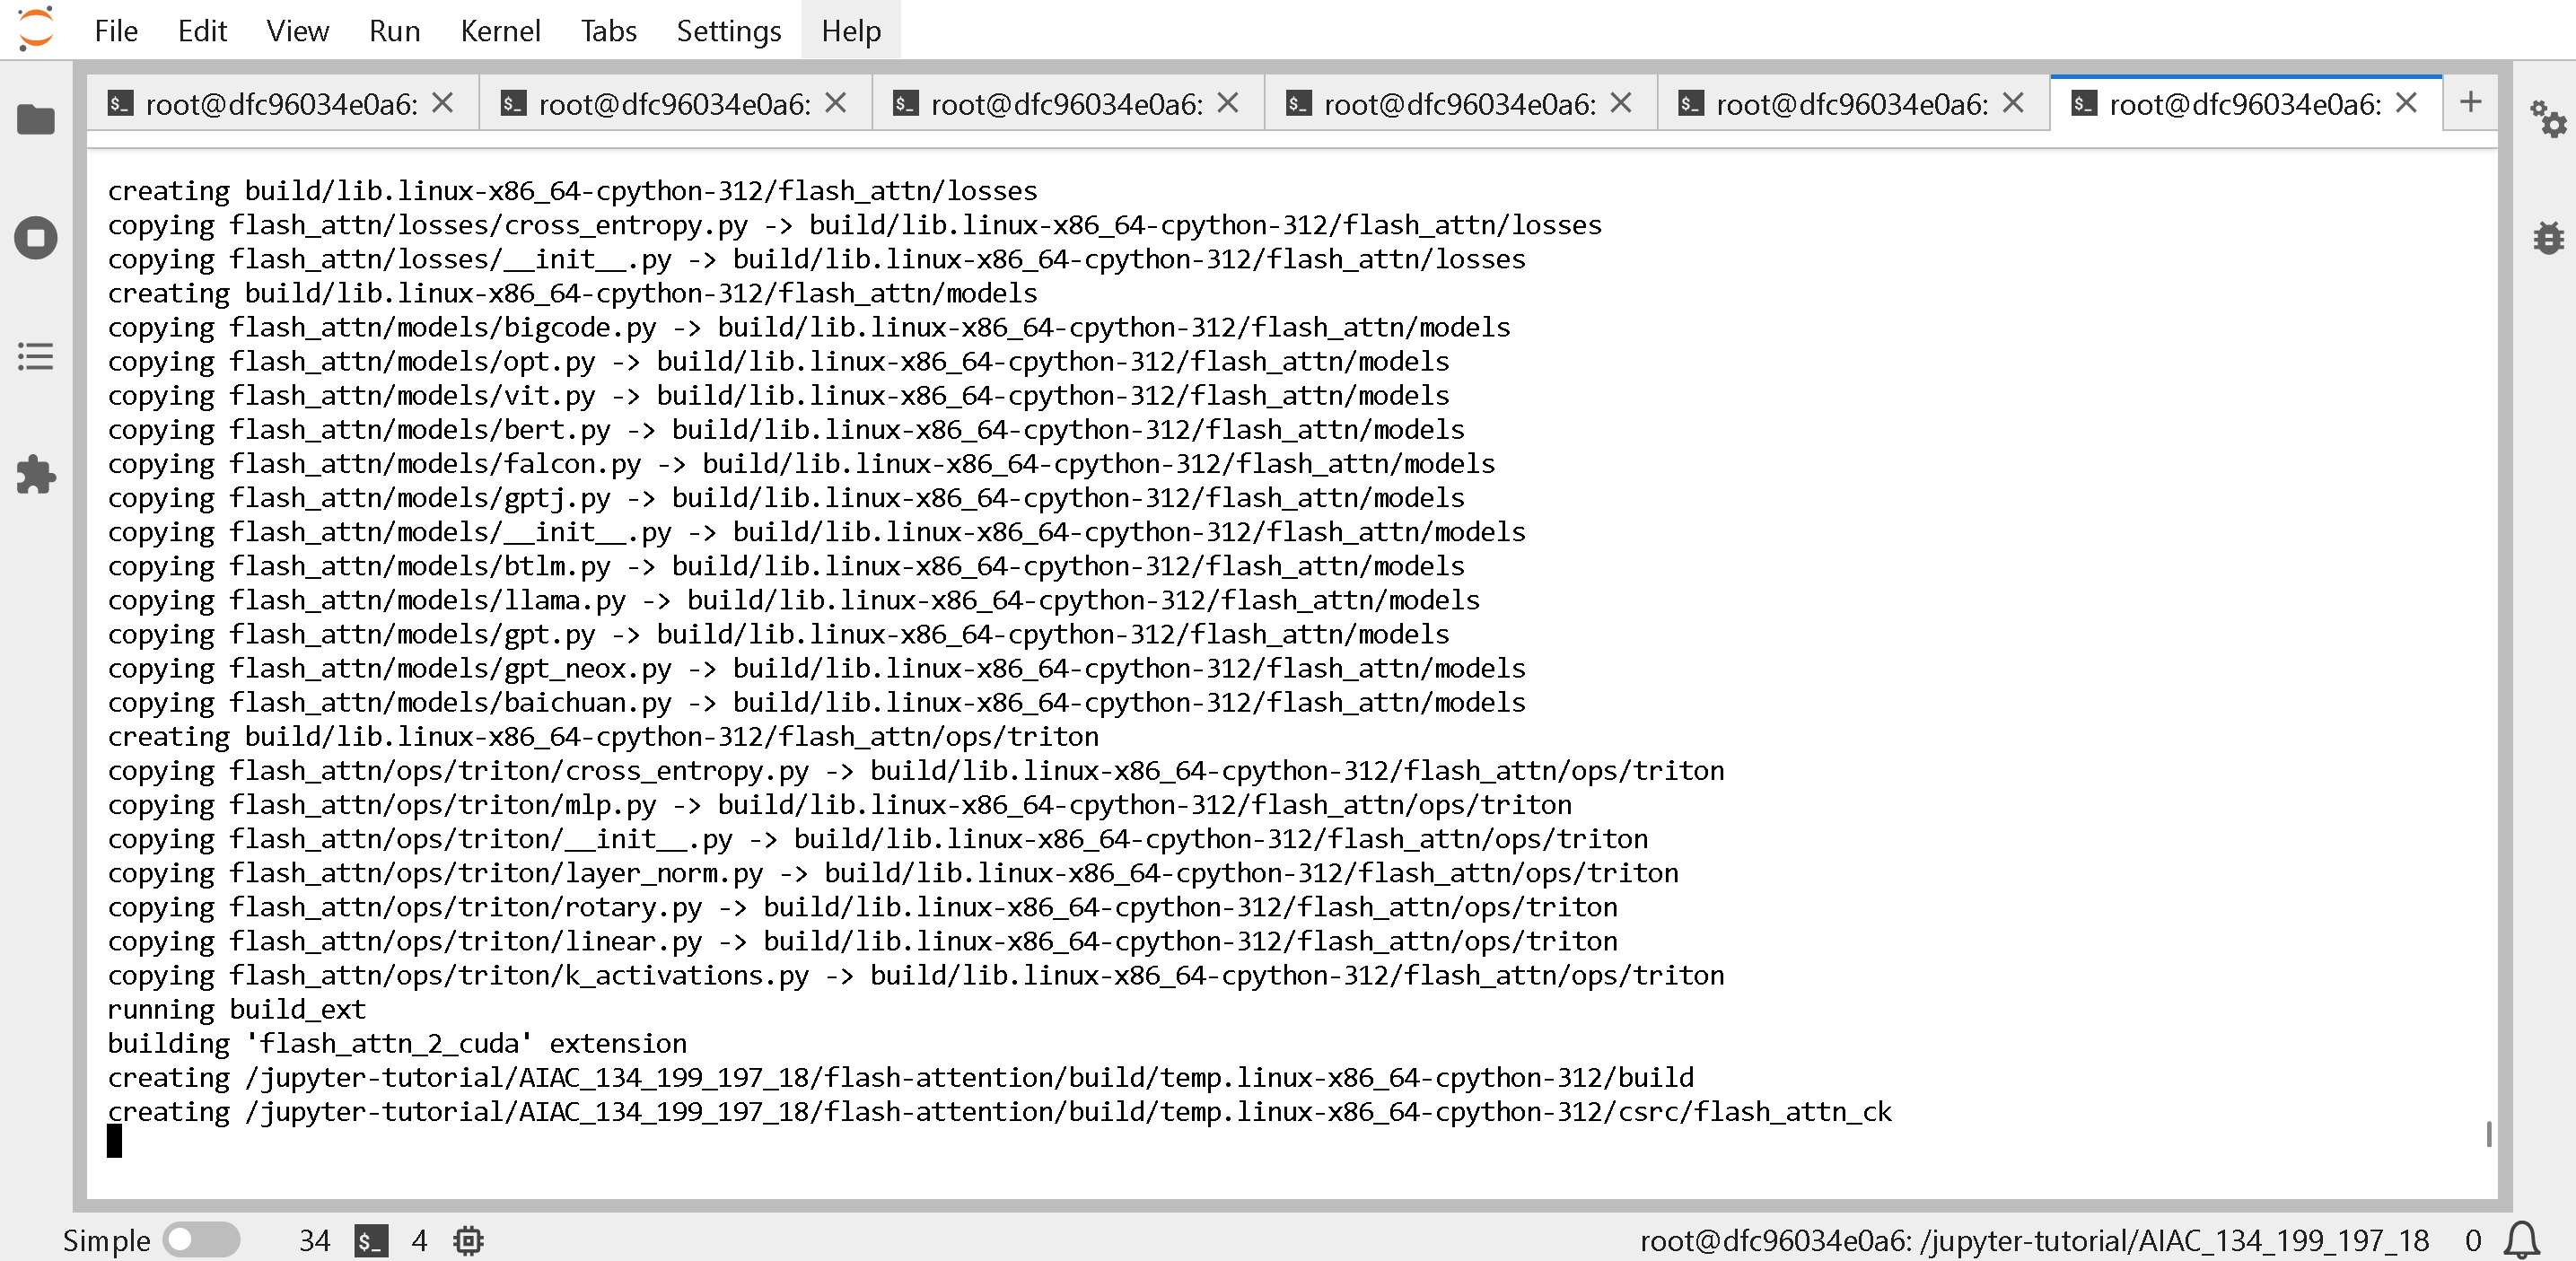 Flash-Attention の進捗(かなり長くなる場合があります)を監視するには、\[296/2206] の進捗を確認してください。
**(任意ではありません)** 次に aiter をビルドします [ROCm 向け AI Tensor Engine](https://github.com/ROCm/aiter) (これには 5 分かかります)
{% code overflow="wrap" %}
```bash
python3 -m pip uninstall -y aiter
git clone --recursive https://github.com/ROCm/aiter.git
cd aiter
git checkout $AITER_BRANCH_OR_COMMIT
git submodule sync; git submodule update --init --recursive
python3 setup.py develop
cd ..
```
{% endcode %}
**(任意ではありません)** 次に vLLM をビルドします:
```bash
pip install --upgrade pip
pip uninstall vllm -y
pip install --upgrade -qqq --no-cache-dir --force-reinstall --no-deps unsloth unsloth_zoo
pip uninstall bitsandbytes -y
pip install "unsloth[amd] @ git+https://github.com/unslothai/unsloth"
# AMD SMI をビルドしてインストール
pip install /opt/rocm/share/amd_smi
# 依存関係をインストール
pip install --upgrade numba \
scipy \
huggingface-hub[cli,hf_transfer] \
setuptools_scm
git clone --depth 1 --branch "v0.11.0" https://github.com/vllm-project/vllm.git vllm_build
cd vllm_build
pip install -r requirements/rocm.txt
# MI210/MI250/MI300 向けに vLLM をビルドします。
export PYTORCH_ROCM_ARCH="$(rocminfo | grep -m1 -oE 'gfx[0-9]+[a-z]*')"
python3 setup.py develop
cd ..
```
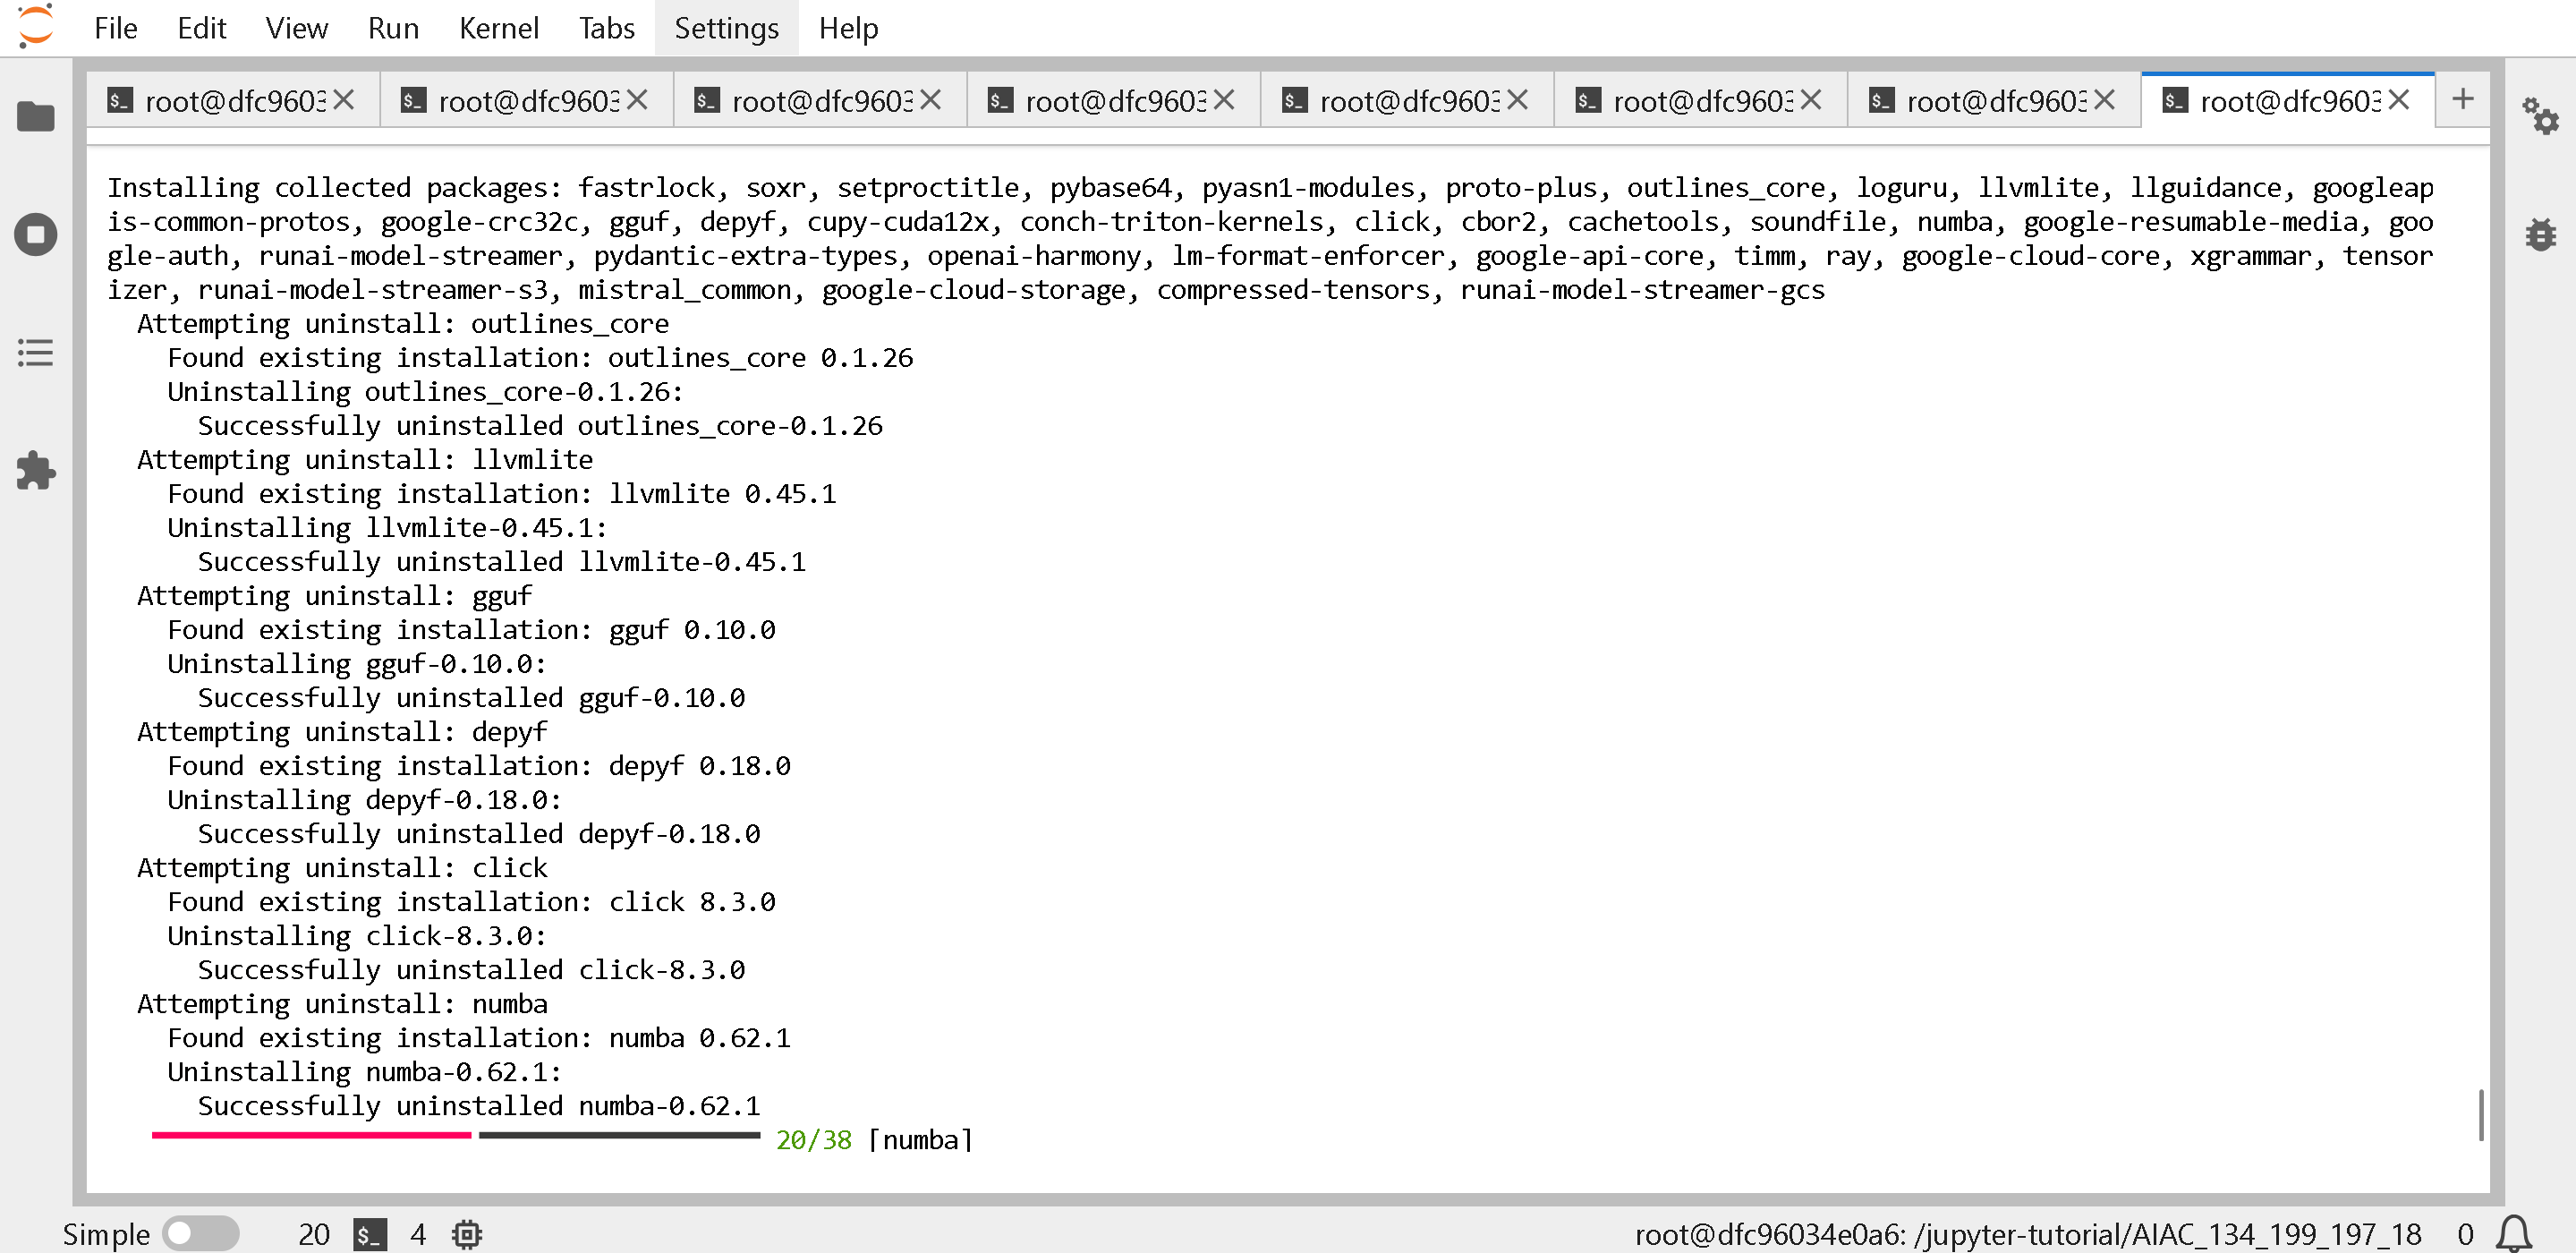
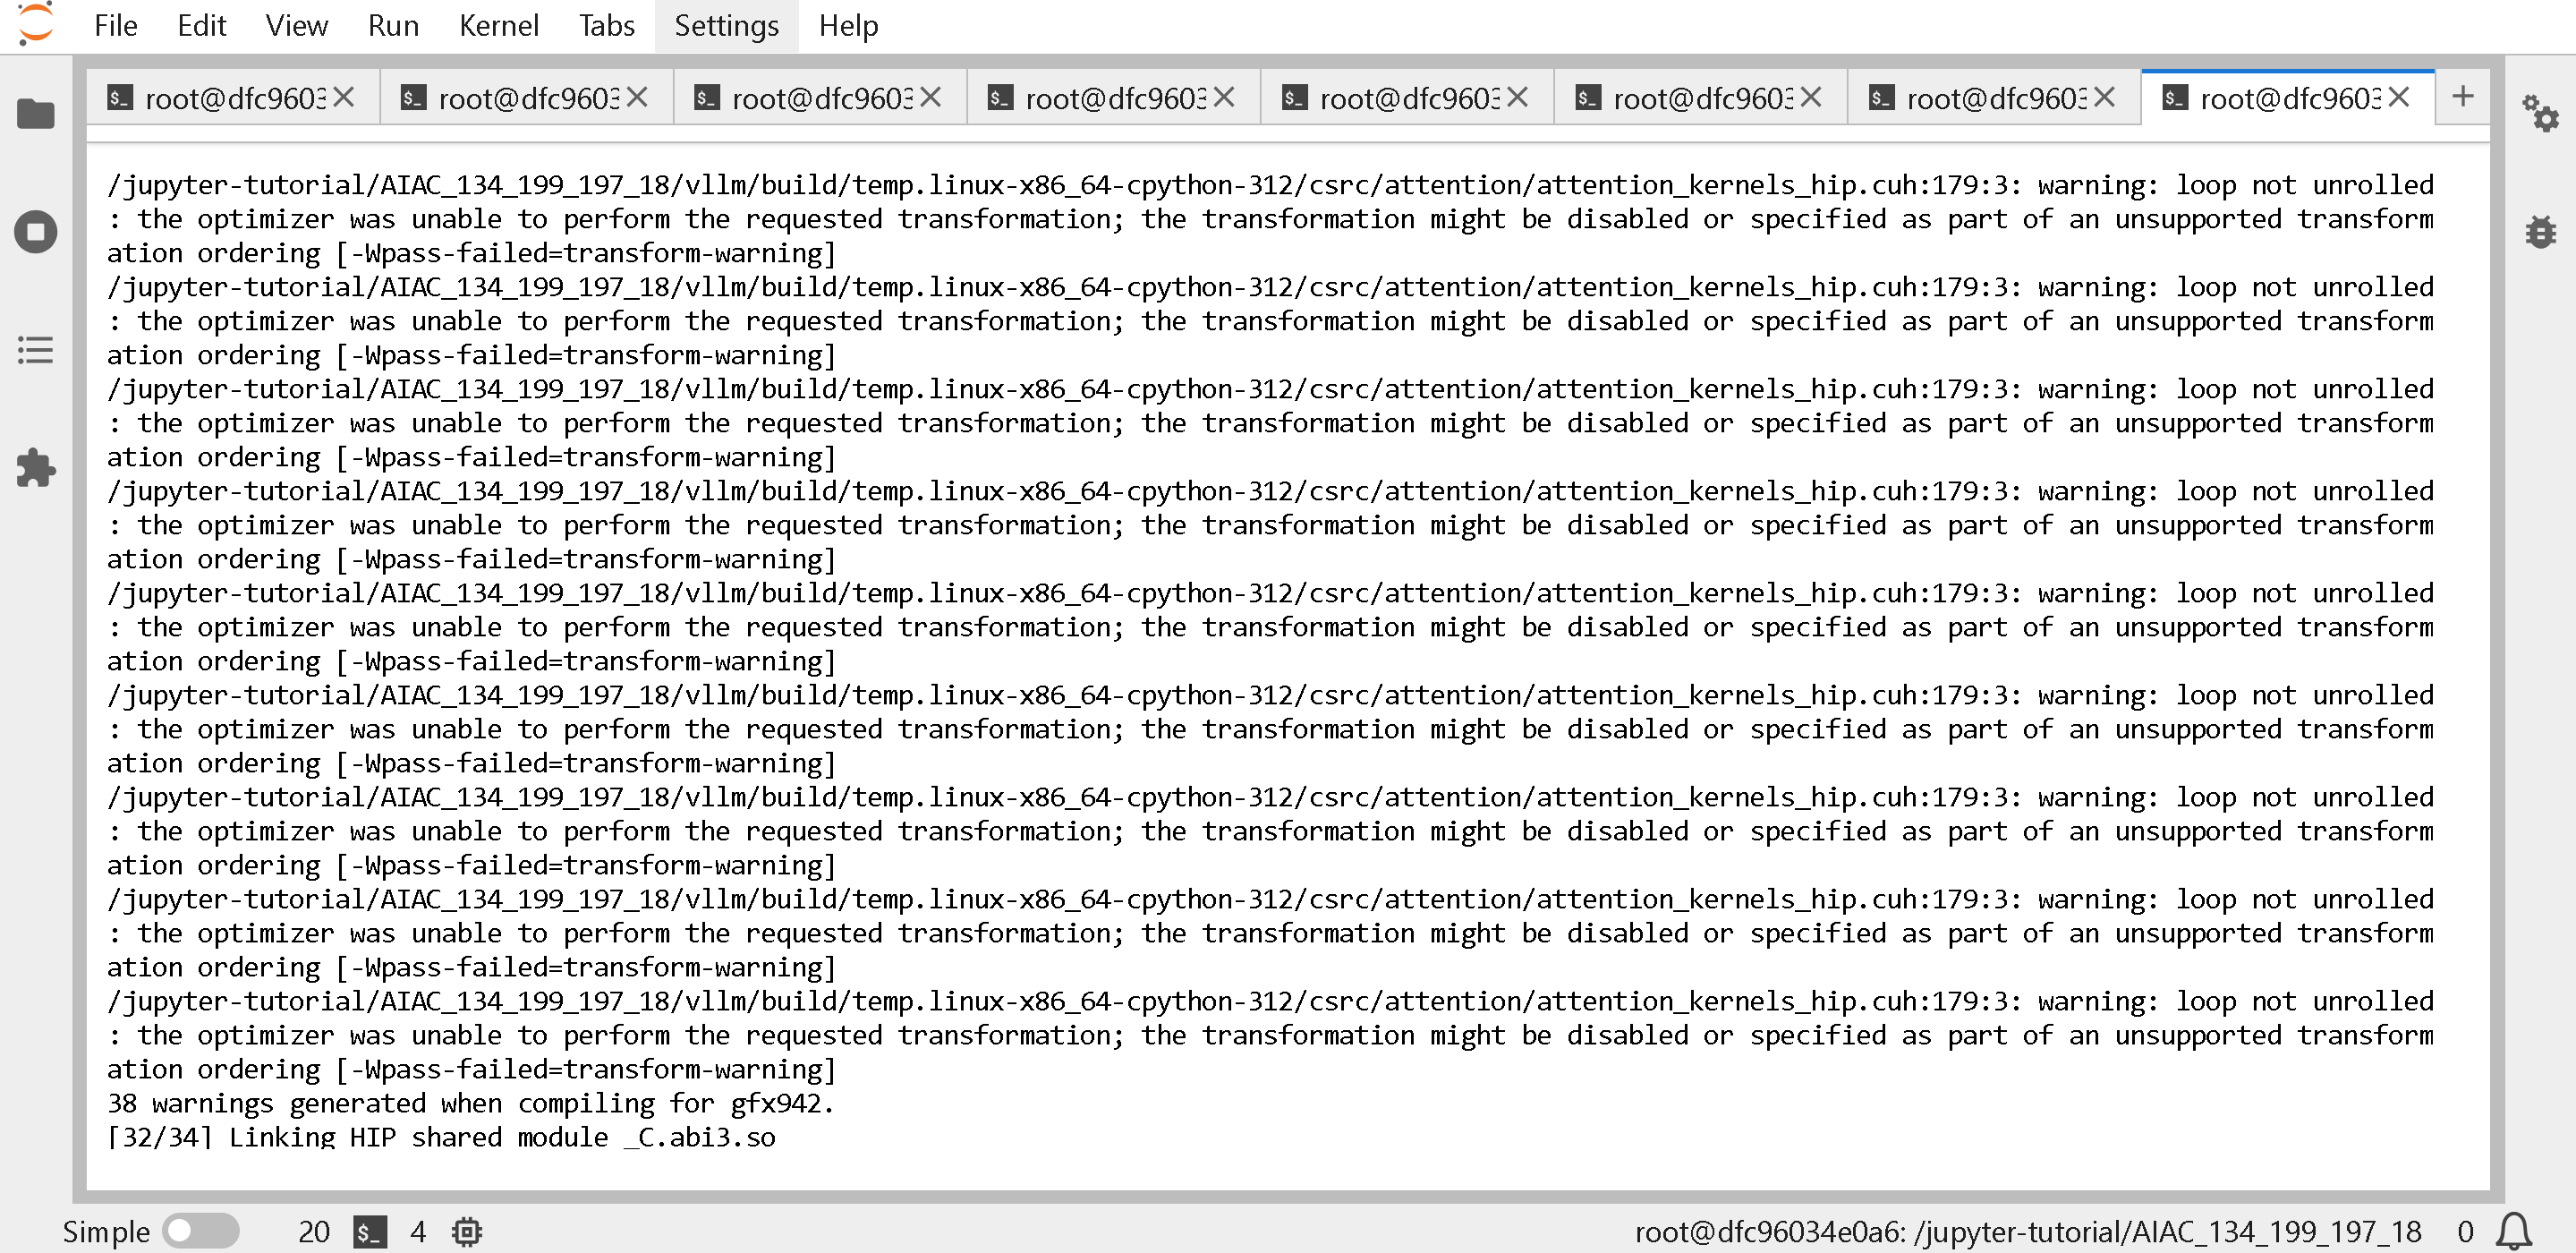
以下が表示されます(**5〜10 分お待ちください!**)
 次を使って vLLM と torch が更新されたことを確認します
{% code overflow="wrap" %}
```bash
python -c "import vllm, torch, unsloth; print(vllm.__version__); print(torch.__version__); print(unsloth.__version__);"
vllm
```
{% endcode %}
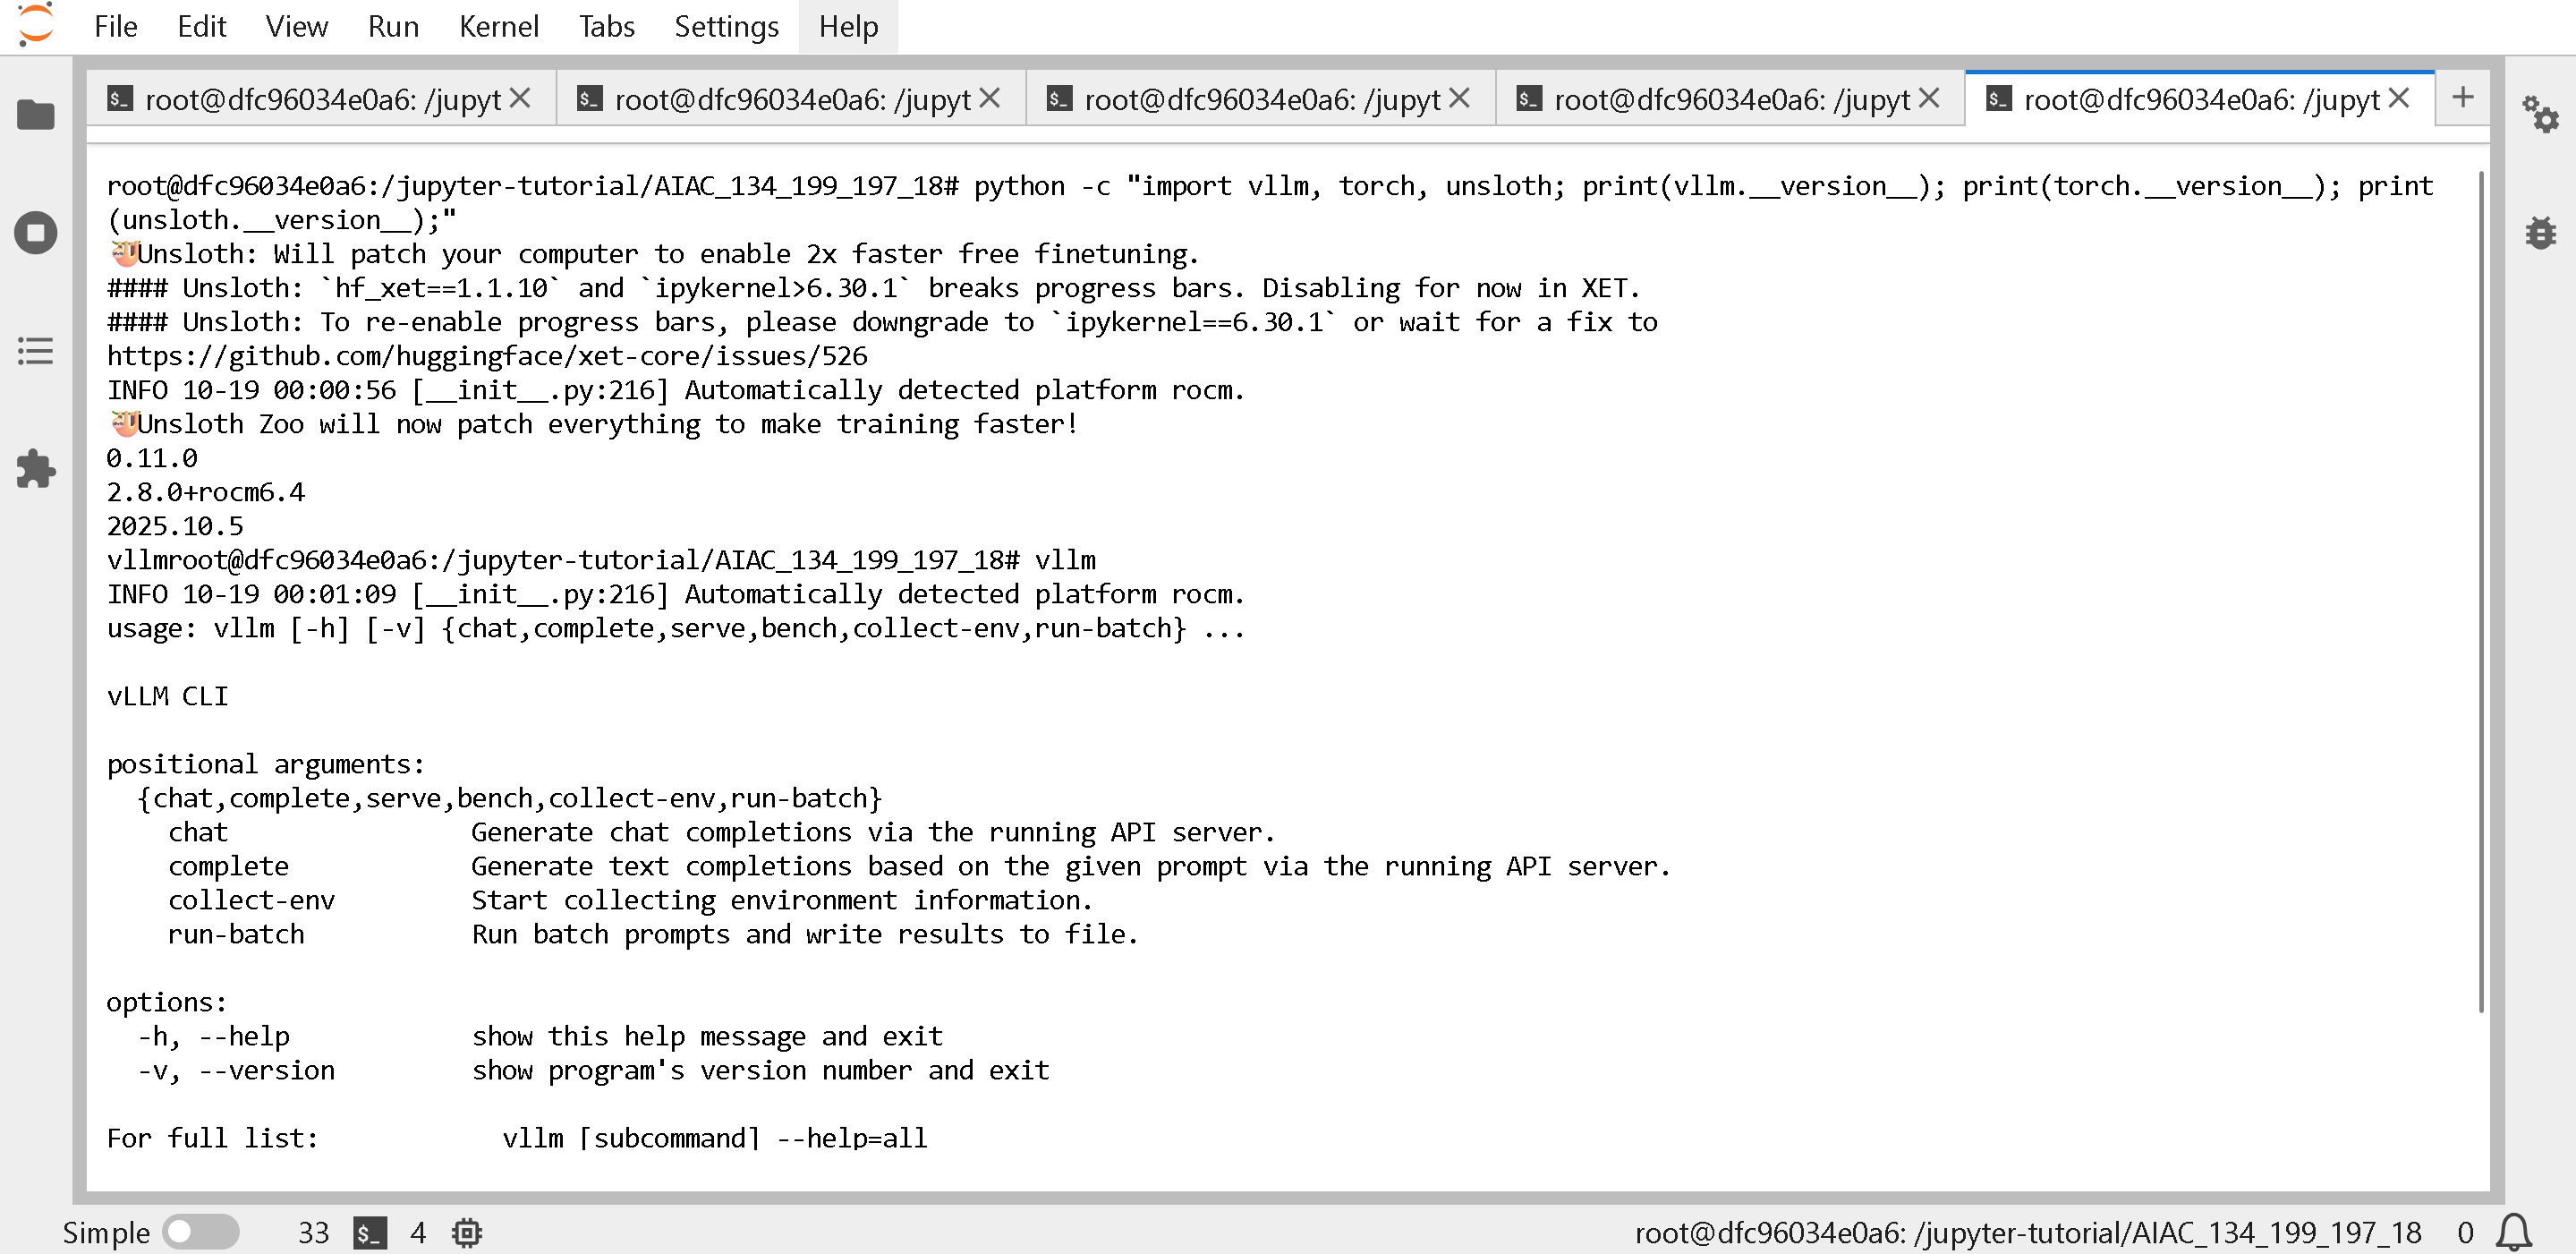
これにより vLLM が 0.11.0 以上であることが表示され、そして torch は 2025 年 10 月時点で 2.8.0 でなければなりません。型 `vllm` で vLLM が期待どおりに動作することを確認します。
```
🦥 Unsloth Zoo が、学習を高速化するために今すべてをパッチします!
0.11.0
2.8.0+rocm6.4
2025.10.6
```
次を使って vLLM と torch が更新されたことを確認します
{% code overflow="wrap" %}
```bash
python -c "import vllm, torch, unsloth; print(vllm.__version__); print(torch.__version__); print(unsloth.__version__);"
vllm
```
{% endcode %}
これにより vLLM が 0.11.0 以上であることが表示され、そして torch は 2025 年 10 月時点で 2.8.0 でなければなりません。型 `vllm` で vLLM が期待どおりに動作することを確認します。
```
🦥 Unsloth Zoo が、学習を高速化するために今すべてをパッチします!
0.11.0
2.8.0+rocm6.4
2025.10.6
```
 ### :book:vLLM で unsloth/gpt-oss-20b を実行する
{% hint style="warning" %}
**ソースからビルドした後は、GPT-OSS はまだ vLLM で実行できません - 現時点では次を参照してください** [**https://rocm.blogs.amd.com/ecosystems-and-partners/openai-day-0/README.html**](https://rocm.blogs.amd.com/ecosystems-and-partners/openai-day-0/README.html) **Docker で gpt-oss を実行する場合 - 残念ながらハッカソンでは Docker の中の Docker は使えません。次のエラーが出ることがあります:**
{% code overflow="wrap" %}
```
ImportError: cannot import name 'GFX950MXScaleLayout' from 'triton_kernels.tensor_details.layout' (/usr/local/lib/python3.12/dist-packages/triton_kernels/tensor_details/layout.py)
(EngineCore_DP0 pid=44662) プロセス EngineCore_DP0:
```
{% endcode %}
{% endhint %}
次を使って vLLM を更新した後 [#updating-vllm-to-the-latest-on-amd](#updating-vllm-to-the-latest-on-amd "mention")、次を実行できます [gpt-oss-20b](https://huggingface.co/unsloth/gpt-oss-20b)! 次を参照 [#optimal-vllm-commands-on-amd](#optimal-vllm-commands-on-amd "mention") AMD GPU 上で vllm を実行するための、より最適なコマンドについて(より速い推論が得られるかもしれません!)
{% code overflow="wrap" %}
```bash
export VLLM_ROCM_USE_AITER=1
export VLLM_ROCM_USE_AITER_MHA=0
vllm serve unsloth/gpt-oss-20b \
--no-enable-prefix-caching \
--compilation-config '{"full_cuda_graph": true}' \
--port 8001 \\
--max-model-len 48000 \
--gpu-memory-utilization 0.85
```
{% endcode %}
### :interrobang:RuntimeError: User specified an unsupported autocast device\_type 'hip'
### :book:vLLM で unsloth/gpt-oss-20b を実行する
{% hint style="warning" %}
**ソースからビルドした後は、GPT-OSS はまだ vLLM で実行できません - 現時点では次を参照してください** [**https://rocm.blogs.amd.com/ecosystems-and-partners/openai-day-0/README.html**](https://rocm.blogs.amd.com/ecosystems-and-partners/openai-day-0/README.html) **Docker で gpt-oss を実行する場合 - 残念ながらハッカソンでは Docker の中の Docker は使えません。次のエラーが出ることがあります:**
{% code overflow="wrap" %}
```
ImportError: cannot import name 'GFX950MXScaleLayout' from 'triton_kernels.tensor_details.layout' (/usr/local/lib/python3.12/dist-packages/triton_kernels/tensor_details/layout.py)
(EngineCore_DP0 pid=44662) プロセス EngineCore_DP0:
```
{% endcode %}
{% endhint %}
次を使って vLLM を更新した後 [#updating-vllm-to-the-latest-on-amd](#updating-vllm-to-the-latest-on-amd "mention")、次を実行できます [gpt-oss-20b](https://huggingface.co/unsloth/gpt-oss-20b)! 次を参照 [#optimal-vllm-commands-on-amd](#optimal-vllm-commands-on-amd "mention") AMD GPU 上で vllm を実行するための、より最適なコマンドについて(より速い推論が得られるかもしれません!)
{% code overflow="wrap" %}
```bash
export VLLM_ROCM_USE_AITER=1
export VLLM_ROCM_USE_AITER_MHA=0
vllm serve unsloth/gpt-oss-20b \
--no-enable-prefix-caching \
--compilation-config '{"full_cuda_graph": true}' \
--port 8001 \\
--max-model-len 48000 \
--gpu-memory-utilization 0.85
```
{% endcode %}
### :interrobang:RuntimeError: User specified an unsupported autocast device\_type 'hip'
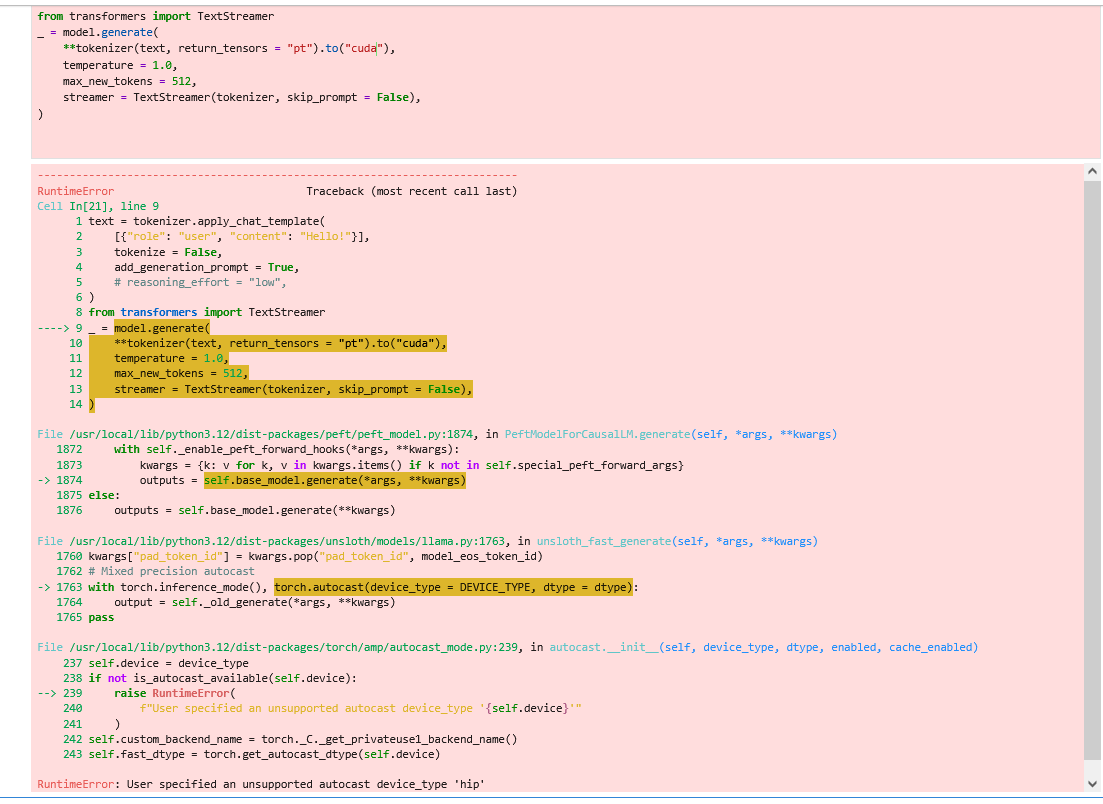 **Unsloth を更新してください!** 以下を参照 [#updating-unsloth](#updating-unsloth "mention")
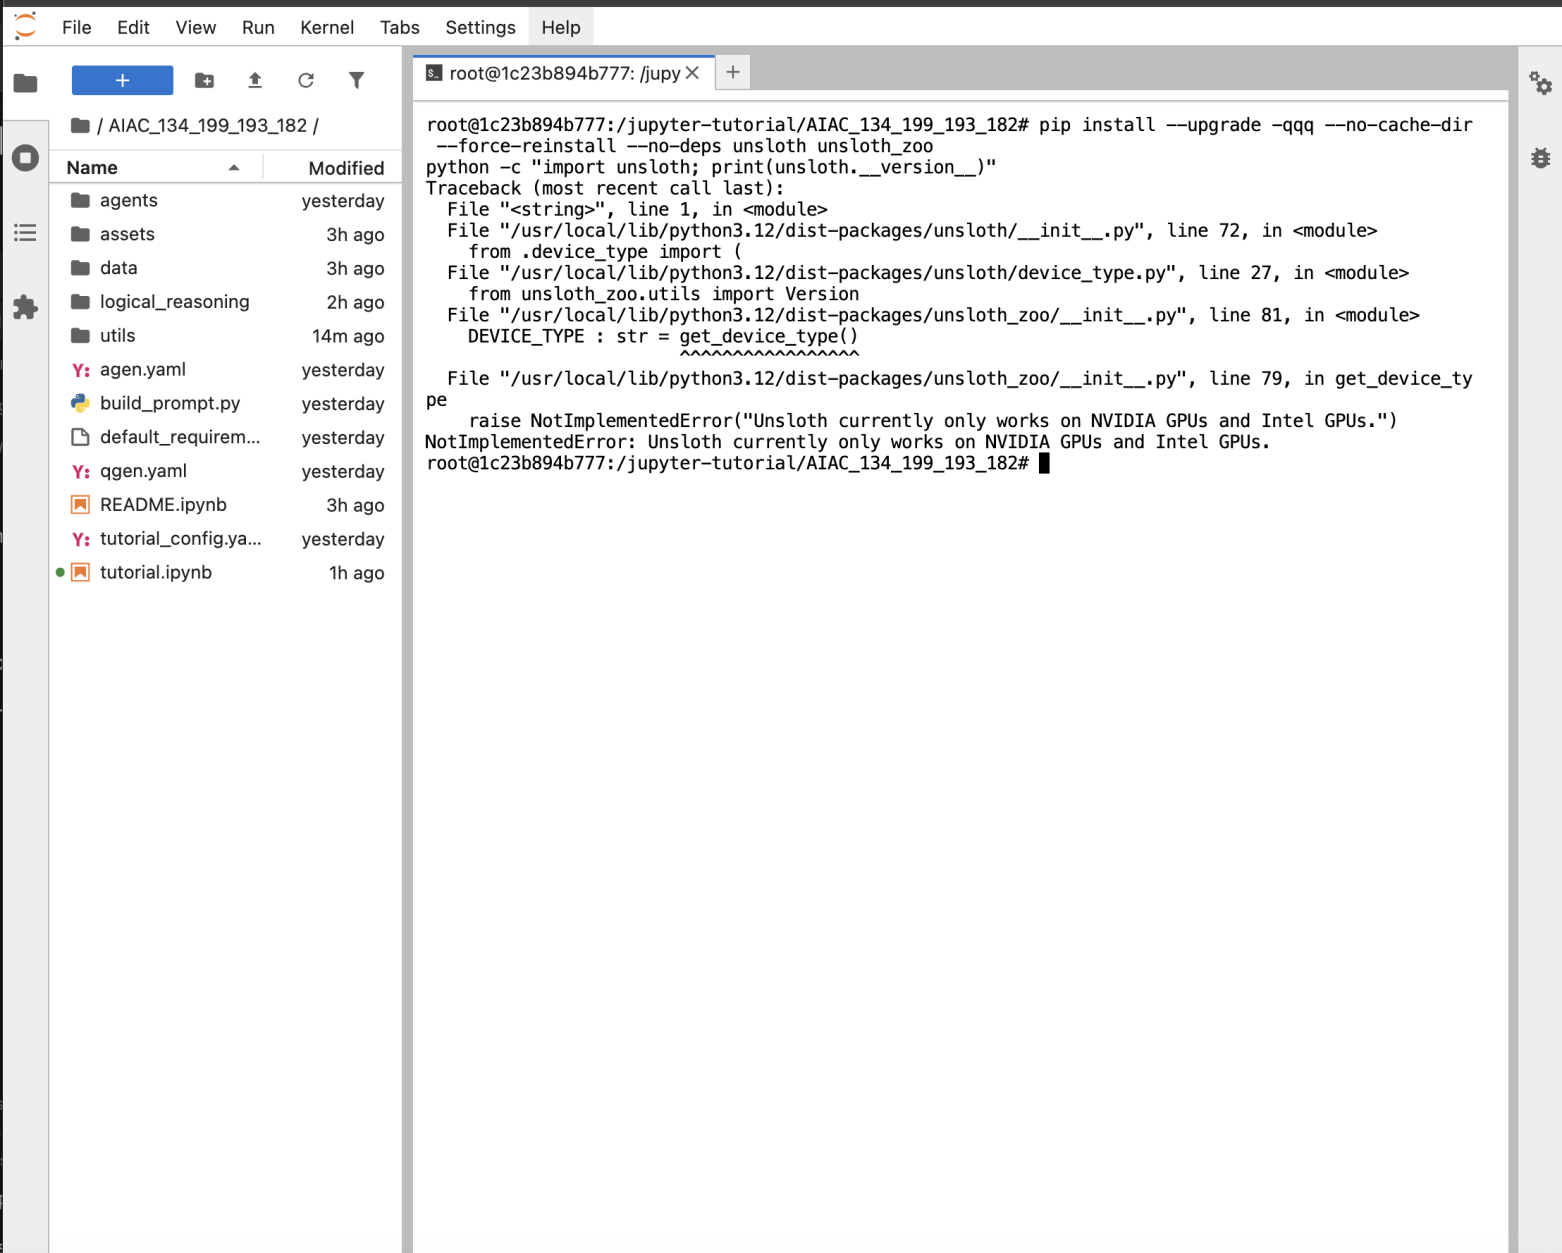
### :bug:NotImplementedError: Unsloth currently ok
**Unsloth を更新してください!** 以下を参照 [#updating-unsloth](#updating-unsloth "mention")
### :bug:NotImplementedError: Unsloth currently ok
 ### :new:Unslothの更新
**まず、Unsloth を更新します** そして、すべてが期待どおりに動作することを確認します - 次をクリックしてください **ターミナル**
次に、以下を実行します **ターミナル** Unsloth を更新するには - **バージョンが 2025.10.5 以上であることを確認してください。**
```
pip install --upgrade -qqq --no-cache-dir --force-reinstall --no-deps unsloth unsloth_zoo
pip uninstall bitsandbytes -y
pip install "unsloth[amd] @ git+https://github.com/unslothai/unsloth"
python -c "import unsloth; print(unsloth.__version__)"
```
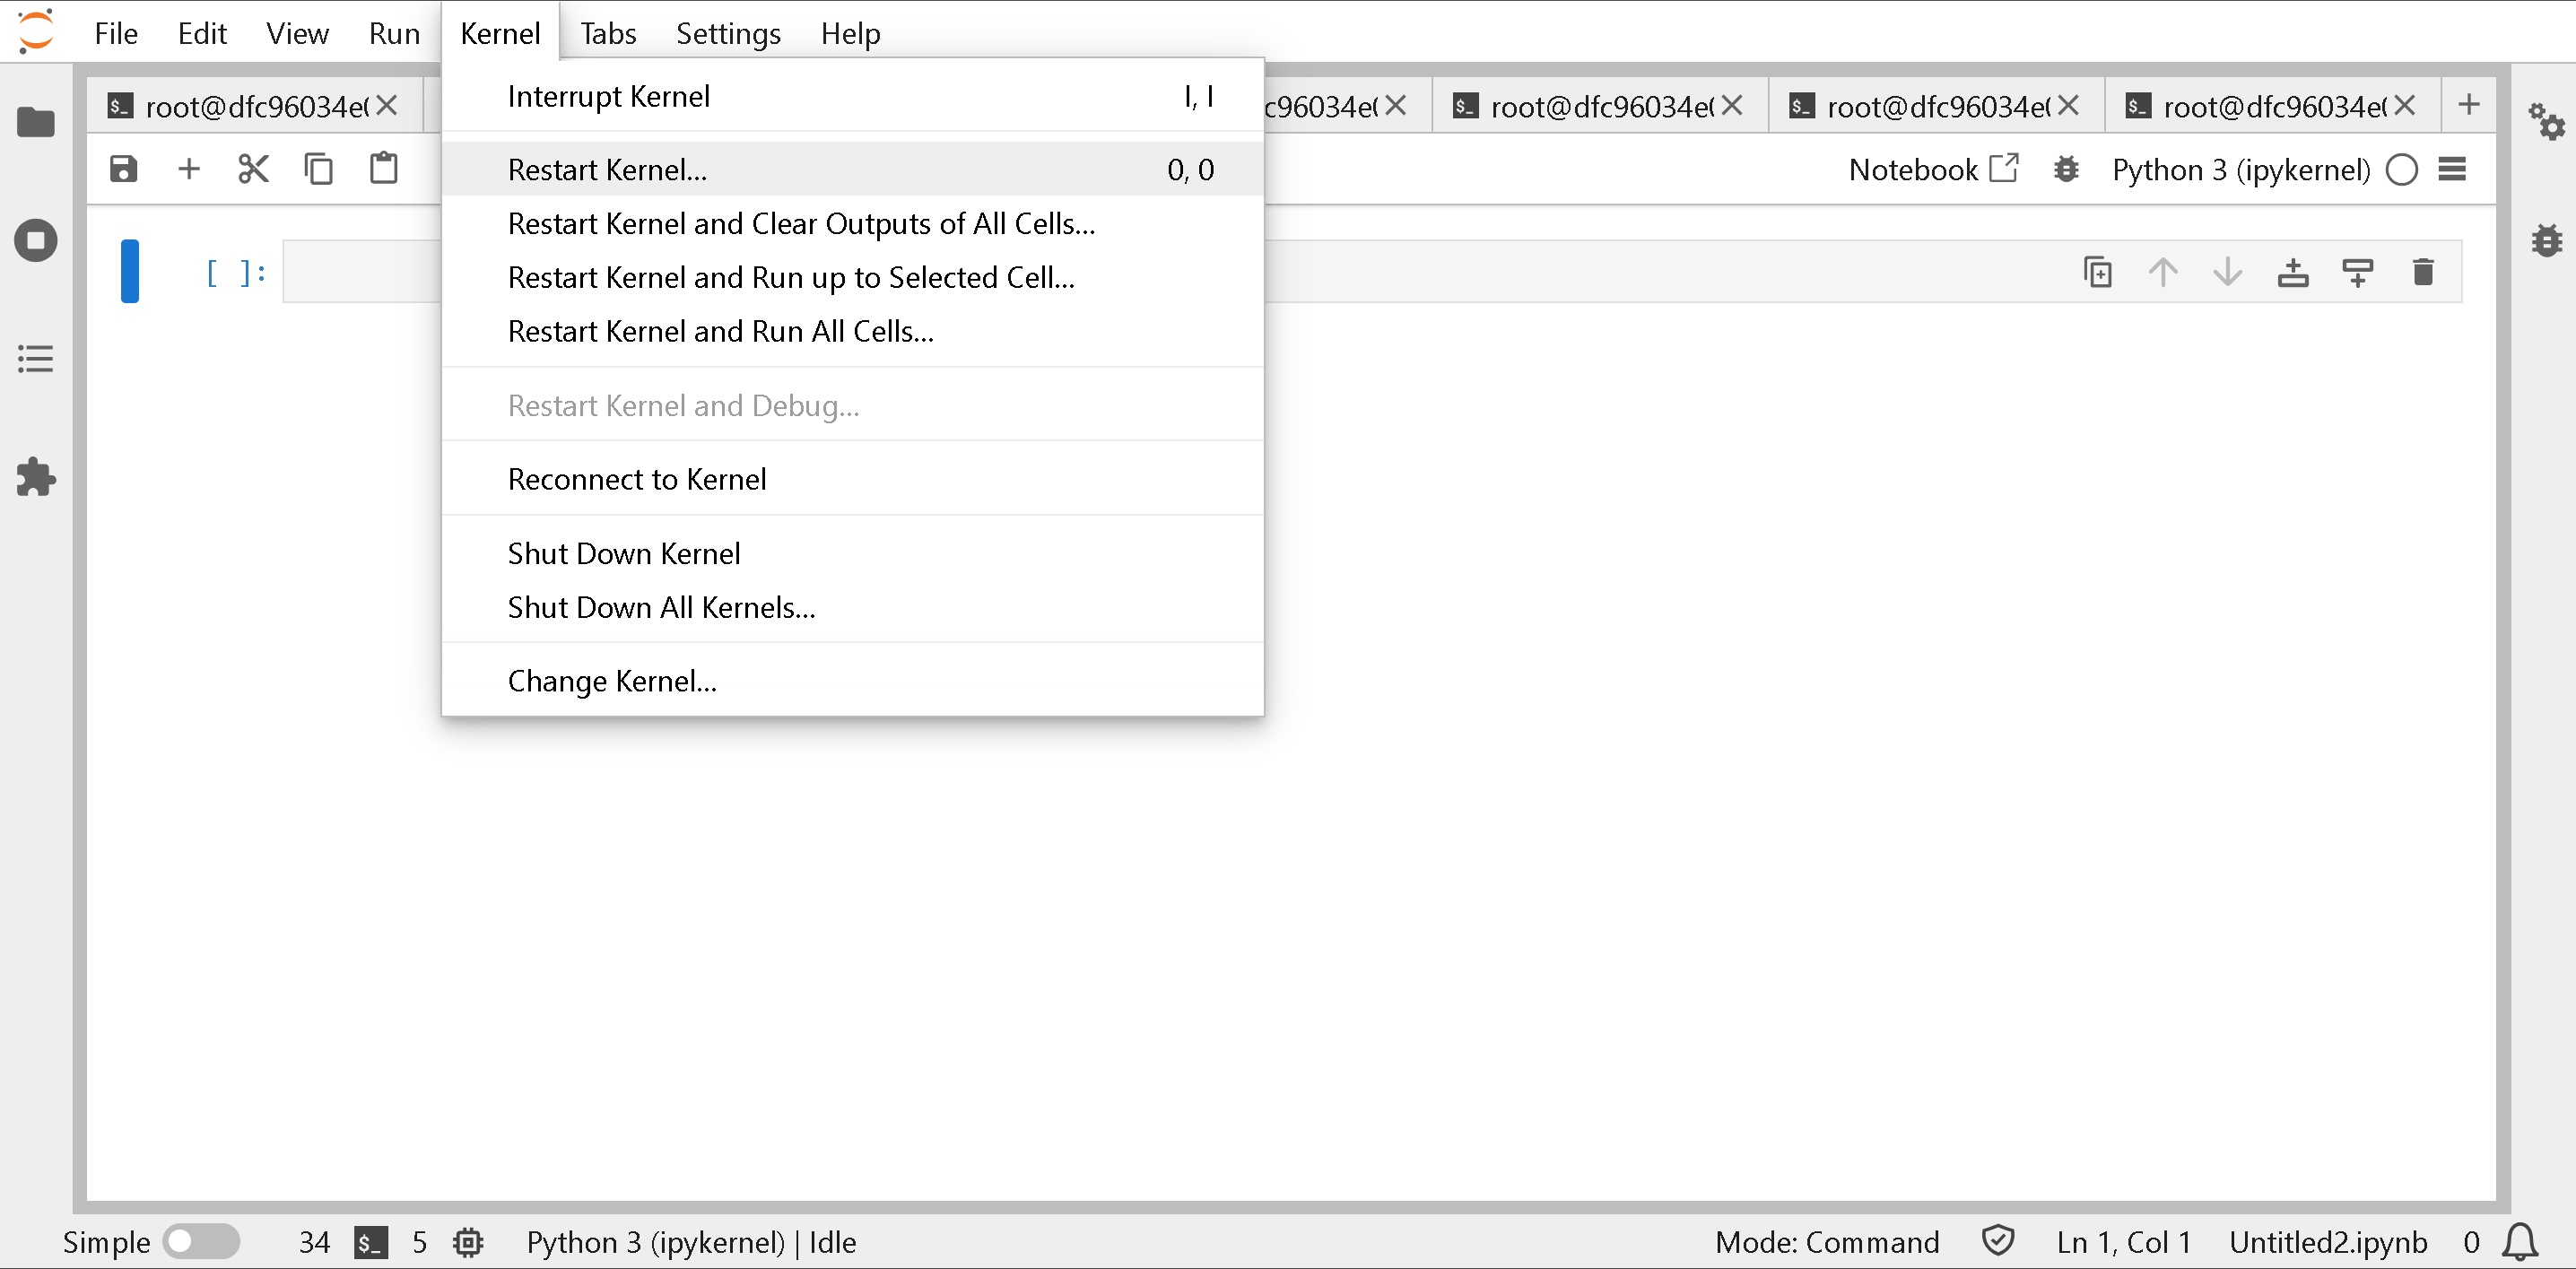
**runtime も再起動しなければなりません**
### :new:Unslothの更新
**まず、Unsloth を更新します** そして、すべてが期待どおりに動作することを確認します - 次をクリックしてください **ターミナル**
次に、以下を実行します **ターミナル** Unsloth を更新するには - **バージョンが 2025.10.5 以上であることを確認してください。**
```
pip install --upgrade -qqq --no-cache-dir --force-reinstall --no-deps unsloth unsloth_zoo
pip uninstall bitsandbytes -y
pip install "unsloth[amd] @ git+https://github.com/unslothai/unsloth"
python -c "import unsloth; print(unsloth.__version__)"
```
**runtime も再起動しなければなりません**
 ### :interrobang:terminate called after throwing an instance of 'std::logic\_error' what()
次を実行していることを確認してください `torch==2.8.0`。以下を再実行してください:
{% code overflow="wrap" %}
```bash
pip install --upgrade torch==2.8.0 pytorch-triton-rocm torchvision torchaudio torchao==0.13.0 xformers --index-url https://download.pytorch.org/whl/rocm6.4
```
{% endcode %}
### :interrobang:terminate called after throwing an instance of 'std::logic\_error' what()
次を実行していることを確認してください `torch==2.8.0`。以下を再実行してください:
{% code overflow="wrap" %}
```bash
pip install --upgrade torch==2.8.0 pytorch-triton-rocm torchvision torchaudio torchao==0.13.0 xformers --index-url https://download.pytorch.org/whl/rocm6.4
```
{% endcode %}
 ### :question:System has not been booted, Failed to connect to bus
以下が表示されることがあります:
```
root@270fa7fa9157:/jupyter-tutorial/AIAC_129_212_183_103/assets# reboot
System has not been booted with systemd as init system (PID 1). Can't operate.
Failed to connect to bus: Host is down
Failed to talk to init daemon.
```
マシンを再起動できるように、私たちにメッセージしてください!
### :bug:Configured ROCm binary not found - get\_native\_library()
これは、以下のように bitsandbytes が正しくインストールされていないことを示しています:
{% code overflow="wrap" %}
```
Traceback (most recent call last):
File "/usr/local/lib/python3.12/dist-packages/bitsandbytes/cextension.py", line 313, in
lib = get_native_library()
^^^^^^^^^^^^^^^^^^^^
File "/usr/local/lib/python3.12/dist-packages/bitsandbytes/cextension.py", line 282, in get_native_library
raise RuntimeError(f"Configured {BNB_BACKEND} binary not found at {cuda_binary_path}")
RuntimeError: Configured ROCm binary not found at /usr/local/lib/python3.12/dist-packages/bitsandbytes/libbitsandbytes_rocm64.so
```
{% endcode %}
ご覧ください [#updating-unsloth](#updating-unsloth "mention")bitsandbytes と Unsloth を更新するには!
### :exclamation:NotImplementedError: Cannot copy out of meta tensor; no data!
これはメモリ不足を意味します。GPU メモリを解放するには [#how-do-i-free-amd-gpu-memory](#how-do-i-free-amd-gpu-memory "mention") を参照してください。
{% code overflow="wrap" %}
```
--------------------------------------------------------------------------
NotImplementedError Traceback (most recent call last)
Cell In[18], line 8
5 tokenizer.pad_token_id = tokenizer.eos_token_id
7 # ROCm に適した設定と適切なデータ処理で trainer をセットアップ
----> 8 trainer = SFTTrainer(
9 model=model,
...
--> 235 lm_head_bad = lm_head_bad.cpu().float().numpy().round(3)
236 from collections import Counter
237 counter = Counter()
NotImplementedError: Cannot copy out of meta tensor; no data!
```
{% endcode %}
### :thought\_balloon:ModuleNotFoundError("No module named 'vllm.\_C'") により vllm.\_C からの import に失敗しました
vLLM を再インストールしてください。次を使用してください `vllm_build` git clone する際のフォルダ名として使用し、 `vllm`. [#updating-vllm-to-the-latest-on-amd](#updating-vllm-to-the-latest-on-amd "mention")
### :hushed:ModuleNotFoundError: No module named 'vllm'
どうか `rm -rf vllm_build` ビルドしたフォルダを削除しないでください。あるいは次を使って vllm を再インストールしてください [#updating-vllm-to-the-latest-on-amd](#updating-vllm-to-the-latest-on-amd "mention")
### :ledger:ipykernel>6.30.1 は進捗バーを壊します。
以下が表示される場合:
{% code overflow="wrap" %}
```
🦥 Unsloth: 2 倍速い無料の fine-tuning を有効にするため、あなたのコンピューターにパッチを当てます。
#### Unsloth: `hf_xet==1.1.10` と `ipykernel>6.30.1` は進捗バーを壊します。XET では今のところ無効化しています。
#### Unsloth: 進捗バーを再度有効にするには、`ipykernel==6.30.1` にダウングレードするか、修正を待ってください
https://github.com/huggingface/xet-core/issues/526
```
{% endcode %}
今は無視して構いません - モデルのダウンロードやアップロード時に進捗バーが表示されないだけです。
### :bug:AssertionError: No MXFP4 MoE backend
gpt-oss-20b を実行していて、vLLM 中にこれが表示される場合は、次を使って vLLM を再インストールしてください [#updating-vllm-to-the-latest-on-amd](#updating-vllm-to-the-latest-on-amd "mention")
### :head\_bandage:NotImplementedError: Could not run \`aten::empty\_strided\`
### :question:System has not been booted, Failed to connect to bus
以下が表示されることがあります:
```
root@270fa7fa9157:/jupyter-tutorial/AIAC_129_212_183_103/assets# reboot
System has not been booted with systemd as init system (PID 1). Can't operate.
Failed to connect to bus: Host is down
Failed to talk to init daemon.
```
マシンを再起動できるように、私たちにメッセージしてください!
### :bug:Configured ROCm binary not found - get\_native\_library()
これは、以下のように bitsandbytes が正しくインストールされていないことを示しています:
{% code overflow="wrap" %}
```
Traceback (most recent call last):
File "/usr/local/lib/python3.12/dist-packages/bitsandbytes/cextension.py", line 313, in
lib = get_native_library()
^^^^^^^^^^^^^^^^^^^^
File "/usr/local/lib/python3.12/dist-packages/bitsandbytes/cextension.py", line 282, in get_native_library
raise RuntimeError(f"Configured {BNB_BACKEND} binary not found at {cuda_binary_path}")
RuntimeError: Configured ROCm binary not found at /usr/local/lib/python3.12/dist-packages/bitsandbytes/libbitsandbytes_rocm64.so
```
{% endcode %}
ご覧ください [#updating-unsloth](#updating-unsloth "mention")bitsandbytes と Unsloth を更新するには!
### :exclamation:NotImplementedError: Cannot copy out of meta tensor; no data!
これはメモリ不足を意味します。GPU メモリを解放するには [#how-do-i-free-amd-gpu-memory](#how-do-i-free-amd-gpu-memory "mention") を参照してください。
{% code overflow="wrap" %}
```
--------------------------------------------------------------------------
NotImplementedError Traceback (most recent call last)
Cell In[18], line 8
5 tokenizer.pad_token_id = tokenizer.eos_token_id
7 # ROCm に適した設定と適切なデータ処理で trainer をセットアップ
----> 8 trainer = SFTTrainer(
9 model=model,
...
--> 235 lm_head_bad = lm_head_bad.cpu().float().numpy().round(3)
236 from collections import Counter
237 counter = Counter()
NotImplementedError: Cannot copy out of meta tensor; no data!
```
{% endcode %}
### :thought\_balloon:ModuleNotFoundError("No module named 'vllm.\_C'") により vllm.\_C からの import に失敗しました
vLLM を再インストールしてください。次を使用してください `vllm_build` git clone する際のフォルダ名として使用し、 `vllm`. [#updating-vllm-to-the-latest-on-amd](#updating-vllm-to-the-latest-on-amd "mention")
### :hushed:ModuleNotFoundError: No module named 'vllm'
どうか `rm -rf vllm_build` ビルドしたフォルダを削除しないでください。あるいは次を使って vllm を再インストールしてください [#updating-vllm-to-the-latest-on-amd](#updating-vllm-to-the-latest-on-amd "mention")
### :ledger:ipykernel>6.30.1 は進捗バーを壊します。
以下が表示される場合:
{% code overflow="wrap" %}
```
🦥 Unsloth: 2 倍速い無料の fine-tuning を有効にするため、あなたのコンピューターにパッチを当てます。
#### Unsloth: `hf_xet==1.1.10` と `ipykernel>6.30.1` は進捗バーを壊します。XET では今のところ無効化しています。
#### Unsloth: 進捗バーを再度有効にするには、`ipykernel==6.30.1` にダウングレードするか、修正を待ってください
https://github.com/huggingface/xet-core/issues/526
```
{% endcode %}
今は無視して構いません - モデルのダウンロードやアップロード時に進捗バーが表示されないだけです。
### :bug:AssertionError: No MXFP4 MoE backend
gpt-oss-20b を実行していて、vLLM 中にこれが表示される場合は、次を使って vLLM を再インストールしてください [#updating-vllm-to-the-latest-on-amd](#updating-vllm-to-the-latest-on-amd "mention")
### :head\_bandage:NotImplementedError: Could not run \`aten::empty\_strided\`
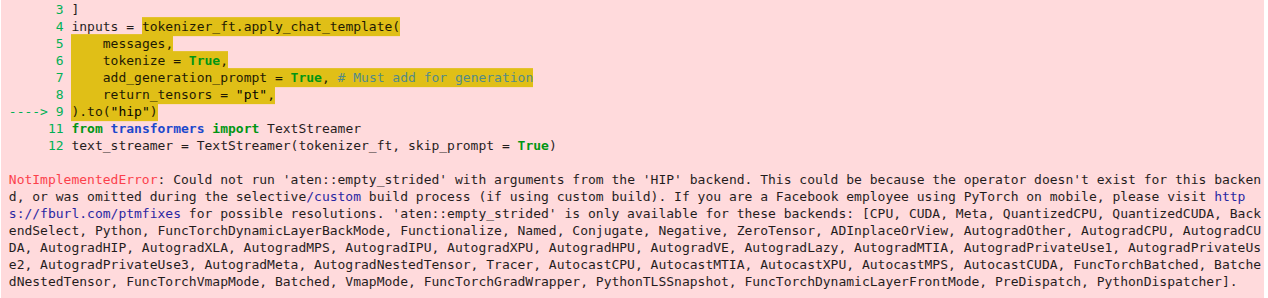 次を使用してください `.to("cuda")` そして `.to("hip")` Unsloth も更新してください [#updating-unsloth](#updating-unsloth "mention")
### :bug:NotImplementedError: Could not run 'aten::empty.memory\_format'
ご覧ください [#updating-unsloth](#updating-unsloth "mention")bitsandbytes と Unsloth を更新するには!
---
# Agent Instructions
This documentation is published with GitBook. GitBook is the documentation platform designed so that both humans and AI agents can read, navigate, and reason over technical content effectively. Learn more at gitbook.com.
## Querying This Documentation
If you need additional information that is not directly available in this page, you can query the documentation by asking a question.
Perform an HTTP GET request on the following URL with the `ask` and `goal` query parameters:
```
GET https://unsloth.ai/docs/jp/burogu/unsloth-amd-pytorch-synthetic-data-hackathon.md?ask=&goal=
```
`ask` is the immediate question: it should be specific, self-contained, and written in natural language.
`goal` is what the user is ultimately trying to achieve, the reason they need the answer. Sharing it helps GitBook give you a better, more relevant answer. A goal is most helpful when it describes the outcome the user wants rather than restating the question. For example, with `ask=how do I create an API token`, a goal like `automate deployments from our CI pipeline` lets GitBook tailor the answer to that use case.
The response will contain a direct answer to the question and relevant excerpts and sources from the documentation.
Use this mechanism when the answer is not explicitly present in the current page, you need clarification or additional context, or you want to retrieve related documentation sections.
次を使用してください `.to("cuda")` そして `.to("hip")` Unsloth も更新してください [#updating-unsloth](#updating-unsloth "mention")
### :bug:NotImplementedError: Could not run 'aten::empty.memory\_format'
ご覧ください [#updating-unsloth](#updating-unsloth "mention")bitsandbytes と Unsloth を更新するには!
---
# Agent Instructions
This documentation is published with GitBook. GitBook is the documentation platform designed so that both humans and AI agents can read, navigate, and reason over technical content effectively. Learn more at gitbook.com.
## Querying This Documentation
If you need additional information that is not directly available in this page, you can query the documentation by asking a question.
Perform an HTTP GET request on the following URL with the `ask` and `goal` query parameters:
```
GET https://unsloth.ai/docs/jp/burogu/unsloth-amd-pytorch-synthetic-data-hackathon.md?ask=&goal=
```
`ask` is the immediate question: it should be specific, self-contained, and written in natural language.
`goal` is what the user is ultimately trying to achieve, the reason they need the answer. Sharing it helps GitBook give you a better, more relevant answer. A goal is most helpful when it describes the outcome the user wants rather than restating the question. For example, with `ask=how do I create an API token`, a goal like `automate deployments from our CI pipeline` lets GitBook tailor the answer to that use case.
The response will contain a direct answer to the question and relevant excerpts and sources from the documentation.
Use this mechanism when the answer is not explicitly present in the current page, you need clarification or additional context, or you want to retrieve related documentation sections.